How to connect to my server
Last Update 2025-01-30 15:40:13
How to Connect to Your Valheim Server: A Step-by-Step Guide
Congratulations on your new Valheim server! Whether you're planning to embark on grand Viking adventures with your friends or explore the vast, mysterious world of Valheim on your own, connecting to your server is the first step. Don't worry if you're not tech-savvy; this guide will walk you through the entire connection process step by step!
Step 1: Ensure Your Game is Up-to-Date
Before connecting, make sure your Valheim game is updated to the latest version. The game developers often release updates that could affect your connection, so it’s best to ensure you have the newest features and fixes.
Step 2: Launch Valheim
- Open Steam or Xbox PC: Launch Steam or the Xbox App on your computer.
- Find Valheim: Navigate to your Library and locate Valheim.
Start the Game: Click “Play” to launch the game.
Step 3: Go to the Server List
Once Valheim is launched:
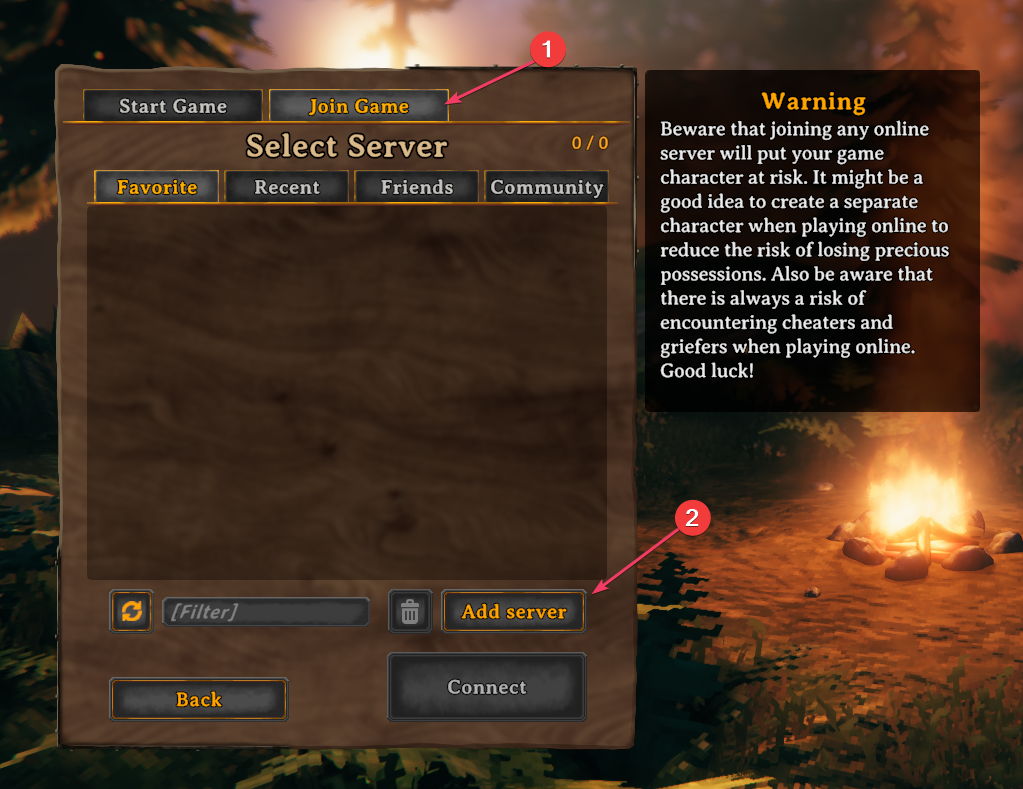
- Select "Start Game": You’ll see this option on the main menu.
- Click "Join Game": This will take you to the server selection screen.

Step 4: Enter Your Server Information
Now, it's time to connect to your server:
- Click "Add server": This option lets you manually enter the server details.
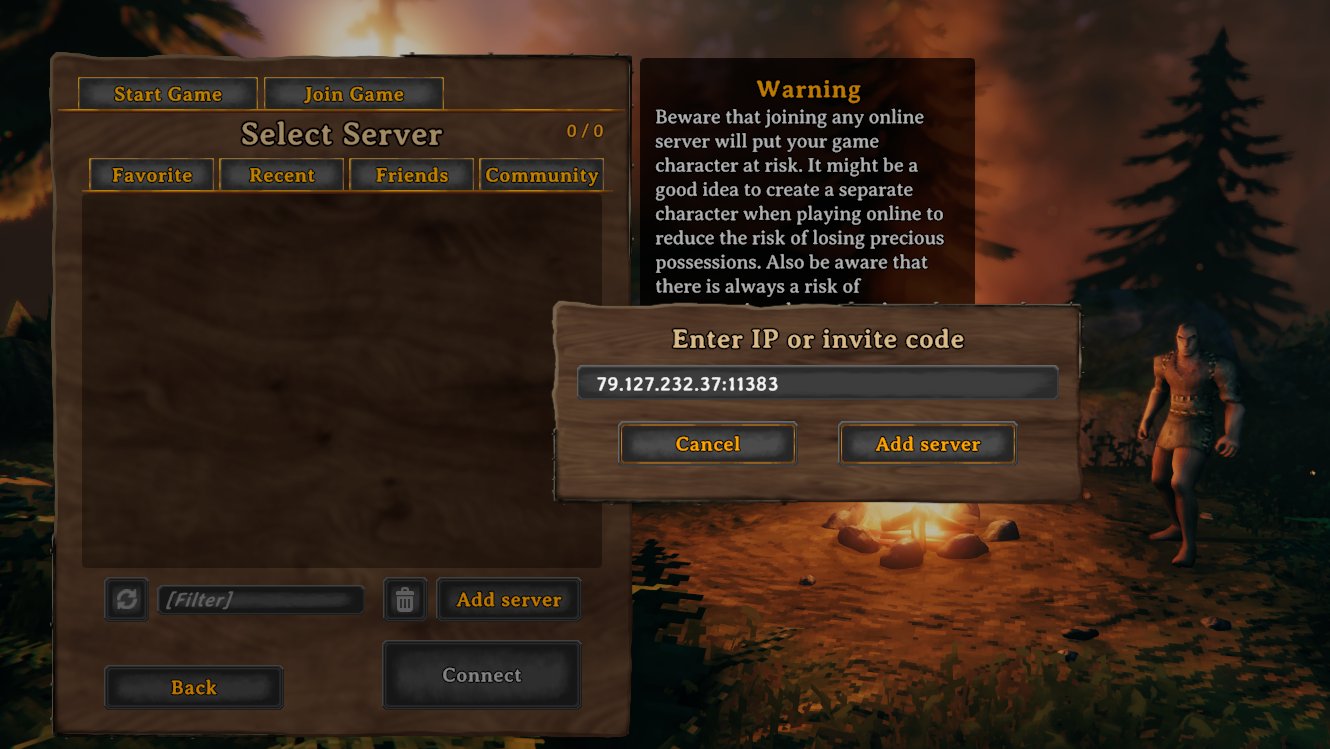
Enter the IP and Port:
- In the prompt that appears, type in your server’s IP address followed by a colon and the port number.
- It should look like this:
192.168.1.1:2456(replace it with your actual IP and port).
Remember that the name you selected is inside the "Basic Settings". You can access it from your account → My Servers → Valheim → Basic Settings.

Step 5: Join the selected server
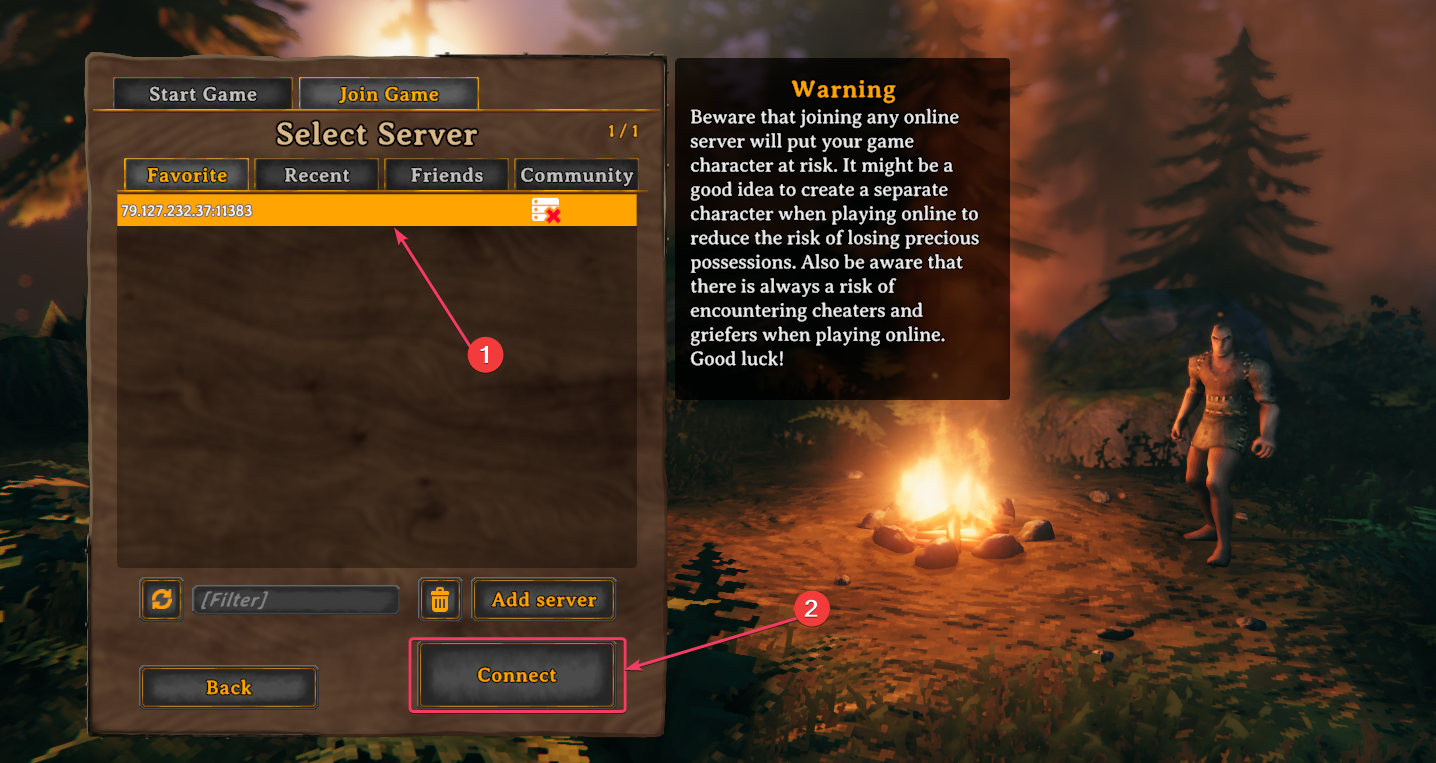
- After entering the IP and port, click on "Add server."
- You will see it get added to the server list and you can double click to join.
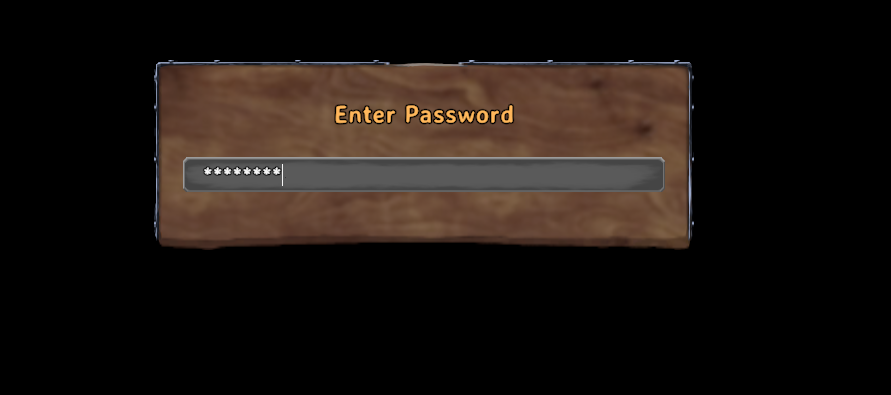
- Click “Connect” to load into the game. You'll need to insert the password to join.


Step 6: Enjoy Your Viking Adventure!
Once connected, you should find yourself in your world on the server you just joined! Now you and your friends can start building, exploring, and battling your way through Valheim!
Tips for a Smooth Connection
- Check Firewall Settings: If you’re having trouble connecting, ensure that your firewall is not blocking Valheim. You may need to adjust your settings to allow the game to communicate freely.
- Can't join: Sometimes the world is still generating and it may take a few minutes to be ready for joining. Also check that crossplay is enabled for platforms other than Steam!
- Restart the Server: If you experience any issues while connecting, try restarting your server via the PingPlayers control panel.
If you have any questions or need assistance, feel free to reach out to our customer care agents through our live chat or email at [email protected]