How to connect to my server
Last Update 2025-01-28 09:56:05
How to Connect to Your 7 Days to Die Server
Congratulations on setting up your own 7 Days to Die server with PingPlayers! Now that you’re ready to dive into the world of survival, crafting, and exploration, connecting to your server is the next step. Follow this guide to seamlessly connect to your server.
Step-by-Step Guide to Connect to Your 7 Days to Die Server
Step 1: Launch 7 Days to Die
Start the Game: Open the 7 Days to Die application on your computer. Make sure that the game is fully updated to avoid connectivity issues.
Step 2: Access the Server Menu
- Navigate to the Multiplayer Menu: From the main menu, click on “Join a Game.” This will take you to the server browser where you can see a list of available servers.
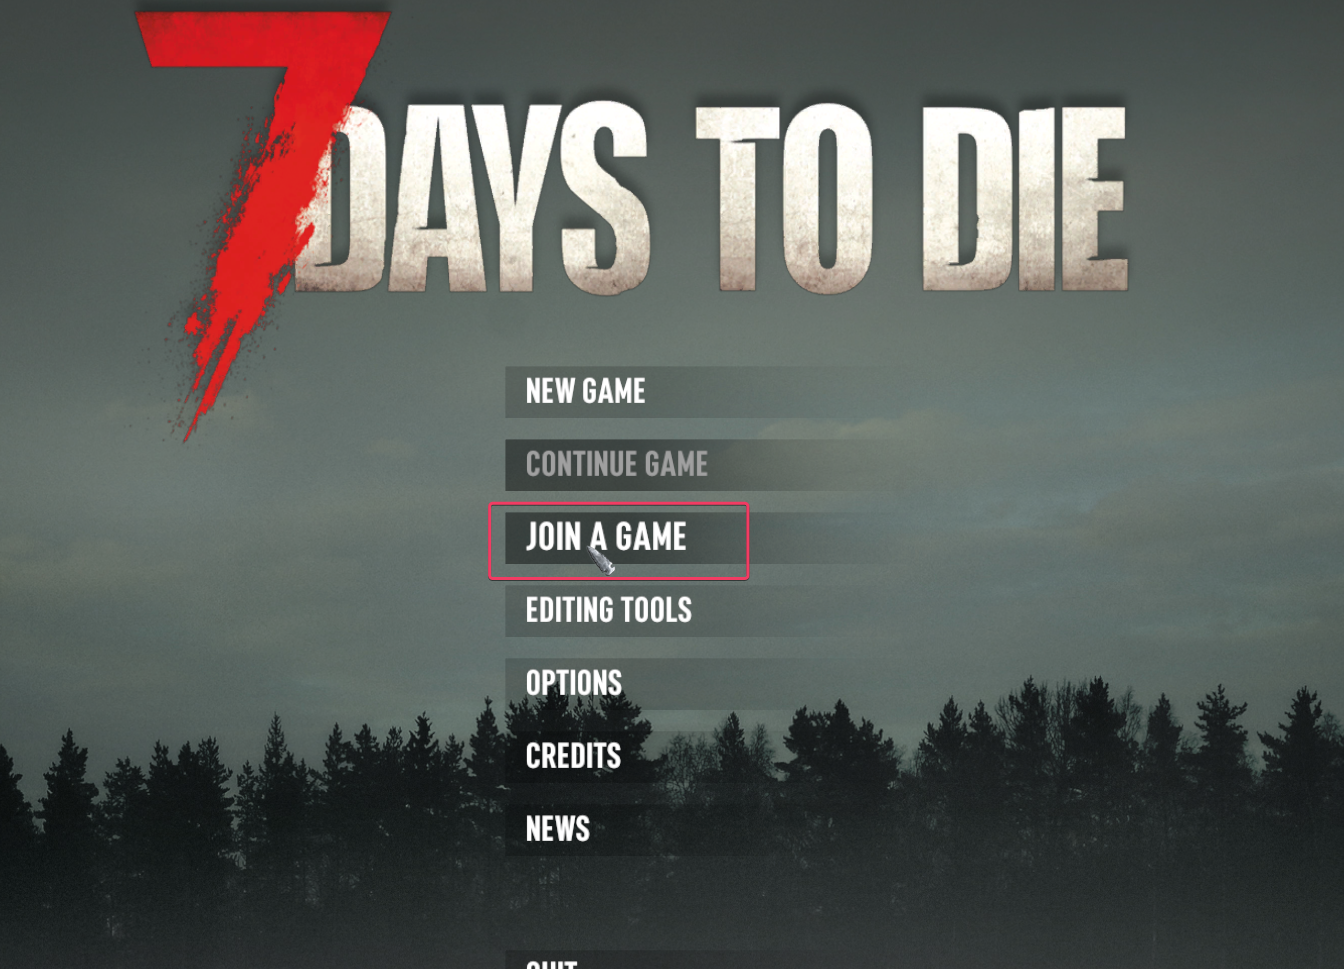
Step 3: Enter Server Details
In the “Server” window, you’ll need to enter the following information:
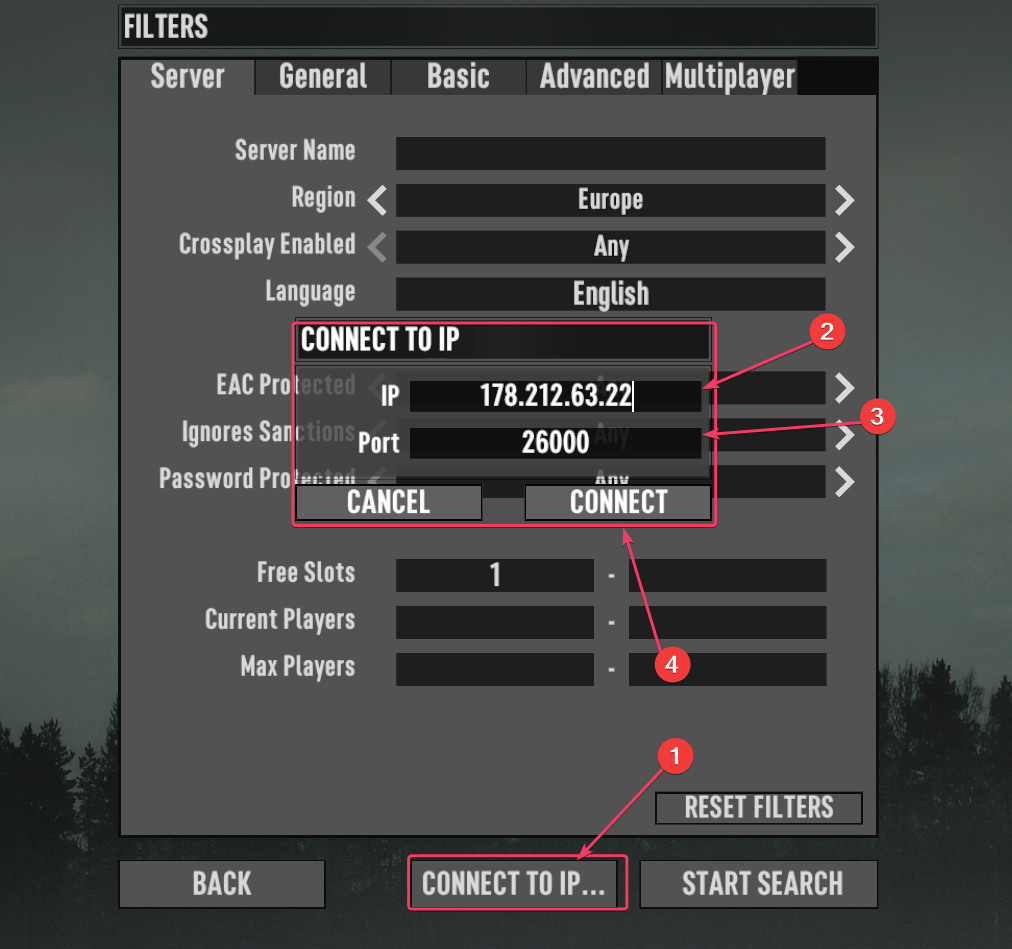
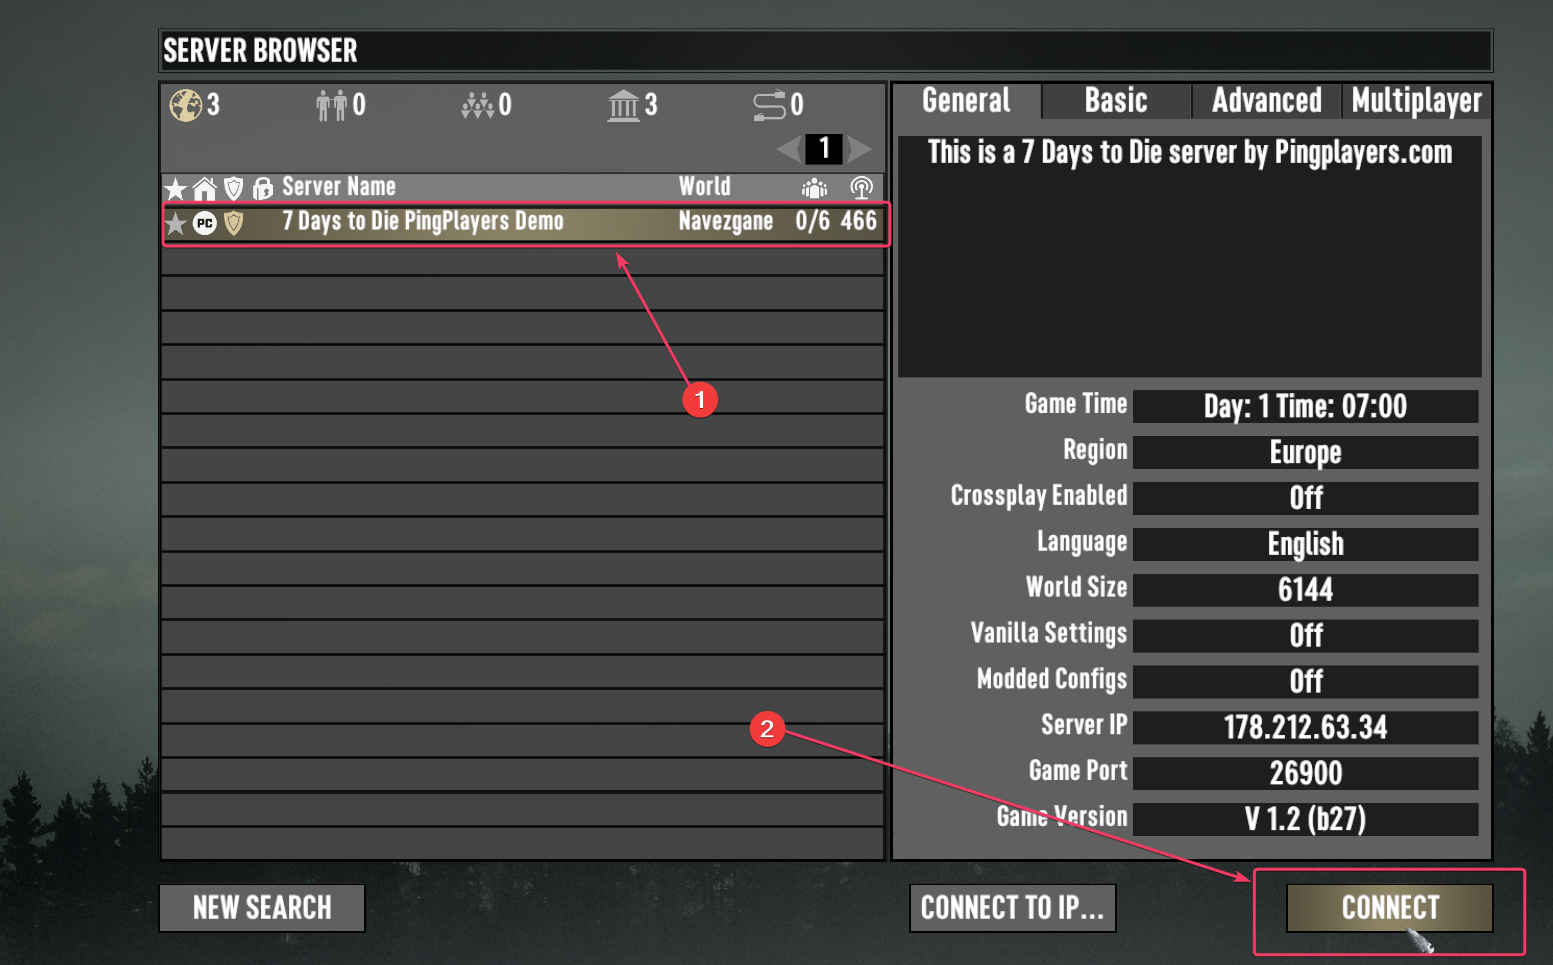
- Direct Connect (Recommended): You can click "Connect to IP..." button at the bottom of the menu to connect to the server IP directly. Type in the IP address that you received from PingPlayers. You can find it in the server dashboard. We recommend this method as it's much more straightforward.
Port: Enter the port number associated with your server. By default, 7 Days To Die uses 26900, but it may be different if you specified a custom port. Once you've filled in these fields, click the “OK” button. Example format:
178.212.63.22:26000
- Using your Server Name: This is the name you specified when setting up your server. You can give it any name you like for your reference. Remember that the name you selected is inside the "Basic Settings". You can access it from your account->My Servers->Game->Basic Settings. After adding your server, it will now appear on the list of available servers. Look for the name you entered earlier.
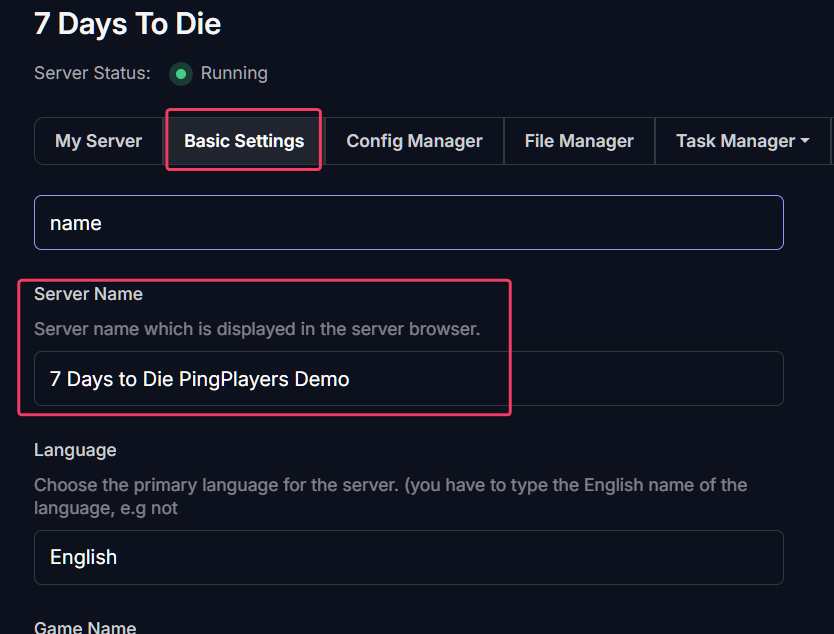
Click ‘Start Search’ after entering the server information to confirm.
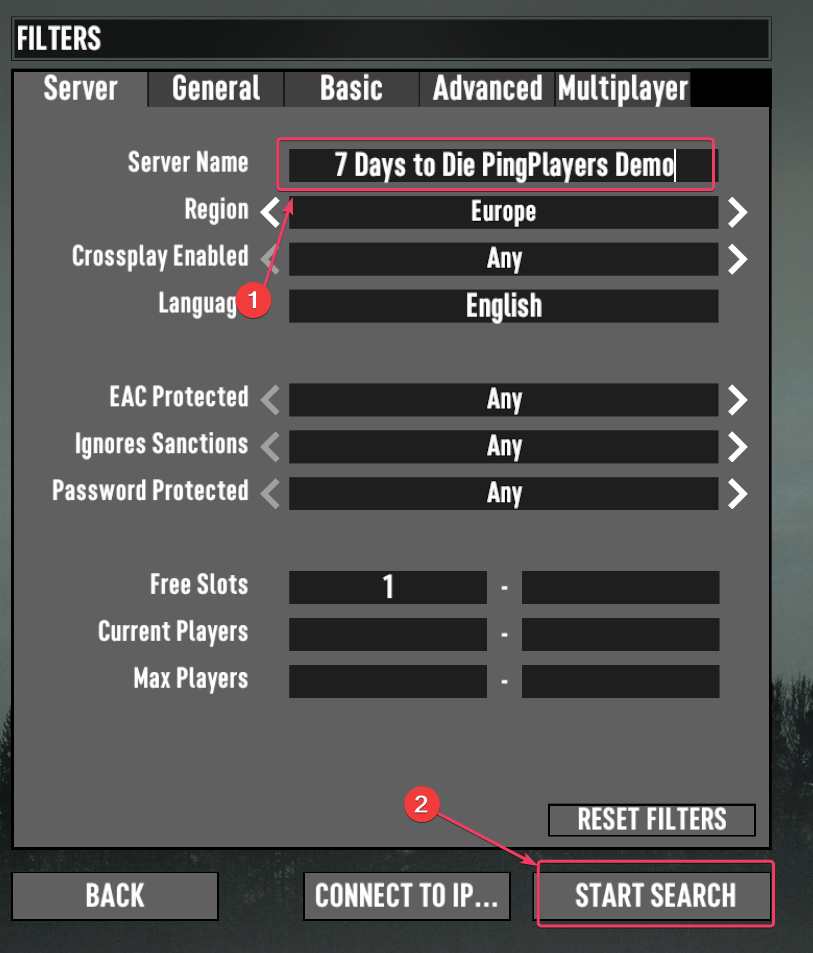
Select the server and click “Connect” to join the game.
Step 4: Enjoy Your Game!
- Wait for Loading: After a few moments of loading, you should be connected to your game server. If everything is in order, you’ll find yourself in the world of 7 Days to Die, ready to start building, exploring, and surviving!
Troubleshooting Tips
- Connection Failed: If you are unable to connect, double-check the IP address and port number you entered for any typos. Ensure there are no extra spaces or characters or that the name is correct.
Server Status: If you’re still having trouble, double-check with PingPlayers to ensure your server is up and running properly.
Final Words
Now that you know how to connect, gather your friends, start crafting, and survive the zombie apocalypse together!
If you have any additional questions or need more help, don’t hesitate to reach out to PingPlayers support for assistance.