How to install mods onto your DayZ server
Last Update 2025-01-28 12:12:35
How to Install Mods on Your DayZ Server: A Step-by-Step Guide
Welcome to your new DayZ server with PingPlayers! One of the best ways to enhance your gaming experience is by installing mods. But don’t worry if you’re not a professional modder; we’ll walk you through each step of the process. Basically, the installation of mods has 5 steps: download the mod, transfer it to the server, transfer the bikey file to the Keys folder, add it to the command line and restart the server. Let’s dive in!
Step 1: Finding the Mods on Steam Workshop
- Visit Steam Workshop: Go to the Steam Workshop for DayZ page.
- Browse or Search for Mods: Here, you can browse through various mods that other players have created. You can search for specific mods based on categories or keywords that interest you.
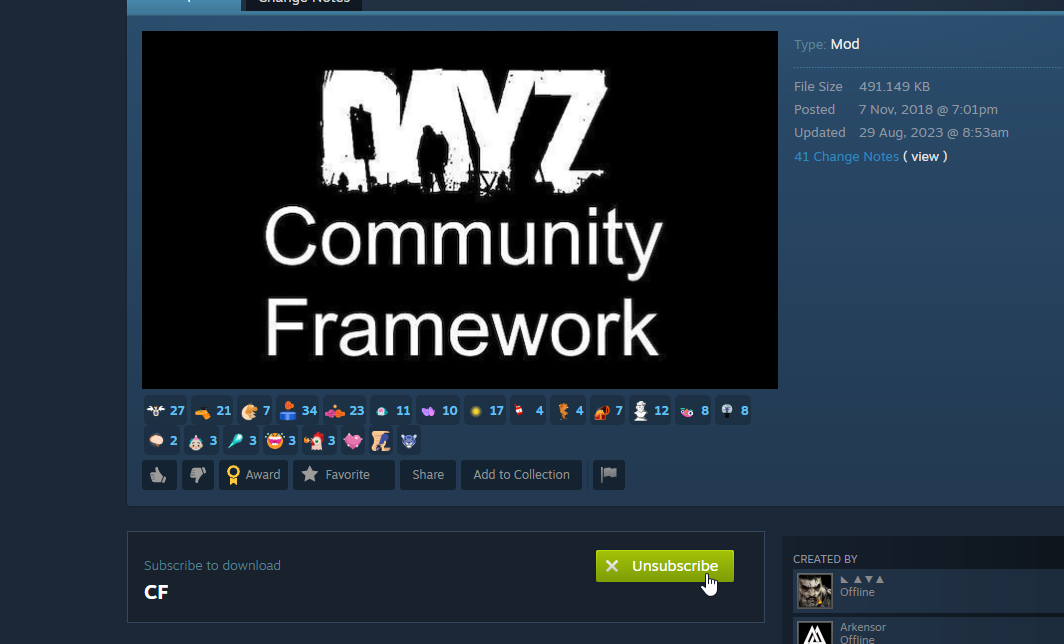
- Subscribe to the Mods: Once you find a mod you want to use, click on the “Subscribe” button. This will download the mod to your local Steam client, but it doesn’t directly affect your server just yet!
Step 2: Transfer Mod Files to Your Server Using FTP
For Mods to work on your server, you need to install them there, too. The easiest way is to use File Transfer Protocol (FTP). Before transferring the mod files, you need to ensure that your server is shut down to prevent any issues during the process.
Important: Turn off "Auto boot" in the "My Server" tab to prevent the server from turning back on as soon as it's shut down. Some files might be in use otherwise, and transfers will fail.
- Access Your FTP: Using an FTP client (like FileZilla), connect to your DayZ server using the FTP credentials sent to your email upon signup or the FTP details tab inside "My Servers" -> "Manage Server".
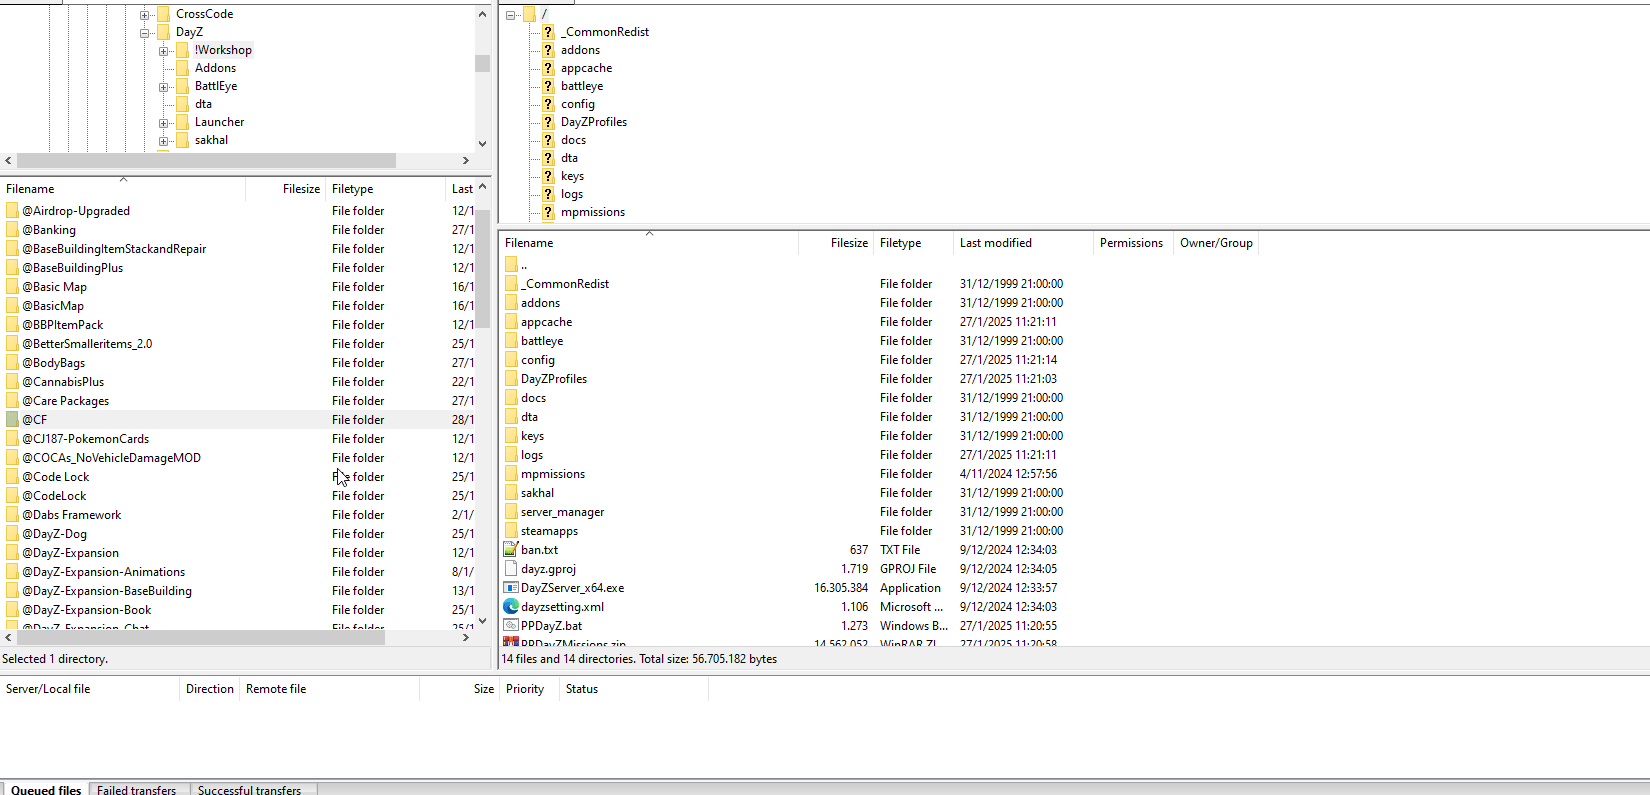
- Transfer the mod folder to the server main directory: Navigate to the main folder on your server where you will upload the mod files. This is the root directory for the folders where you'll see all files and folders. For example, the Custom Framework mod folder is called "@CF" or "@CustomFramework" depending on its version. This folder will need to be uploaded to the server main directory.
- Find Your Local Mod Files: Within your computer, navigate to your DayZ installation folder. Most mods have two folders of files, "Addons" and "Keys". The mod itself is the file inside the "Keys" folder. You'll usually find this under:
C:\Program Files (x86)\Steam\steamapps\common\DayZ\Workshop
- Copy the Mod Folder: Look for the folder that corresponds to the mod you subscribed to. Inside this folder, you should see essential files that may include:
addon(normally ".PBO" files)key(normally ".bikey" files)- Other related files, depending on the mod.
- Transfer the Key file(s): Transfer the key files from your local system or from the already uploaded "@modname" folder to your server’s
keysfolder. If the mod requires extra files such as PBO files, you can move them from your local "addon" folder to the server's "addon" folder. However, we don't recommend doing this unless you're an advanced user, as other mods can be broken by this.
Step 3: Configure Your Server to Use Mods
- Access Your Server Control Panel: Log in to your PingPlayers game hosting control panel.
- Go to Basic Settings: Find the section labeled “Basic Settings” where server configurations can be adjusted.
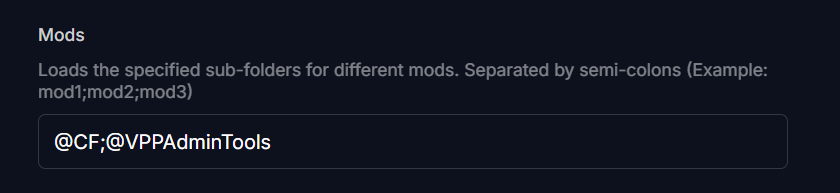
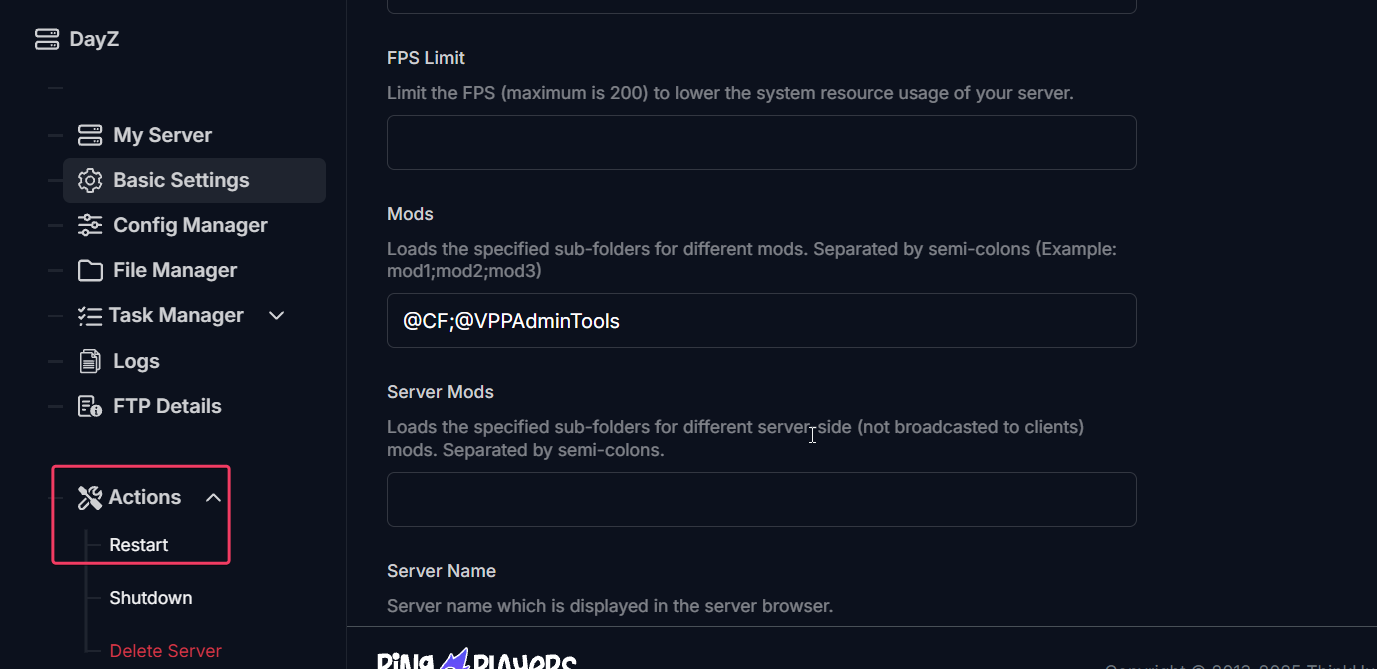
- Locate the “Mods” Field: Here, you will see a field labeled “Mods.” This is where you need to specify the mods you have installed.
- Add Mod Names: Enter the names of all the mods you want to use, separating multiple mod names with a semicolon (
;). A\can be added at the end to mark the end of a folder while the;is to specify the mod name finished and there should be another mod following it. For example:
@MyMod;@AnotherMod;@ThirdModHowever, note that some mods don't allow this as it prevents the game from loading further assets in sub-folders. Our recommendation is not to use \ unless you're an advanced user and it's necessarry for mod configuration.
Step 4: Restart Your Server
- Update Server: Save all changes by clicking "Update Server".
- Restart Your Server: After adjusting the mod names, restart your server back up again using the control panel. If it's still offline, it will be online, so don't worry.
Step 5: Verify Mod Installation
- Open the DayZ Launcher: Launch your DayZ game through Steam.
- Access the Servers Menu: From the main menu, go to the “Servers” section.
- Search for Your Server: Find your server listed among available servers.
- Check Mod Status: Click on your server to check if all the mods are listed correctly. There should be indicators showing that your mods are installed and active with a green colored number matching the mod quantity.
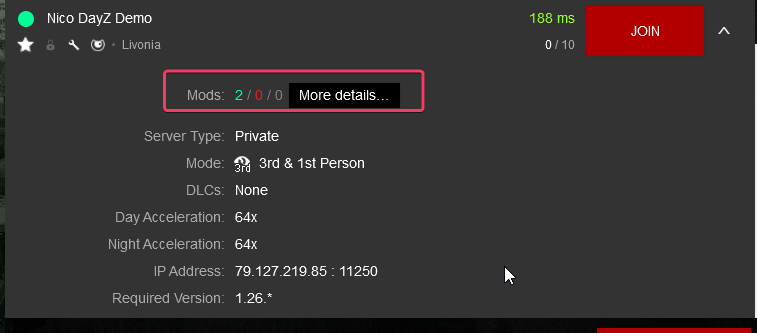
- More Details: Click "More Details" next to the number of Mods and you'll see if they're correctly installed and if they have all content needed inside the game server.
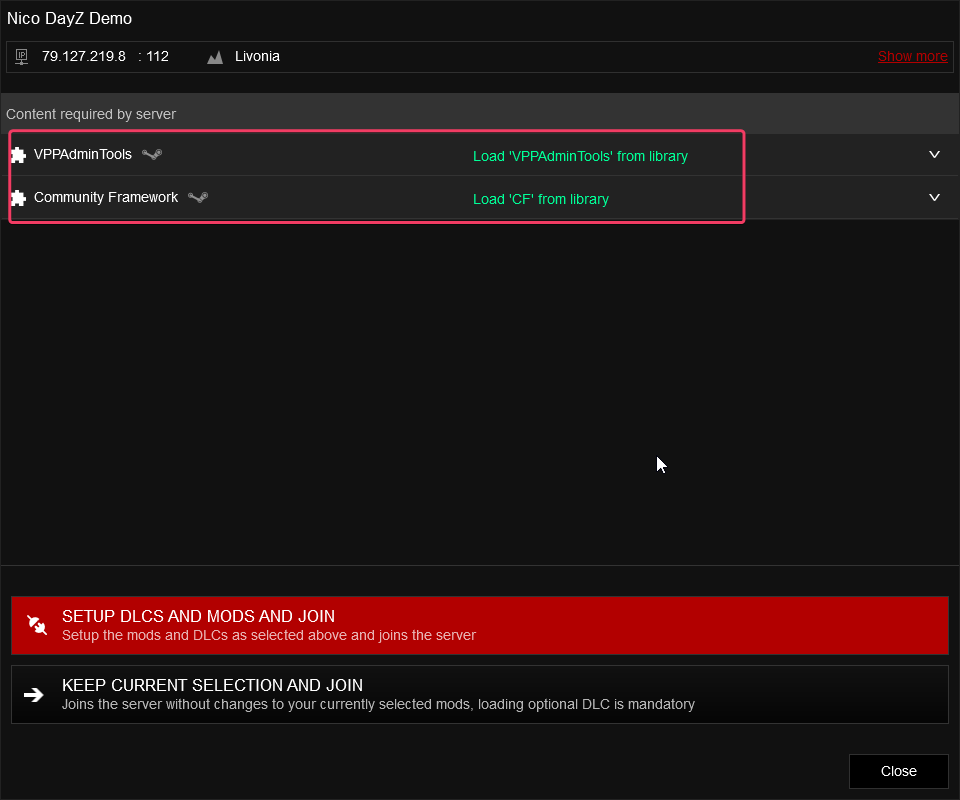
Setup DLCs and Mods and Join: Once all is in order, just click SETUP DLCS AND MODS AND JOIN. This should run the game with the selected mods.
Troubleshooting
- Mod is red and no content inside: Your server is missing a required mod file. Make sure all addon/key files needed are in the corresponding files. If you don't know, check the mod website for clarification on what's required. It could also be that the name of the folder doesn't align with the folder name in the server; to fix this error, you can connect through FTP and rename the folder to match the mod folder in the server.
- The map loads but crashes with an error of a PBO: That probably means your PC has a conflicting PBO file with the server's. Try removing all the mods in your content folder (usually
C:\Program Files (x86)\Steam\steamapps\workshop\content\221100, 221100 being DayZ specifically and all the subfolders being each mod). Don't worry, the game will download every needed file for the game to work this way. - Script error: The game loads but there is a SCRIPT error? It's most likely an error related to dependencies. A mod in your list needs another mod and it isn't installed properly or at all. Repairing it from the "MODS" menu inside the game launcher will help. Right-clicking on them also shows "Dependencies" option that directs you to the needed mods.
- My server is not showing up correctly: Always make sure you restart after modifying "Basic settings" and you added all listed mods in the "Mods" field with the appropriate syntax. Refreshing the server list with the top right corner button on the game launcher will show the most updated version of the server information.
Why are there two Mods fields?: Mods are used for regular mods that don't require special permissions, while the "Server Mods" field is needed for server-side specific mods. Usually, admin controls to manage the server or impose some rules. These are not usually broadcasted to clients, and players don't need to have them installed.
Final Thoughts
Congratulations! You’ve successfully installed mods on your DayZ server. Adding mods can significantly enhance your gameplay experience, and each mod can bring something unique to your gaming sessions. If you encounter any issues, don’t hesitate to reach out to PingPlayers support for assistance, as modding can always take some trial and error as mix and matching can cause errors here and there, trust us, we KNOW :) Enjoy your game!