How to make a user Admin in 7 Days to Die
Last Update 2025-01-30 11:05:38
How to Become an Admin on Your 7 Days to Die Server: A Step-by-Step Guide
Welcome to PingPlayers! We’re thrilled to hear that you've purchased a server for 7 Days to Die, and now you might be wondering how to become an administrator. Being an admin gives you the power to manage your server, set rules, and create a fun environment for you and your friends. Don't worry; we’ve got you covered with an easy-to-follow guide to help you become an admin on your server. We know the game developers didn't make it very self-explanatory, so it'll be a piece of cake to follow the steps here.
Step 1: Access Your Control Panel
First, you'll need to log into your PingPlayers account and navigate to your server control panel. Once you're logged in, locate the section labeled "My Servers," which will show you the servers you've set up.
Step 2: Manage Your Server
Find the server you want to work with and click on "Manage Server." This will take you to the management area where you can make changes to your server settings.

Step 3: Connect through FTP
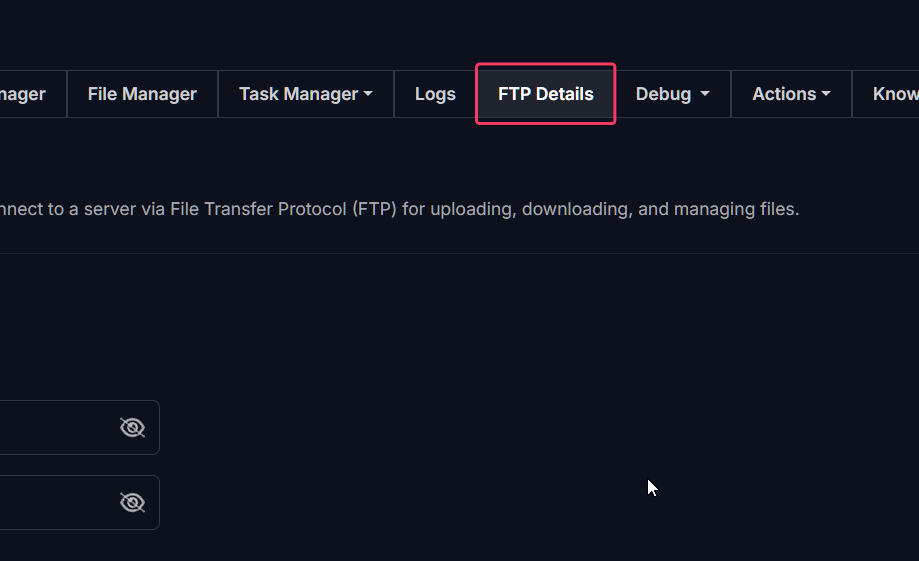
In the management area, look for the "FTP details" option. Click on it; it'll show the credentials to connect to FTP, if you're not familiar with it, you may check our FTP guide .
Step 4: Find Your SteamID
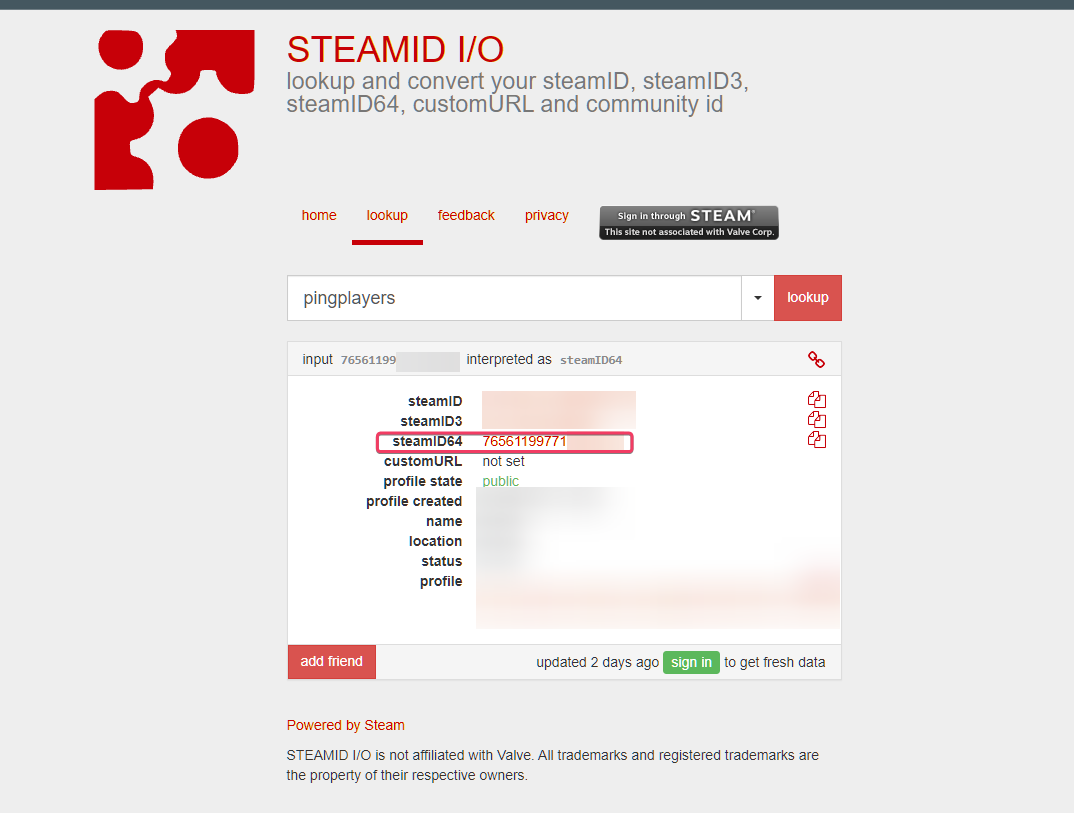
Before you can become an admin, you need your SteamID. You can find this in your Steam account details or by using a useful tool like SteamDB or SteamIDio. Simply input your Steam profile name on that site to retrieve your SteamID.
Step 5: Navigate to the Saves Folder
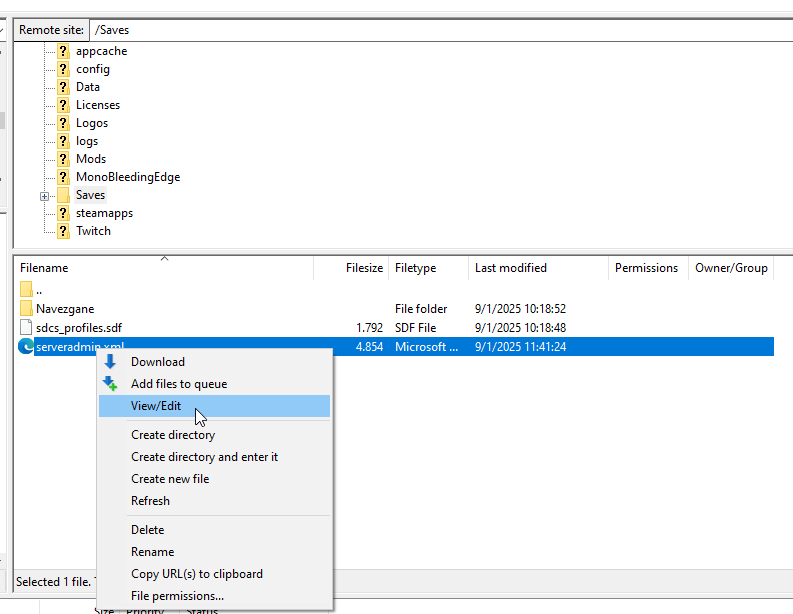
Once you’re connected through FTP, look for a folder called "Saves." Inside, you'll find the serveradmin.xml file among other files. This file must be edited here.
Note: File Manager can be used to check this file, but editing it is not possible as it'll be reverted after a server restart.
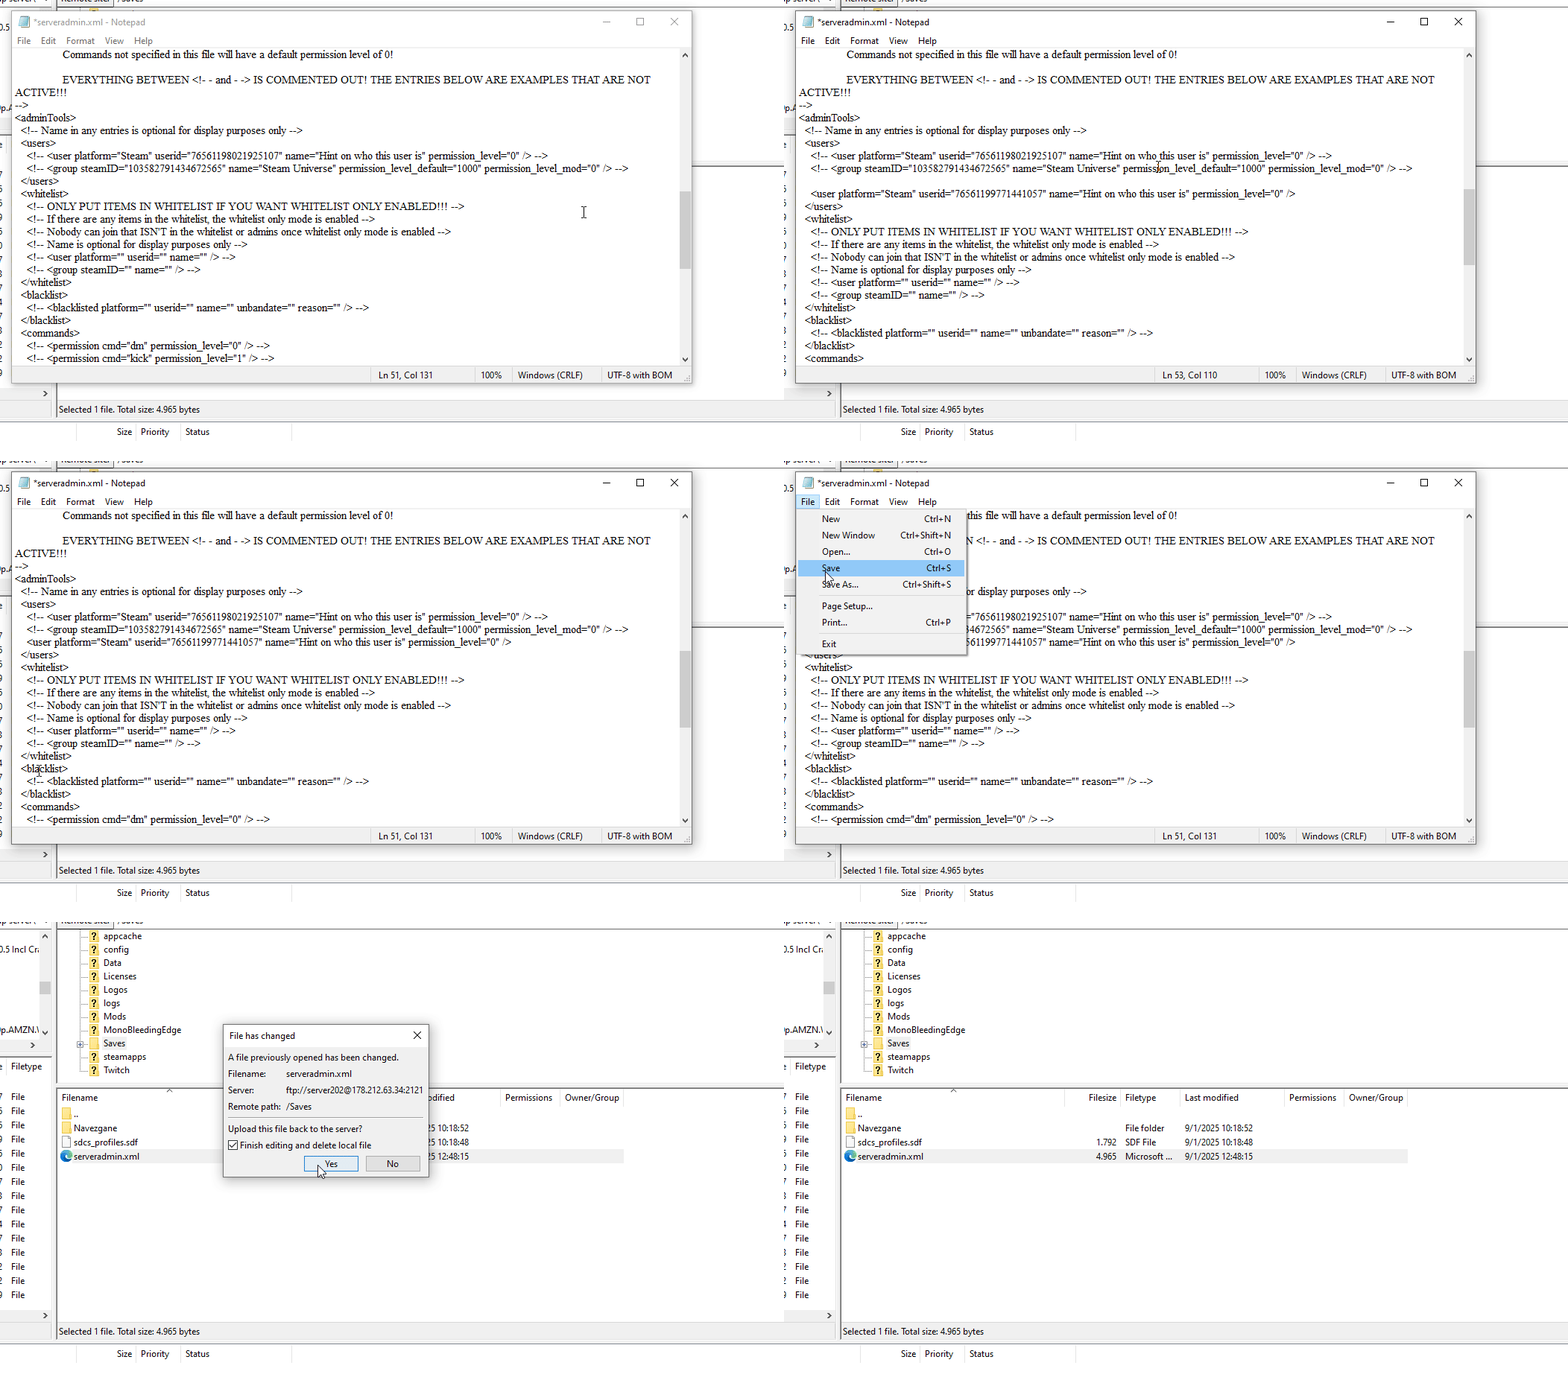
Step 6: Edit serveradmin.xml
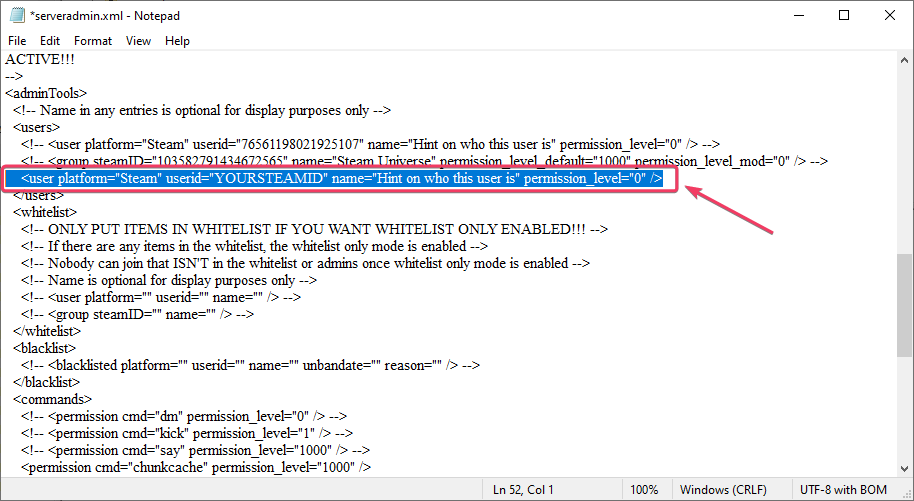
This is where you'll configure your admin settings. Right-click the file and click View/Edit on FileZilla or download from Windows Explorer and edit it locally and overwrite it. Find the <adminTools> section and below, add the line: <user platform="Steam" userid="YOURSTEAMID" name="Hint on who this is" permission_level="0" /> replacing YOURSTEAMID by the SteamID of the player you want to give admin. replacing YOURSTEAMID by the SteamID of the player you want to give admin. The spaces at the beginning are to match the indentation on the left.
Step 7: Reboot Your Server
Finally, it's time to reboot your server to apply the changes. Find the option to "Reboot" your server in the control panel. Once the server has restarted, wait for it to be fully ready, and you will now have admin privileges!
You can press F1 to open the console and type commands. Typing help will give you an extensive list of commands like shutdown, give or cm. CM is particularly useful as it enables the creative menu.
Congratulations!
You have successfully set yourself up as an admin on your 7 Days to Die server. Enjoy managing your game, tweaking settings, and creating a great gaming experience for you and your friends. If you have any further questions, feel free to reach out to our support team at PingPlayers. Happy gaming!