Last Update 2025-07-23 06:53:27
How to Install and Run Mods on Your 7 Days to Die Game Server
Congratulations on setting up your very own 7 Days to Die game server! Now that you’ve taken this first step into the exciting world of gaming, you might want to enhance your experience by adding some mods. Mods can improve gameplay, introduce new features, and even fix bugs (or introduce them, but let's ignore that for now! 😊). In this guide, we’ll walk you through the steps to install and run mods on your server. Let’s get started!
Step-by-Step Guide to Installing Mods
Step 1: Download the Mod
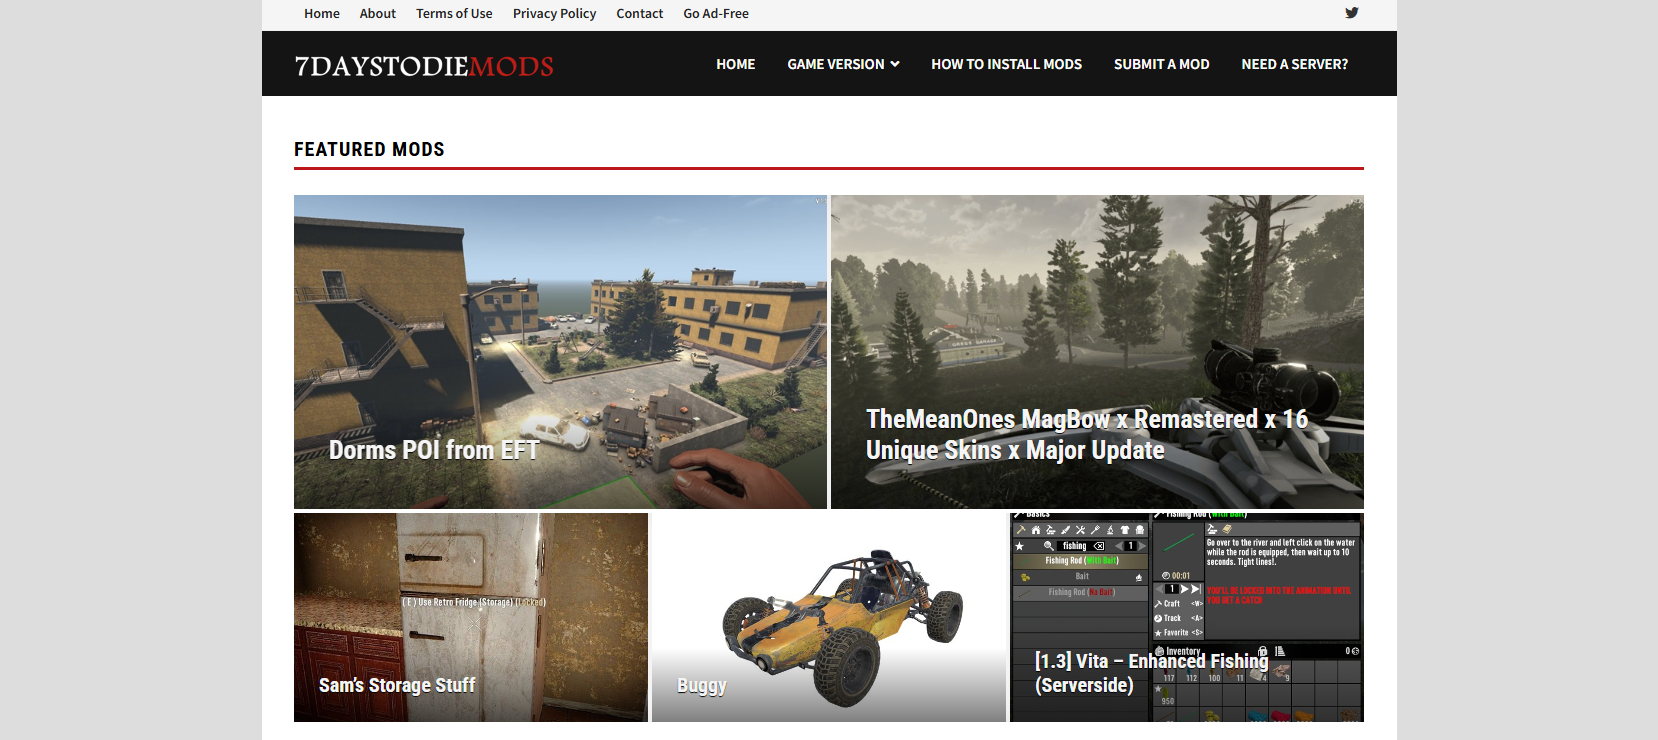
Visit the Mod Website:
Go to 7daystodiemods.com.

Browse or Search for Mods:
Look through the categories or use the search bar to find the mod you want to install.
Download the Mod:
Click on the mod's title and find the download link. Download the mod file to your computer. This file usually comes in a format like .zip or .rar.
Step 2: Extract the Mod Files
Locate the Downloaded File:
Go to your computer’s downloads folder to find the downloaded mod file.
Extract the Files:
If it’s compressed, right-click on the downloaded file and select "Extract All..." (or use a program like WinRAR or 7-Zip).
Find the Mod's Content:
After extraction, open the extracted folder. Do not simply assume the extracted folder is the mod. Look inside that folder. You are searching for the folder(s) and file(s) that comprise the actual mod. This could be a folder named after the mod itself, or simply a collection of files.
Step 3: Place the Mod in Your Local Game Folder
Navigate to the Local Game Folder:
Open the installation directory for 7 Days to Die. This is usually found at
C:\Program Files (x86)\Steam\steamapps\common\7 Days to Die\if you installed it via Steam.
Locate the Mods Folder:
Inside your game directory, look for a folder named “Mods.” If it doesn’t exist, you can create it.
Note: If you’re using 7 Days to Die 1.0 or later, a “Mods” folder should automatically be created.
Copy the Mod Content:
Important: Copy the contents that you found in step 2, into the "Mods" folder. Do not simply copy the extracted folder, unless the extracted folder is the mod folder itself.
Ensure that the folder structure stays intact. The folder that you place into the "Mods" folder, is the folder that the game will use to load the mod.
Example: If the extracted folder contains a folder named "MyAwesomeMod" that contains the mod files, then copy the "MyAwesomeMod" folder into your local games "Mods" folder.
Step 4: Transfer the Mod to the Server
Access Your Server via FTP:
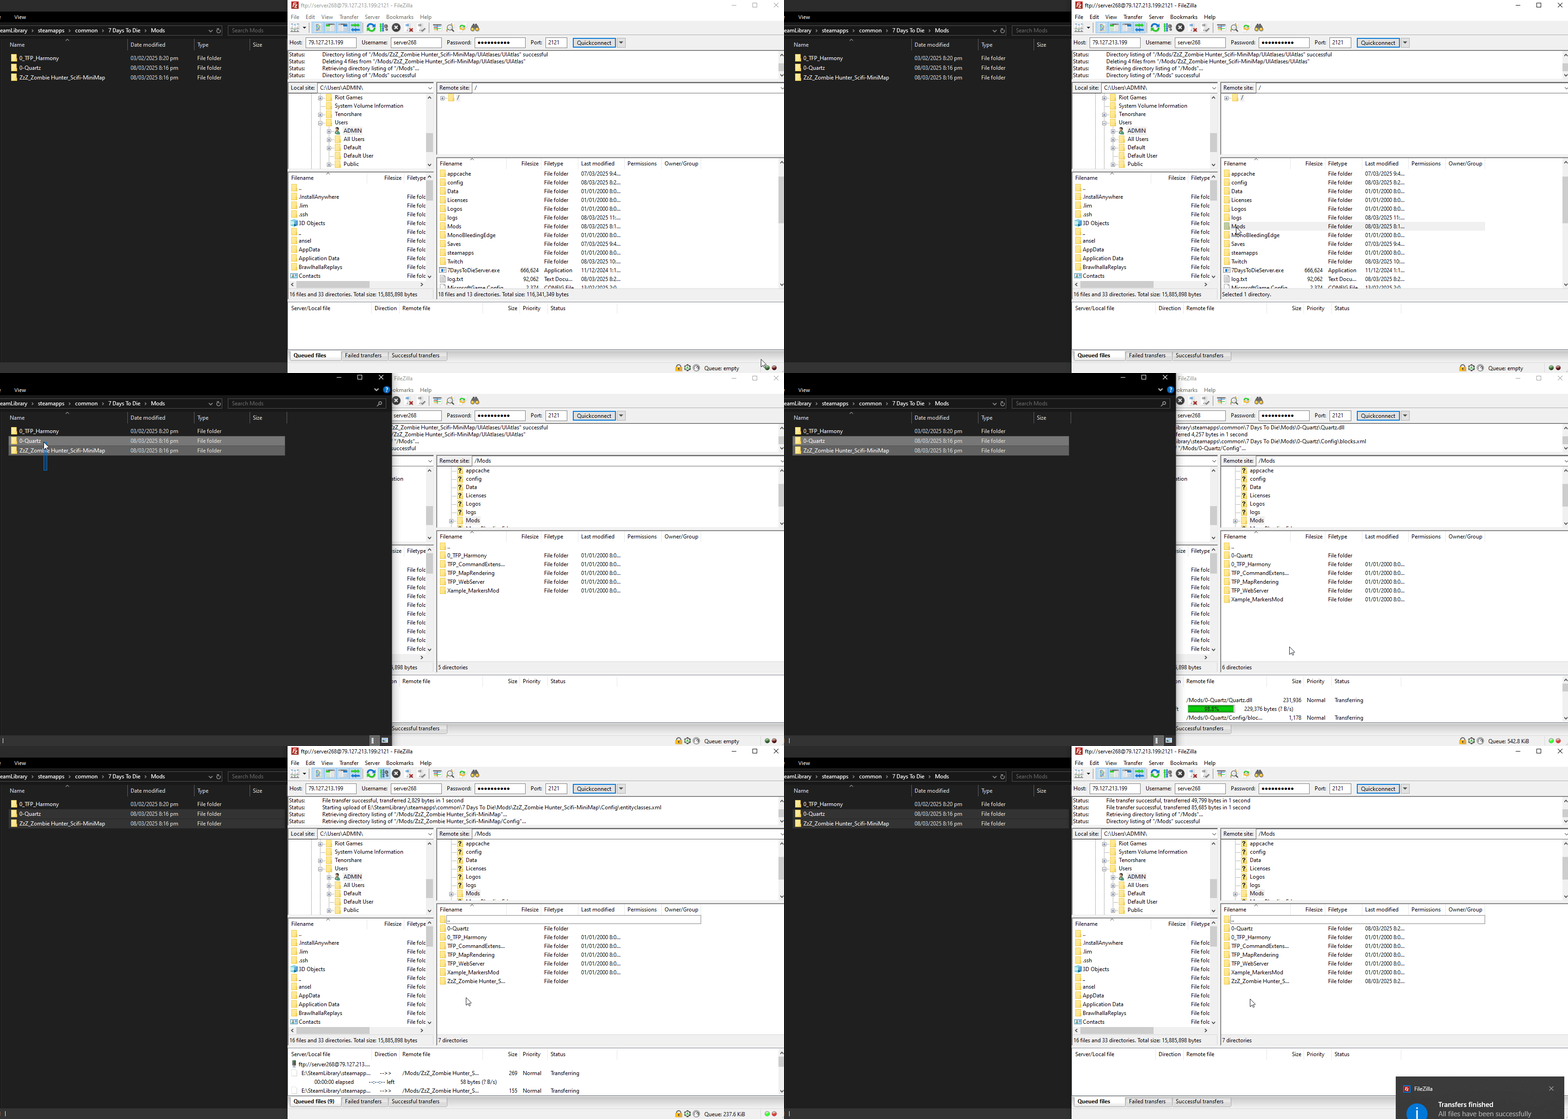
It’s best to have your server turned off before transferring files, but it's not strictly necessary for adding files. Use an FTP client like FileZilla to log in with the credentials provided by PingPlayers.
Find the Server Mods Folder:
After logging in, navigate to the “Mods” folder on the server.
Upload the Mod Content:
Important: Upload the same folder(s) and file(s) that you placed into your local "Mods" folder, into the server's "Mods" folder. Again, you are copying the mod contents, not always the extracted folder itself.
Ensure that the folder structure on the server's "Mods" folder, exactly matches the folder structure of your local "Mods" folder.

Step 5: Restart Your Server
Restart Your Server:
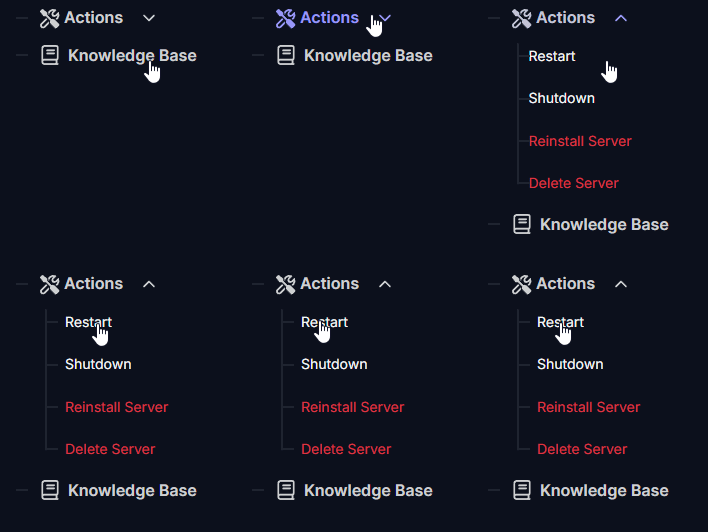
Go to your PingPlayers control panel and find the option to restart your game server. This step is necessary for the new mod to load.

Troubleshooting Common Issues
Even the best of us encounter bumps along the way. Here are some common problems when installing mods and how to troubleshoot them:
1. Wrong Game Version
Issue: If the mod doesn’t run after installation, it may not be compatible with your version of 7 Days to Die.
Solution: Ensure your game and server are updated to the latest version, and confirm that the mod is designed for the same version.
2. Mod Not Showing Up
Issue: You might have placed the mod files incorrectly, or the server may not have restarted properly.
Solution: Double-check that you copied the correct content into the "Mods" folder, not just the extracted folder. Verify that the folder structure is identical on your local computer and server. Restart the server again to see if it works.
3. Server Crashes or Errors
Issue: The mod may conflict with other mods you’ve installed or with the game itself.
Solution: Remove newly added mods one at a time and check the server’s stability. Check the mod’s documentation for more compatibility information.
With these steps, you should be well on your way to enhancing your 7 Days to Die experience with mods.
Conclusion
And there you have it! By following these steps, you've unlocked the true potential of your 7 Days to Die server. The key to success lies in careful file placement—ensuring the Mods folder on both your local machine and the server are identical, and a simple server restart.
From adding new zombies and weapons to completely overhauling survival mechanics, you now have the power to create a truly unique and personalized 7 Days to Die experience for you and your community. Don't be afraid to experiment with different combinations of mods, but always remember to back up your server before making major changes—it's a small step that can save you a lot of time.
If you run into any further issues, don’t hesitate to reach out to PingPlayers support for assistance.