Last Update 2025-07-14 10:09:29
How to Change Missions on Your Arma 3 Server
Changing missions/scenarios on your Arma 3 server allows you to keep your gameplay fresh and engaging. It's a pretty easy process, so let's dive right into it.
First of all, it's important to understand the difference between a mission and a map.
While a map contains all the terrain details such as buildings, trees, bases, etc, the mission is a scenario or set of scripted events that take place on a given map.
So changing the missions won't actually change the map, rather it'll run a custom preset based your preferences.
Now, missions and maps are listed in the "Map Selection" section. Each map has its mission preceding it in the file name, for example ArmA3_Wasteland.Altis.
In this example Wasteland is the mission and “Altis” is the map. We could have ArmA3_Wasteland.Stratis where the map would be Stratis instead, while retaining the Wasteland mission.
We won't detail how to set custom missions/scenarios on this guide specifically. In case you'd like to know how to do so, please check our guide here.
Changing your missions
Step 1: Open the server configuration
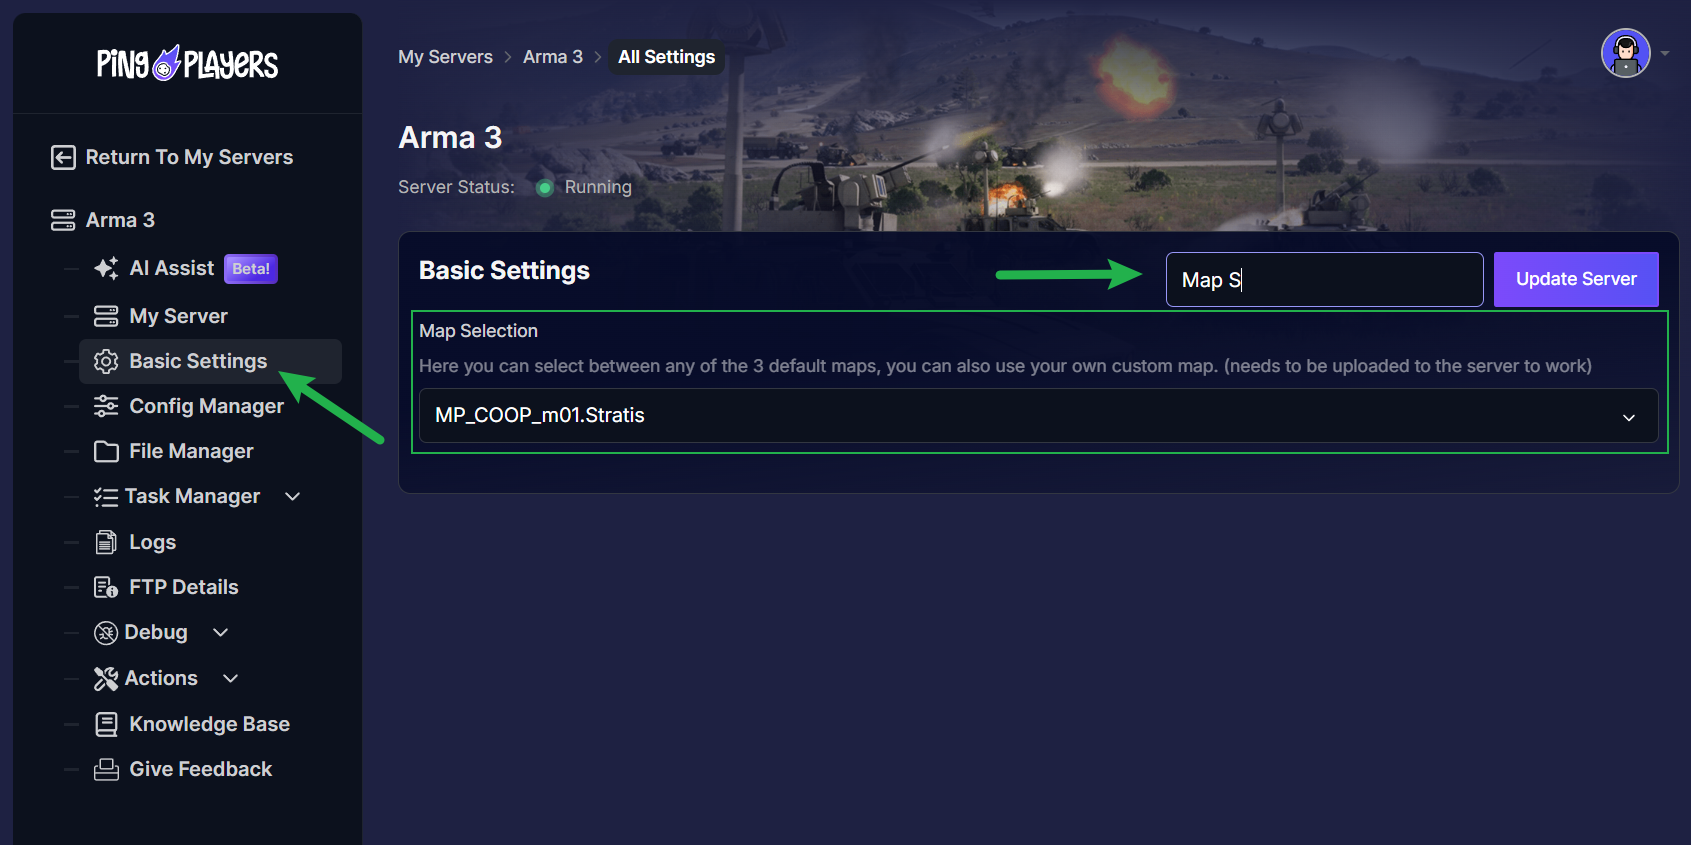
Find your server configuration by clicking on My Servers and then Basic Settings on the left panel. From this panel, you may change any settings on the server at any time.
Step 2: Locate the Missions variable
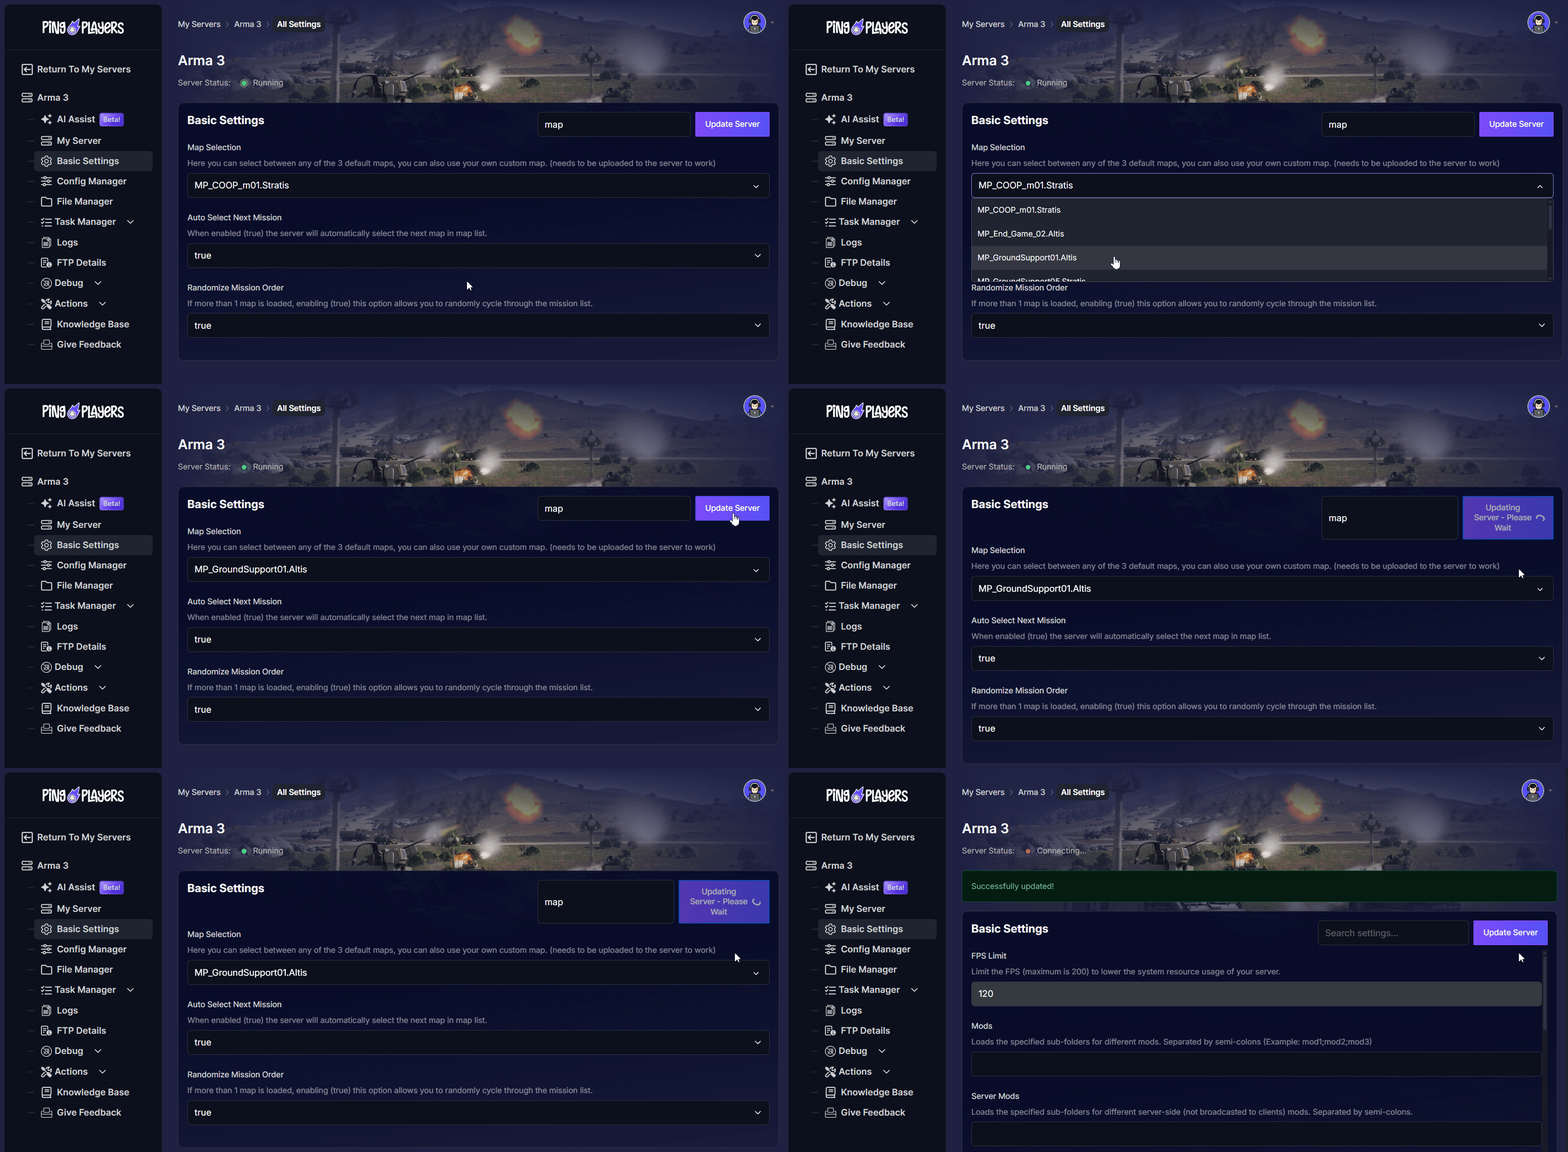
Scroll down on the list until you see the Map Selection option.
There are different default options for you to choose in here, so feel free to select the one that fits you best.

Step 3: Set your desired map and mission
One of the default maps for the game will be “Altis”, in which you can use many different missions.
To differentiate which map to load, you may check the end of the map's name on the list.
For example:
ArmA3_Wasteland.Altis
ArmA3_Wasteland.Stratis
MP_ZGM_m11.Altis
ArmA3_Wasteland.Tanoa
After you select a map and its mission, make sure to save the changes by clicking on Update Server in the top right corner.

Step 4: Restart the server
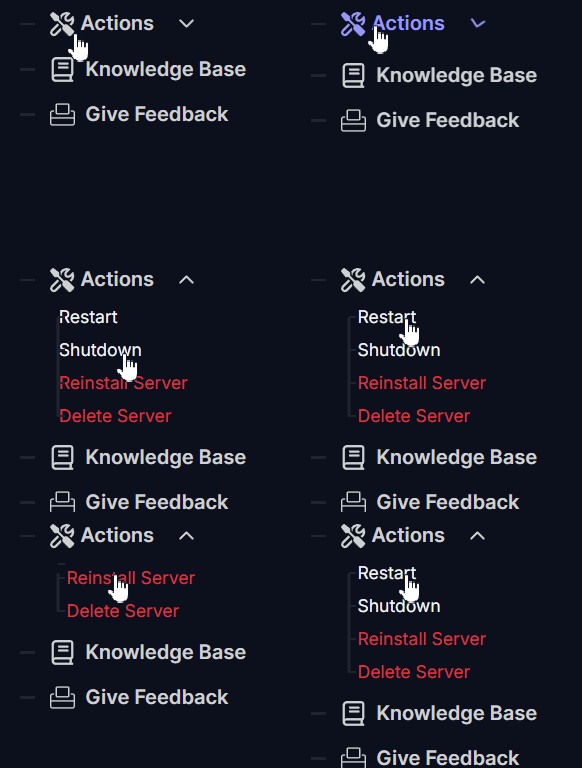
Finally, go back to your left panel and restart the server by clicking on Actions > Restart.

And that's it! The new mission you have selected has now been applied to your server.
Troubleshooting
If you encounter any issues, here are a few common problems and solutions:
- Wrong Mission/Map Combination: Ensure the mission you selected (e.g.,
ArmA3_Wasteland.Tanoa) is designed for the map you have active. A mission for Altis won't load correctly on the Tanoa map. - Mission Requires Mods: If you are using a custom mission from the workshop, it might require specific mods to be loaded on the server. Always check the mission's official page to see its dependencies.
- Server Didn't Restart Correctly: Sometimes, a simple second restart is all it takes to get the new settings to apply properly.
Conclusion
And that's all it takes! You've just mastered one of the most fundamental skills of a server admin: changing the entire gameplay experience with just a few clicks. You're no longer stuck on one scenario. Now, you can run a quick co-op mission on Monday, a sprawling Wasteland battle on Friday, and a custom spec-ops scenario on the weekend. This is how you keep your server exciting and your community coming back for more.
If you have any questions or need assistance, feel free to reach out to our customer care agents through our live chat or email at [email protected].