Last Update 2025-04-07 09:45:30
How to Connect to Your Project Zomboid Server
Congratulations on purchasing your own Project Zomboid server from PingPlayers! Now that you have your very own server, it's time to get connected and start surviving the zombie apocalypse with your friends. In this guide, we’ll walk you through the simple steps to connect to your Project Zomboid server using the IP and Port you received.
Step 1: Launch Project Zomboid
Open Project Zomboid: Make sure you have the game installed on your computer. If it's not installed, you can find it on Steam. Launch the game to get to the main menu.
Step 2: Navigate to the Server Options
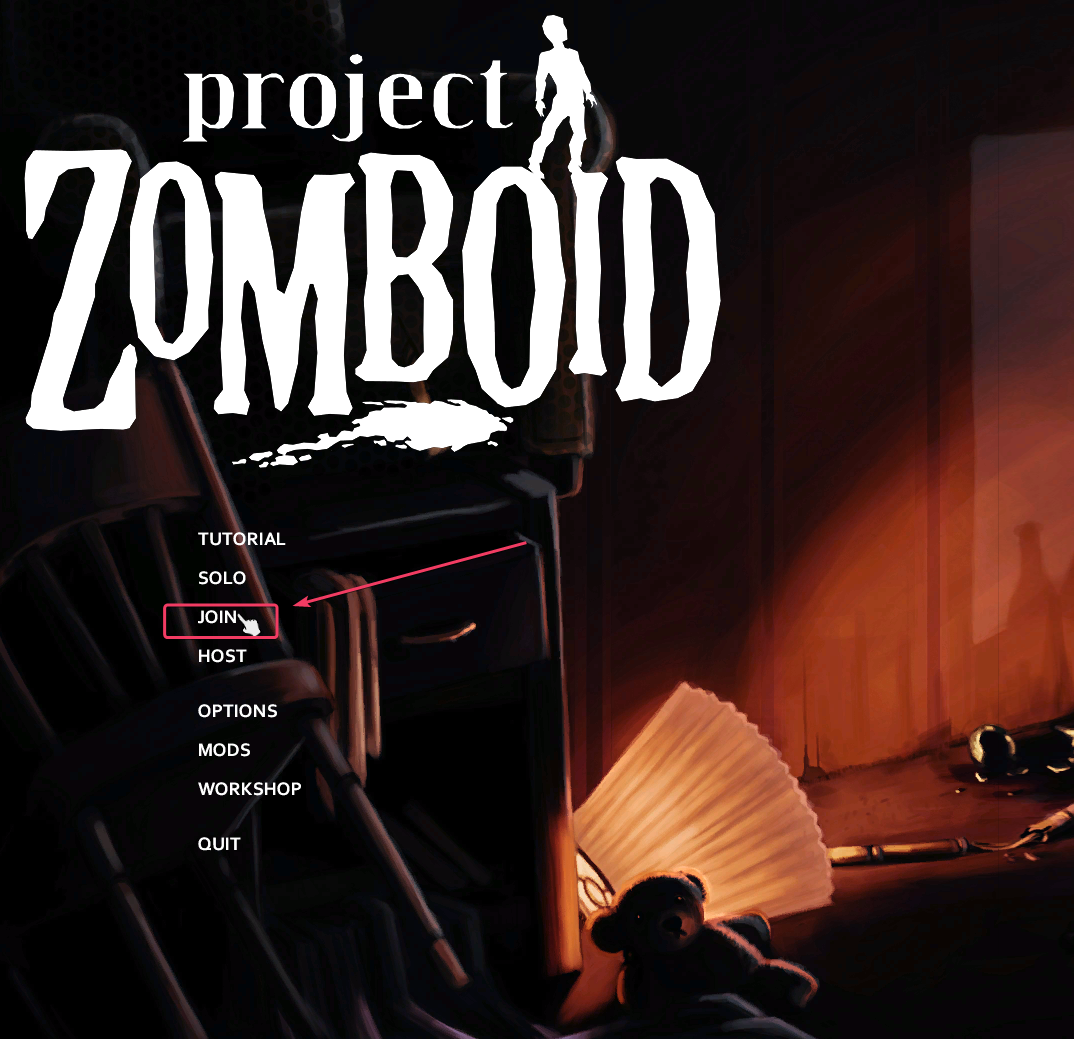
- Click on "Join": Once you’re in the main menu, look for the “Join” option. This is where you will enter the information needed to connect to your server.

Step 3: Enter Server Information
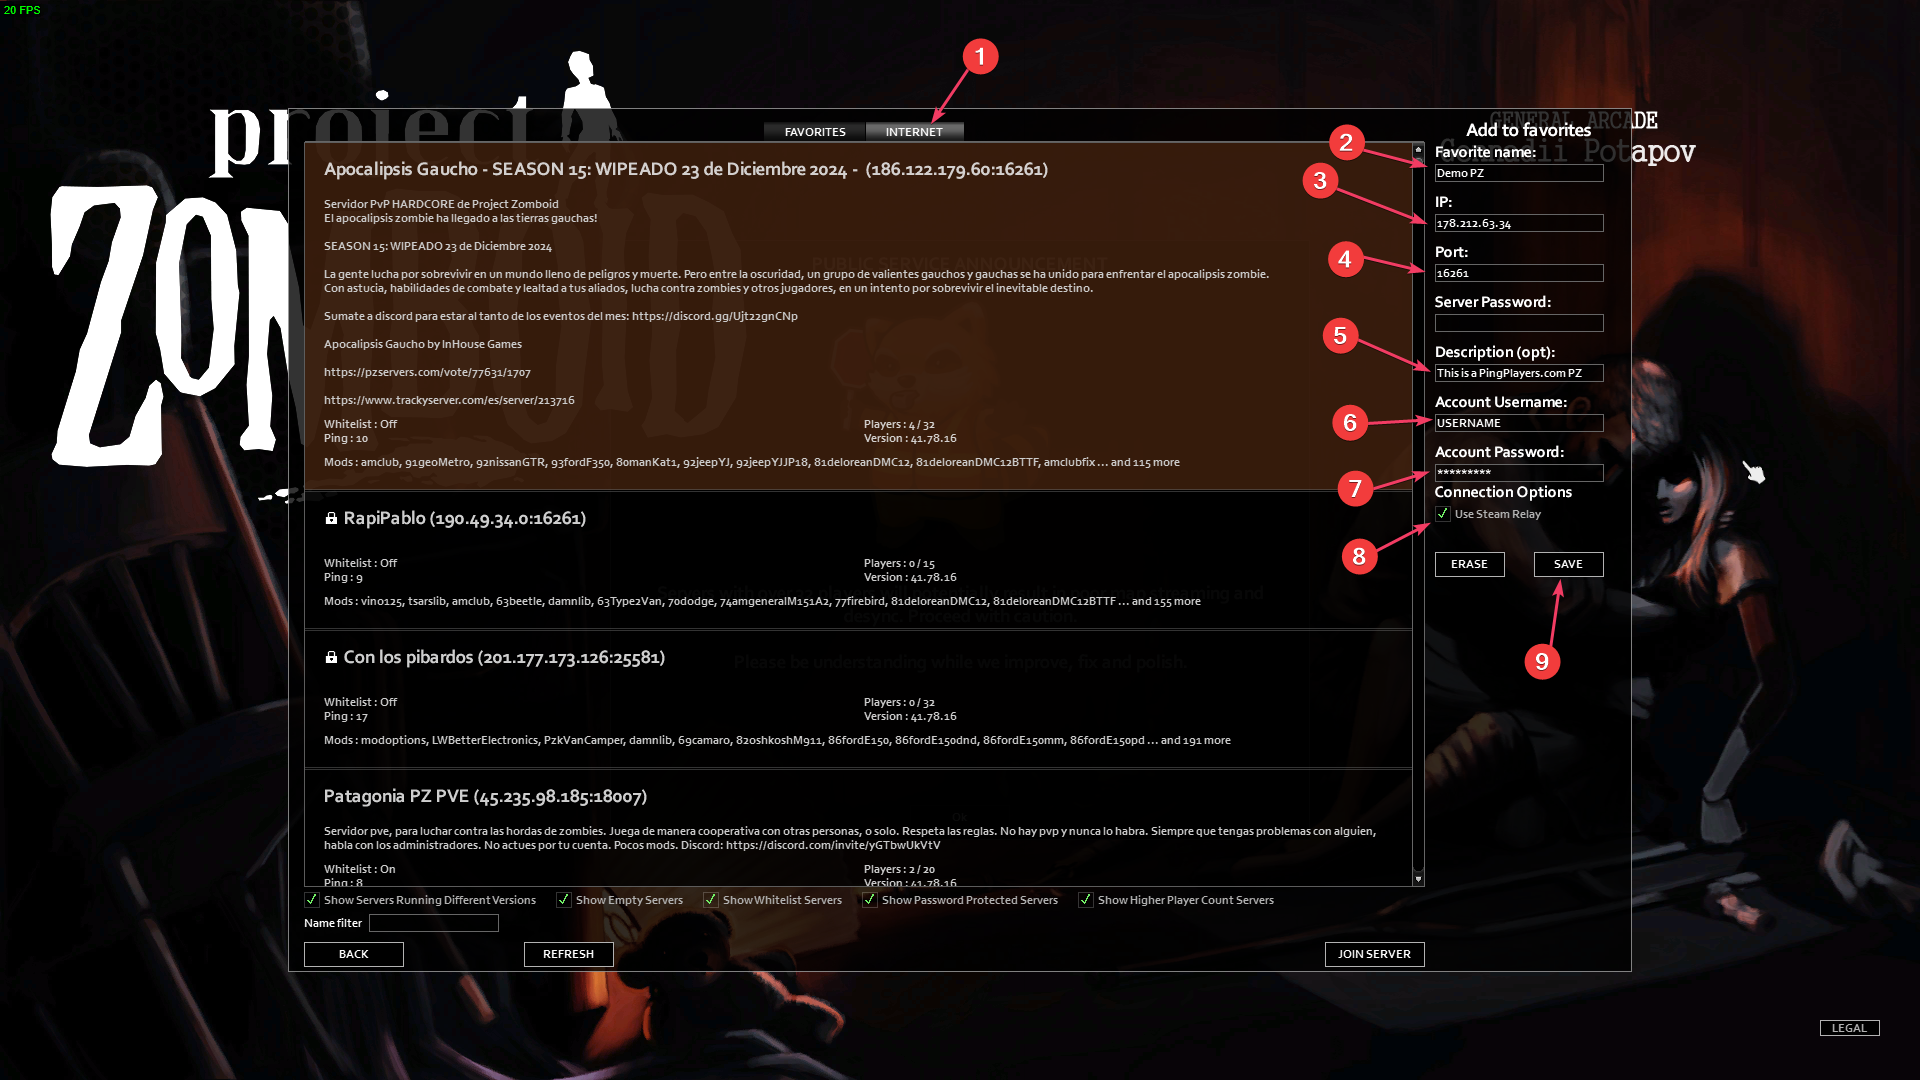
- Input the Details:
- IP Address: Enter your server’s IP address. This was provided to you by PingPlayers and should look something like
192.168.1.100. - Port: Next to the IP address, you’ll enter the port number. This can usually be found right next to the IP address in your server details (for example,
16261). Your complete server information should look something like192.168.1.100:16261. - Server Name: You can also search for your server by typing its name in the "Server Name" box, though it's not reliable in our experience. The name you specified when setting it up should be entered here. Remember that the name you selected is inside the "Basic Settings". You can access it from your account->My Servers->Game->Basic Settings.
- IP Address: Enter your server’s IP address. This was provided to you by PingPlayers and should look something like

- You can use any username and password you wish, but make sure you remember them in case you use another account or lose the Favorite presets.
- Steam Relay is recommended as it's faster, but it can be disabled. You'll see a port error message but it's a display bug from dedicated servers.
Step 4: Favorites
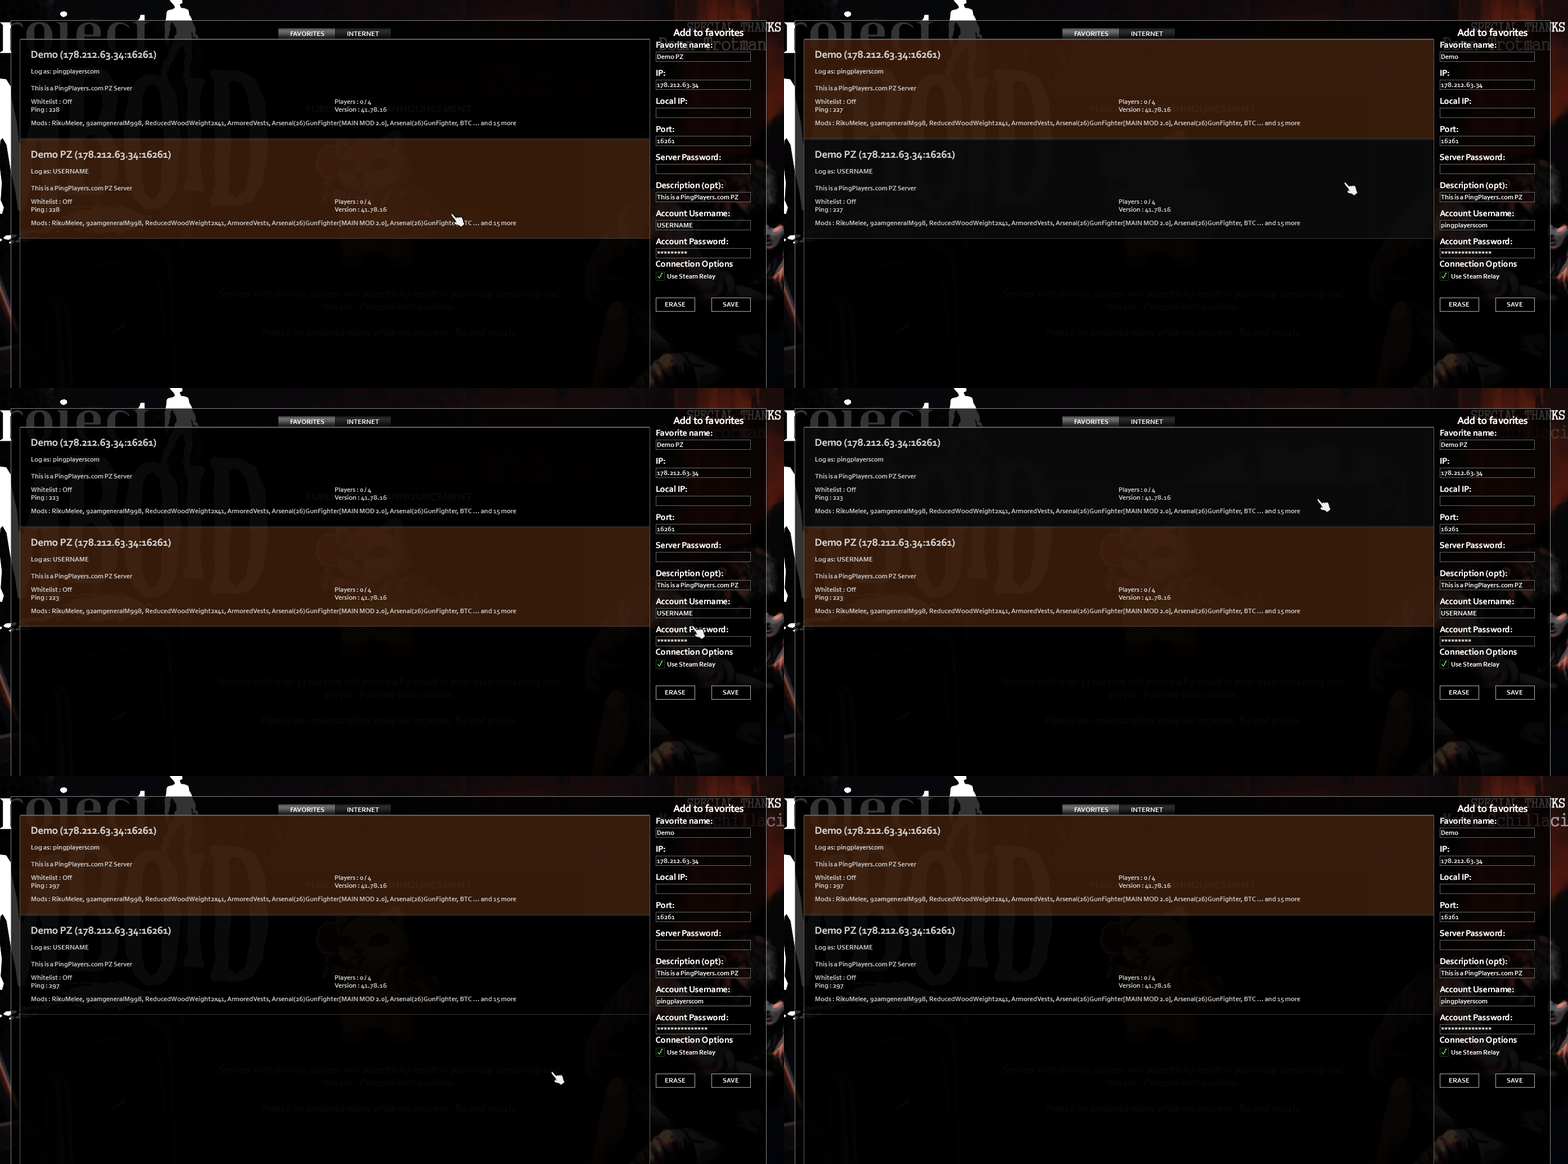
- Managing login list: Once Save is clicked, the credentials are saved and shown in the Favorites tab. You can log in to the same server with different accounts. This is especially useful for logging as Admin without having to re-add your credentials each time.

Step 5: Connect to the Server
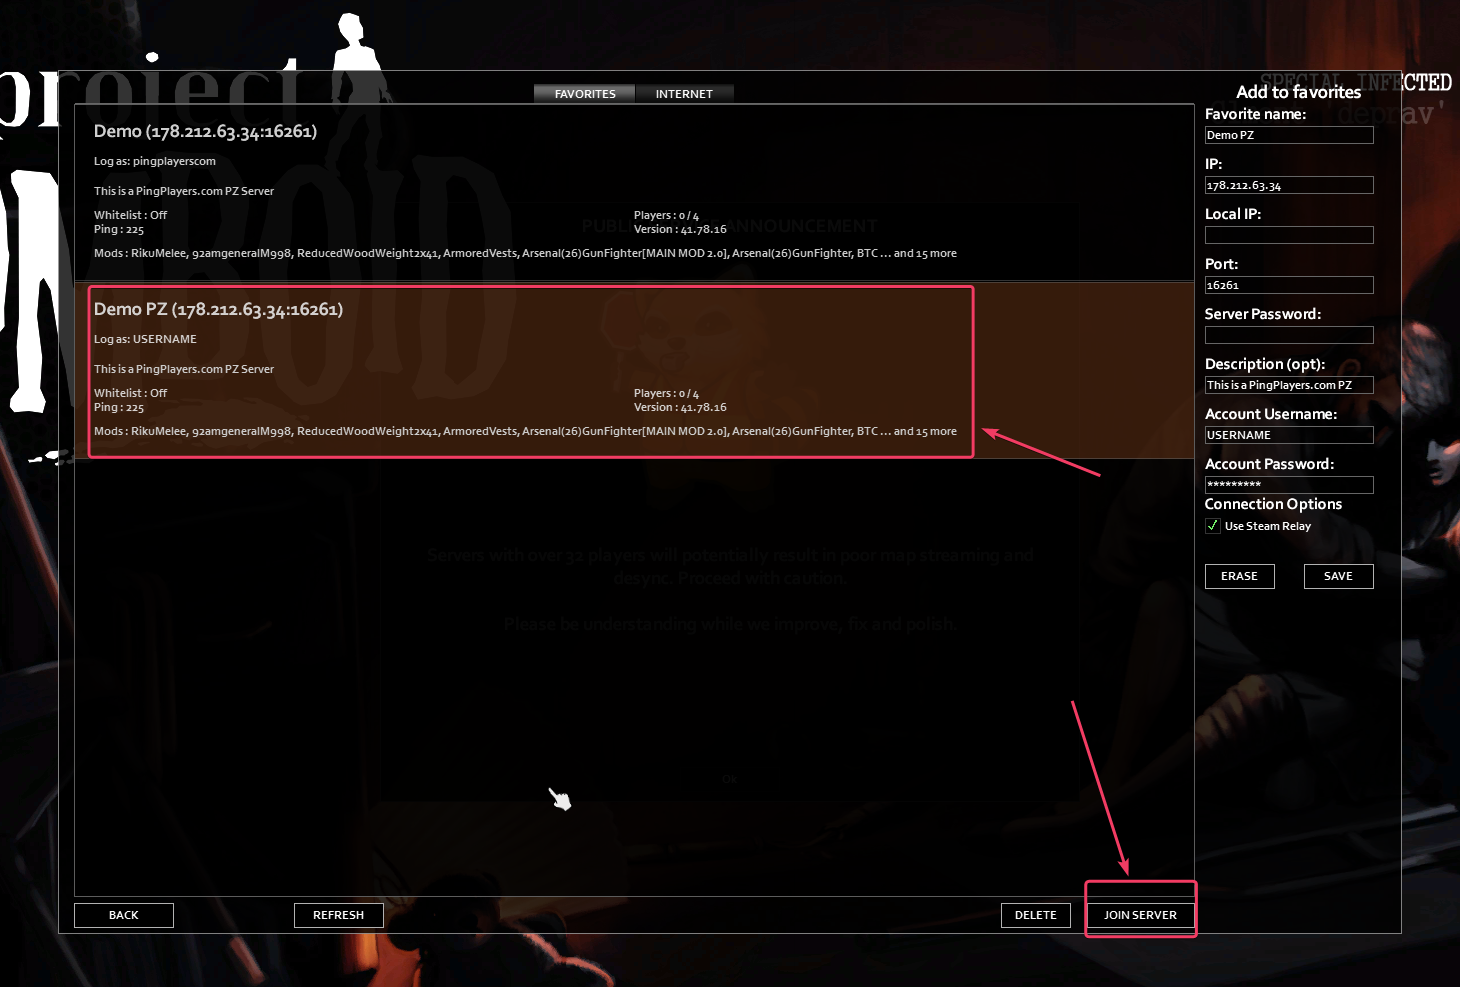
Click "Join": From the Favourite list, you can choose whichever server you prefer and then click Join to connect.

Step 6: Enjoy Your Game!
Getting Started: After you successfully connect, you’ll be taken to the server where you can start playing! If it’s your own server, you may want to set up your character or get familiarized with the game mechanics.
Troubleshooting
- Connection Error:
- Ensure that your IP address and port are entered correctly.
- Verify that the server is online (you may check with PingPlayers' support if you're uncertain).
- Make sure you or your friends have the same version of the game, including any required mods.
Map Download Fail: A common issue is the download for the map chunks failing due to a timeout. To fix this, you can activate Steam relay on the right panel when setting up the details of the server. It should load faster, too! (You can ignore the port warning; it's not a problem).
Now you’re all set to jump into the zombie-infested world of Project Zomboid with your friends! Enjoy your time crafting, building, and surviving together on your very own server.
If you run into any issues, don’t hesitate to reach out to PingPlayers support for assistance.