Last Update 2025-04-17 14:15:56
How To Become Admin and Manage Permissions with Oxide Mod
Becoming an admin for your Rust server can be incredibly useful. As an admin, you have the ability to manage the game environment, enforce rules, and create a more enjoyable experience for your players. You can monitor player activities, issue bans if necessary, and make changes to the server settings to enhance gameplay.
Using the Oxide mod, you gain access to powerful commands that allow you to manage permissions for your players effectively. This means you can grant or restrict access to certain features based on a player's role, ensuring a smoother and more organized gaming experience.
RustAdmin RCON Tool
In order to have permissions, you either need to be an owner of the server or be in a group that has been given admin. One of the most efficient ways to manage permissions on your server is through RCON (Remote Console) tools. These tools allow you to send commands to your server remotely, making it easier to control and configure without having to log directly into your server’s files.
RustAdmin
RustAdmin is a widely-used RCON tool that can help you manage your server settings and permissions with ease and it's free. Here's how to use it:
- Download and Install RustAdmin:
Visit the RustAdmin website to download the application compatible with your system.
Install the program following the onscreen instructions.
- Connect to your server:
- Open RustAdmin and select the “Configuration” tab to connect with your server.
RCON type should be selected.
- Open RustAdmin and select the “Configuration” tab to connect with your server.
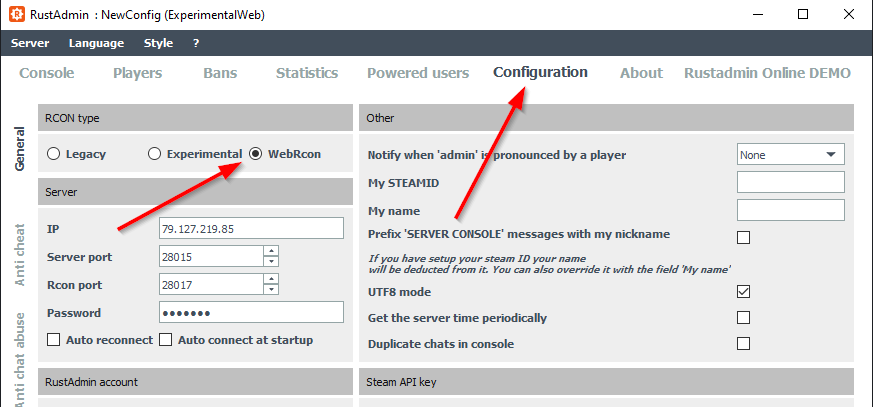
- Insert your server IP+Port, RCON port, and RCON password. You may see the RCON port in your server settings, right below the "Server Features".
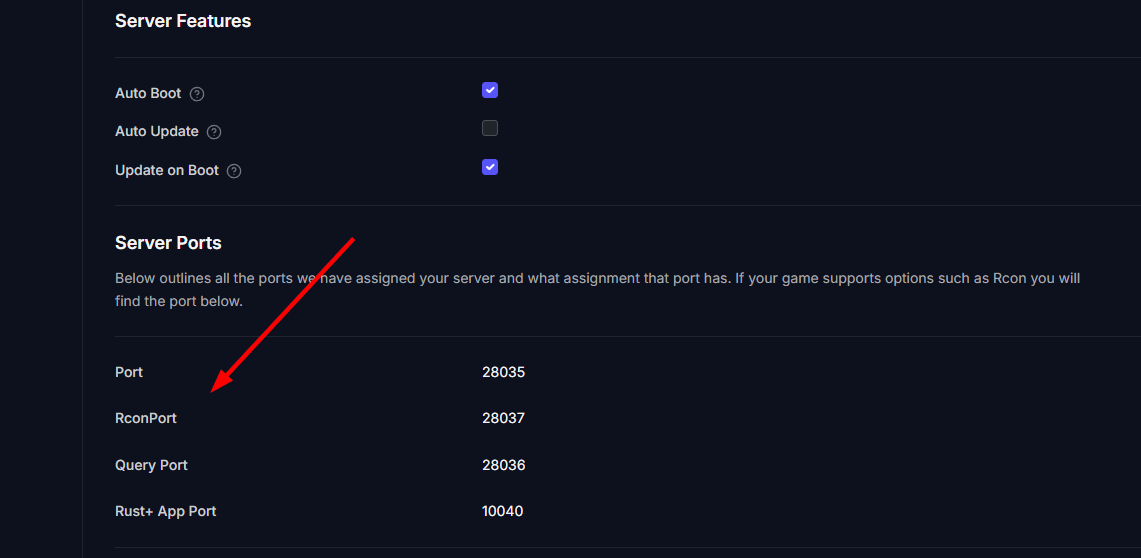
Note: RCON password is always blank by default at server creation, you will need to set it and restart the server to take it into effect. Find the password in the “Basic Settings” of the server.
- Other:
- This tab is on the right in the Server “Configuration” tab and it's quite important as it will provide *owner* status to your Steam user.
- Insert your STEAMID (obtained from your Steam account details) and your Steam username/nickname.
The rest of the settings are optional and depend on your preferences.

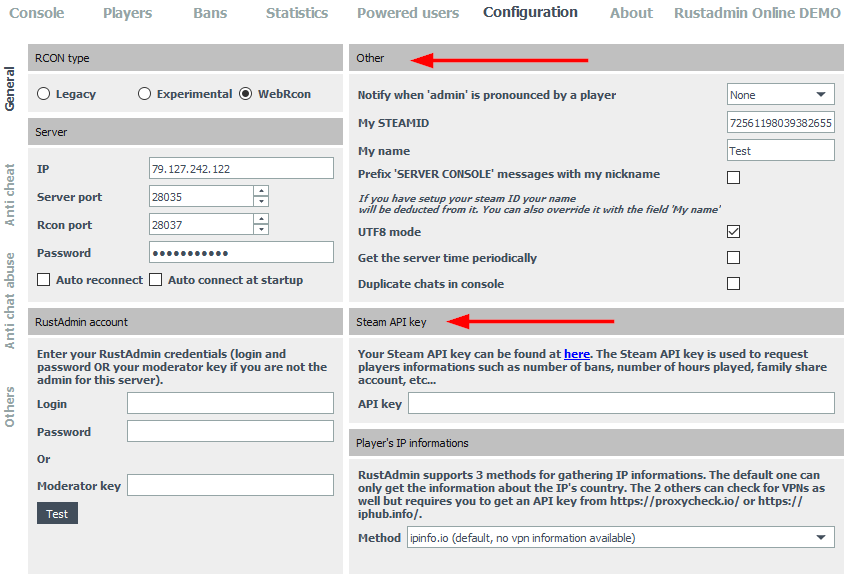
- Steam API key:
- You can get your Steam API key by following the link here (you need to be logged in Steam): Steam API key. It's used for statistics.
- Save Configuration:
Once all is set correctly, you can just save your configuration by clicking Save and giving it a recognizable name.
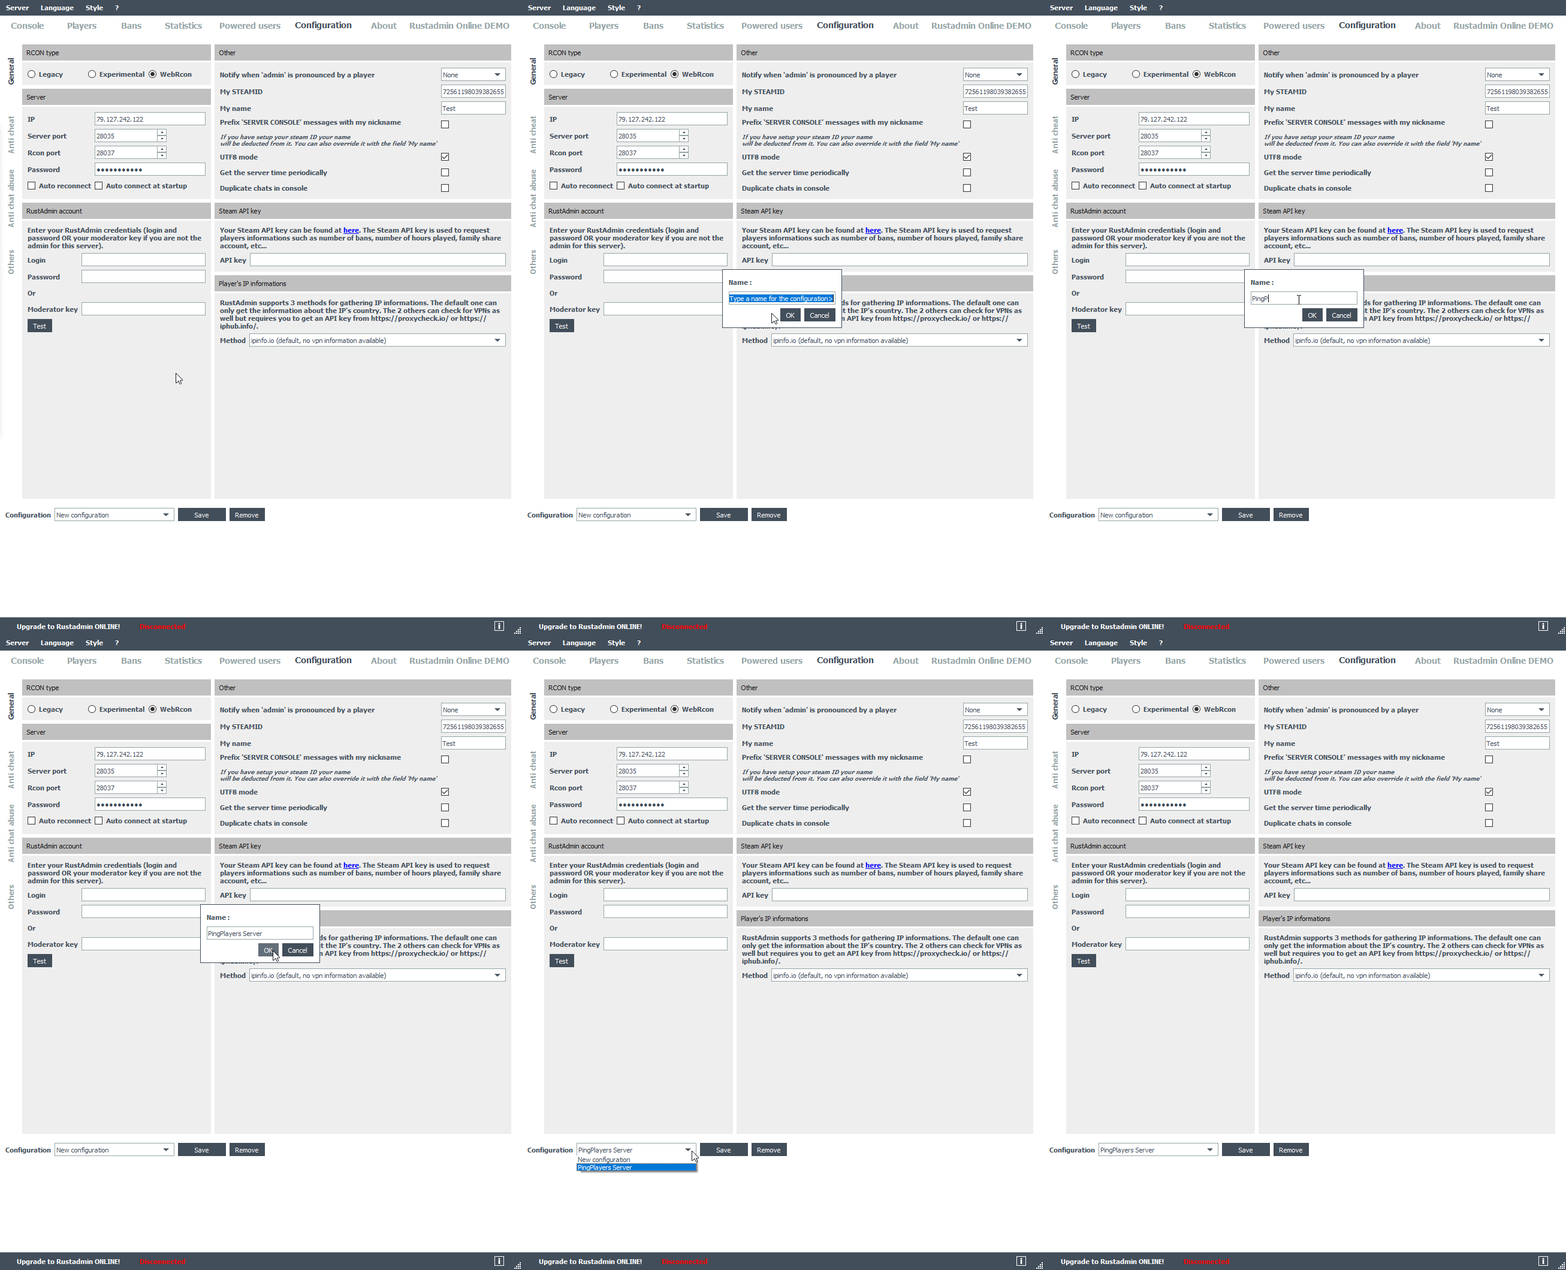
- If you've filled all the information correctly, you're now ready to connect.
- Click on “Server” at the top left corner of the RustAdmin window and select “Connect”.
- Wait until the “Configuration” tab gets greyed out. You might get prompted with a warning if you haven't filled the “Steam API key” section, simply accept it and proceed.
- Check at the bottom of the RustAdmin screen for a green text that says “Connected”.
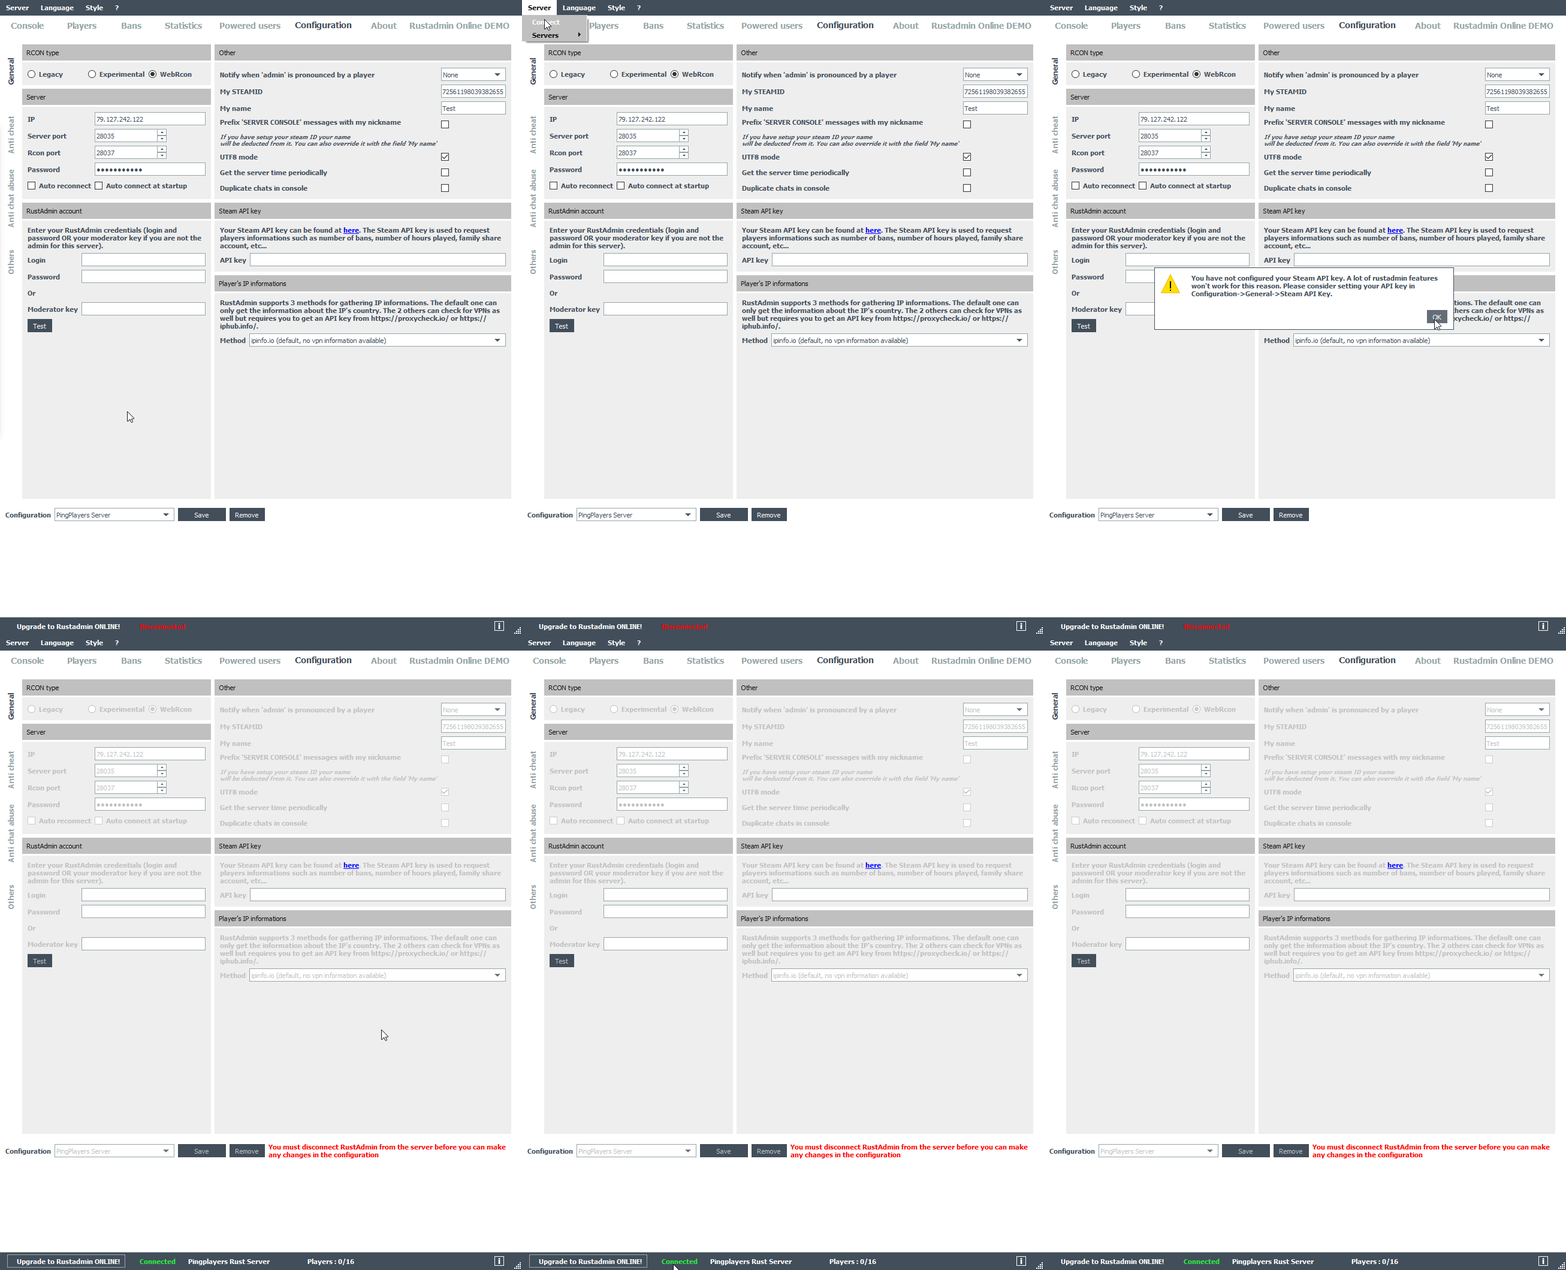
That's it, you are now connected to your server using RustAdmin with RCON.
Granting Permissions:
- Once connected, you can use the command interface to grant permissions.
- Go to the Console tab and use the two chat boxes at the bottom, either to send messages in-game as admin or to execute commands directly.
You can give other players permissions by granting them admin or owner status, if needed.
The main difference between an admin/moderator and an owner of the server, is that the owner can promote any other players as admin/owner, but admin users don't have the power to do so.
The respective lines to achieve this are as followed:moderatorid <STEAMID64> <NAME (or) REASON>Example:
moderatorid 72561198039382655 Admin
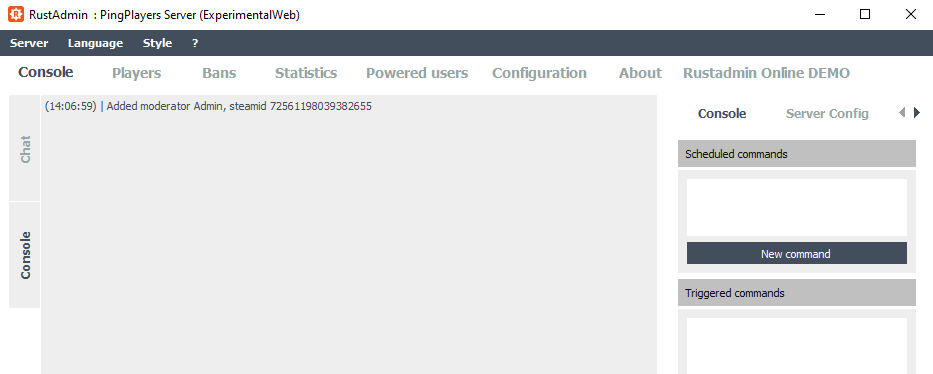
ownerid <STEAMID64> <NAME (or) REASON>Example:
ownerid 72561198039382655 Owner

Once you or your friends became admin or owner, you may use any command to execute either in-game or from the RustAdmin console.
Find here a list of all commands to use as admin/owner.
Oxide Mod: Group creation
It's important to understand how to create groups with Oxide since it's a pretty useful tool to manage users in groups instead of giving them permissions individually.
The most important commands are:oxide.group(create/delete different groups with custom names)
Formats:
oxide.group <add|set> <name> [title] [rank] oxide.group <parent> <name> <parentName> oxide.group <remove> <name>oxide.usergroup(assign users to created groups)
Format:
oxide.usergroup <add|remove> <username> <groupname>
Here's an example for a better understanding.
Let's say you have two users called “Player1” and “Player2” which need to have permissions to manage a mod called “Permission Manager”.
What we can do is create a group to include both users inside and then give this particular group permissions to the mod.
(Make sure all users have either admin or owner status first)
To do so, we can run the commands as followed:
oxide.group add ModAdmins

Once created, you need to add users inside of it. So let's run the following command:
oxide.usergroup add Player1 ModAdmins
oxide.usergroup add Player2 ModAdmins
Since Player1 and Player2 are not actual players we need to use their respective SteamID, but you should be able to use either the player's ID or the custom name once assigned as admin/owner.
For Player1 we'll use the ID 72561198039382654
For Player2 we'll use the ID 72561198039382658
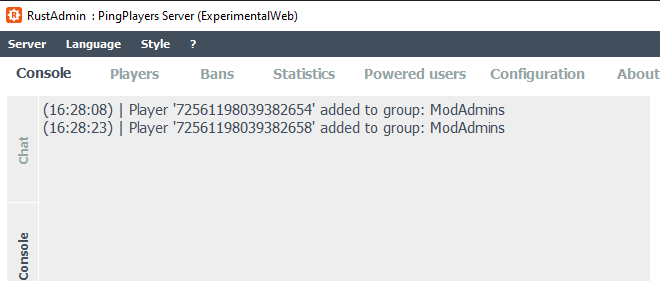
Now we need to give the group “ModAdmins” permissions to the mod directly. For this we'll use a different command.
oxide.grantFormat:
oxide.grant <group|user> <name|id> <permission>So let's run the command:
oxide.grant group ModAdmins permissionsmanager.allowed
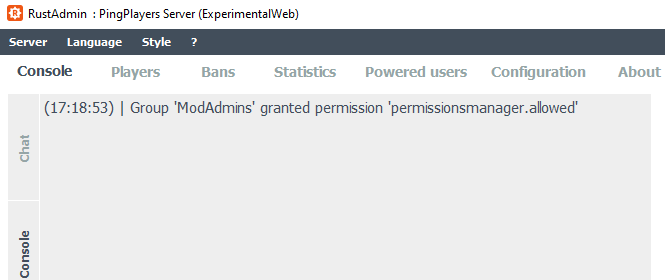
That's it, both Player1 and Player2 now have access to this particular plugin/mod. If you would like to verify this, you can use a different command.
oxide.show
Formats:oxide.show <groups|perms> oxide.show <group|user> <name>So we need to use it as followed:
oxide.show group ModAdmins
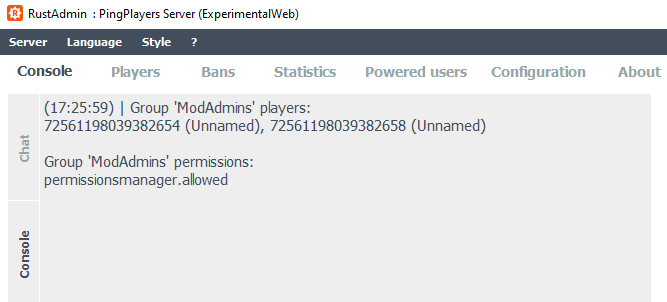
If all users are included there, they should be able to use the plugin/mod without any issues.
You can repeat this steps with any other groups or plugins that you'd like to configure, for your players to use it at any time.
If you prefer to give direct permissions to players instead, you can simply type the permission's command there.
It's important to note that the used command depends on the plugin that you've installed, since each command involves the Oxide mod to execute it.
For example, to give a user the ability to teleport, you would type a command like:
oxide.grant user teleport
You can also revoke permissions by using:oxide.revoke user teleportTo see the permissions a user currently has, you can use:
oxide.show user
Make sure to replace USER with the actual username of the player you want to modify.
The default commands for Oxide mod that you can use are the following:
oxide.plugins, oxide.load, oxide.reload, oxide.unload, oxide.grant, oxide.group, oxide.revoke, oxide.show, oxide.usergroup
We encourage you to check the OxideMod official website for a better understanding on each command. Feel free to do so here.
Troubleshooting
If you encounter any issues, consider the following common problems:
- Wrong SteamID: Ensure that you're using the correct SteamID for the player you want to manage. You can find a player's SteamID by visiting their Steam profile.
- Incorrect Command Line: Double-check the command you are inputting. Make sure you're following the correct syntax as specified in the Oxide documentation.
If you have any questions or need assistance, feel free to reach out to our customer care agents through our live chat or email at [email protected]. Happy gaming!