Last Update 2025-03-15 17:49:02
Managing Your Satisfactory Servers: A Beginner's Guide
Congratulations on getting your game server for Satisfactory! This guide will walk you through the basics of managing your server, ensuring that you can enjoy your gaming experience to the fullest. We will cover how to create a game, configure your server advanced settings, and manage your saves. Let’s dive in!
Step 1: Accessing the Server Management Tool
The first step to managing your game server is to access the server information from our website.
Go to “My Servers” and open your Satisfactory server. From here you may get the IP and Port to connect into the server.
- Open the Satisfactory game in your PC.
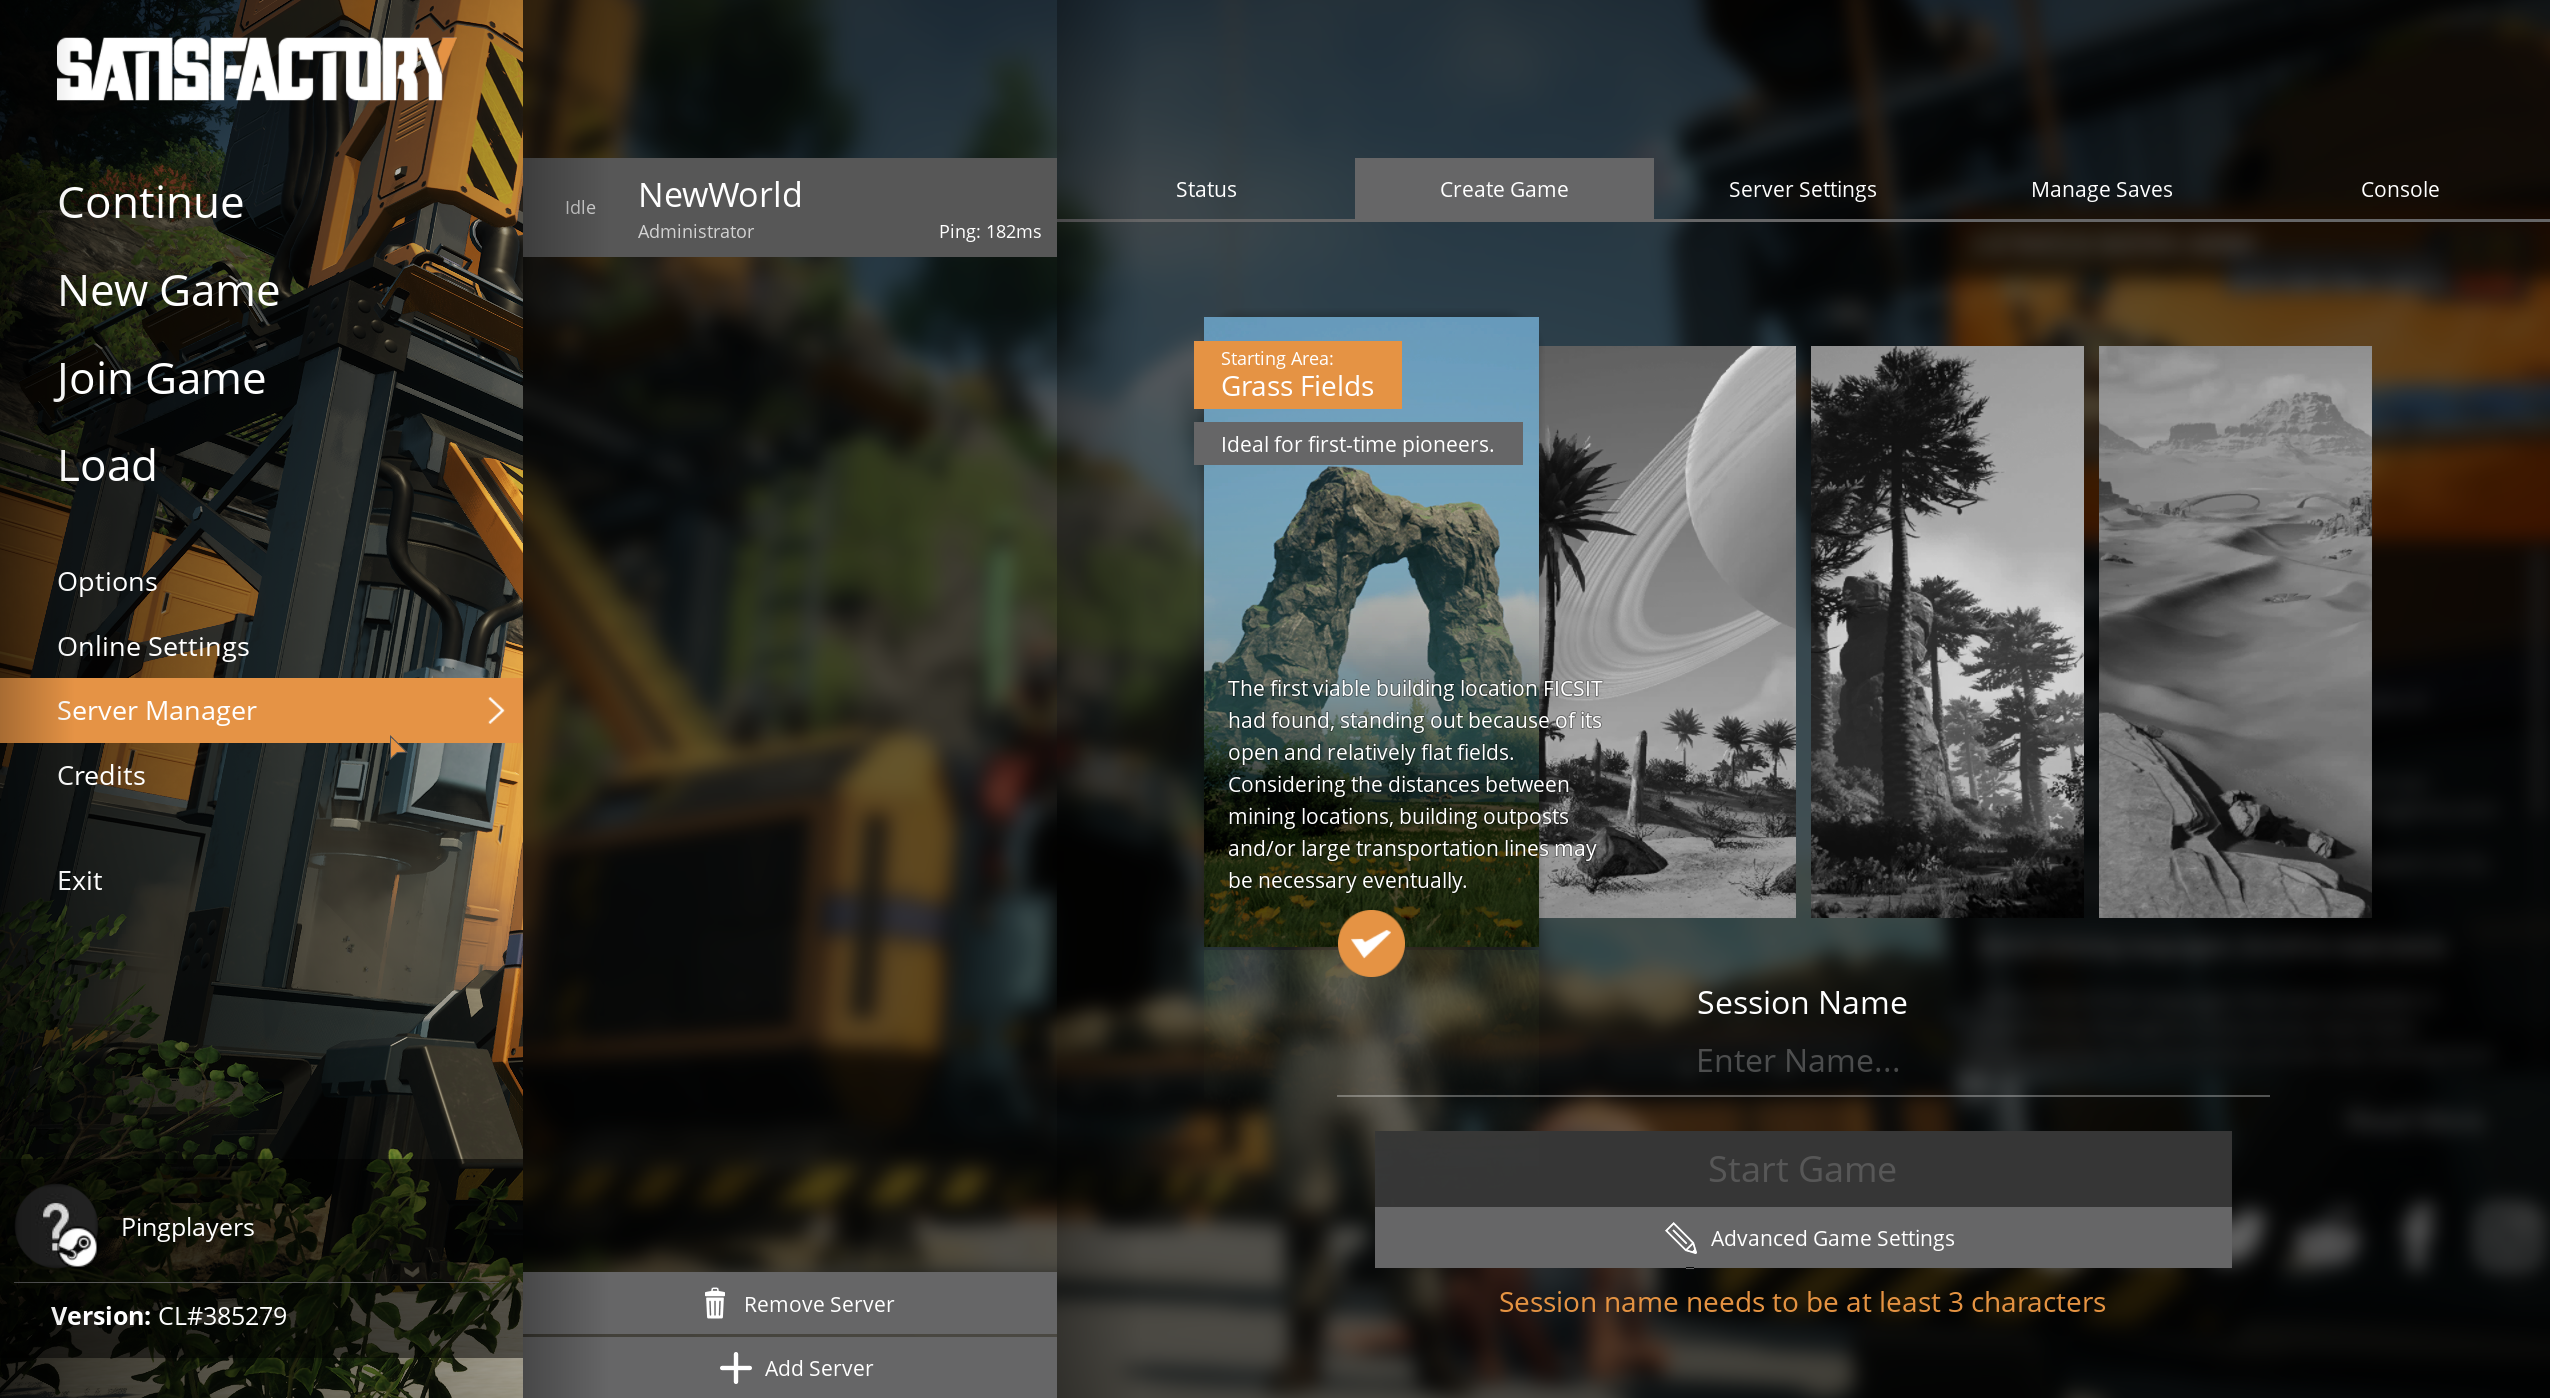
- Go to "Server Manager" and add your desired server, if not added.
Step 2: Create a Game (if you haven't already)
Now that you’re in the server management interface, let’s start by creating a game.
- Locate the “Create Game” tab. This is typically found on the “Server Manager” option.
- Select the desired Starting Area. You’ll have the options between a first-time player or an advanced one, by hovering over the different categories.
- Fill out the Session name right below the selected starting area.
Click “Start Game.” This action will establish your server and prepare it for gameplay.
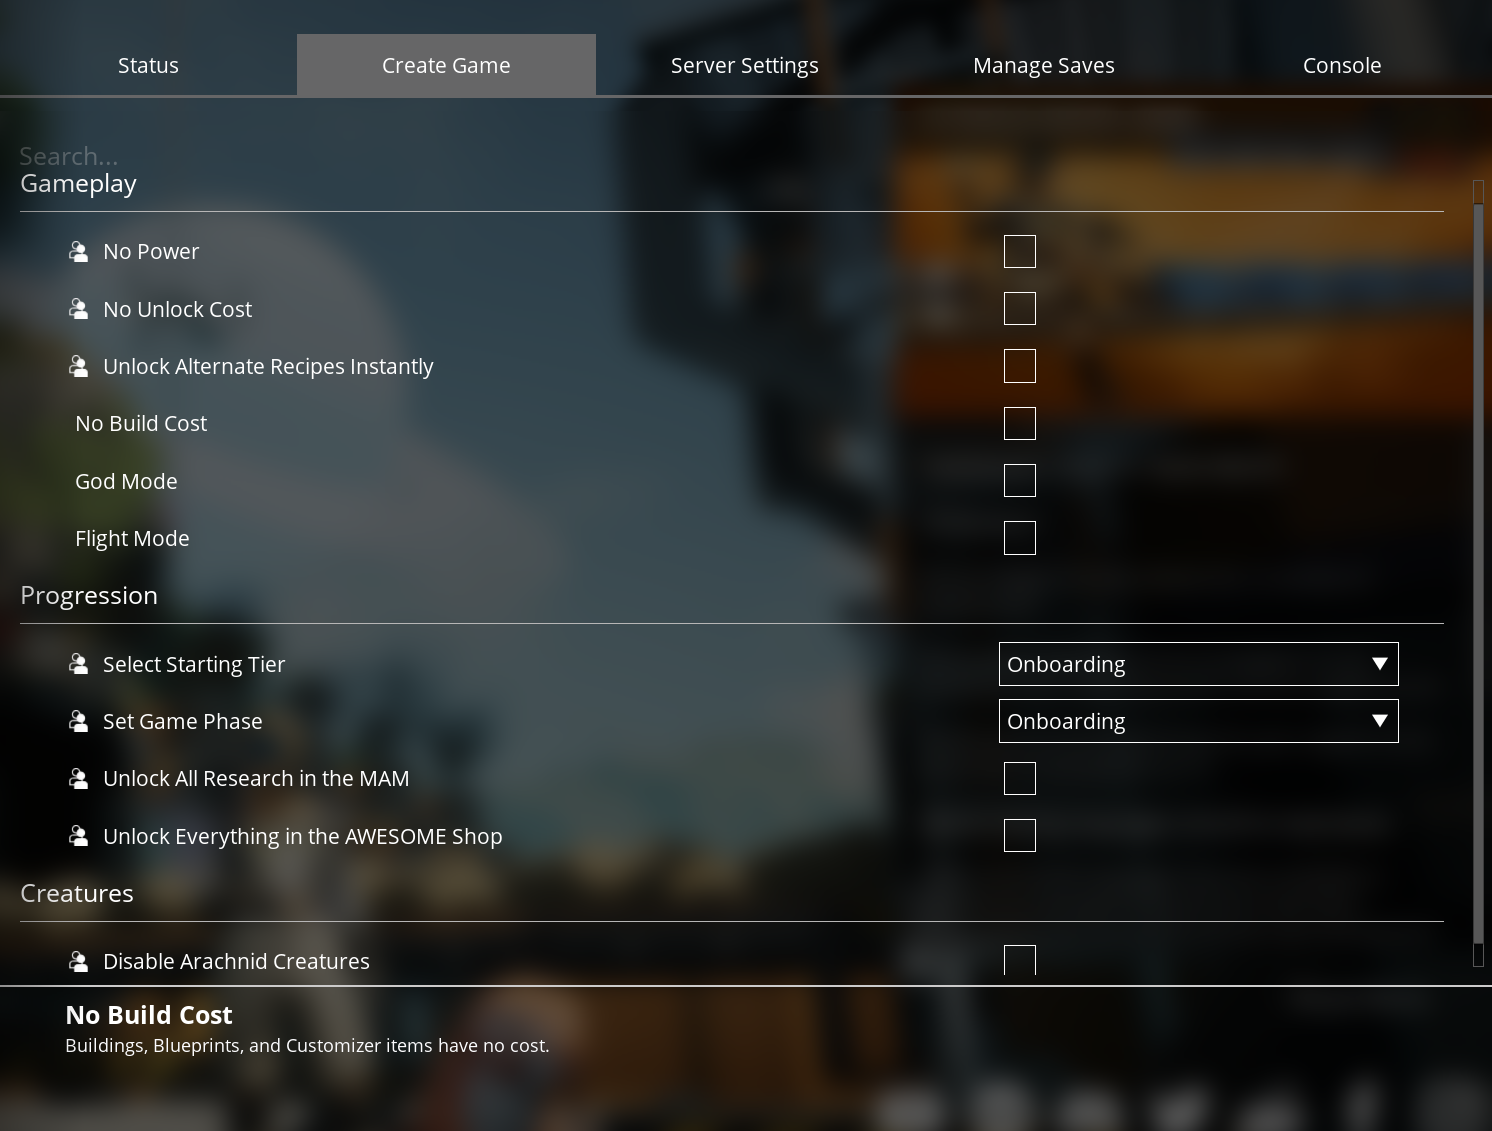
If you're an advanced player, you can create a custom server by clicking on "Advanced Game Settings" before its creation.
In here you'll find options such as unlocked recipes, no build cost, no power requirements, flight mode and many more. Make sure to select the correct options before you create the world as they can't be changed later.

Step 3: Server Settings
Next, we need to configure the server settings. This step is crucial for optimizing your gaming experience.
- Status will show the Tier, Milestones, Game Phase, how many current players there are, Game Duration and the Average Tick Rate (the update frequency on the server).
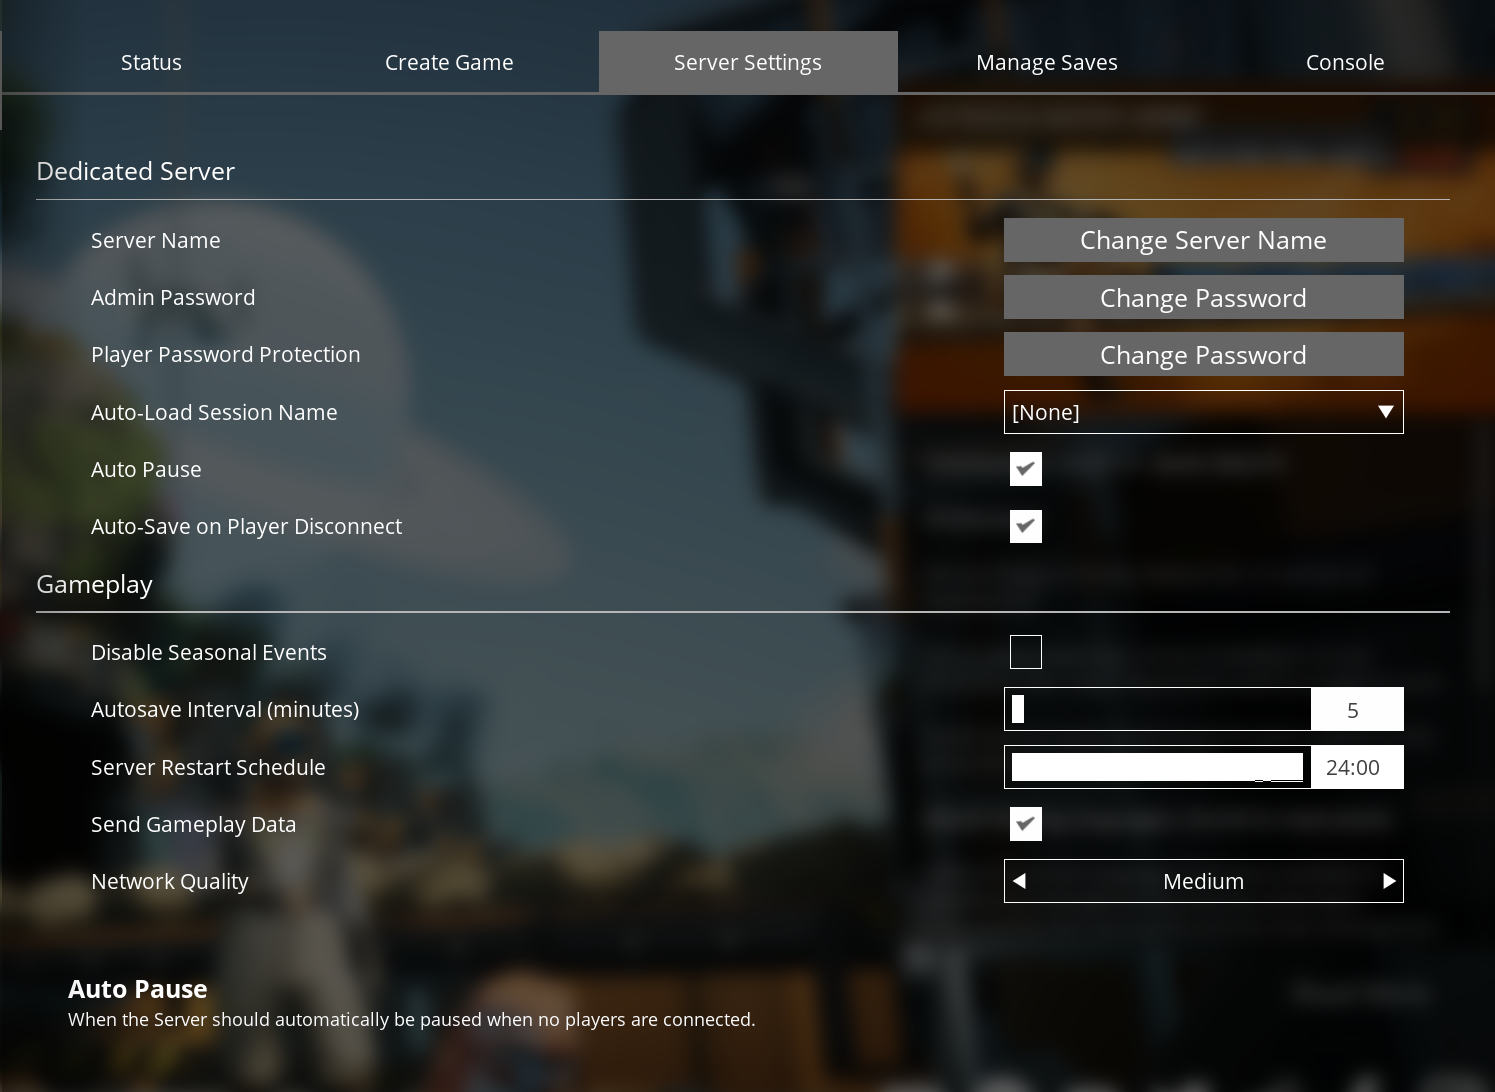
- Find the “Server Settings” section within the management interface. This should be prominently displayed.
- Adjust the following key settings:
- Server Name: Customize this to help players identify your server easily.
- Admin Password: This is the password to access the server and manage it. Very important and don't lose it as PingPlayers website won’t show it.
- Password: Set a password if you want to restrict access to your friends only.
- Auto-Pause: Whether the server pauses itself if there are no players connected.
- Auto-Save on Player Disconnect: Whether the server saves the game when a player disconnects.
- Gameplay:
- Autosave interval in minutes: Default is 5 minutes but it can be set up to 120.
- Server Restart Schedule: The time when you want the server to be restarted. It can also be done from our website, of course.
- Send Gameplay Data: Enable or disable data gathering by the developer.
- Network Quality: A trade-off between server FPS and load times. A bit of experimentation is needed here.
- Save Changes: Don’t forget to click on any “Save” buttons to ensure your modifications are applied!

Step 4: Manage Saves
Keeping your game saves organized and manageable is vital. Here’s how to access and manage your saves effectively:
- Find the “Manage Saves” option. This is usually located within your server management settings.
- Review Existing Saves:
- You will see a list of the game saves: Note any automatic or manual saves you’ve created during gameplay.
- Create a Manual Save:
- If you want to save your progress manually, click on the option to create a new save and name it appropriately.
- Load a Save: If you’d like to revert to a previously saved game, simply select the save file you want to load and follow the prompts to restore it.
- Delete Unwanted Saves: You can tidy up by deleting old or unused save files. Just select the save and click on the delete option.
- Upload a Save: To upload a pre-existing save from a local game or from another server onto this server.
- Download a Save: To download the save from the server so it can be continued on another game/system.
Step 5: Finalizing and Concluding
Once you have set everything to your liking, it’s time to launch your server.
- Restart Your Server: If the changes were not applied, you may need to restart your server. Find the restart option in our website under your server configuration.
- Invite Friends: Share your server details with friends, including any password if you’ve set one.
Conclusion
Managing your Satisfactory servers doesn’t have to be overwhelming. By following these steps, you’ll be able to create a fun and organized gaming environment for you and your friends. Enjoy building your factory and exploring the vast world of Satisfactory! If you have any questions, don’t hesitate to reach out to our support team at PingPlayers. Happy gaming!