Last Update 2025-07-02 10:05:12
How to Connect to Your Soulmask Server via RCON
So you're ready to take the reins of your Soulmask world, and this guide is your first step to becoming the master of your domain. We're here to show you how to set up your personal command center using RCON, which will let you manage your server and your community from anywhere. Think of it as your very own admin toolkit, giving you the power to run things your way, even when you're away from the game.
Preparing the server for RCON
Step 1: Gather Your Information
Before you begin, make sure you have the following information:
- Server IP: The public IP address of your server.
- RCON Port: This is usually different from the game port, so note it down.
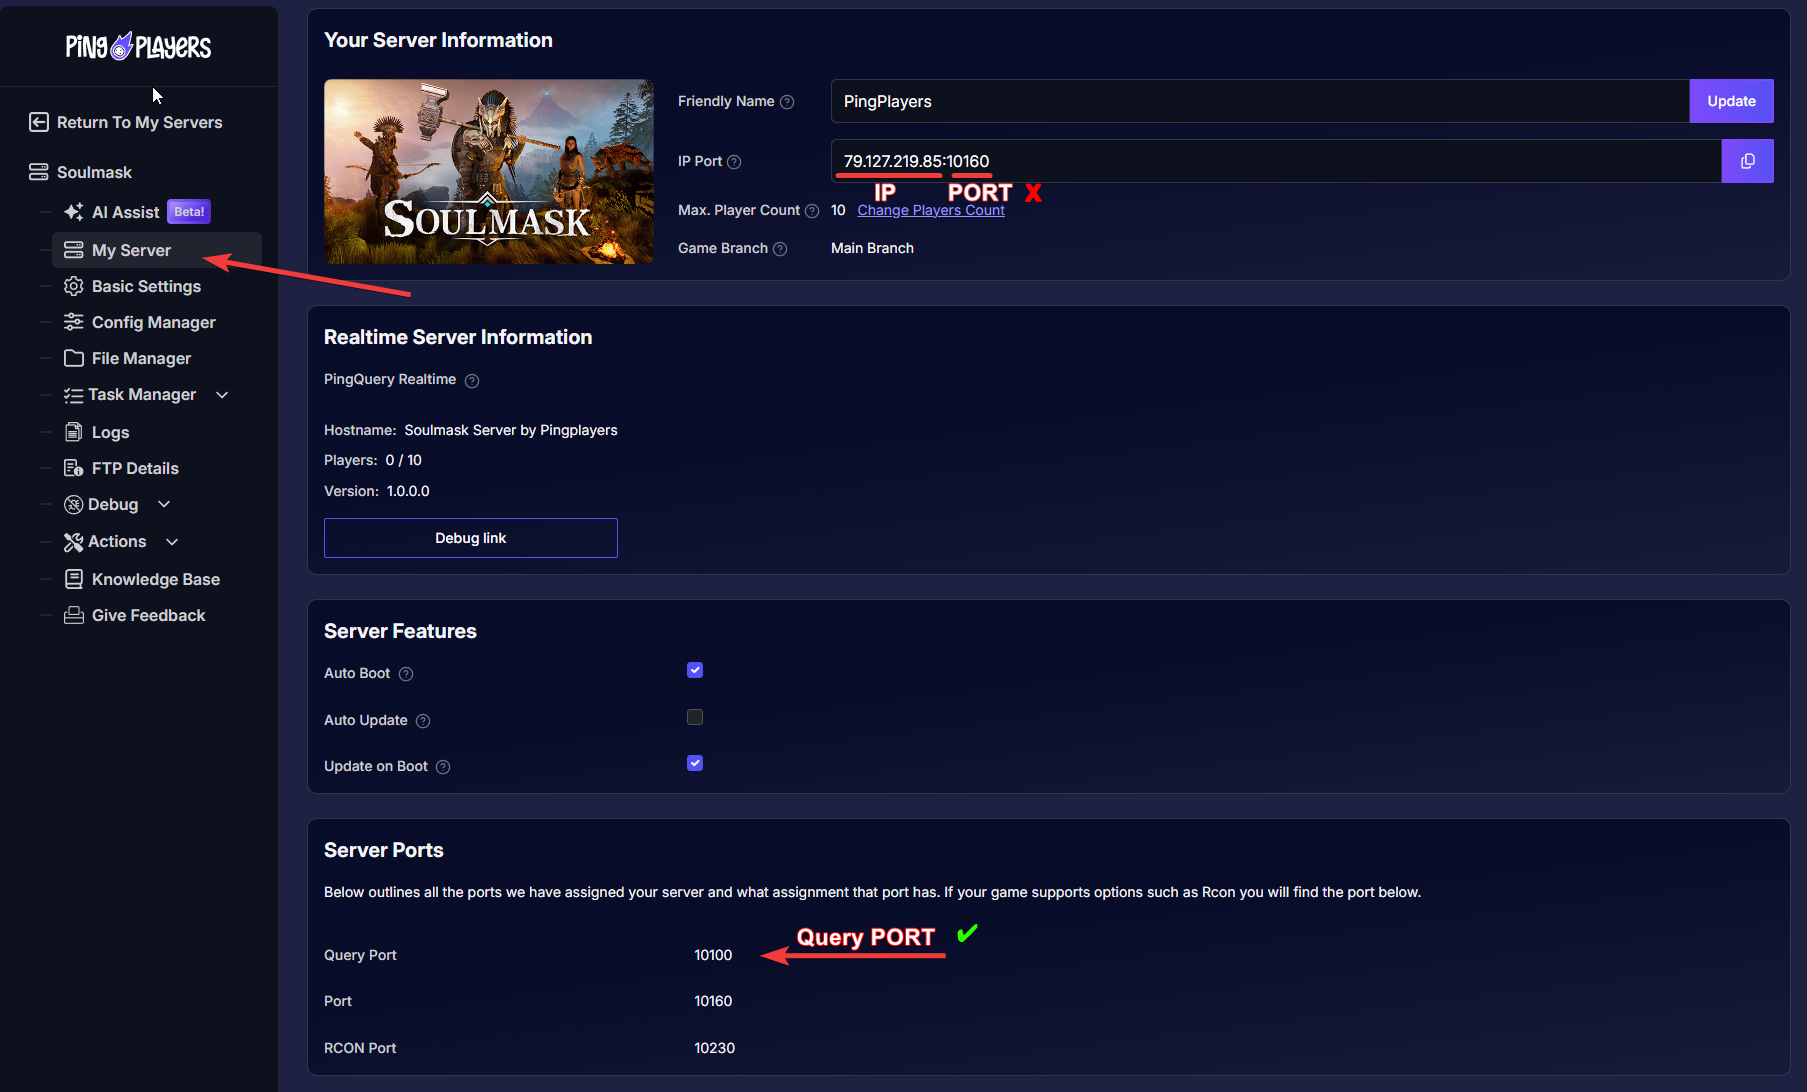
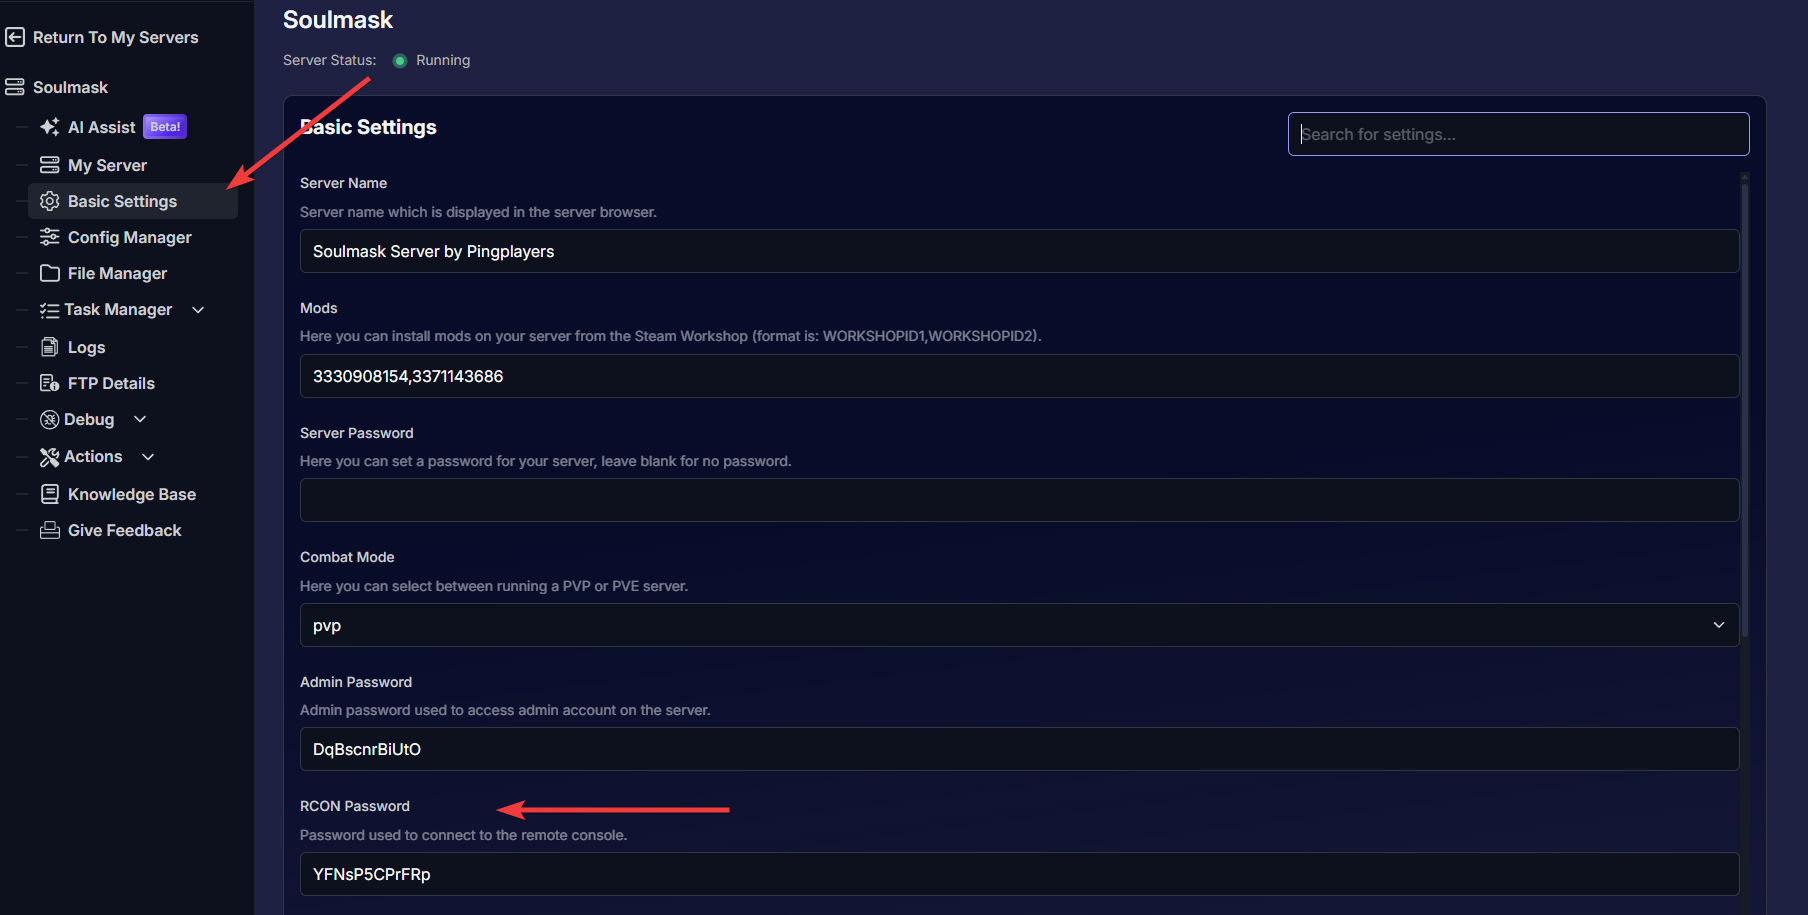
- RCON Password: You can change the RCON password in the Basic Settings at any time if needed. Once changed, make sure to restart the server to apply the changes.
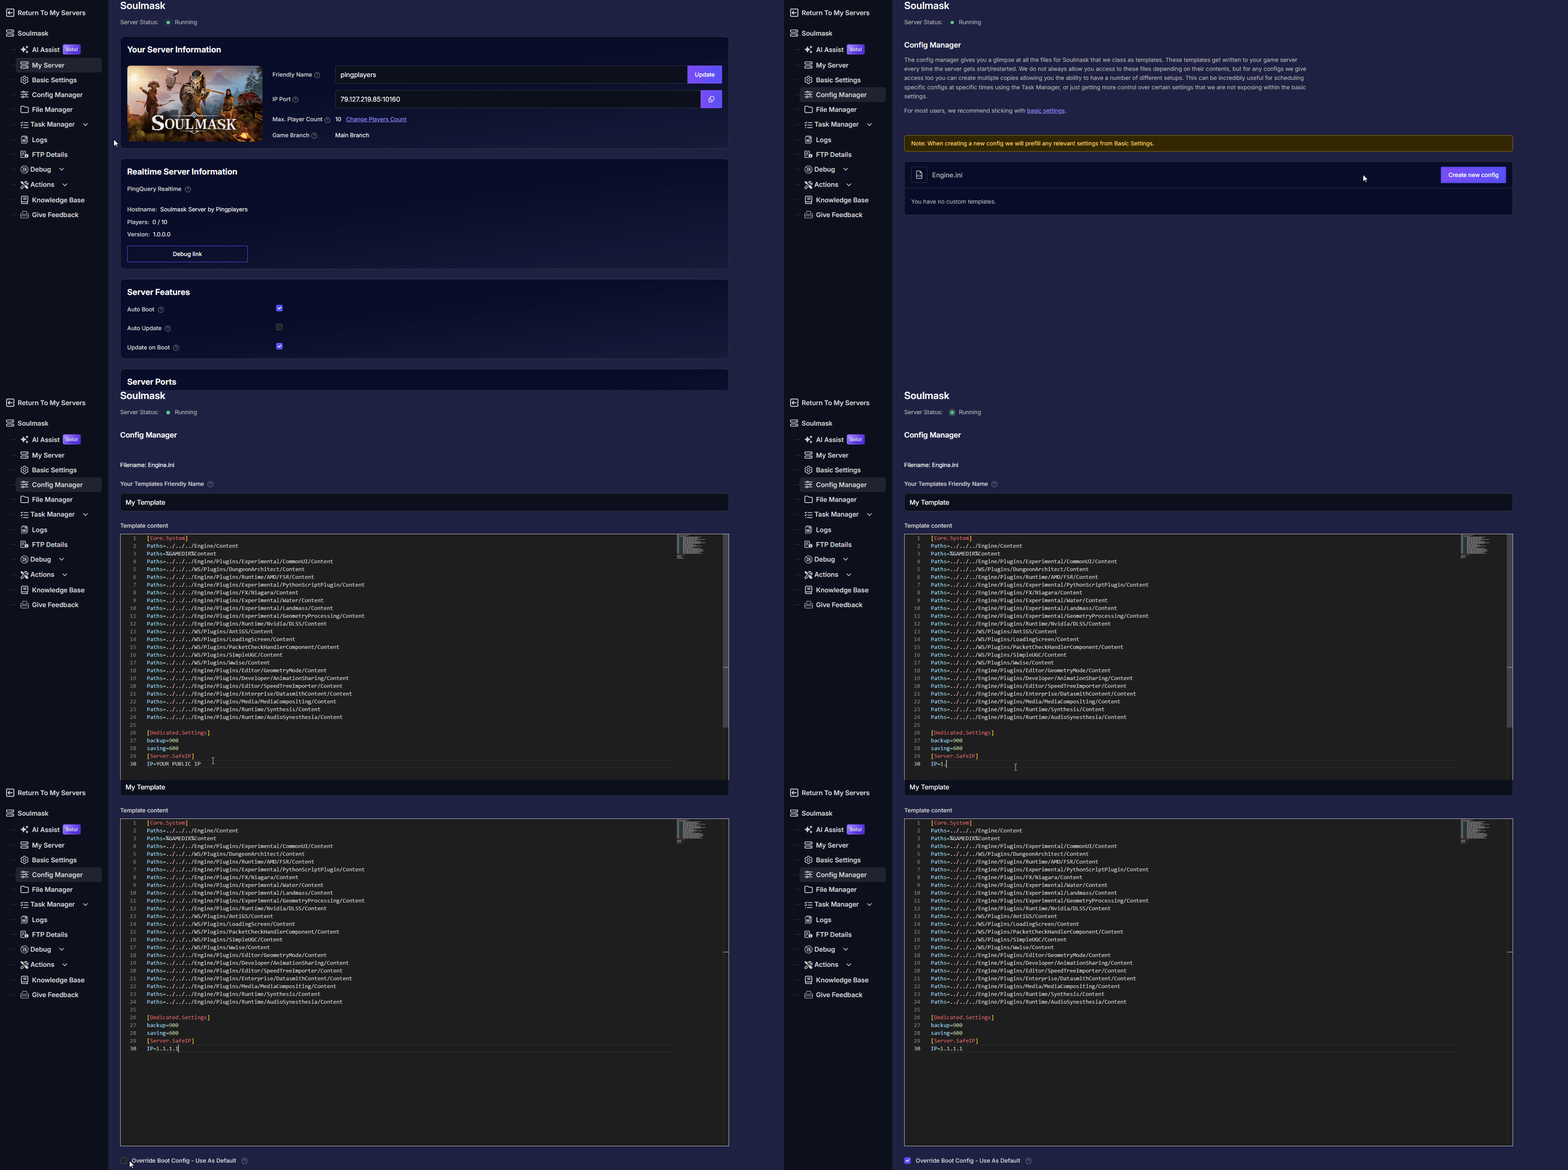
Step 2: Create a Config for Engine.ini
In your game hosting panel, go to the Config Manager and create a new configuration for Engine.ini.
Step 3: Edit the Engine.ini File
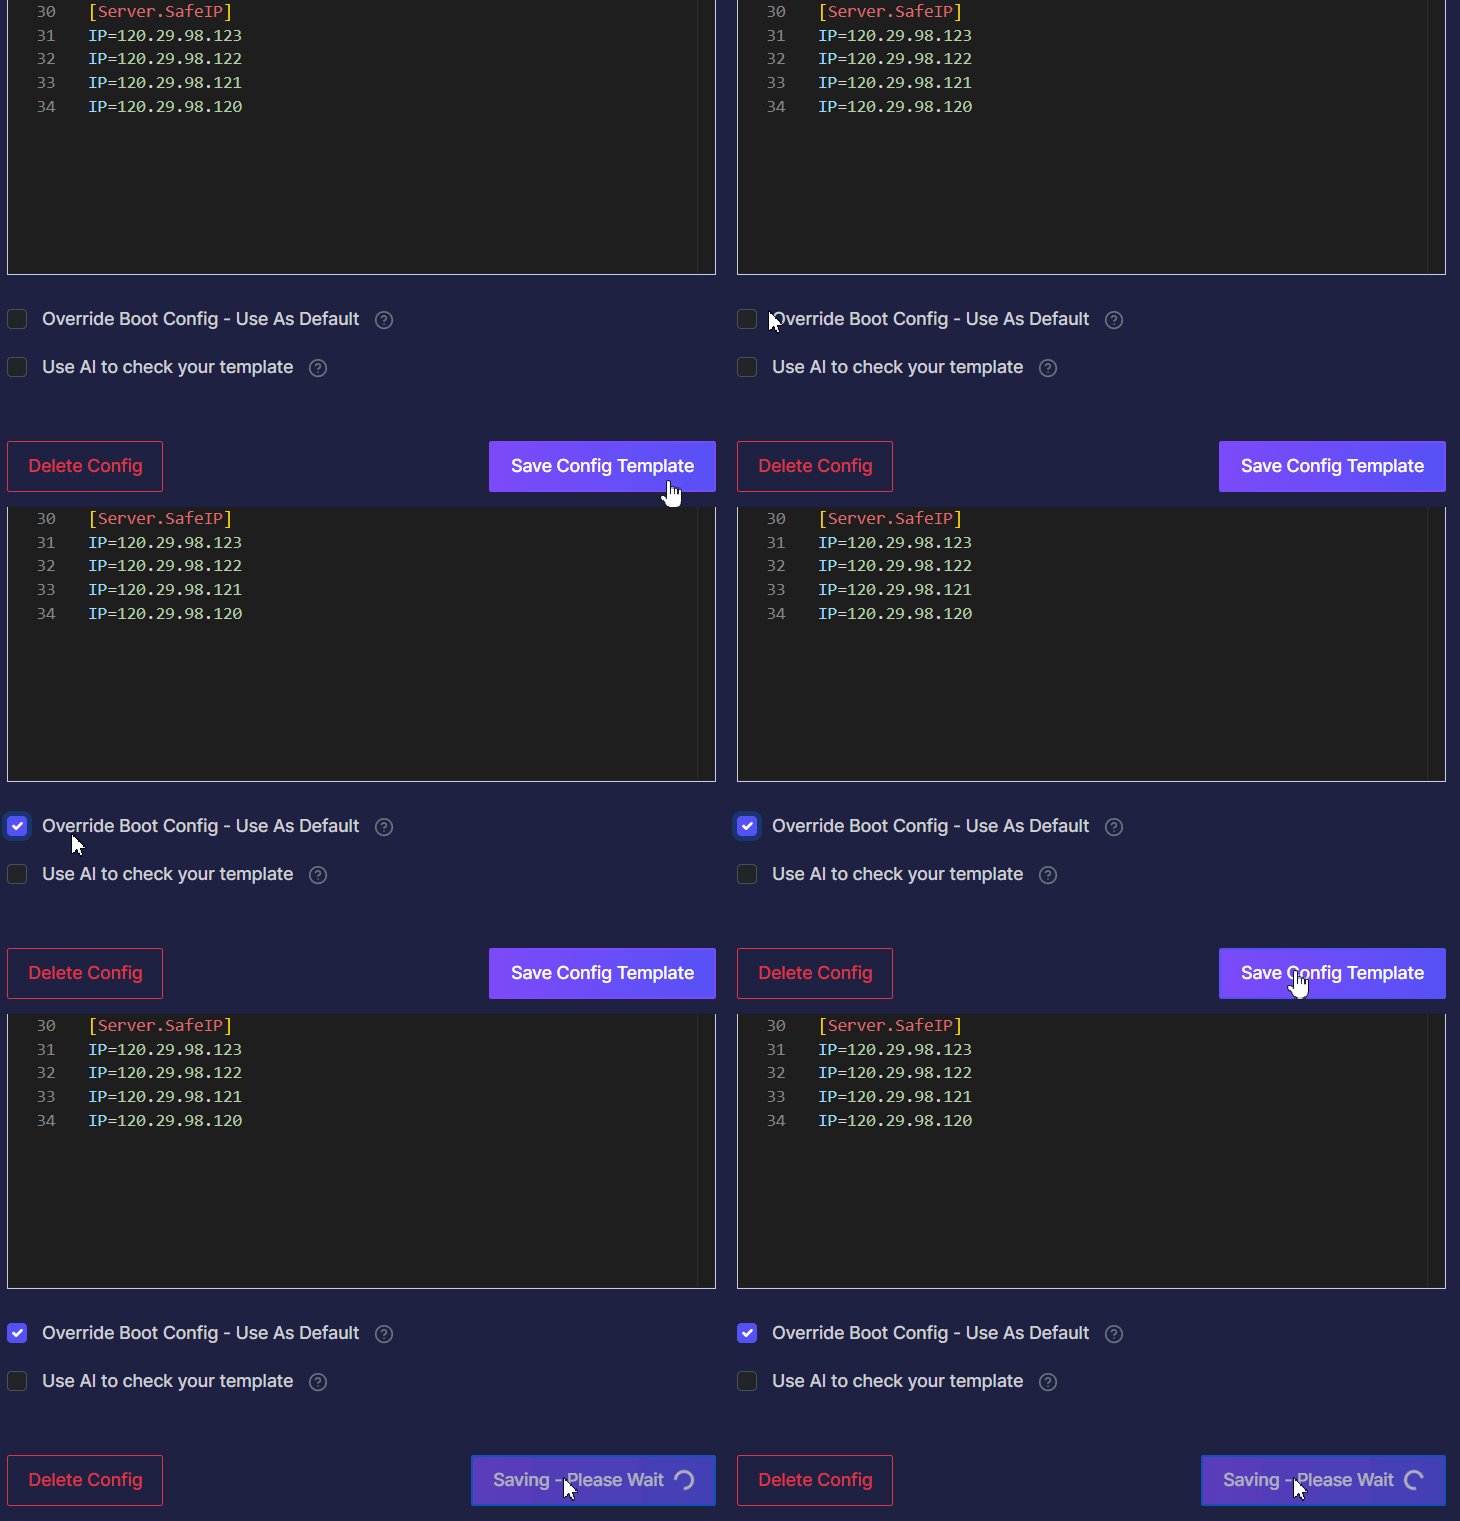
Open the config file you just created and press Enter to start a new line. Add the following lines:
[Server.SafeIP]
IP=YOUR PUBLIC IP
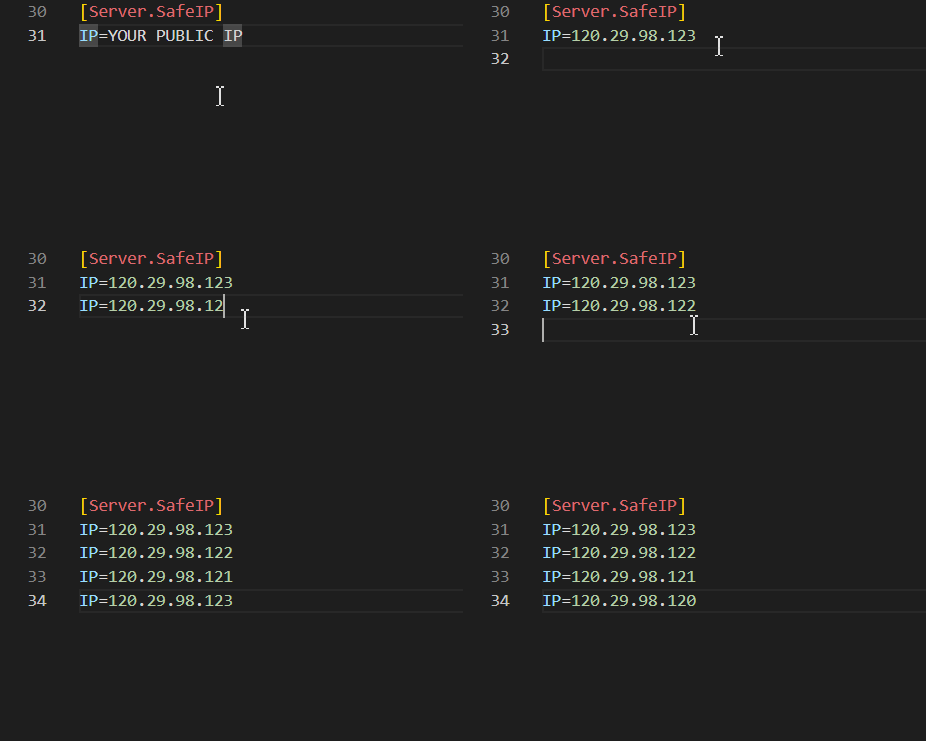
To set additional IP's, simply copy and paste the line “ IP=YOUR PUBLIC IP ” right below
You can find your public IP or any IP you want to connect via RCON by using this website. Replace YOUR PUBLIC IP with the desired public IP addresses, one per line. You can add as many as you need.
Once set, tick the option Override Boot Config - Use As Default and click Save Config Template.
Example:
Additional IP's:
Step 4: Restart Your Server
To apply the changes you've made, you will need to restart your server.
Restart the server by Pressing ![]() > Restart, on the left panel in the server configuration.
> Restart, on the left panel in the server configuration.

Step 5: Getting RCON software
Once the server restarts, you can connect using an RCON client.
Connecting to the server using RCON
You should be able to connect to the server using any RCON software that you prefer. In case you don't have any, we recommend using rcon-cli because it's simple and free. Here is the download link for it.
Step 1: Insert Connection Details
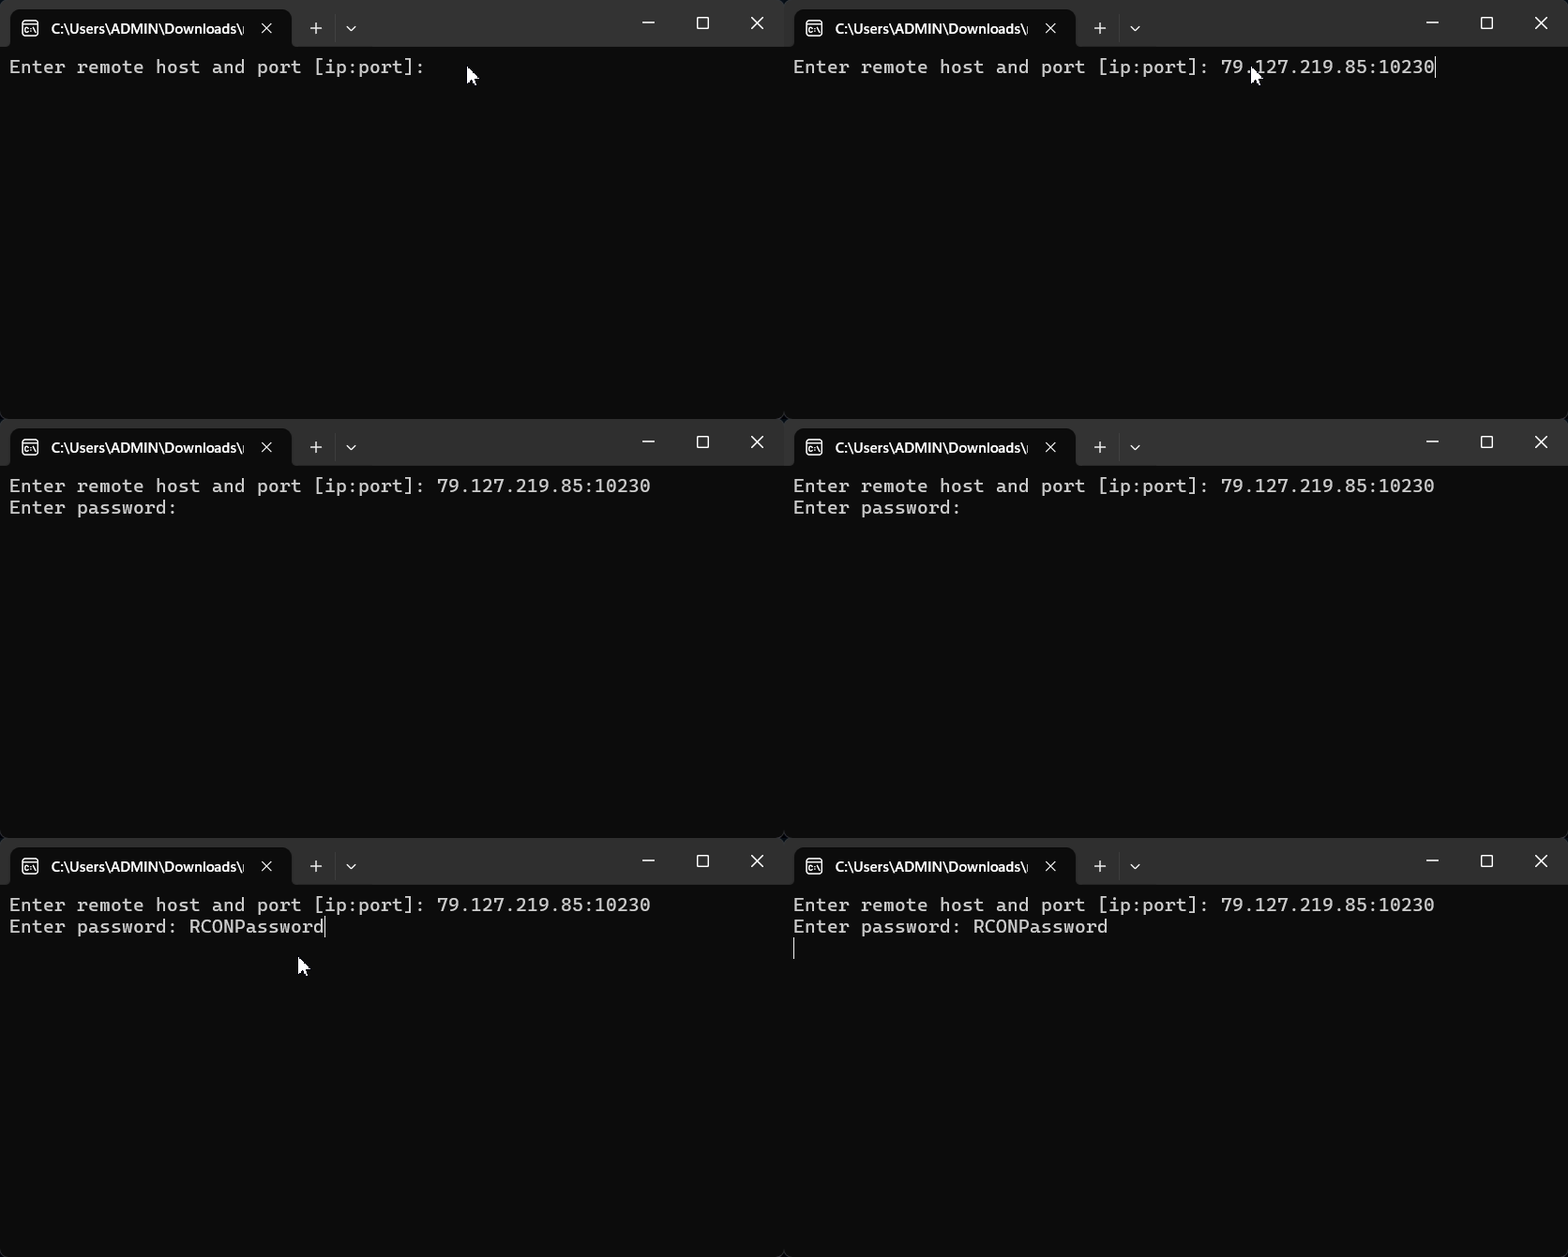
Open your RCON client and insert the server IP address and RCON port, separated by a colon (:).
For example, if your server IP is 79.127.219.85 and your RCON port is 10230, you would enter:
79.127.219.85:10230
Step 2: Enter the RCON Password
Now enter the RCON password you noted down earlier and press Enter.
If everything is done correctly, you should be connected to your server!
That's it! Now you can issue admin commands through RCON directly, even if the game isn't available on the platform.
Conclusion
Great job! You’ve successfully created a direct link to your server, and now the real fun begins. You're officially in control, ready to greet your players with a Broadcast message or manage your community using KickPlayer or ShowPlayerList. If you ever hit a snag, remember to double-check your password or the IP you whitelisted—it’s usually a simple fix. We're here if you need a hand, but you are now fully equipped to build an amazing experience for your players. Enjoy the power!
If you encounter any issues or have further questions, feel free to contact our support team for assistance!