Last Update 2025-11-21 14:29:03
Connecting to Your Game Server via FTP Using FileZilla
Congratulations on setting up your game server with PingPlayers.com! Now that you have your server up and running, you might want to manage your server files directly. The panel has a File Manager feature that allows uploading, downloading and editing files but big files can be problematic on a browser given it's very memory hungry. One of the easiest ways to solve this is by using FTP (File Transfer Protocol) or SFTP (SSH File Transfer Protocol) from a File Explorer (like the one built-in Windows) or a standalone client. In this guide, we'll walk you through connecting to your server using Windows File Explorer or FileZilla, a popular and user-friendly FTP/SFTP client.
Note that FileZilla is not needed and any FTP client can be used, it's just our go-to recommendation as it's free.
What You’ll Need
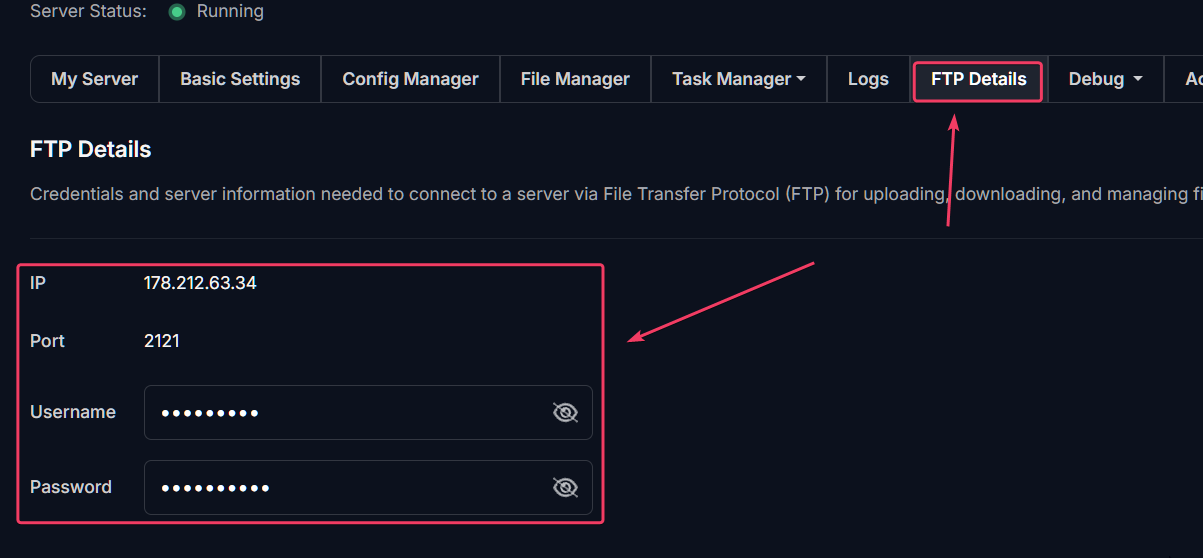
Before you begin, make sure you have the following details at hand. You should have already received them in your PingPlayers control panel under My Servers -> Manage Server -> FTP:
- IP Address
- Port
- Username
- Password
If you’ve gathered all these, you’re ready to go!
Step-by-Step Guide to Connect with Windows File Explorer (no downloads required)
- Open your Windows File Explorer and find the address field on the top bar below the tools and options of the folder. Note that the right one is the search field and we don't care about this one.
- Type ftp://IP:port or sftp://IP:port. Replace IP with your server IP and port with the server port that you got earlier.
- Press Enter and you'll be prompted to insert your game server's username and password (don't enable Log on anonymously).
- You can save the credentials so it won't ask you again. Once you click Log On, a new folder will open with the server files. Congratulations!
Step-by-Step Guide to Connect with FileZilla (Alternative software, download required)
Step 1: Download and Install FileZilla
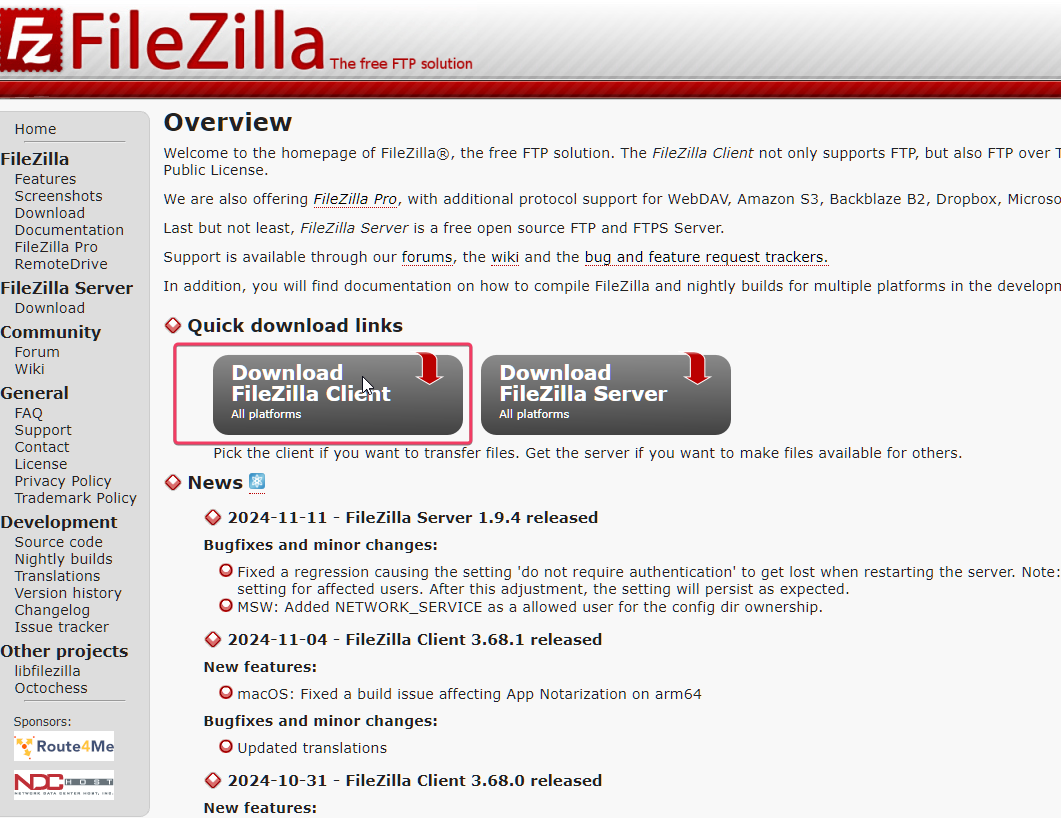
- Go to the FileZilla website.
- Download the version appropriate for your operating system (Windows, Mac, or Linux).
- Follow the installation instructions to install FileZilla on your computer.
Step 2: Open FileZilla
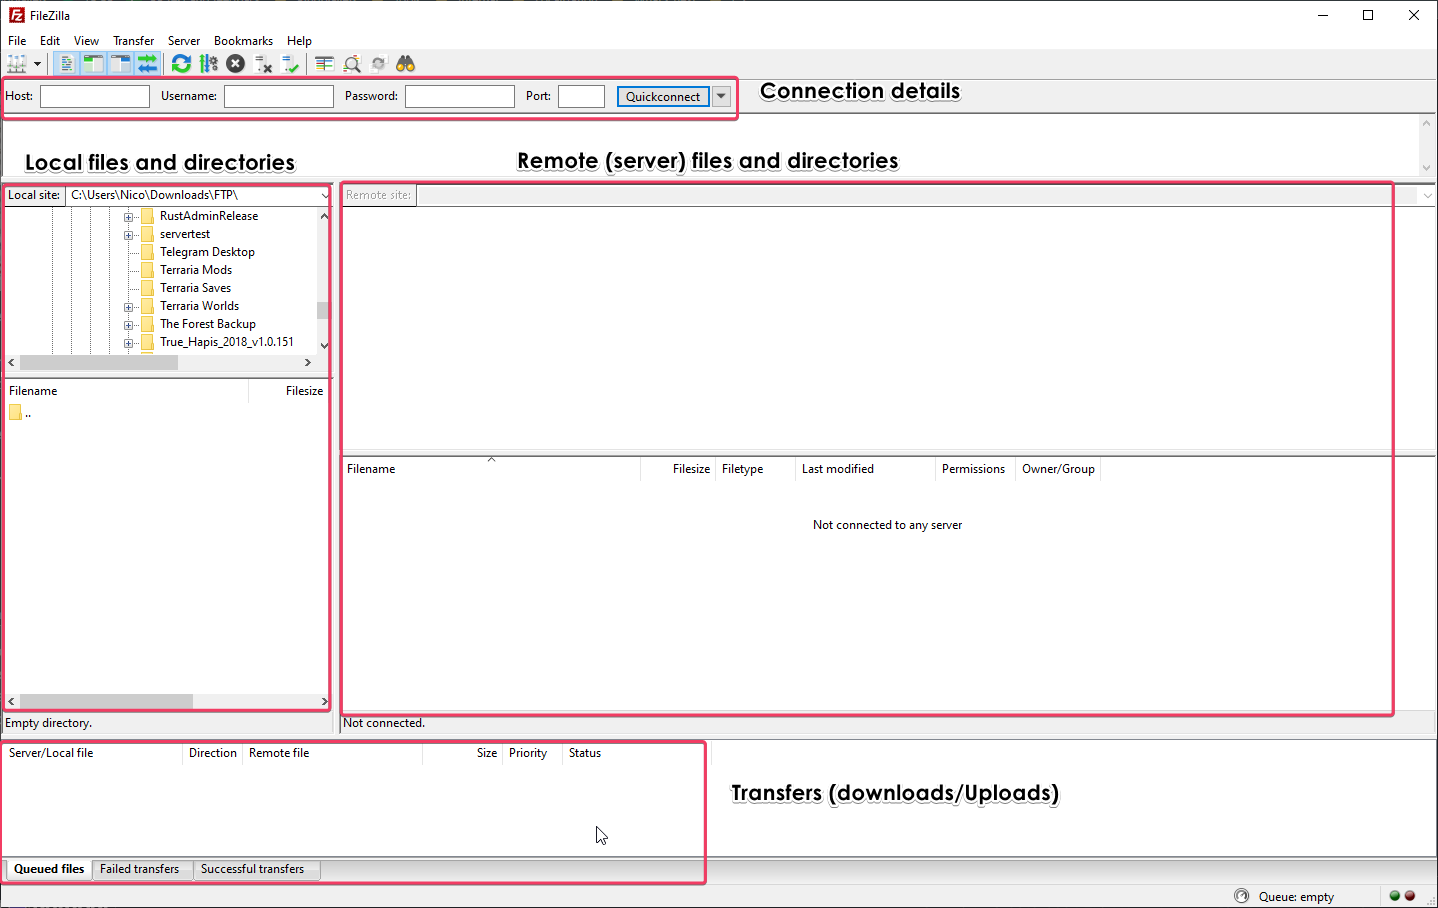
Launch FileZilla after you have installed it. You should see a user interface that is split into two main sections: the local file browser on the left and the remote file browser on the right.
Step 3: Enter Your Connection Details
FTP
In the top menu, you’ll find fields labeled as follows:
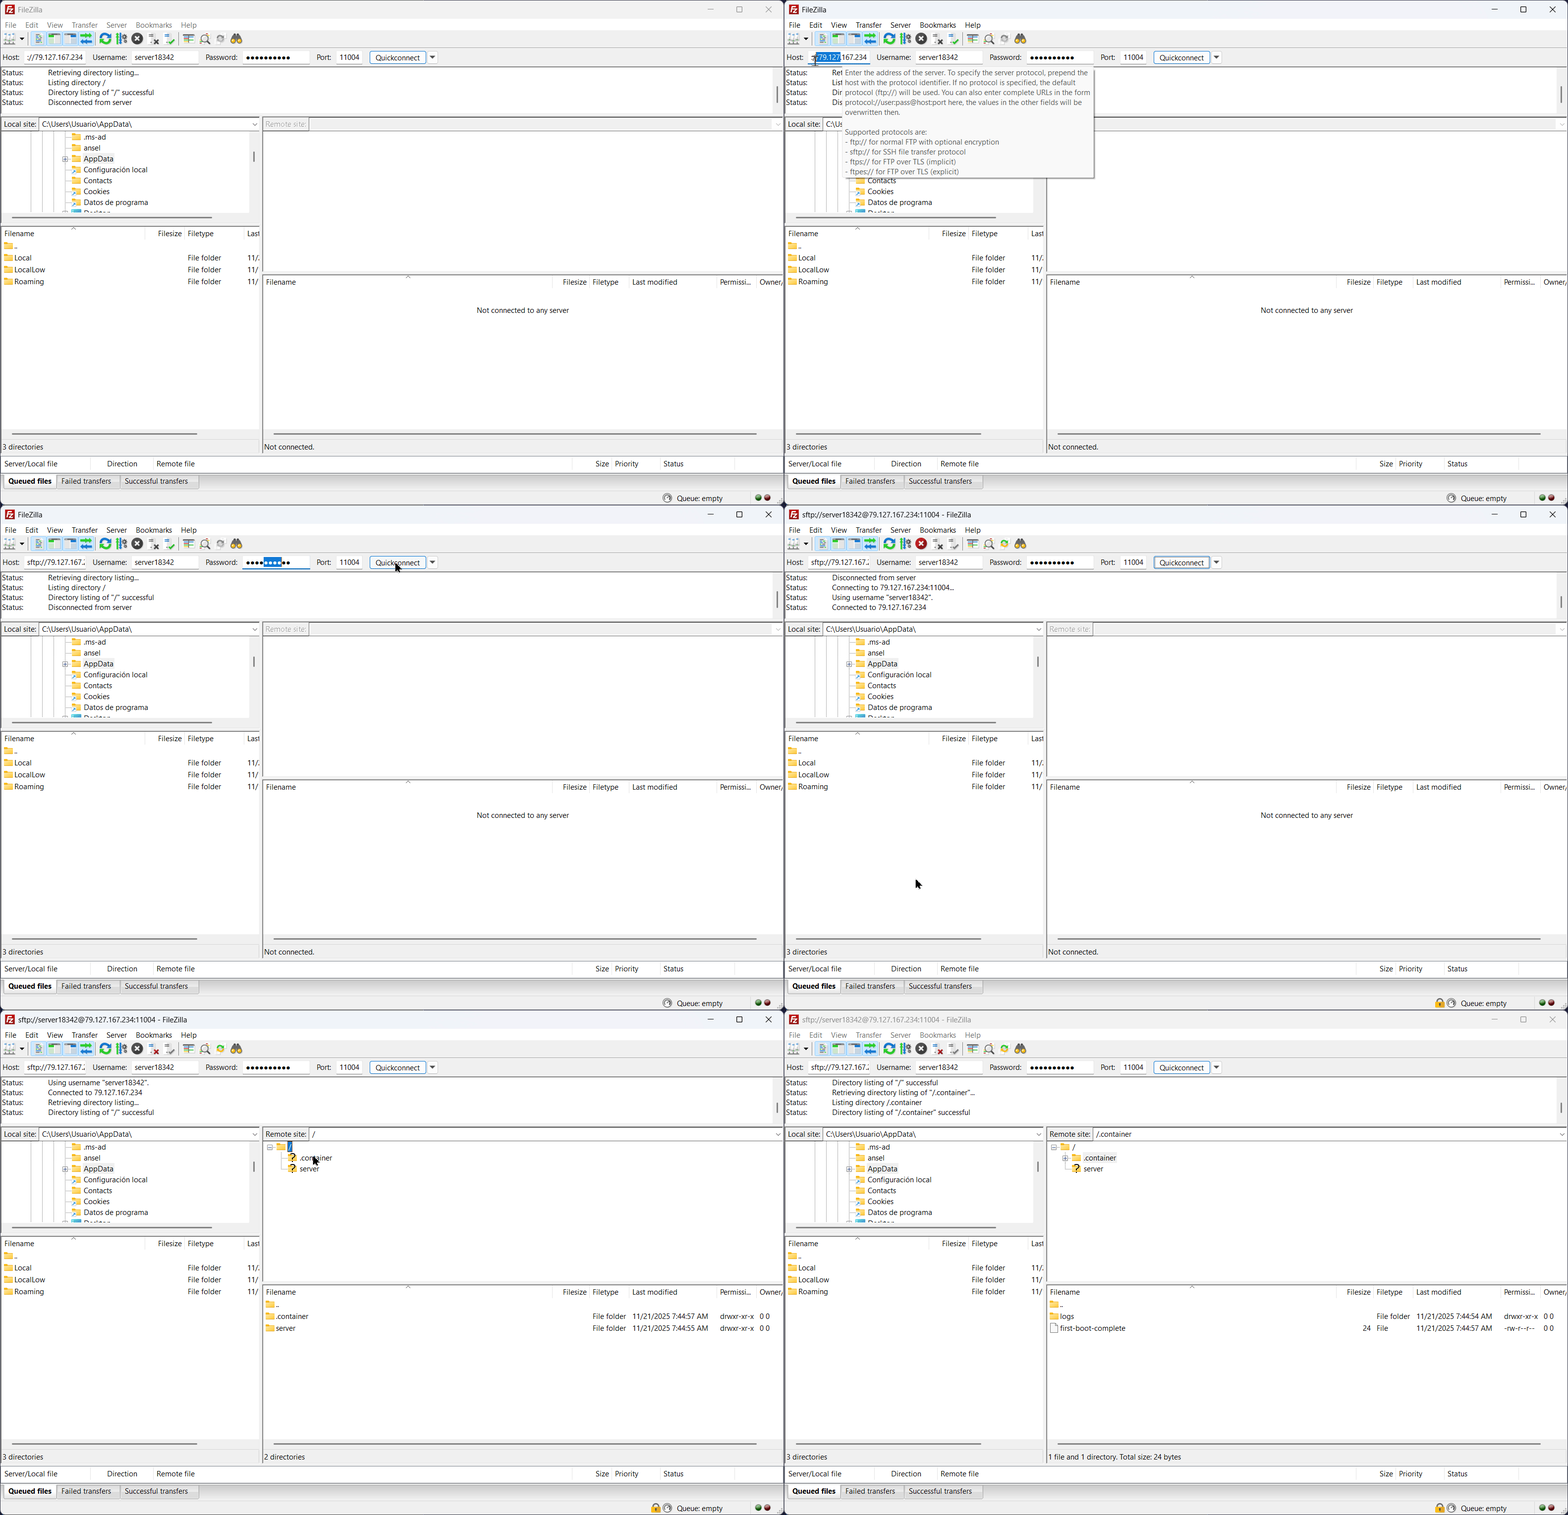
- Host: Enter your server's IP address here.
- Username: Input the username you received from the control panel.
- Password: Type in the password you received as well.
- Port: Enter the port number that corresponds with the FTP connection (this is usually 2121 for standard FTP).
It should look something like this:
Host: 192.168.0.1 (replace with your server's IP)
Username: your_username
Password: your_password
Port: 2121 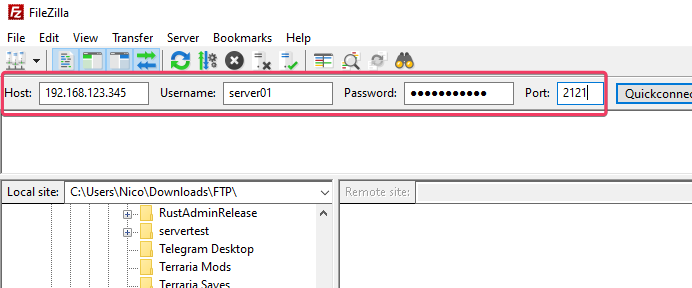
FTP details are obtained from the server itself and they are unique to each server:
SFTP
In the top menu, you’ll find fields labeled as follows:
- Host: Enter sftp:// and your server's IP address here.
- Username: Input the username you received from the control panel.
- Password: Type in the password you received as well.
- Port: Enter the port number that corresponds with the SFTP connection (this is usually 2121 for standard FTP).
It should look something like this:
Host: sftp://192.168.0.1 (replace with your server's IP)
Username: your_username
Password: your_password
Port: 11004
SFTP details are obtained from the server itself and they are unique to each server:

Step 4: Connect to Your Server
- After entering your details, click on the Quickconnect button.
- If this is your first time connecting, you might see a prompt regarding the server's certificate. You can click OK or Always trust this certificate if you're connecting to your server for the first time.
Step 5: Navigate Your Files
Once connected, the remote server's files will appear in the right panel. You can now navigate through the directories and files just as you would on your personal computer.
Uploading Files: You can drag and drop files from your local left pane to the remote right pane to upload content to your server.
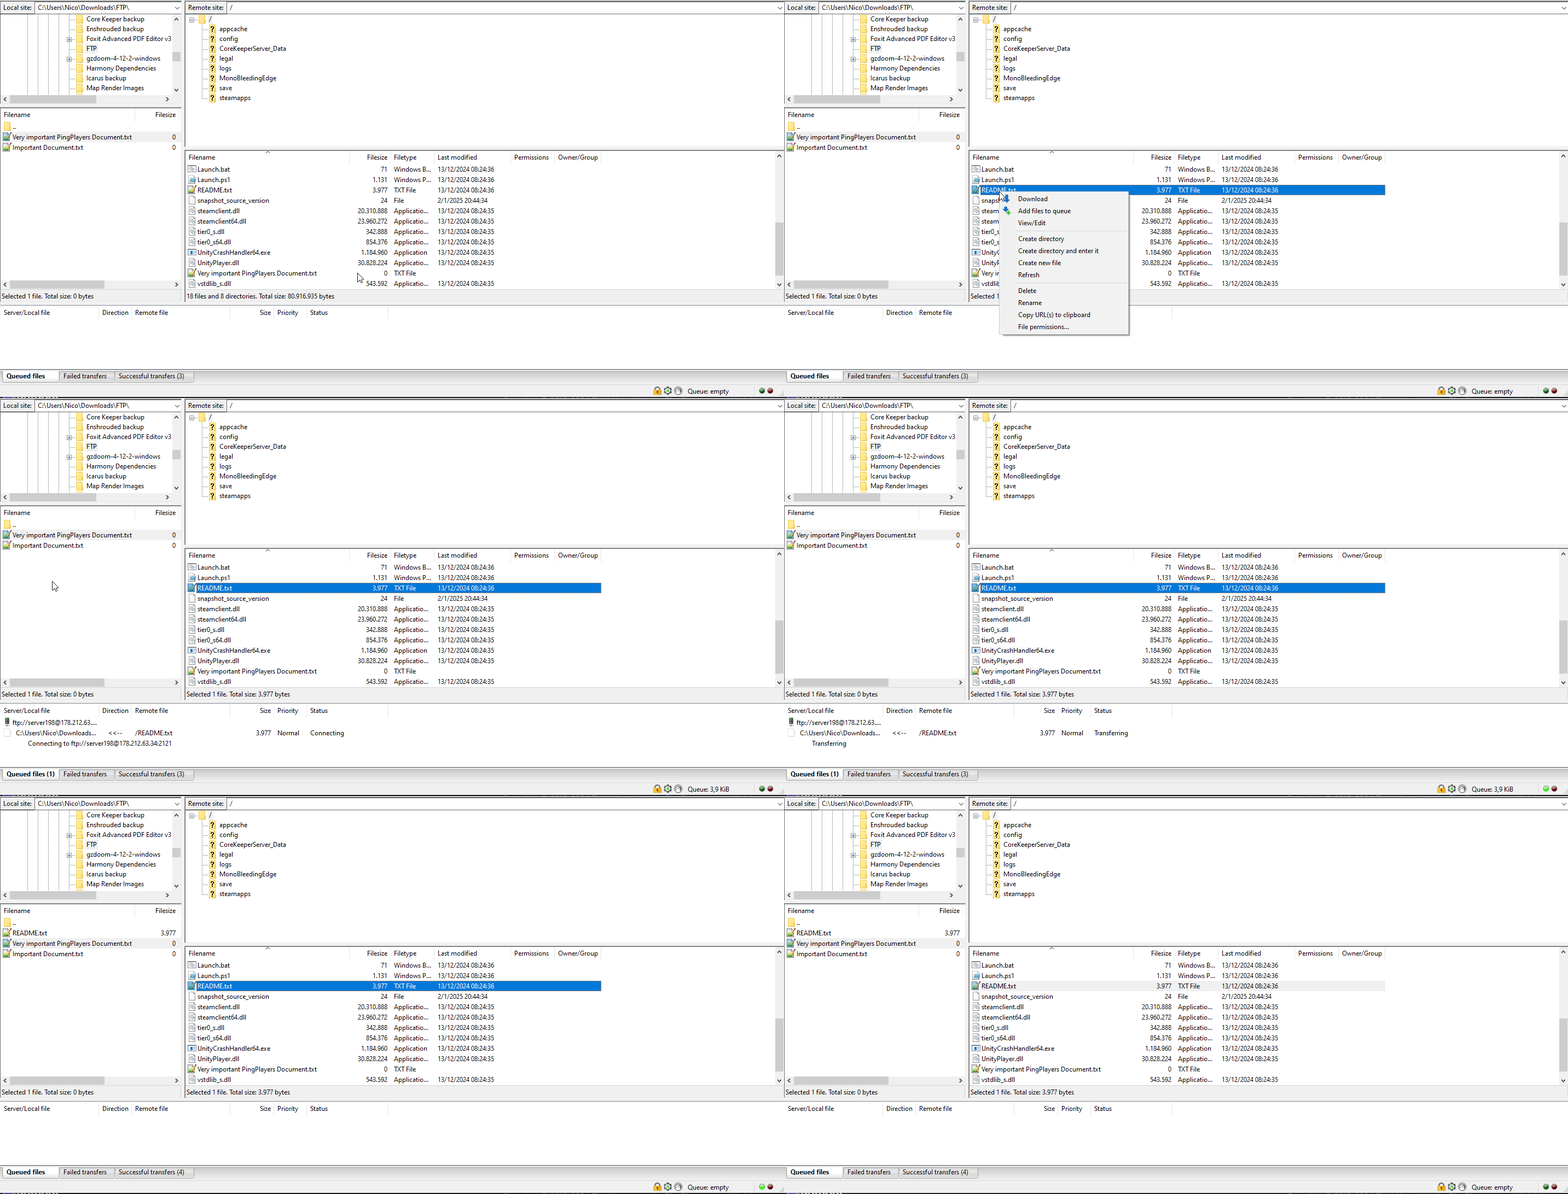
Downloading Files: Conversely, you can drag files from the right pane to the left to download files from your server.
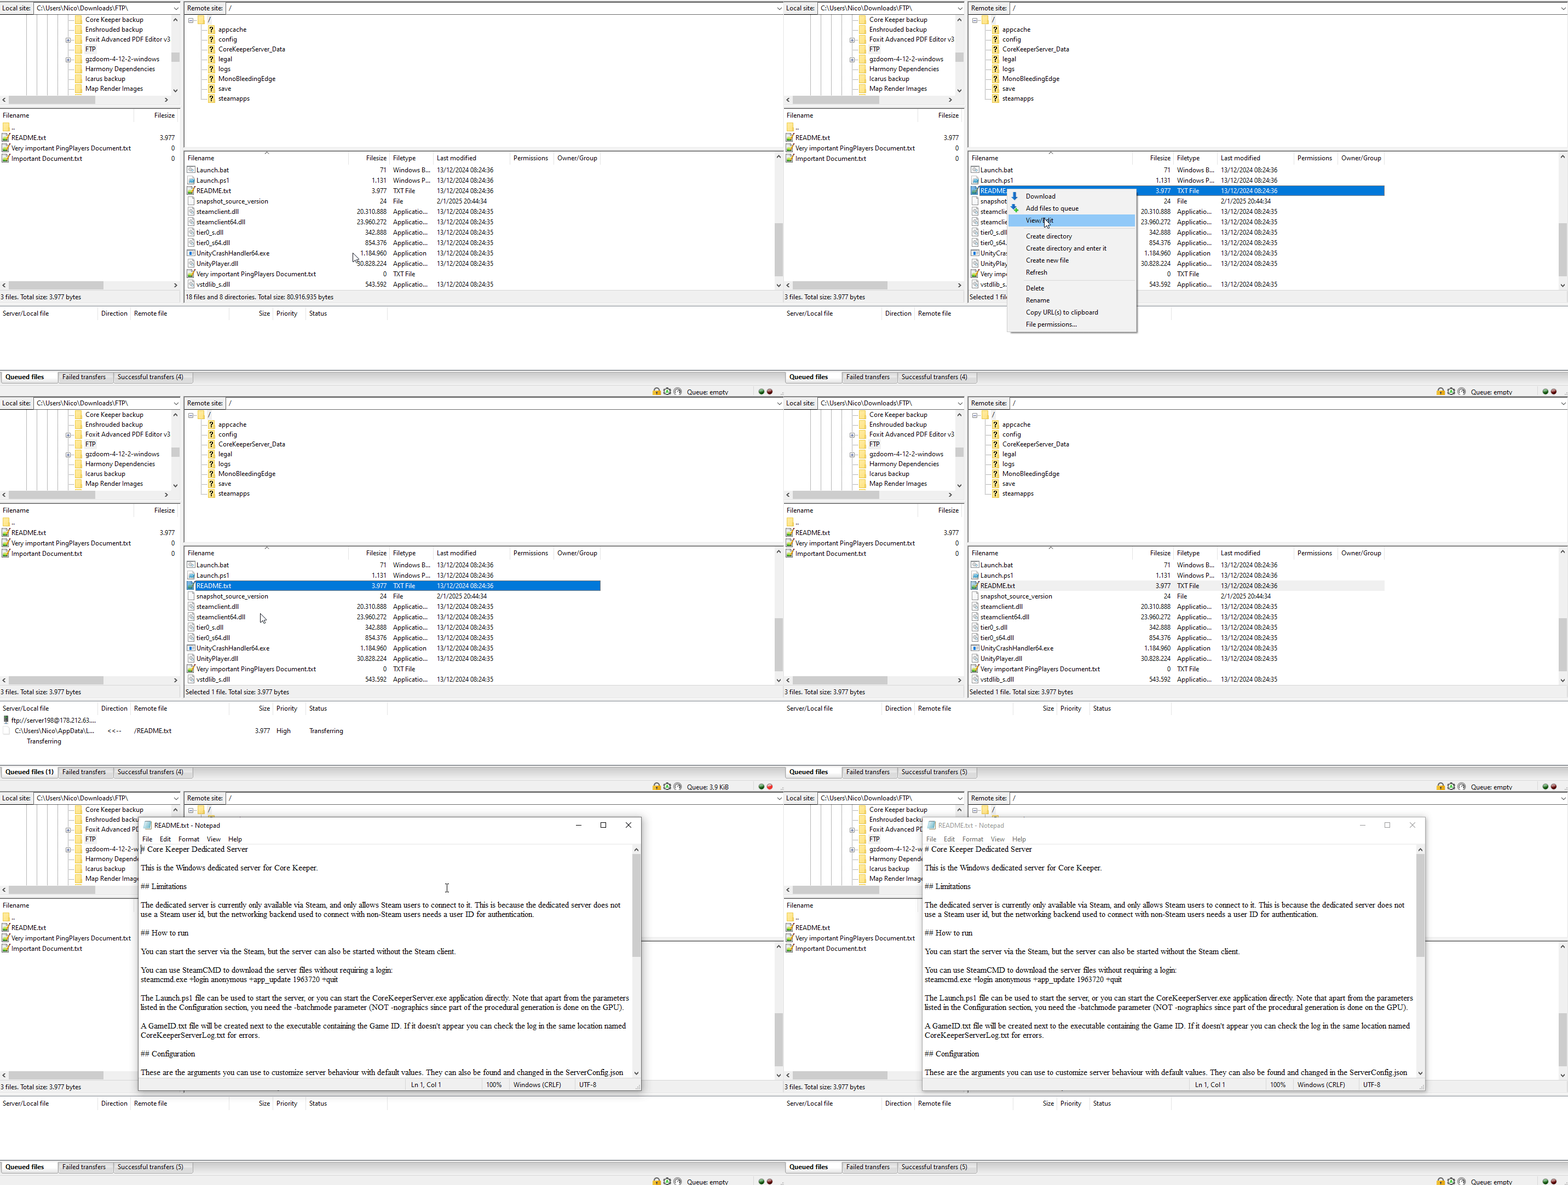
- Managing Files: Right-click on files or folders in either pane to see options for editing, deleting, or changing file permissions.
Step 6: Disconnect Safely
Once you’re done managing your files, make sure to disconnect properly. You can do this by clicking on the Server menu at the top and selecting Disconnect. This ensures that your connections are safely terminated.

Conclusion
And there you have it! You’ve successfully connected to your game server using FileZilla. With FTP access, you can easily upload, download, and manage your server files without hassle. Experiment with different files and settings but always remember to proceed with caution—especially with critical game files!
If you have any questions or need assistance, feel free to reach out to our customer care agents through our live chat or email at [email protected].