Last Update 2025-07-14 10:09:10
How to Backup your Server Data and Restore It
Think of a backup as a save game for your entire Arma 3 server. It's the ultimate undo button and your most powerful tool for peace of mind. A good backup protects you from a corrupted game update, an accidental file deletion, or a mod that doesn't play nice. It’s the key to experimenting with confidence and recovering from any disaster.
This guide will walk you through everything you need to know: how to create a complete manual backup of your server, how to restore it when needed, and even how to migrate your server from another host.
Why Backups Are Your Best Friend
Taking a few minutes to create a backup can save you hours of headaches later. A proper backup allows you to:
- Recover from bad updates that corrupt your world or player data.
- Undo a major admin mistake like accidentally deleting the wrong files.
- Preserve a mission's progress before you try out a risky new mod or script.
- Migrate your entire server to a new host without losing your community's progress.
Part 1: How to Create a Full Manual Backup
Follow these steps to create a complete copy of your server's essential files.
Step 1: Stop Your Server
This is the most important step! Before you touch any files, ensure your server is fully stopped from your control panel. This prevents data corruption and ensures your files are not in use.
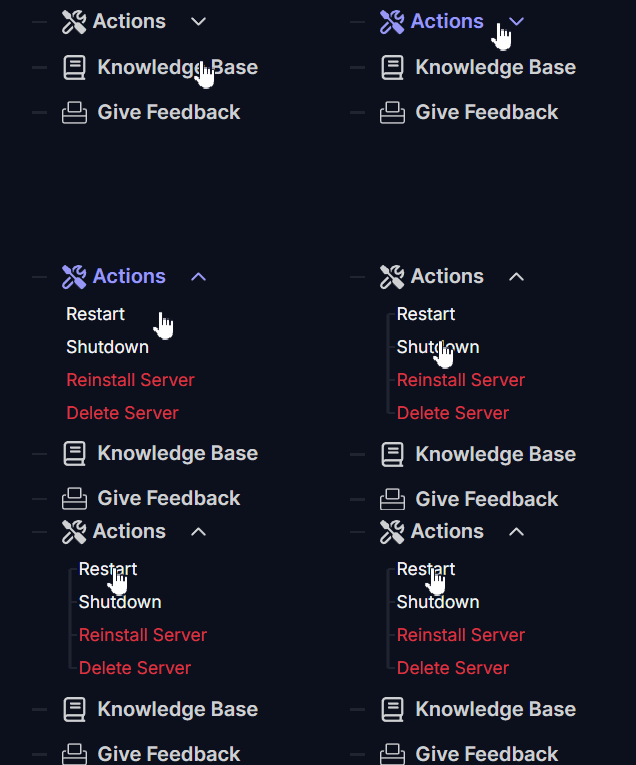
Click on Actions on the left panel and select Shutdown.

Step 2: Connect via FTP
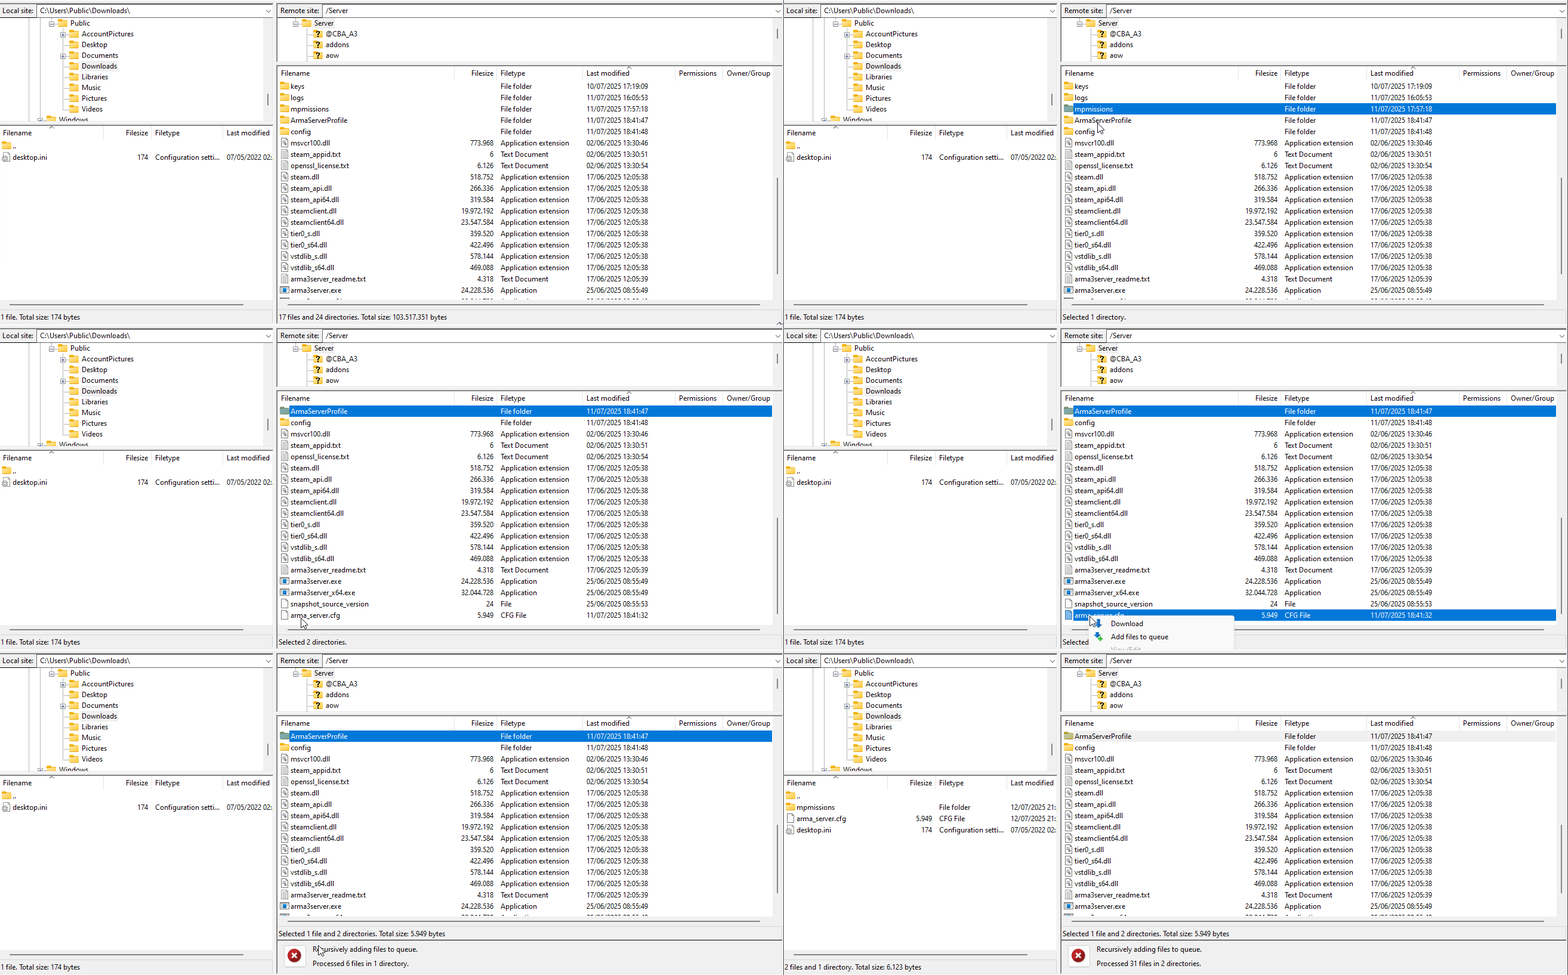
Using an FTP client like FileZilla or the built-in File Manager in your control panel, connect to your server to access its file system.
In case you'd like to use FileZilla, feel free to check our guide here.
Step 3: Download the correct Folders and Files
Navigate to your server's root directory. You need to download the following items to your computer:
- The
mpmissionsfolder: This contains all of your mission files (.pbofiles). This is your entire library of scenarios. - Your Profile Folder (e.g.,
ArmaServerProfileorprofiles): This is one of the most critical folders. It stores all persistent data for your server, including player progression, base locations, and inventory in modes like Antistasi, Exile, or Wasteland. - The
server.cfgfile: This is your main server configuration file, containing your server name, password, admin settings, mods, and more.
You can find this in your Config Manager or copy the file from your/Serverpath.

Step 4: Organize and Store Your Backup
On your local computer, you can create a new folder and name it with the current date (e.g., "Arma 3 Backup - 2025-07-12"). Move all the files you just downloaded into this folder to keep your backups organized and easy to find.
Part 2: How to Restore Your Server (or Migrate from Another Host)
Whether you're recovering from a problem or moving your server from another provider, the process is nearly identical. You are essentially uploading your saved backup to overwrite the server's current files.
Step 1: Prepare Your Server
Ensure your server is stopped. If you are performing a clean restore, it can be helpful to delete the old mpmissions and profile folders from the server before uploading the new ones to avoid any file conflicts.
Step 2: Upload Your Backup Files
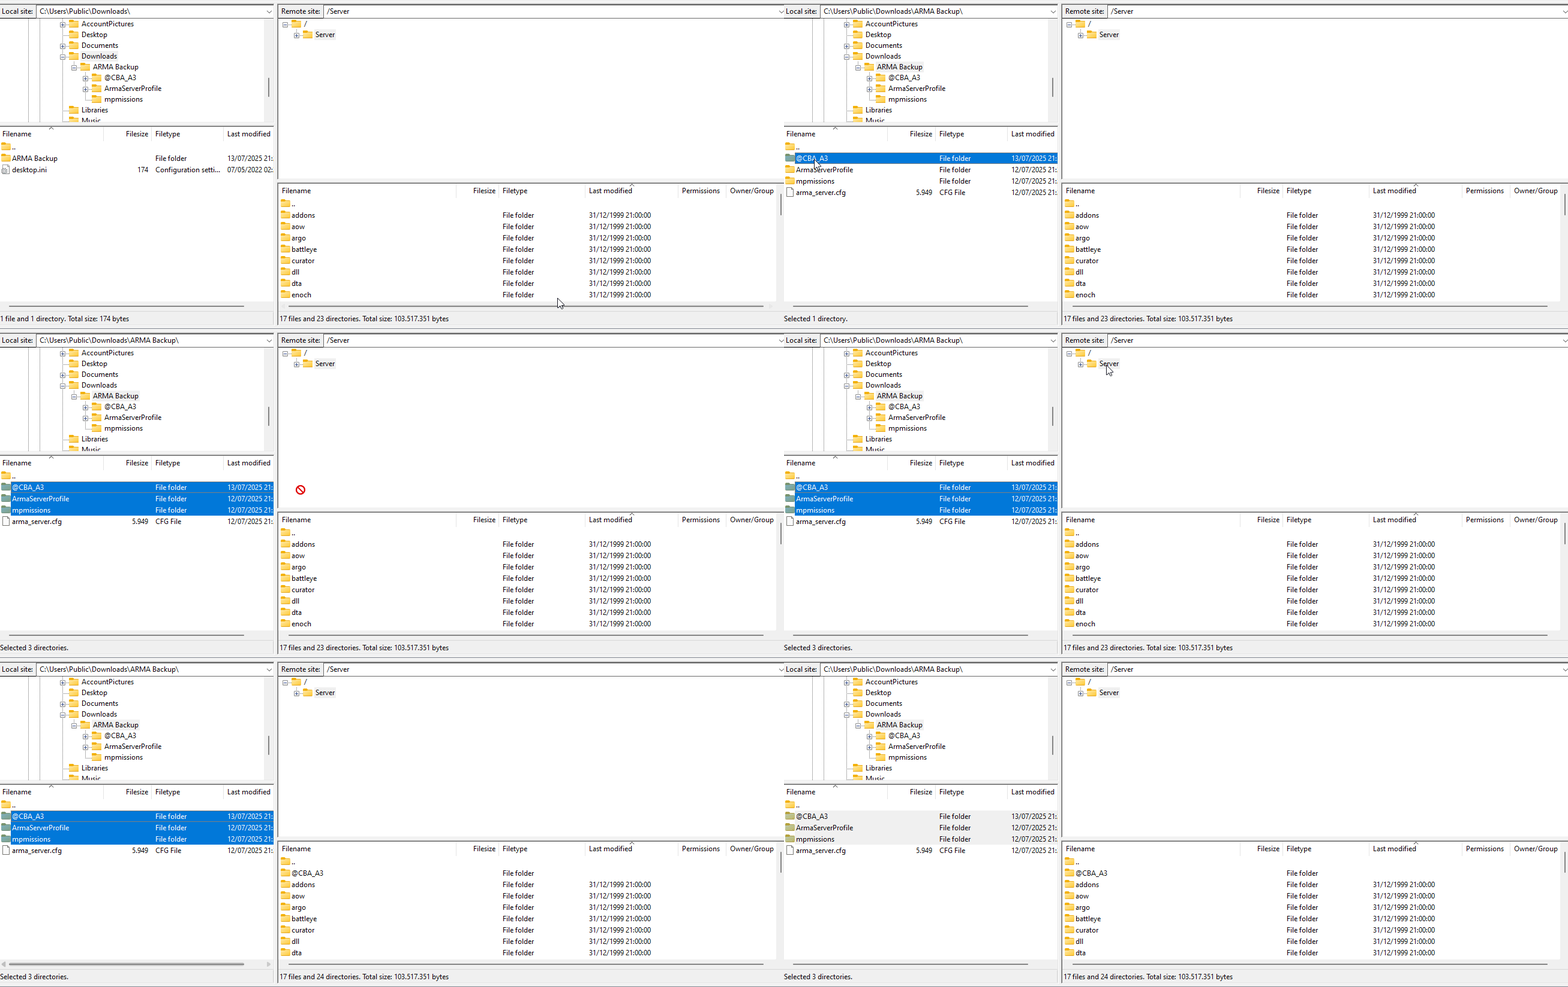
Connect to your server via FTP and upload the folders and files from your dated backup folder on your computer back to their original locations on the server.
- Upload your
mpmissionsfolder to the root directory (/Server). - Upload your
ArmaServerProfile/profilesfolder to the root directory (/Server). - If migrating mods, upload your mod folders (e.g.,
@CBA_A3) and their.bikeyfiles to the appropriatekeysfolder.

Step 3: Restore Your Server Configuration
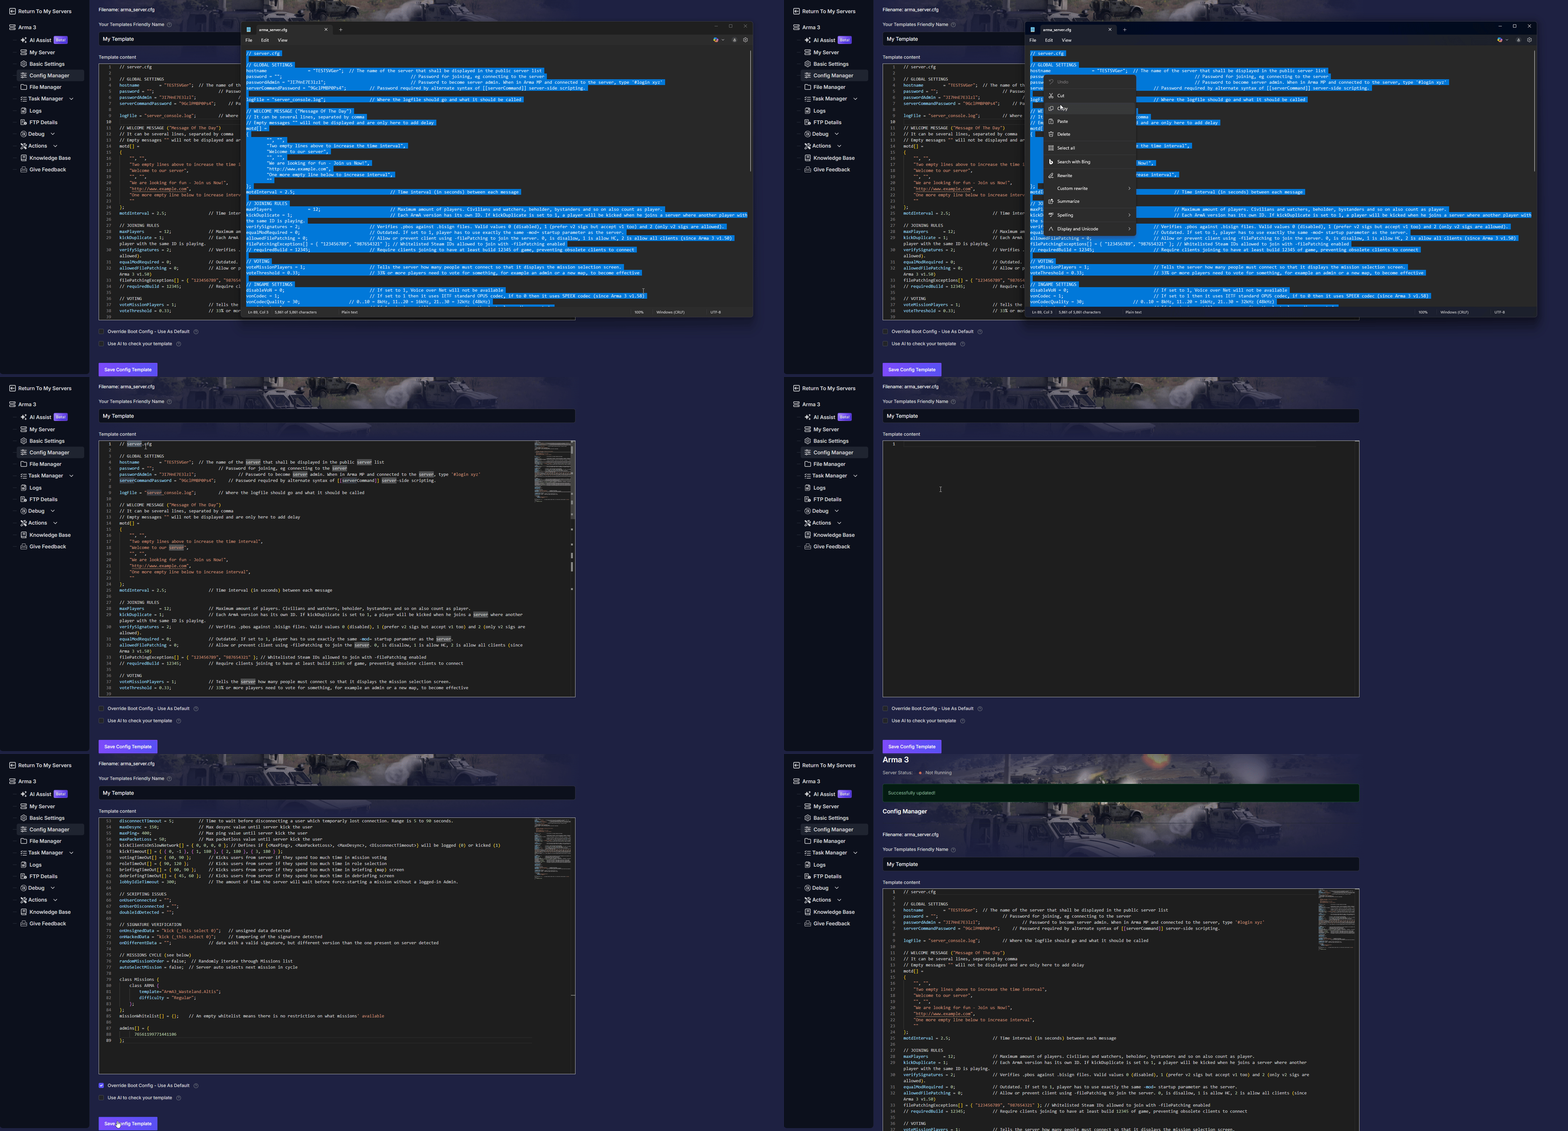
- Copy & Paste: Open your local
server.cfgfile with a text editor, copy its entire contents, and paste them into a newarma_server.cfgconfig template under Config Manager.


- Once pasted, make sure to tick Override Boot Config - Use As Default at the bottom and save the new config.
Step 4: Final Checks and Restart
Go to Basic Settings in your control panel and double-check that the correct mission is selected to load.
Once you've confirmed everything is in place, restart your server. Click on Actions on the left panel and select Restart.

Conclusion
Congratulations, you've just mastered one of the most critical skills for any server administrator. By learning to back up and restore your server, you've given yourself the freedom to experiment and the security to recover from any problem. Make it a habit to create a backup before any major game update or before adding a large number of new mods. It’s the best insurance policy you can have.
If you get stuck during the process or have any questions, our support team is always here to help you secure your server.