Last Update 2025-07-08 14:31:31
How to Become an Admin on Your Arma 3 Server
Taking command of your Arma 3 server means more than just playing the game—it means managing the experience. As an admin, you have the power to maintain order, run custom missions, and ensure a smooth game for all your players. Whether you need to kick a troublemaker or use commands to set up a scenario, having admin access is key.
This guide will walk you through the two primary methods to set yourself up as an admin on your server.
Finding Your SteamID64 (UID)
For the password-free method, you'll need your SteamID64, which Arma 3 uses as your Unique ID (UID). This is a permanent number associated with your Steam account.
- Open your Steam profile and find your username.
- Go to a trusted website like SteamID.io.
- Enter your Steam username in the search box.
- The website will display several versions of your ID. Copy the one labeled steamID64. This is the number you will use as your UID.
Method 1: The Automatic Way (Using SteamID)
This is the best method for regular server owners. Once you add your SteamID, the server will automatically recognize you as an admin every time you join. No password needed!
For a Single Admin:
- Navigate to the Basic Settings and find Admin ID using the search bar.
- Paste your steamID64 into the field labeled Admin ID.
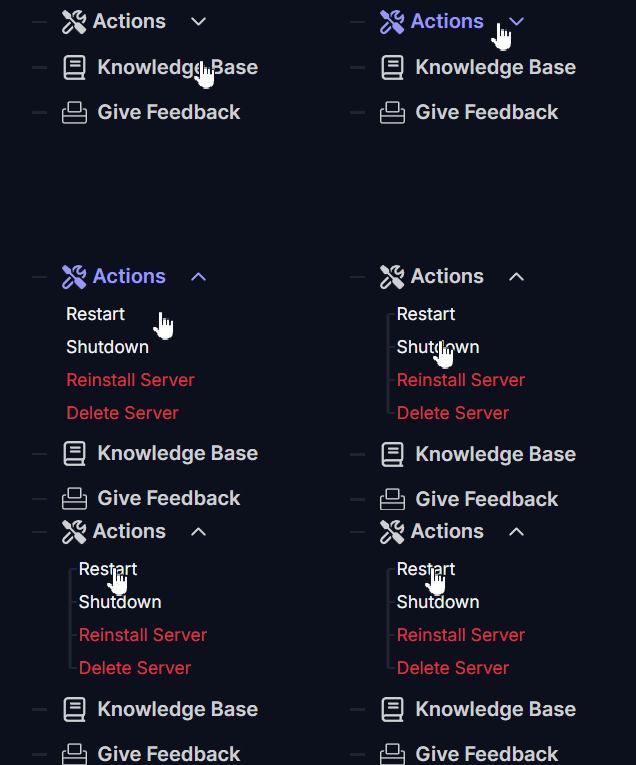
- Save your settings and restart server by going to Actions then Restart. You will now have admin access when you log in.
For Multiple Admins:
If you need to add a whole squad of admins, you'll need to edit your arma_server.cfg file.
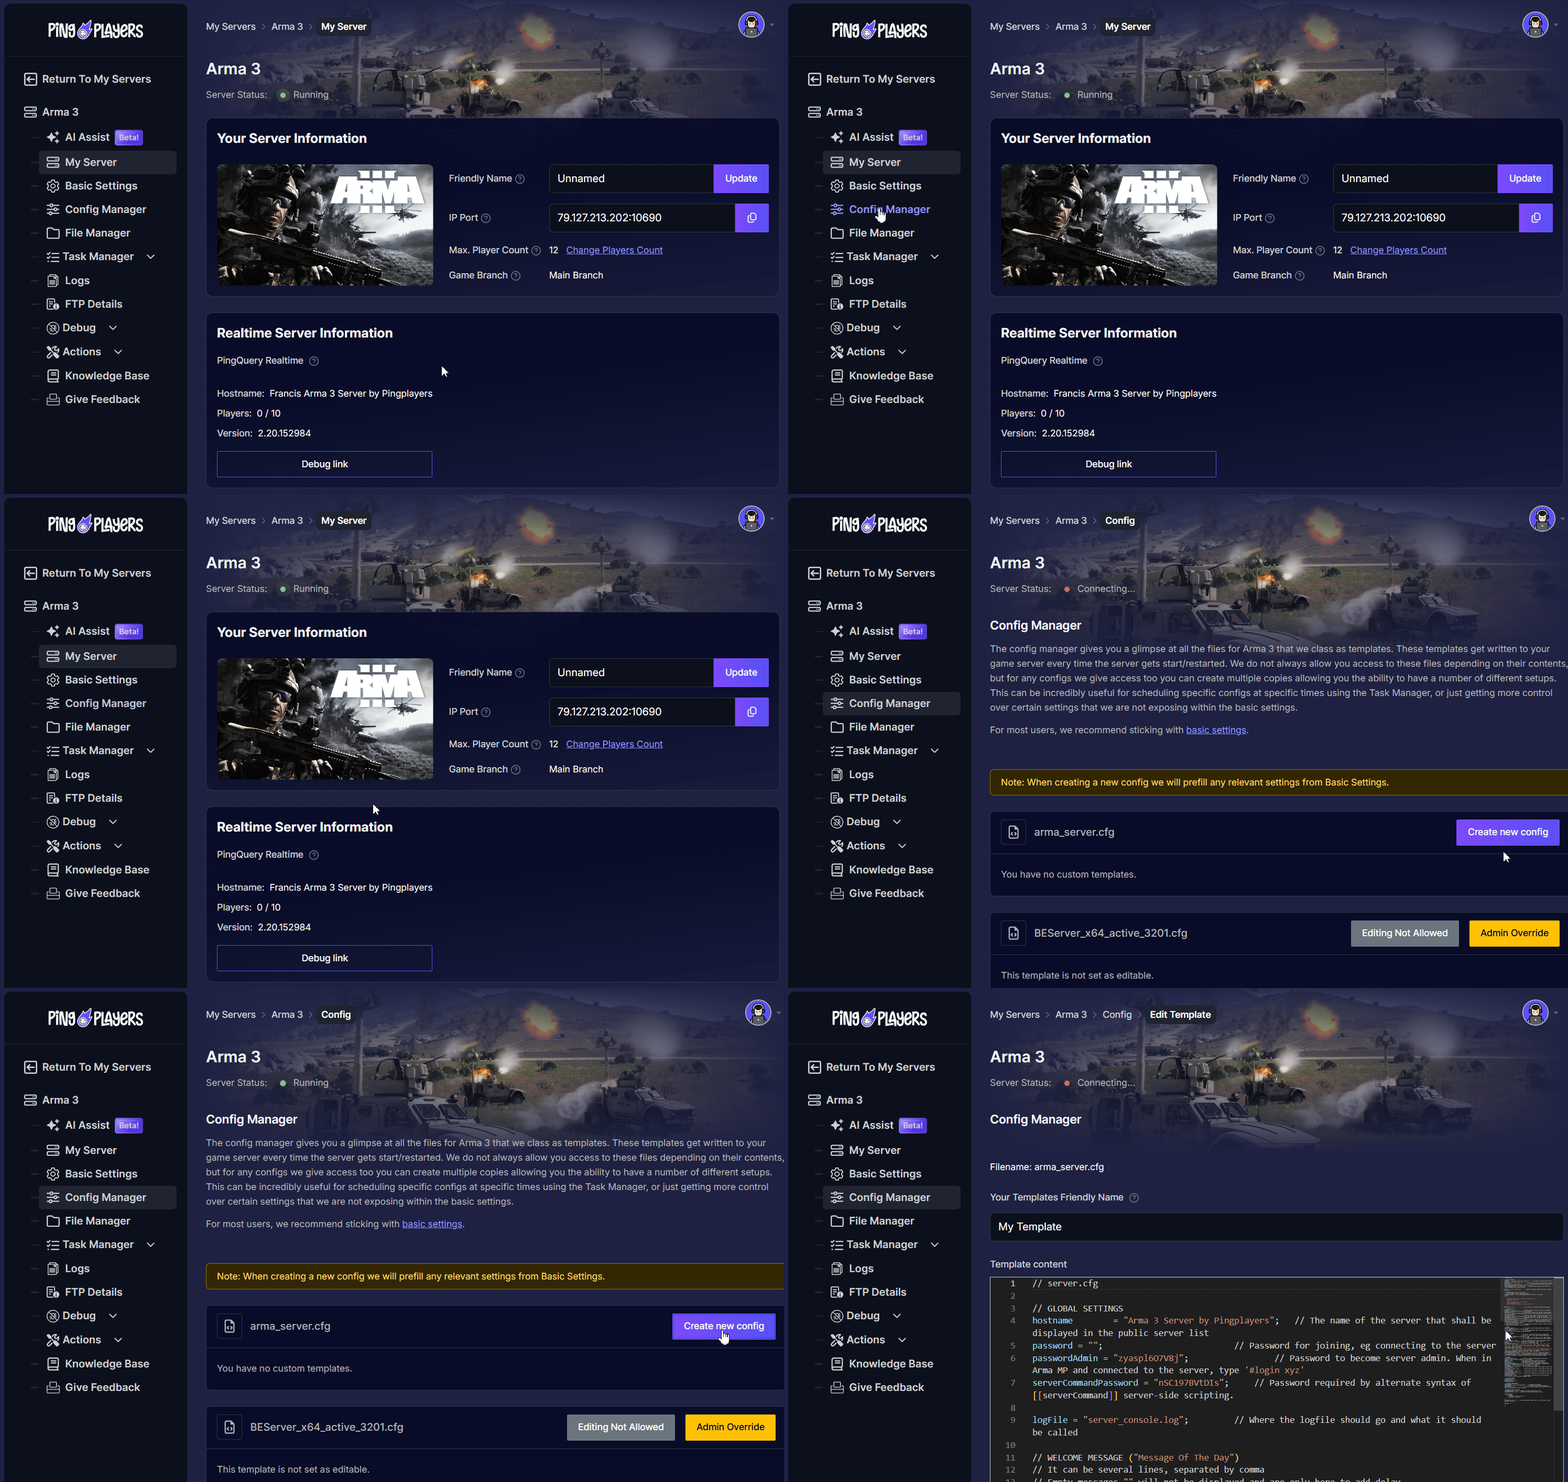
- Go to your Config Manager and click on Create new Config the
arma_server.cfgfile.

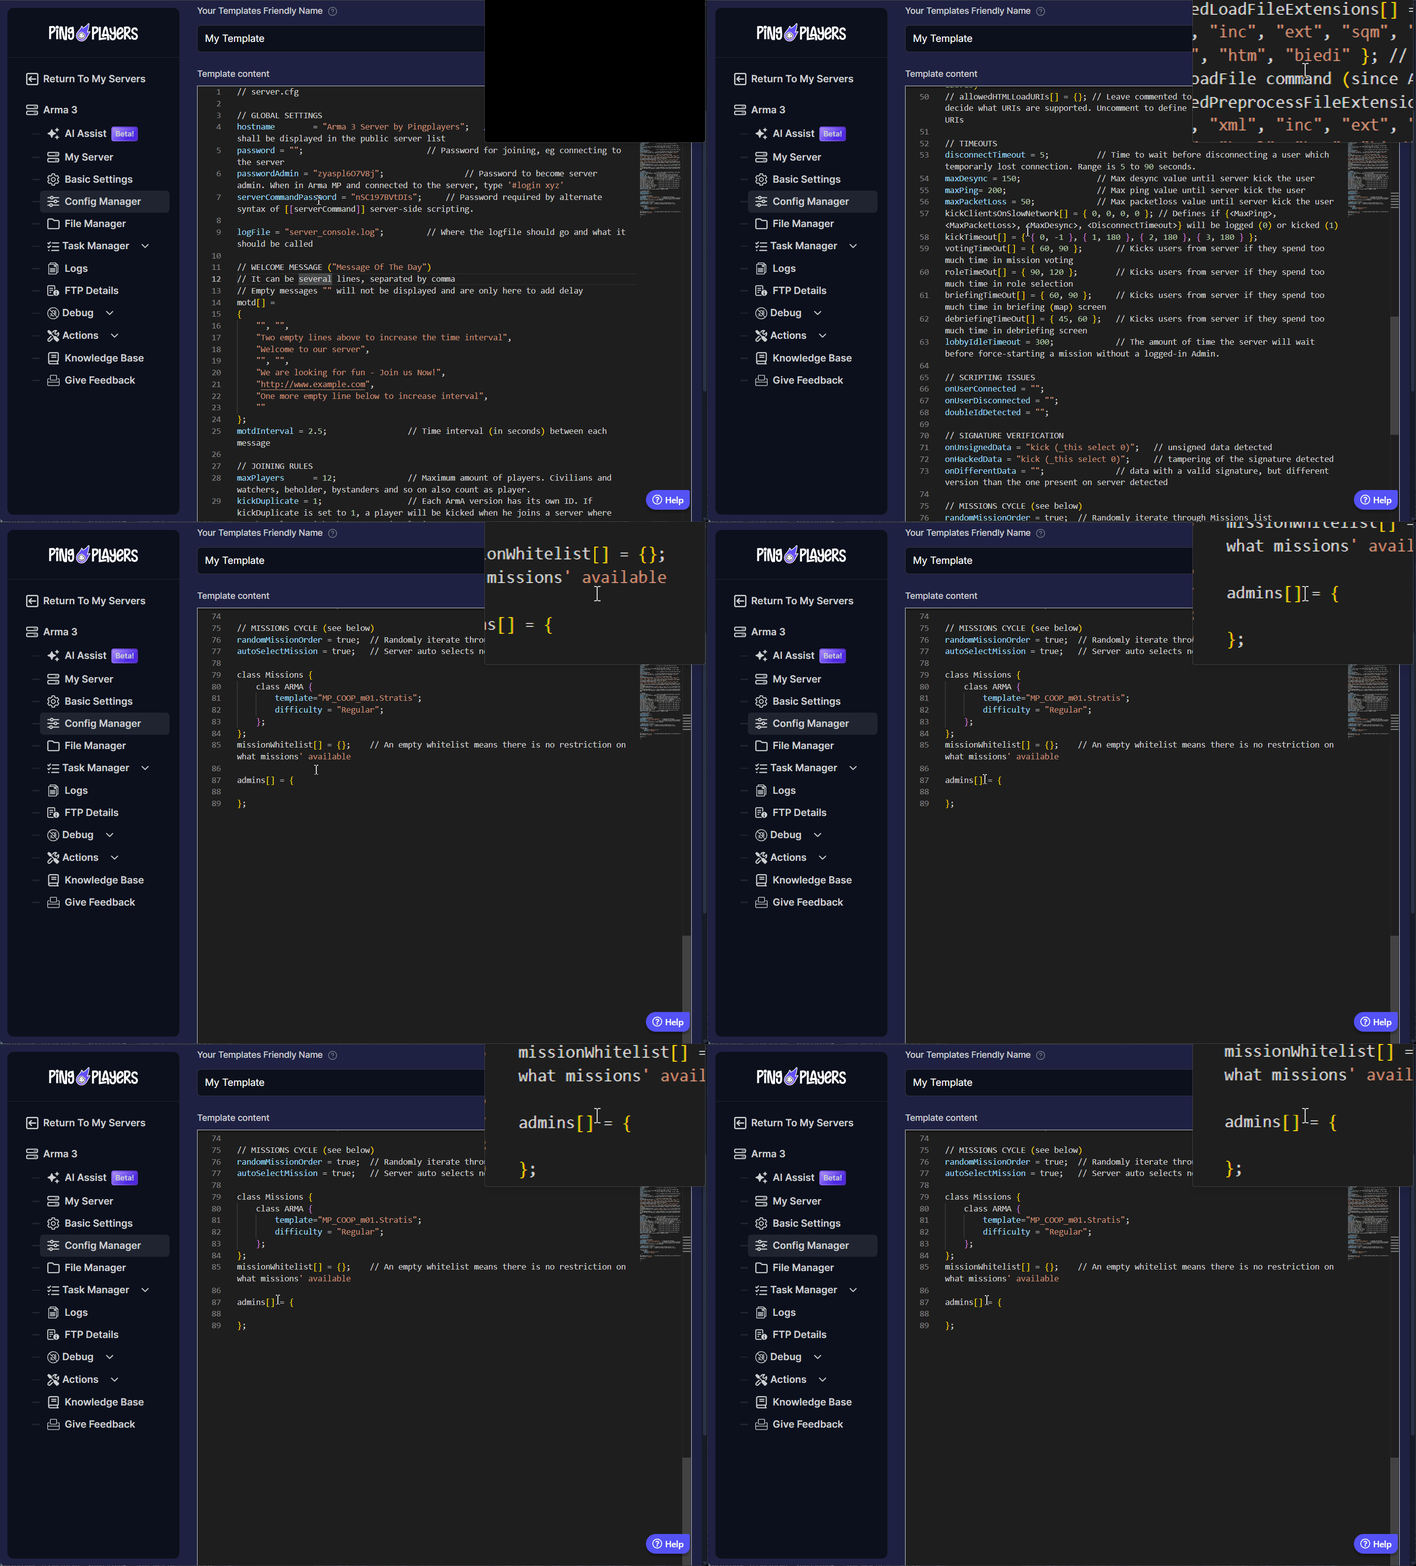
- Find the line that starts with
admins[].

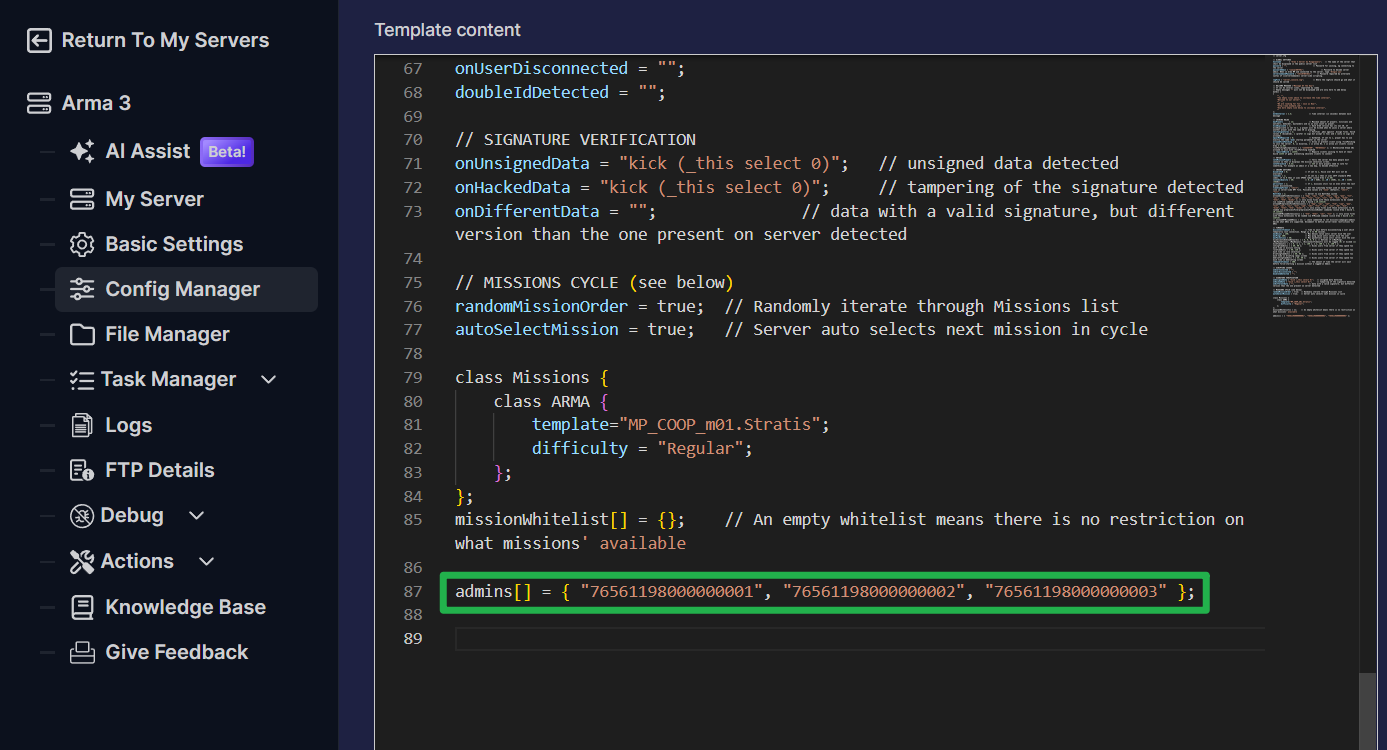
- Add the steamID64 of each admin inside the brackets, enclosed in quotes and separated by commas.
It should look like this:
admins[] = { "76561198000000001", "76561198000000002", "76561198000000003" };

- Save the file and restart the server by going to Actions then Restart. All listed players will now have admin access.

Method 2: The On-the-Fly Way (Using a Password)
This method is great for giving temporary admin access or for users who prefer logging in with a password each session.
Step 1: Set the Admin Password
- First, you need to create a password. You can set this in the Basic Settings then search Admin Password or in the
arma_server.cfgconfig file. Choose a strong, secure password.

Step 2: Use the Login Command In-Game
- Launch Arma 3 and connect to your server.
- Once you're in the game, open the chat window (usually with the
/key). - Type the following command and press Enter:
#login YOUR_ADMIN_PASSWORD(Replace "YOUR_ADMIN_PASSWORD" with the actual password you set). - You will now have admin privileges for the remainder of your session.
Conclusion
That's all there is to it! You are now fully equipped to manage your server. Whether you choose the permanent access of the SteamID method or the flexible password login, you have the tools you need to create the best possible experience for your community. With great power comes great responsibility, so use your new commands wisely!
If you run into any issues or have questions about admin permissions, don't hesitate to reach out to our support team.