Last Update 2025-05-23 23:45:19
How to Add Workshop Mods to Your Arma Reforger Server
Welcome to the world of Arma Reforger! The game developers put up an official workshop separated from Steam to enable mods to be used on all platforms (PC/Xbox/PS5) so, unlike most games, the mods aren't pulled from Steam Workshop, but their official website's workshop here. Adding workshop mods to your server can enhance your gameplay experience significantly. Don't worry if you're new with Arma or server hosting, we'll guide you through the process, step-by-step.
Step-by-Step Guide to Adding Custom Scenarios
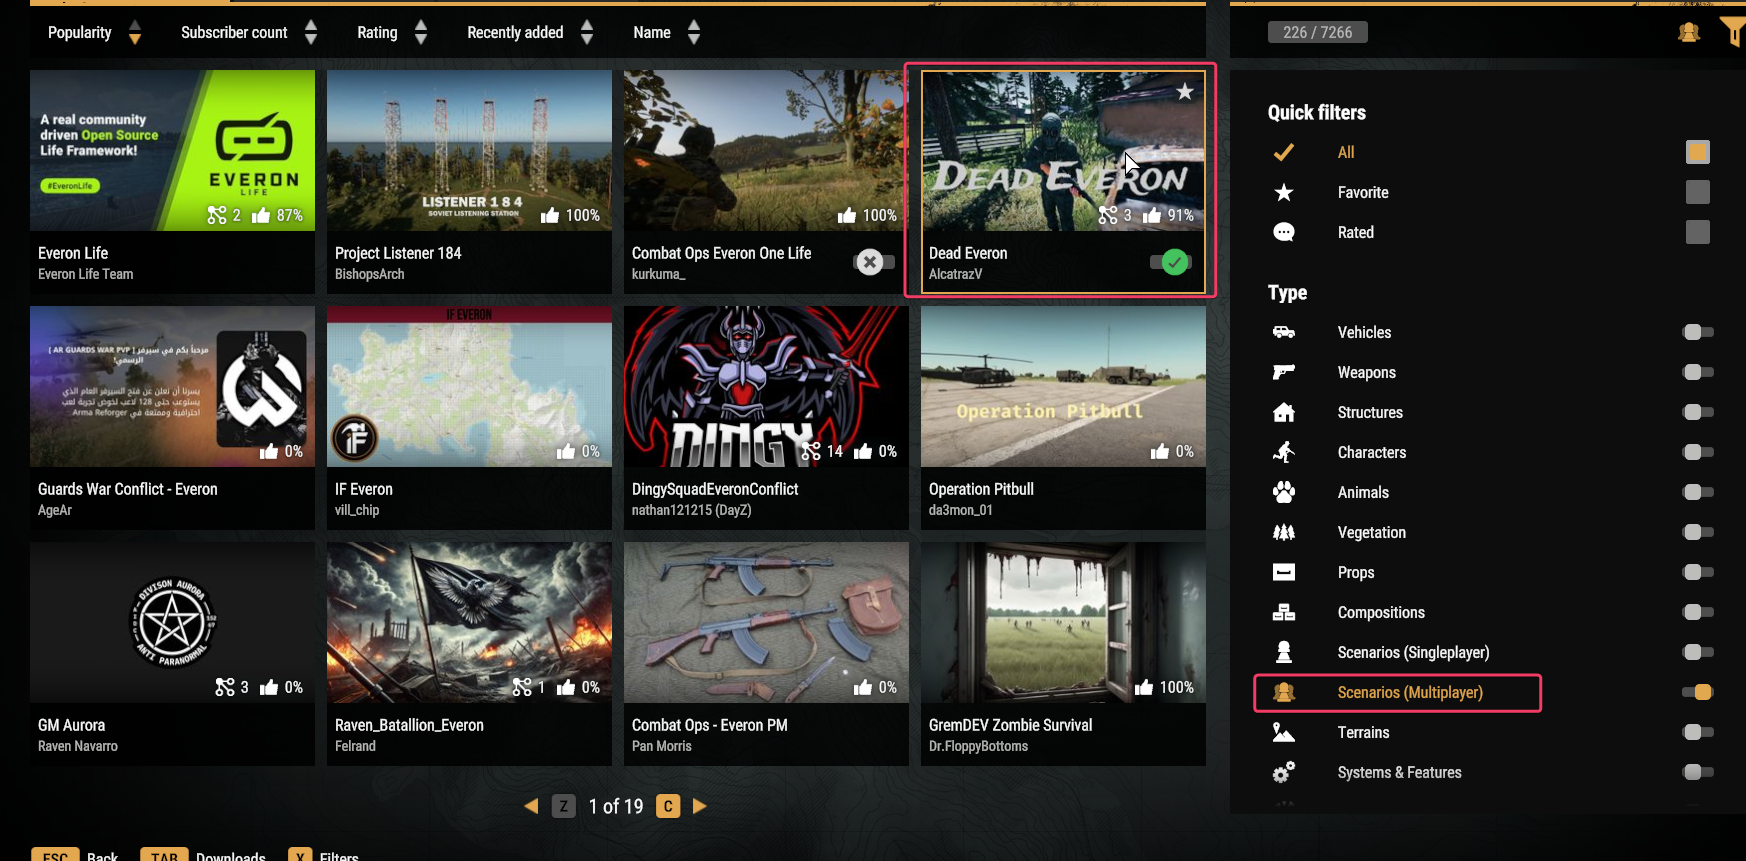
- Download the Custom Scenario:
Launch Arma Reforger and find a custom scenario in the workshop that you'd like to add to your server. Click to download it directly in-game.
- Locate the Mod Folder:
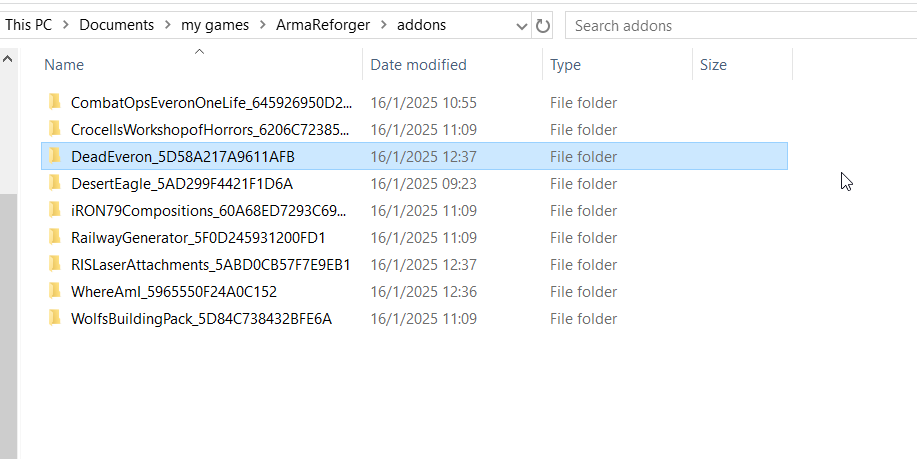
Open File Explorer and navigate to the following directory:C:\Users\USER\Documents\my games\ArmaReforger\addons.
Here, you will find your downloaded scenario. Identify its folder.
- Check the JSON Configuration in Mod Manager:
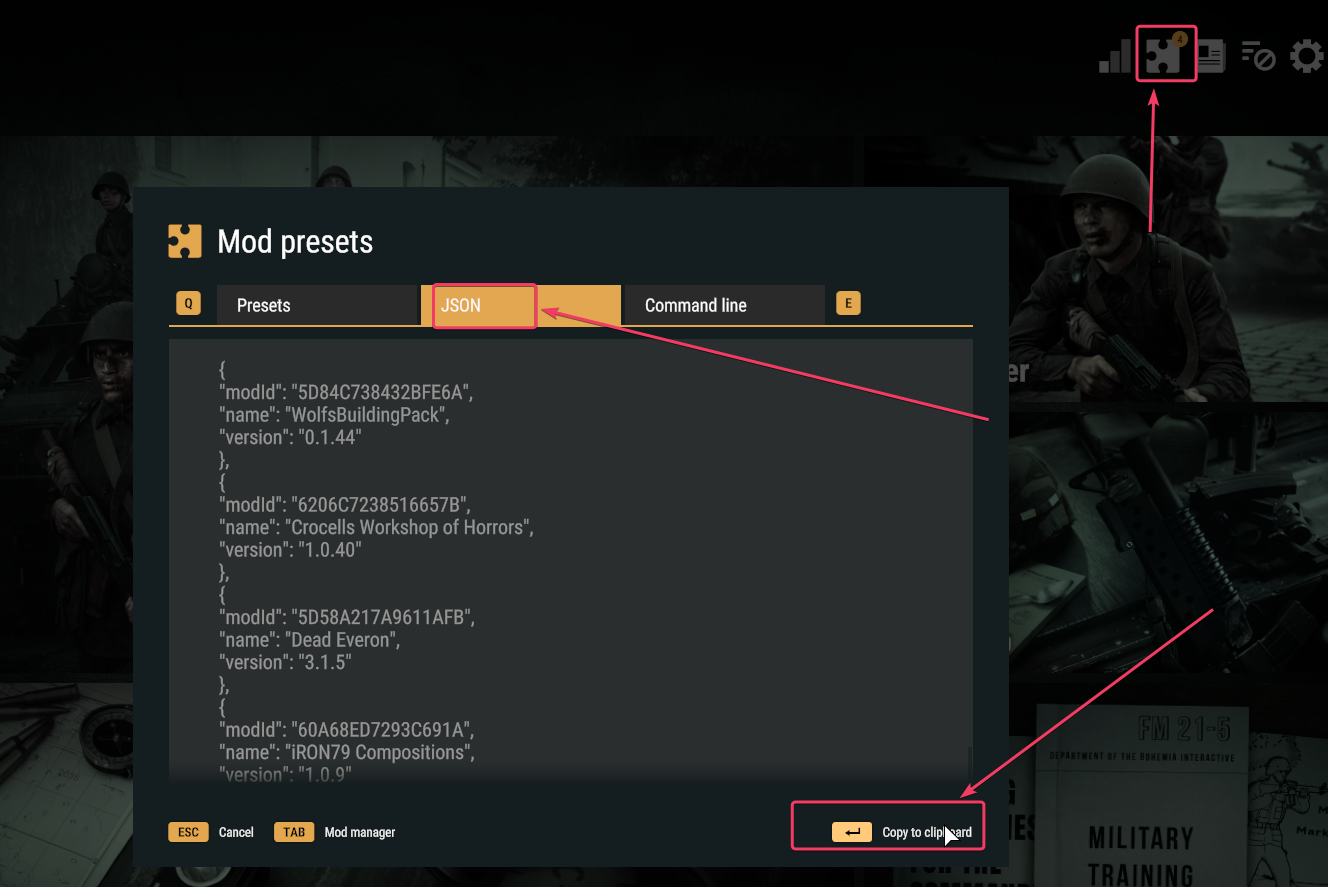
-Back in Arma Reforger, go to the mod manager.
-Locate your mod and check its JSON configuration.
-Copy the entire configuration to your clipboard for future use. Make sure you have all dependencies also there or it won't work!
Create a Custom Configuration:
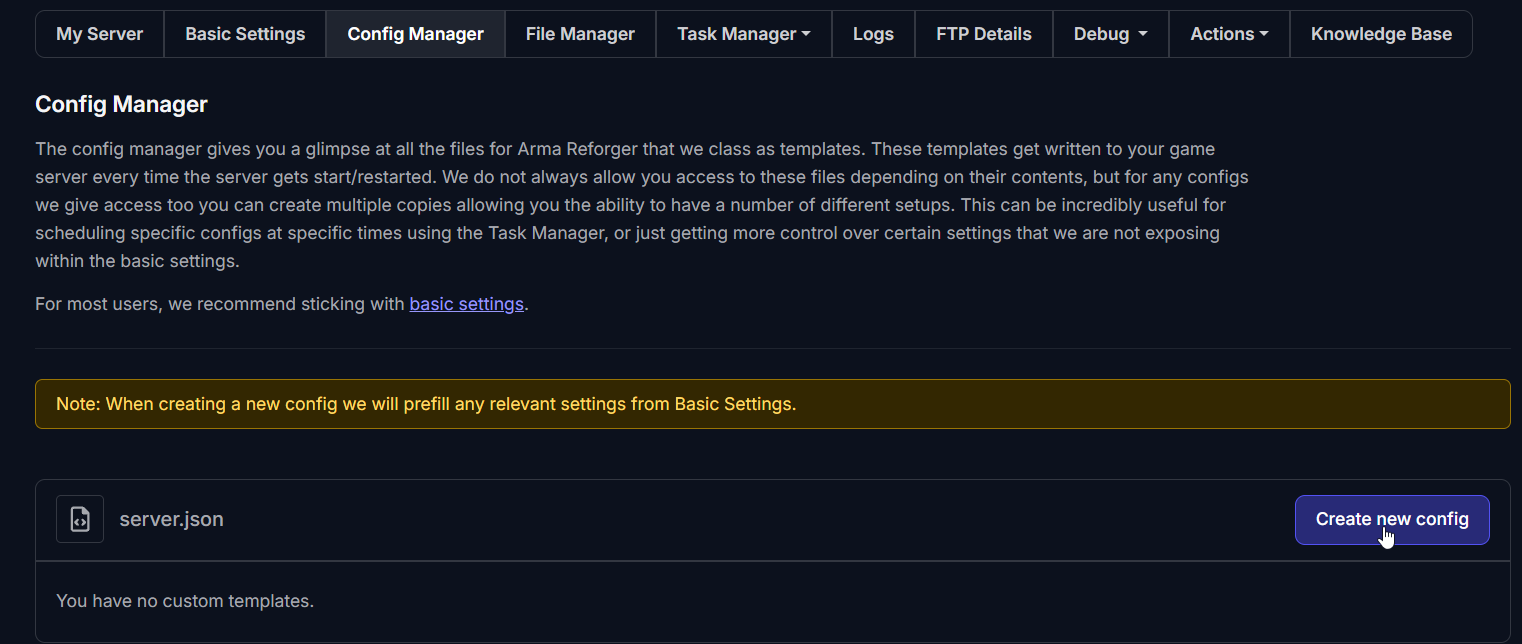
-Navigate to the Config Manager in your server settings.
-Start a new custom configuration and paste the JSON code you copied between the brackets after"mods":{ "modId": "MODID", "name": "MODNAME", "version": "XXXXX" }
Example:
(Note that this is only an example and won't work by simply copying and pasting it exactly)
"mods": [
{
       "modId": "5965550F24A0C152",
       "name": "Where Am I",
       "version": "1.2.0"
   },
   {
       "modId": "5D9ECAD071E9ECBC",
       "name": "HMMWV  VARIANTS PACK",
       "version": "1.0.43"
   },
   {
       "modId": "5E389BB9F58B79A6",
       "name": "SpaceCore",
       "version": "1.3.6"
   },
   {
       "modId": "606B100247F5C709",
       "name": "Bacon Loadout Editor",
       "version": "1.2.37"
   },
   {
       "modId": "5CCCC1DFB9C93581",
       "name": "AH-64D Apache",
       "version": "1.1.1"
   },
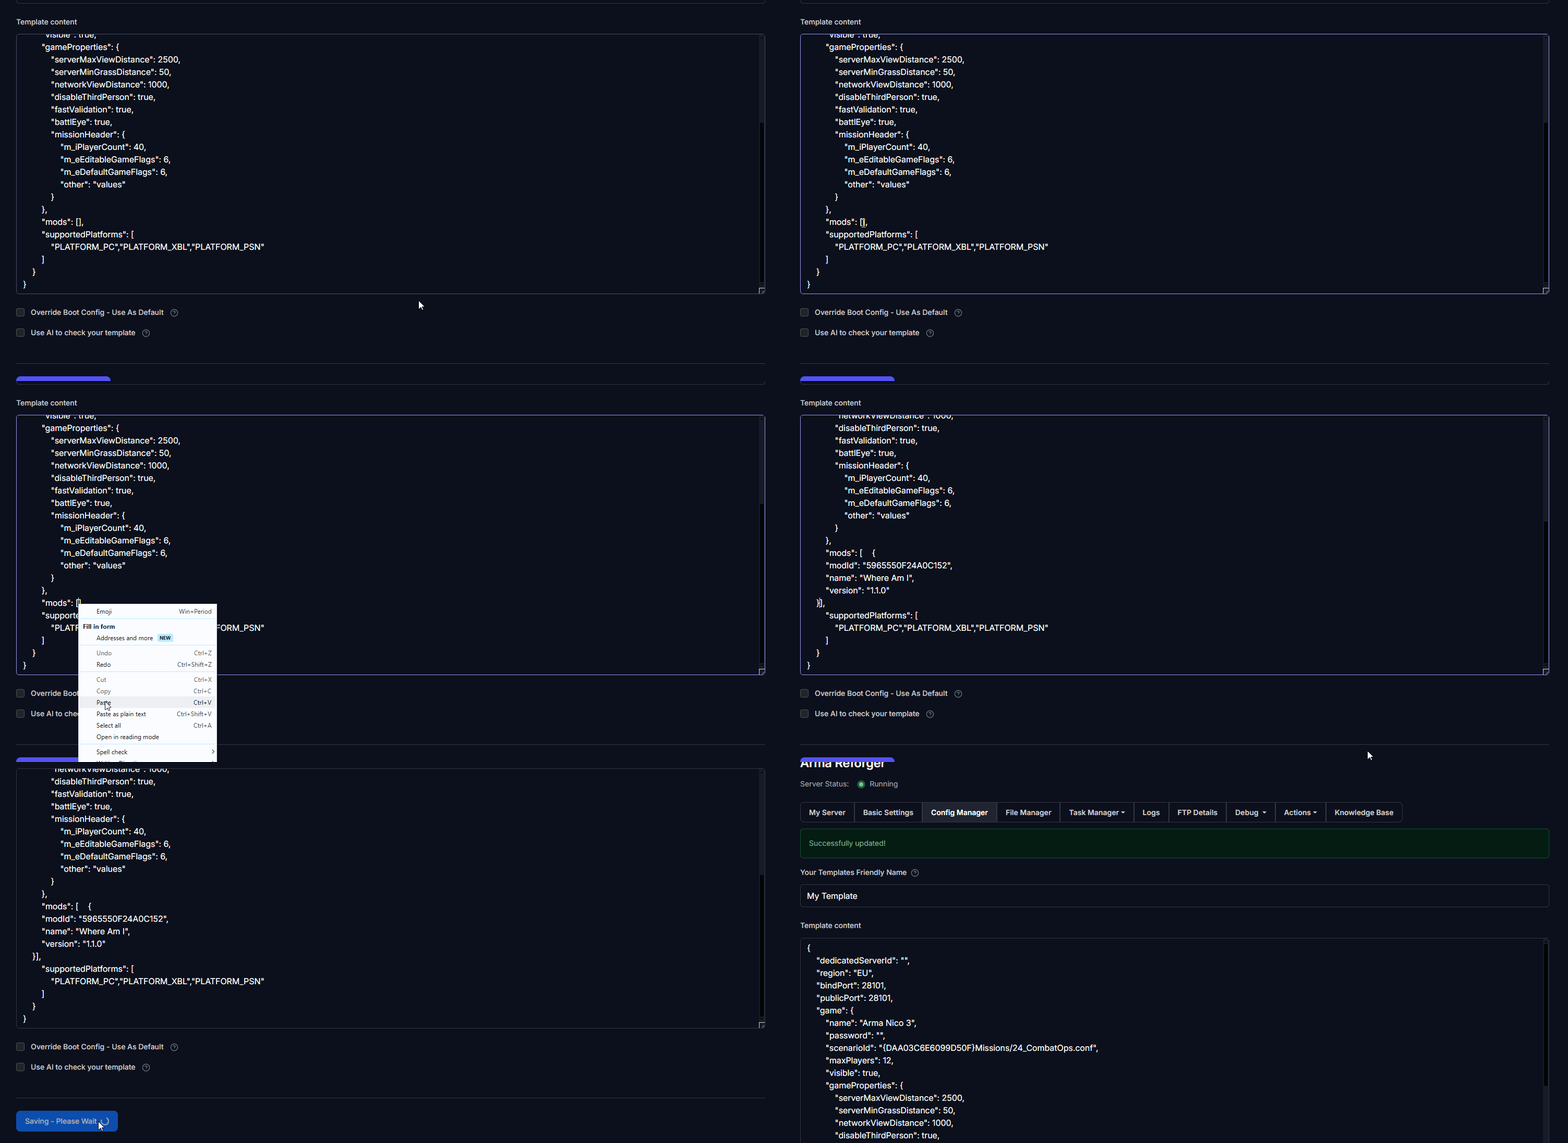
Override Boot Config:
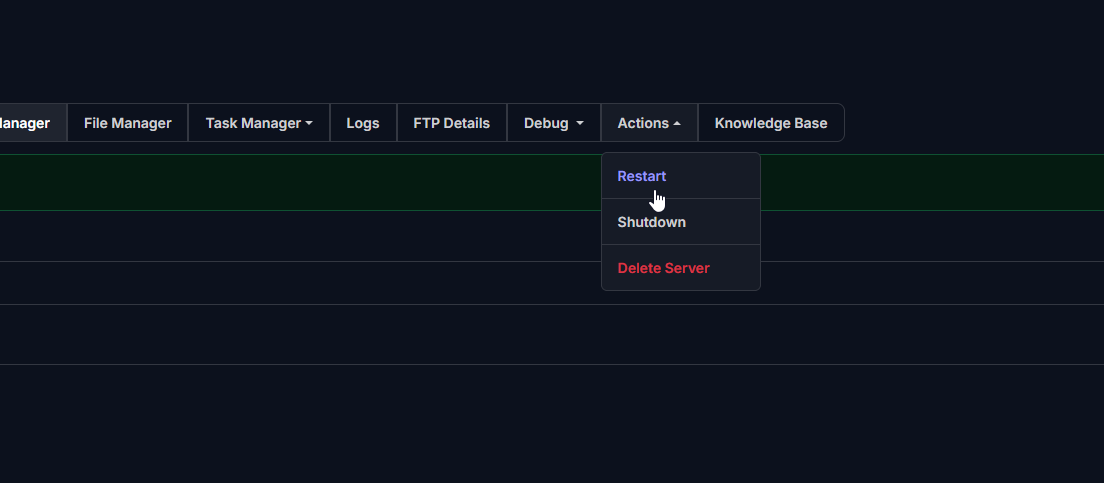
Make sure you click on the option to Override Boot Config, then select Use As Default and save the configuration template.- Restart the Server:
After saving, restart your server to apply the changes. You can start exploring the new scenarios!
Troubleshooting Common Issues
If you encounter issues with your custom scenarios, consider the following:
- Server Not Starting: Ensure that the mod ID matches exactly and that the scenario files are correctly placed. Copying and pasting from the game mod JSON should help a lot.
- Missing Assets: Make sure all necessary mod files have been downloaded and located in the correct folders.
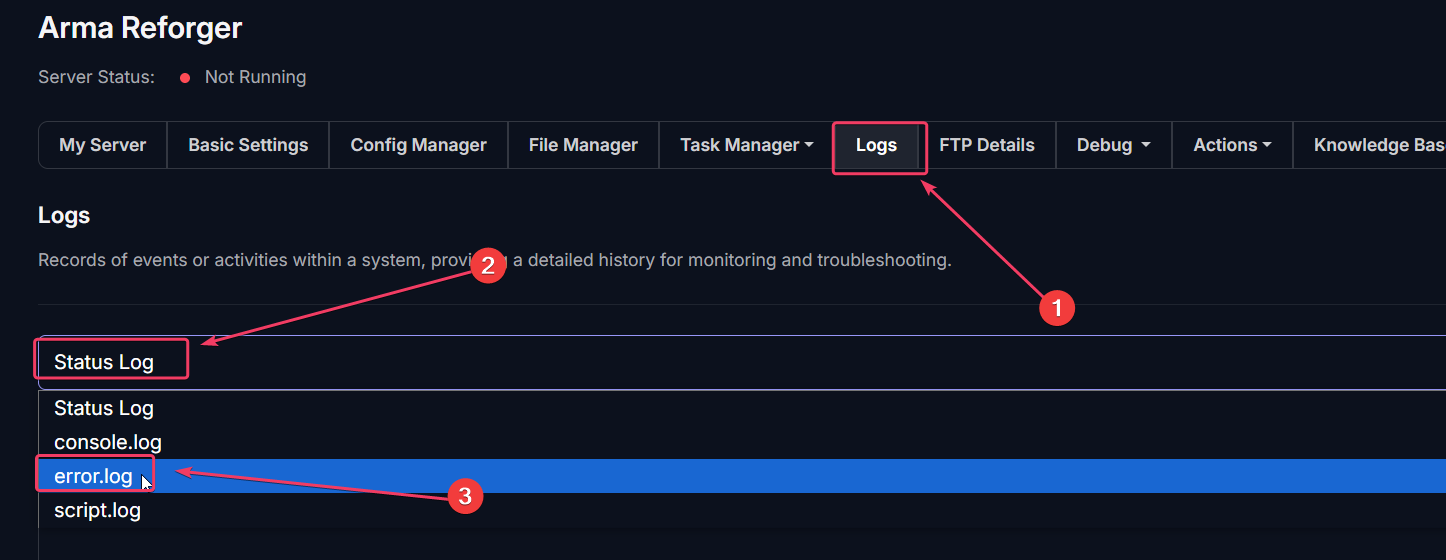
- Error Messages: Pay attention to any specific error messages in the server log, which can provide clues to resolve configuration issues.You can check the Log→Error for any indication of what's wrong.
If you need to upload any files to the server due to the mod requiring them, use FTP. For additional guidance on connecting through FTP, check out our detailed guide here.
We hope this guide helps you successfully add custom scenarios to your Arma Reforger server.
Happy gaming!