Last Update 2025-11-21 15:22:12
How to Enable Developer Console in your in Euro Truck Simulator 2 ServerHow to Enable Developer Console in Euro Truck Simulator 2
The developer console in Euro Truck Simulator 2 allows you to use various commands and is essential for adding mods to your server.
In this guide we'll walk you through how to enable and use it properly, so let's dive right into it.
It's important to know that we'll simply edit one of the files on your local PC, so the server itself won't be affected by this.
Make sure that the game is closed during this process otherwise it won't be applied in-game.
Step-by-step
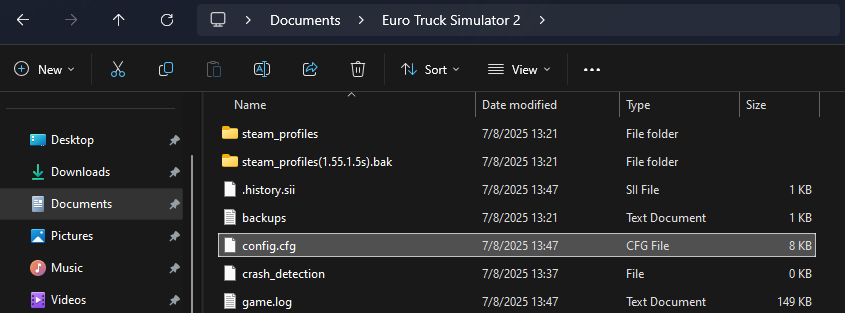
Locate the config.cfg file:
Navigate to:
Documents/Euro Truck Simulator 2/config.cfg

Open config.cfg in a text editor:
Right click on the file and select “Edit in…” or “Edit with…” depending on the text editor that you prefer.
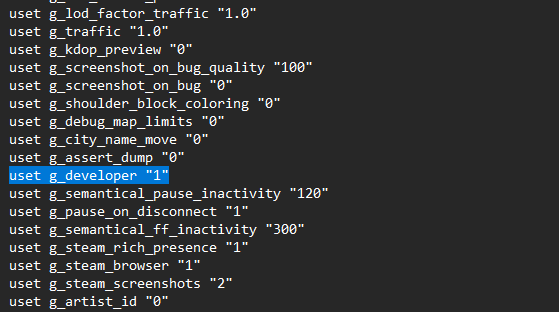
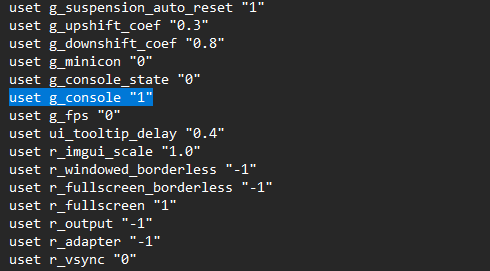
Edit the developer and console variables:
Change
uset g_developeranduset g_consolefrom 0 to 1:uset g_developer "0" --> uset g_developer "1" uset g_console "0" --> uset g_console "1"


(Since this file has many variables, we suggest you to use Ctrl+F to search for a specific one)
Save the changes and close the file
That's it, now you can press the tilde (~) key in-game to open the console.

Some useful commands include:
warpgotog_set_timeexport_server_packages
If you have any questions or need assistance, feel free to reach out to our customer care agents through our live chat or email at [email protected].