Last Update 2025-07-21 11:47:01
How to Change Map Rotation and Its Settings on Your Holdfast: Nations at War Server
Holdfast: Nations at War manages each map's settings through the map rotations. On our server panel you may find several configurations that help owners like you manage these settings with just a few clicks. There are options for both basic and advanced custom-made configuration files.
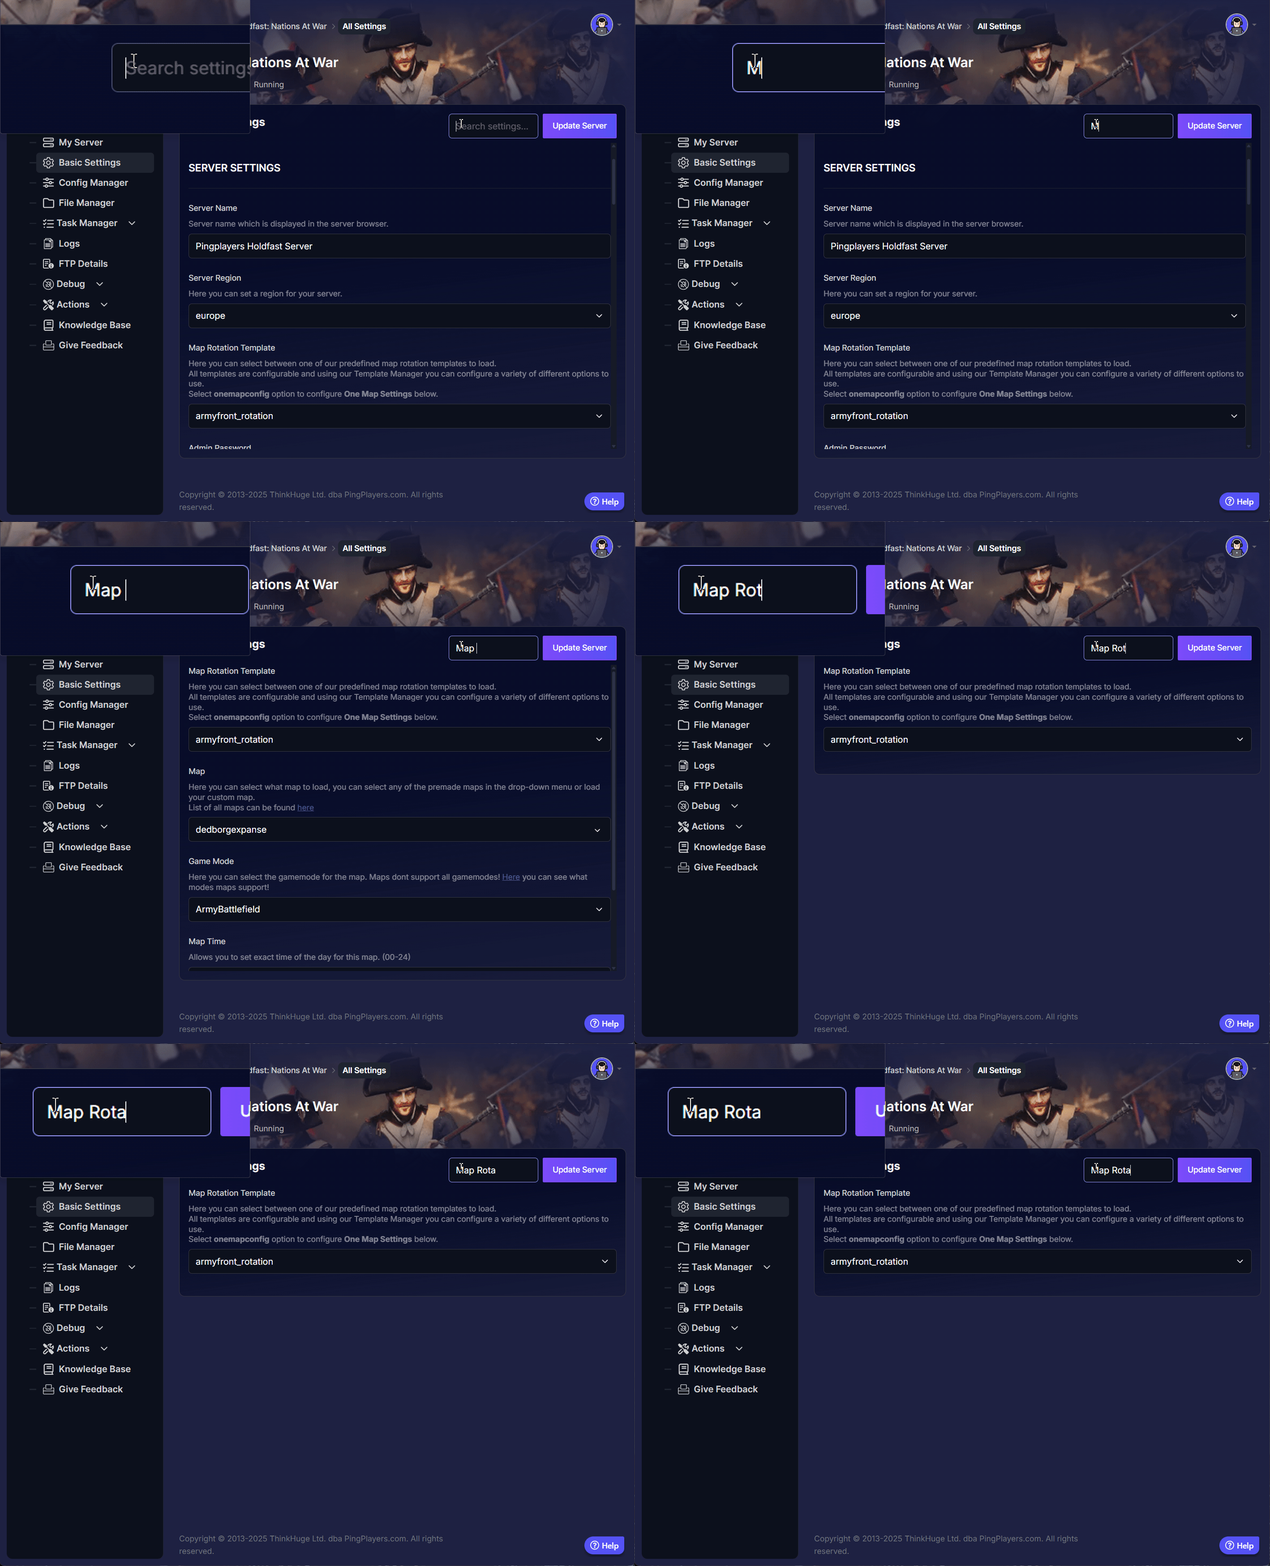
Most of this settings are under the Basic Settings section, on the left panel. Since we want to change the map variables, let's understand how they work first.
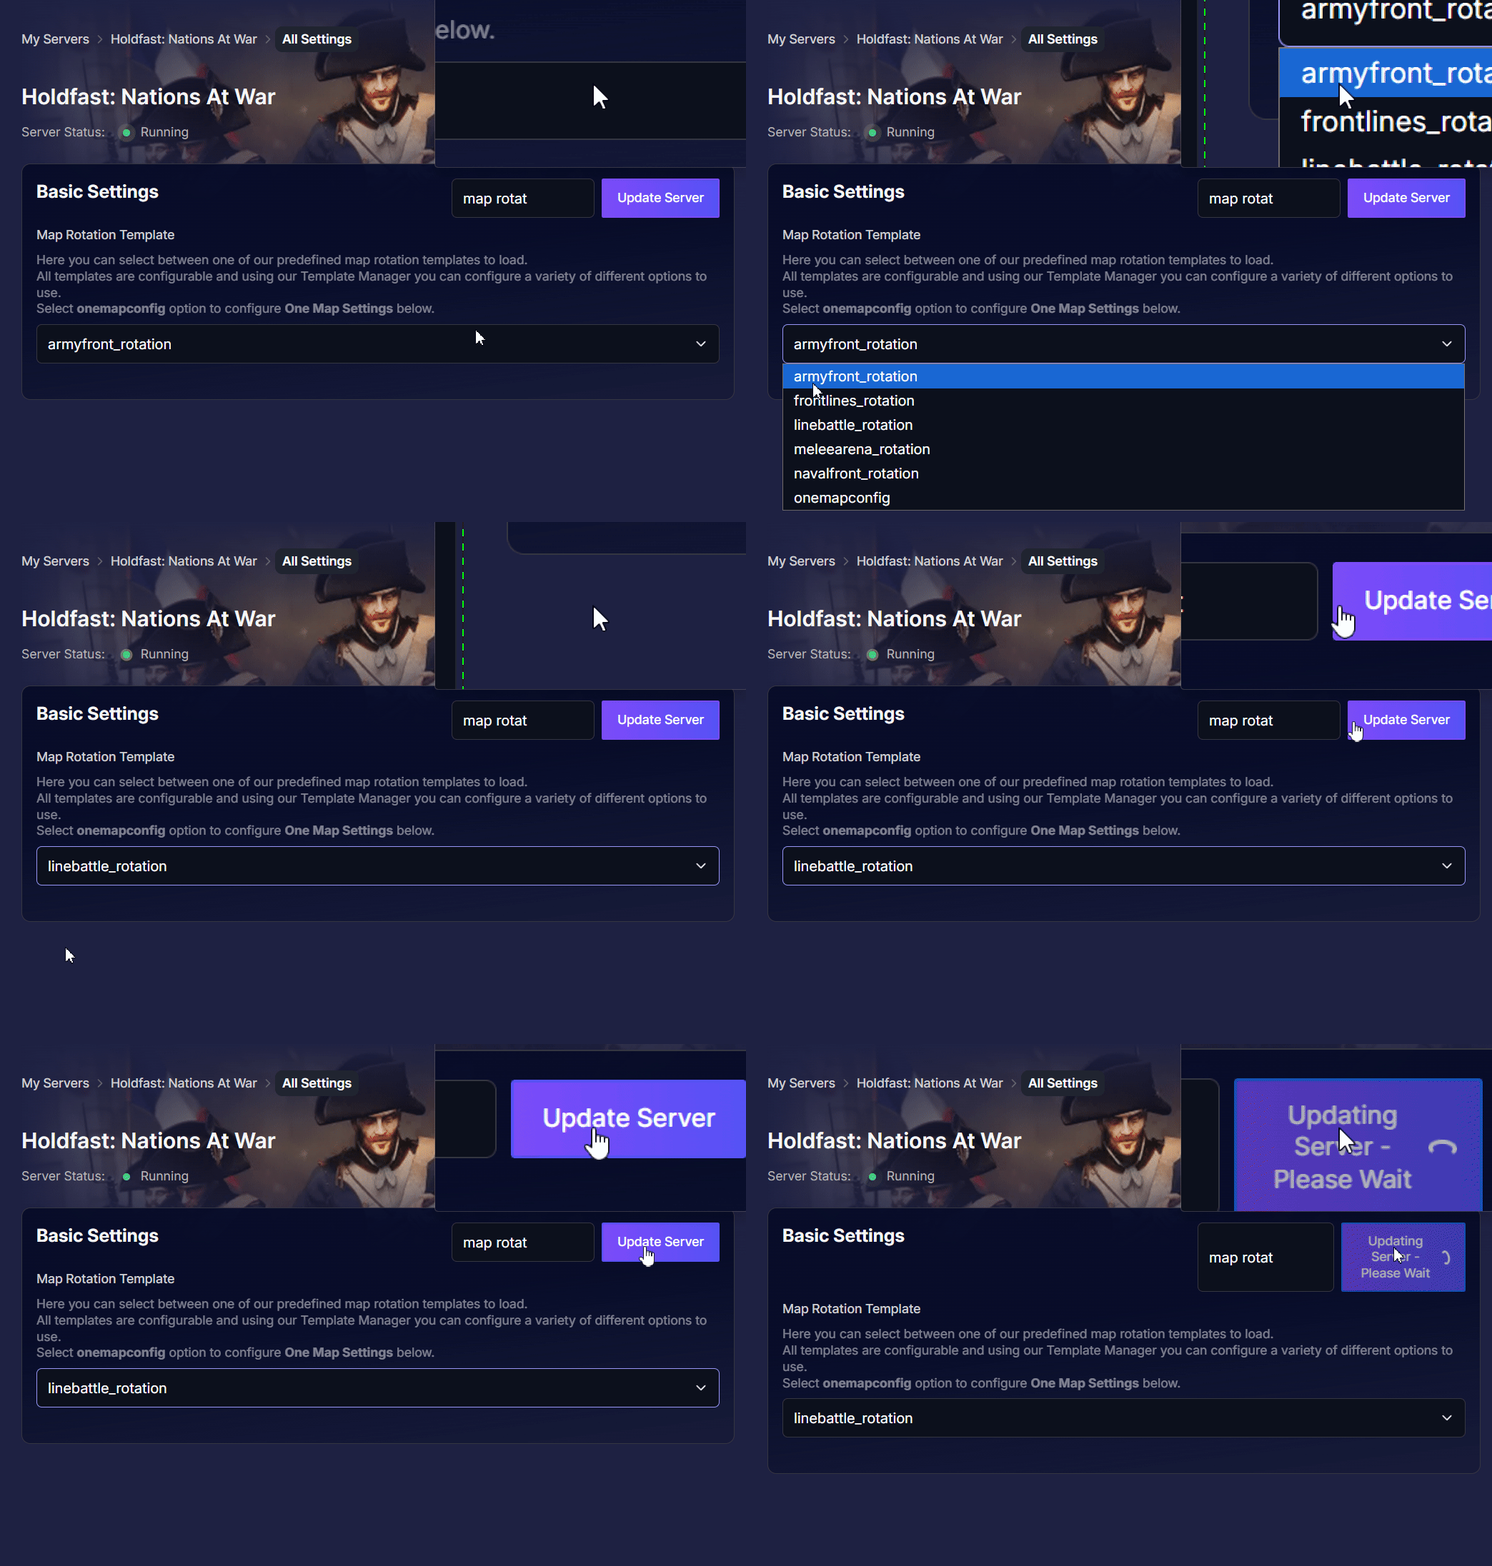
The Map Rotation Template controls which set of maps your game will run on. You can select between two main choices: One Map Configuration or one of the Custom Map Rotations.
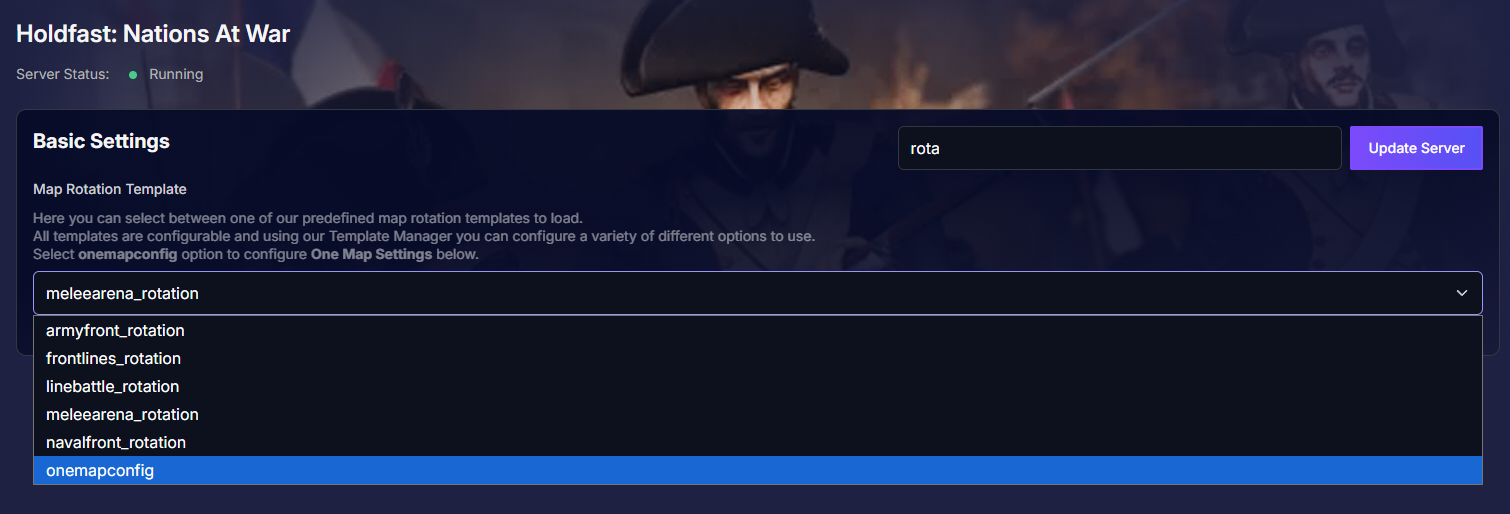
There are five pre-made map rotations, each with its own settings, maps, modes, and even possible mods added.
armyfront_rotation
frontlines_rotation
linebattle_rotation
meleearena_rotation
navalfront_rotation
If we select onemapconfig instead, we can determine its specific settings directly from the Basic Settings.
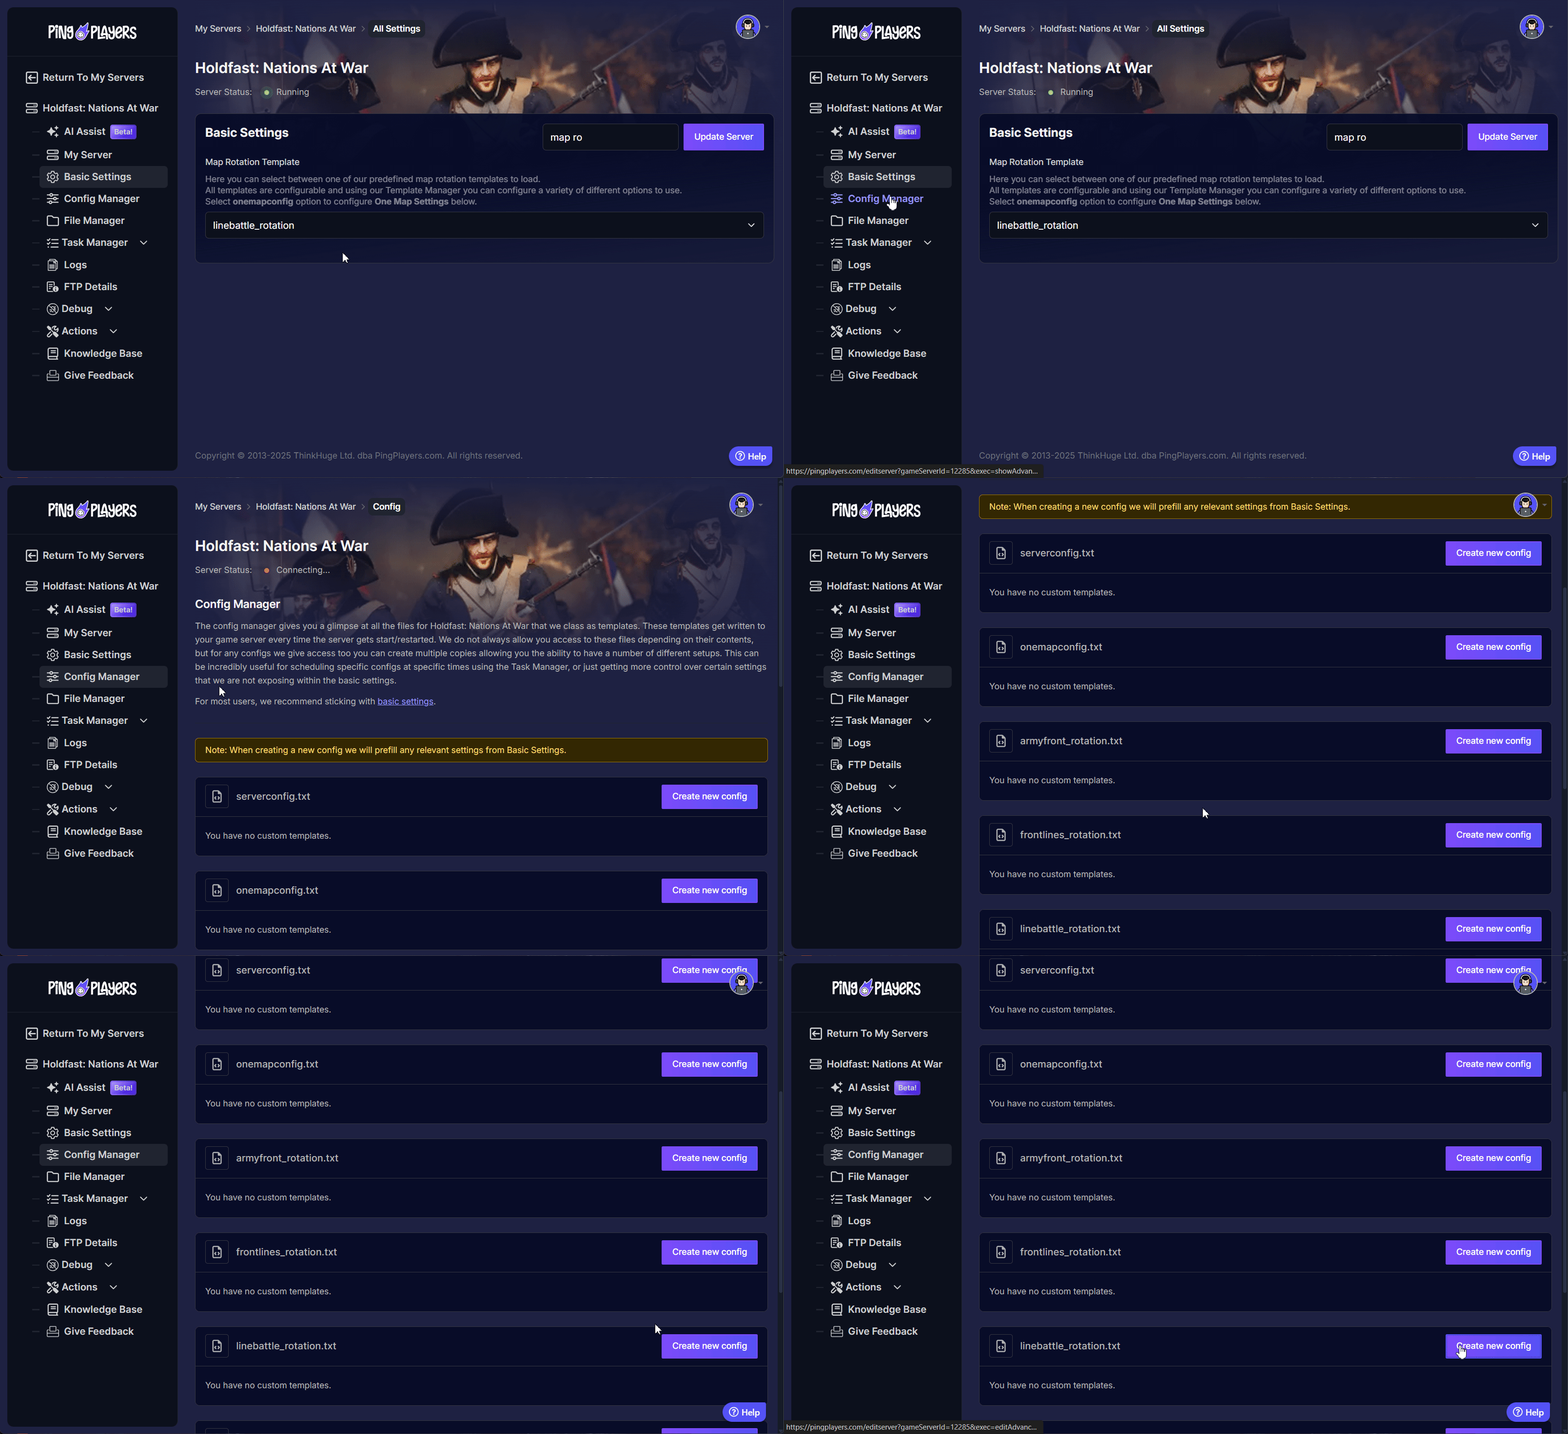
If one of the custom map rotations is chosen, configurations can be done through the Config Manager by creating new templates for the corresponding .txt file.
Remember, any changes made will require a server restart.
Method 1: The Single Map Setup (Easy)
This method is perfect for running a specific event, for regimental practice, or when you just want to focus on one battlefield without any changes.
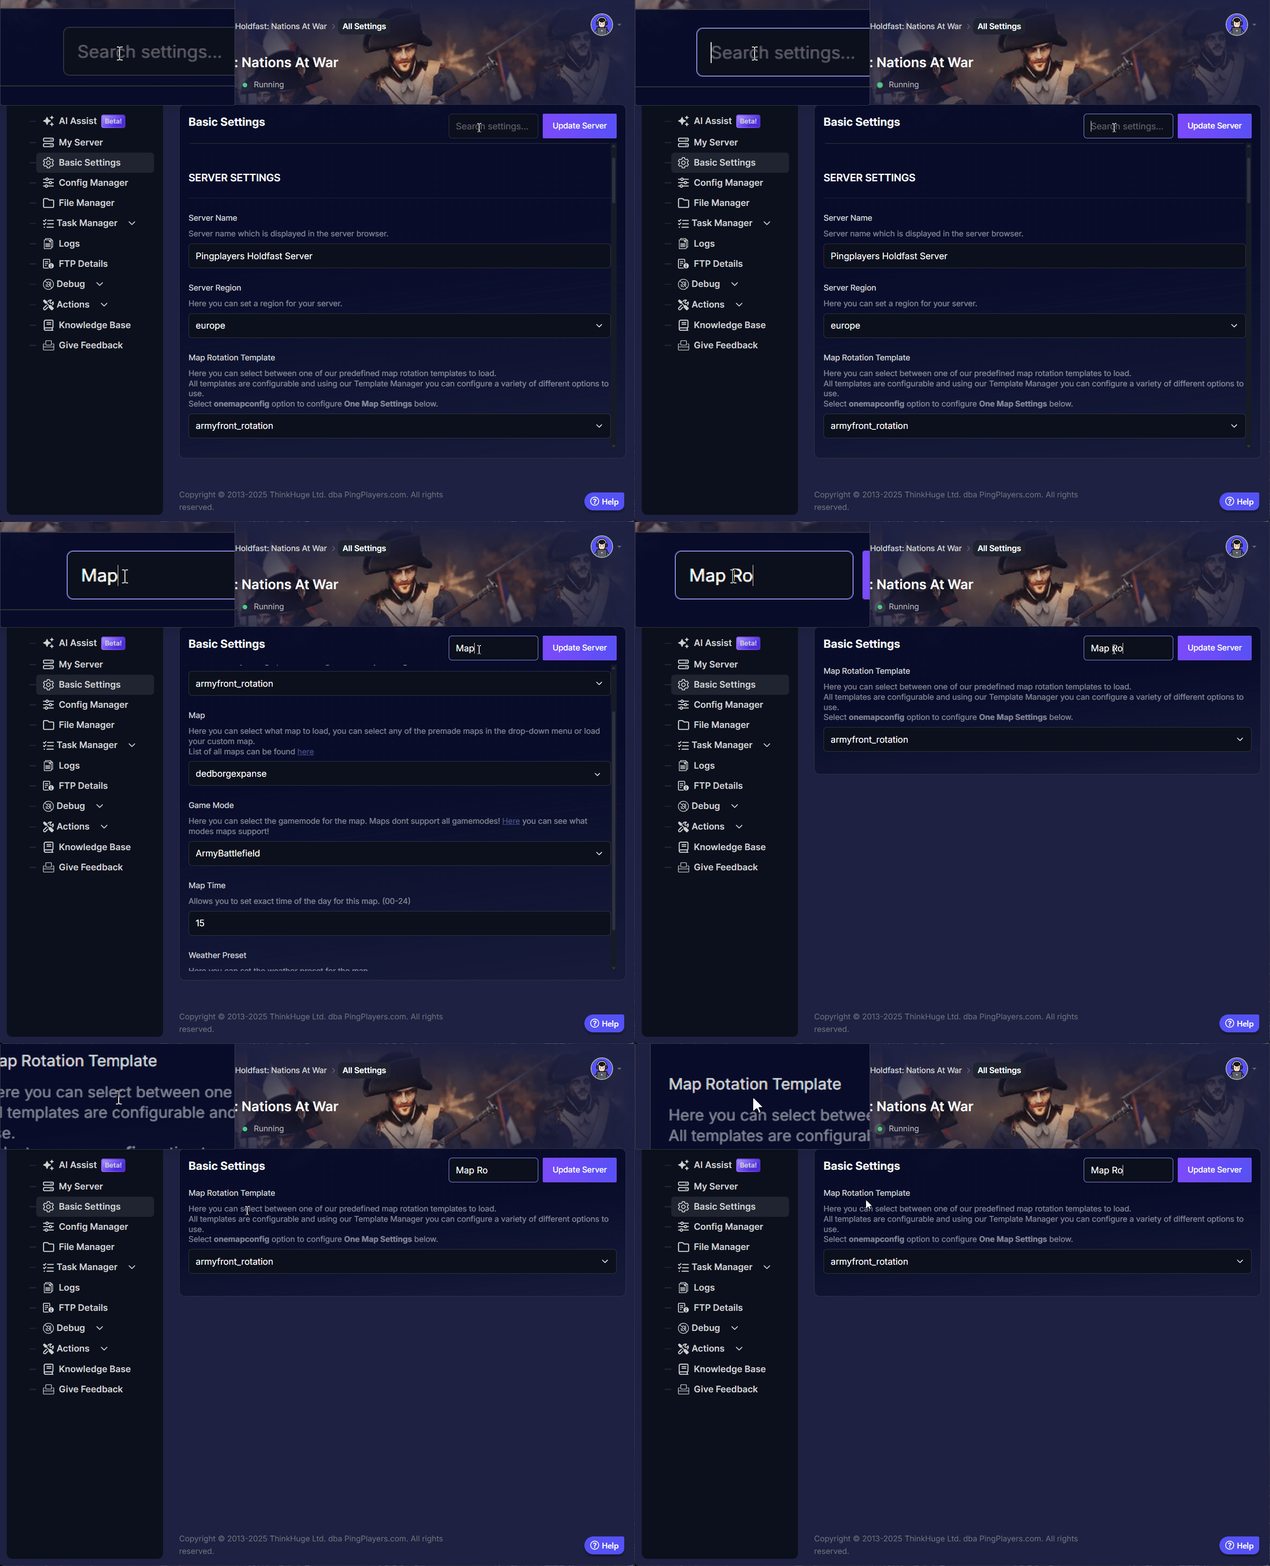
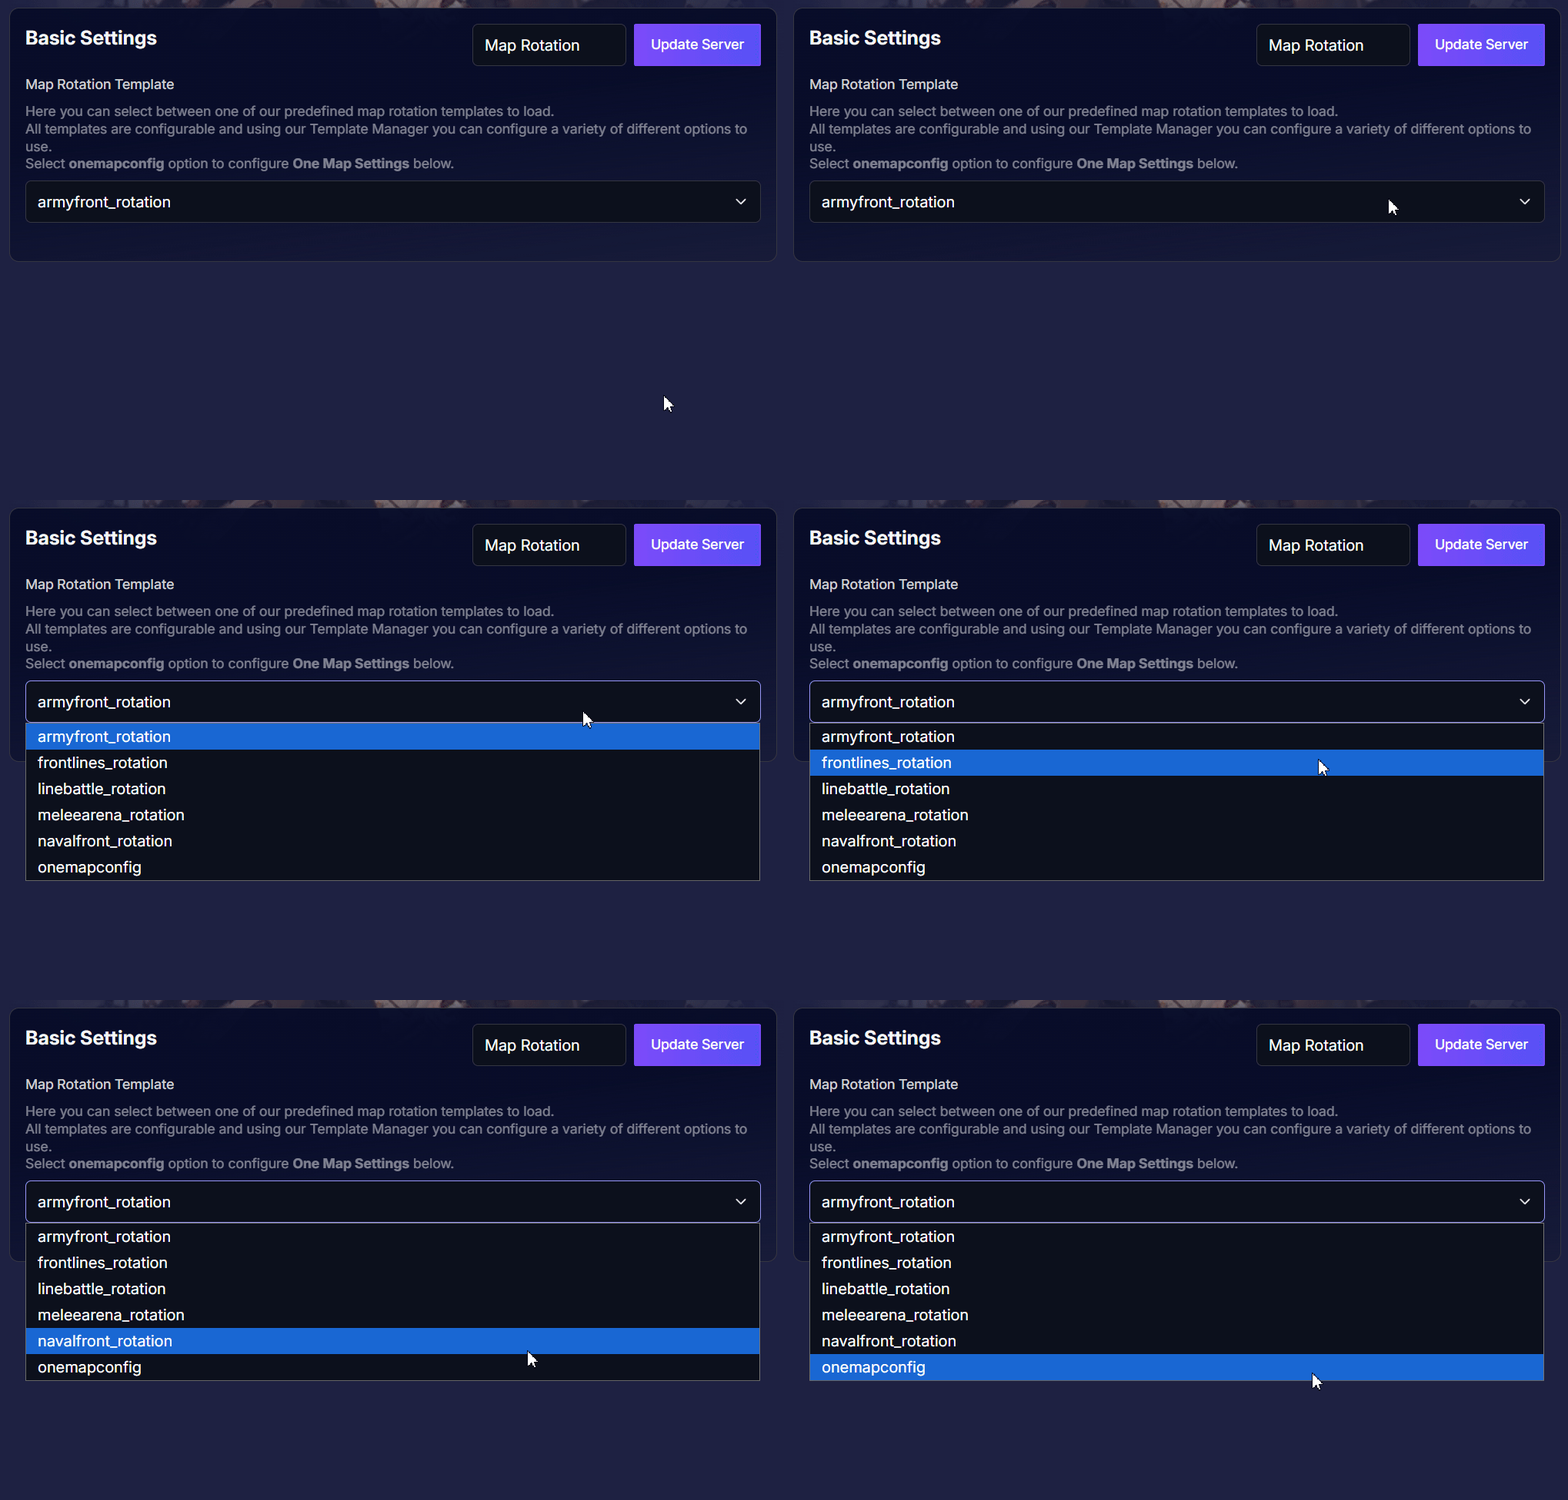
- Select the Single Map Config: In your control panel, go to Basic Settings. Find the Map Rotation Template and select the onemapconfig option from the dropdown menu.
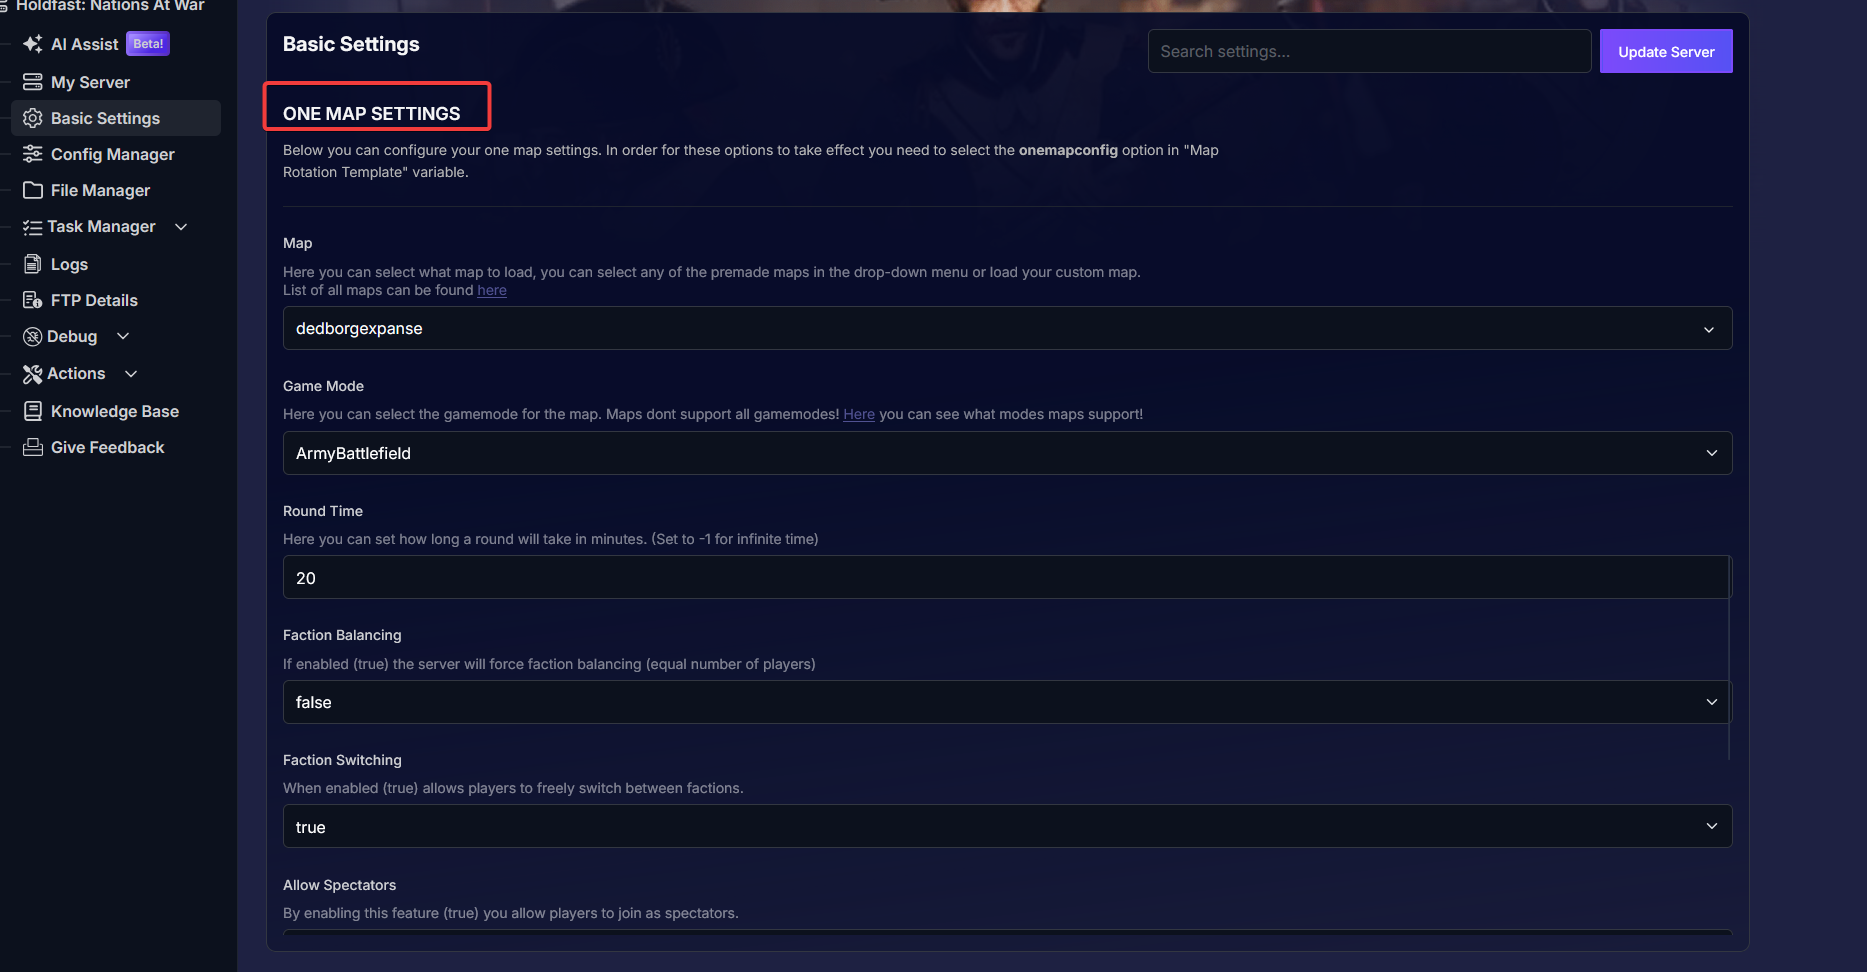
- Configure Your Map: Scroll down to the One Map Settings section. Here, you can choose the exact map, game mode, round time, and other specific settings you want for this single map.
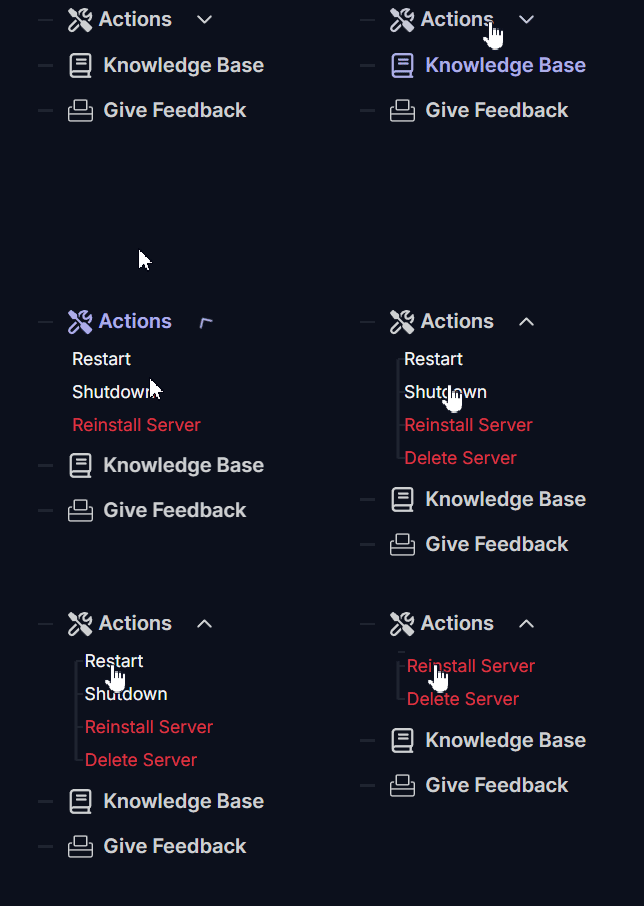
- Save and Restart: Click the Update Server button to save your changes, then restart your server by going to Actions, then Restart to apply them. Your server will now exclusively run the single map you configured.
Method 2: The Custom Rotation Setup (Advanced)
This method is ideal for public servers, allowing you to create a diverse playlist of maps and modes that cycle automatically. You'll start by choosing one of Holdfast's five pre-made rotation templates:
armyfront_rotationfrontlines_rotationlinebattle_rotationmeleearena_rotationnavalfront_rotation
Once you've picked one, you can customize it by following these steps:
- Select a Rotation Template: In Basic Settings, find the Map Rotation Template variable and select the rotation you want to use (e.g., linebattle_rotation).
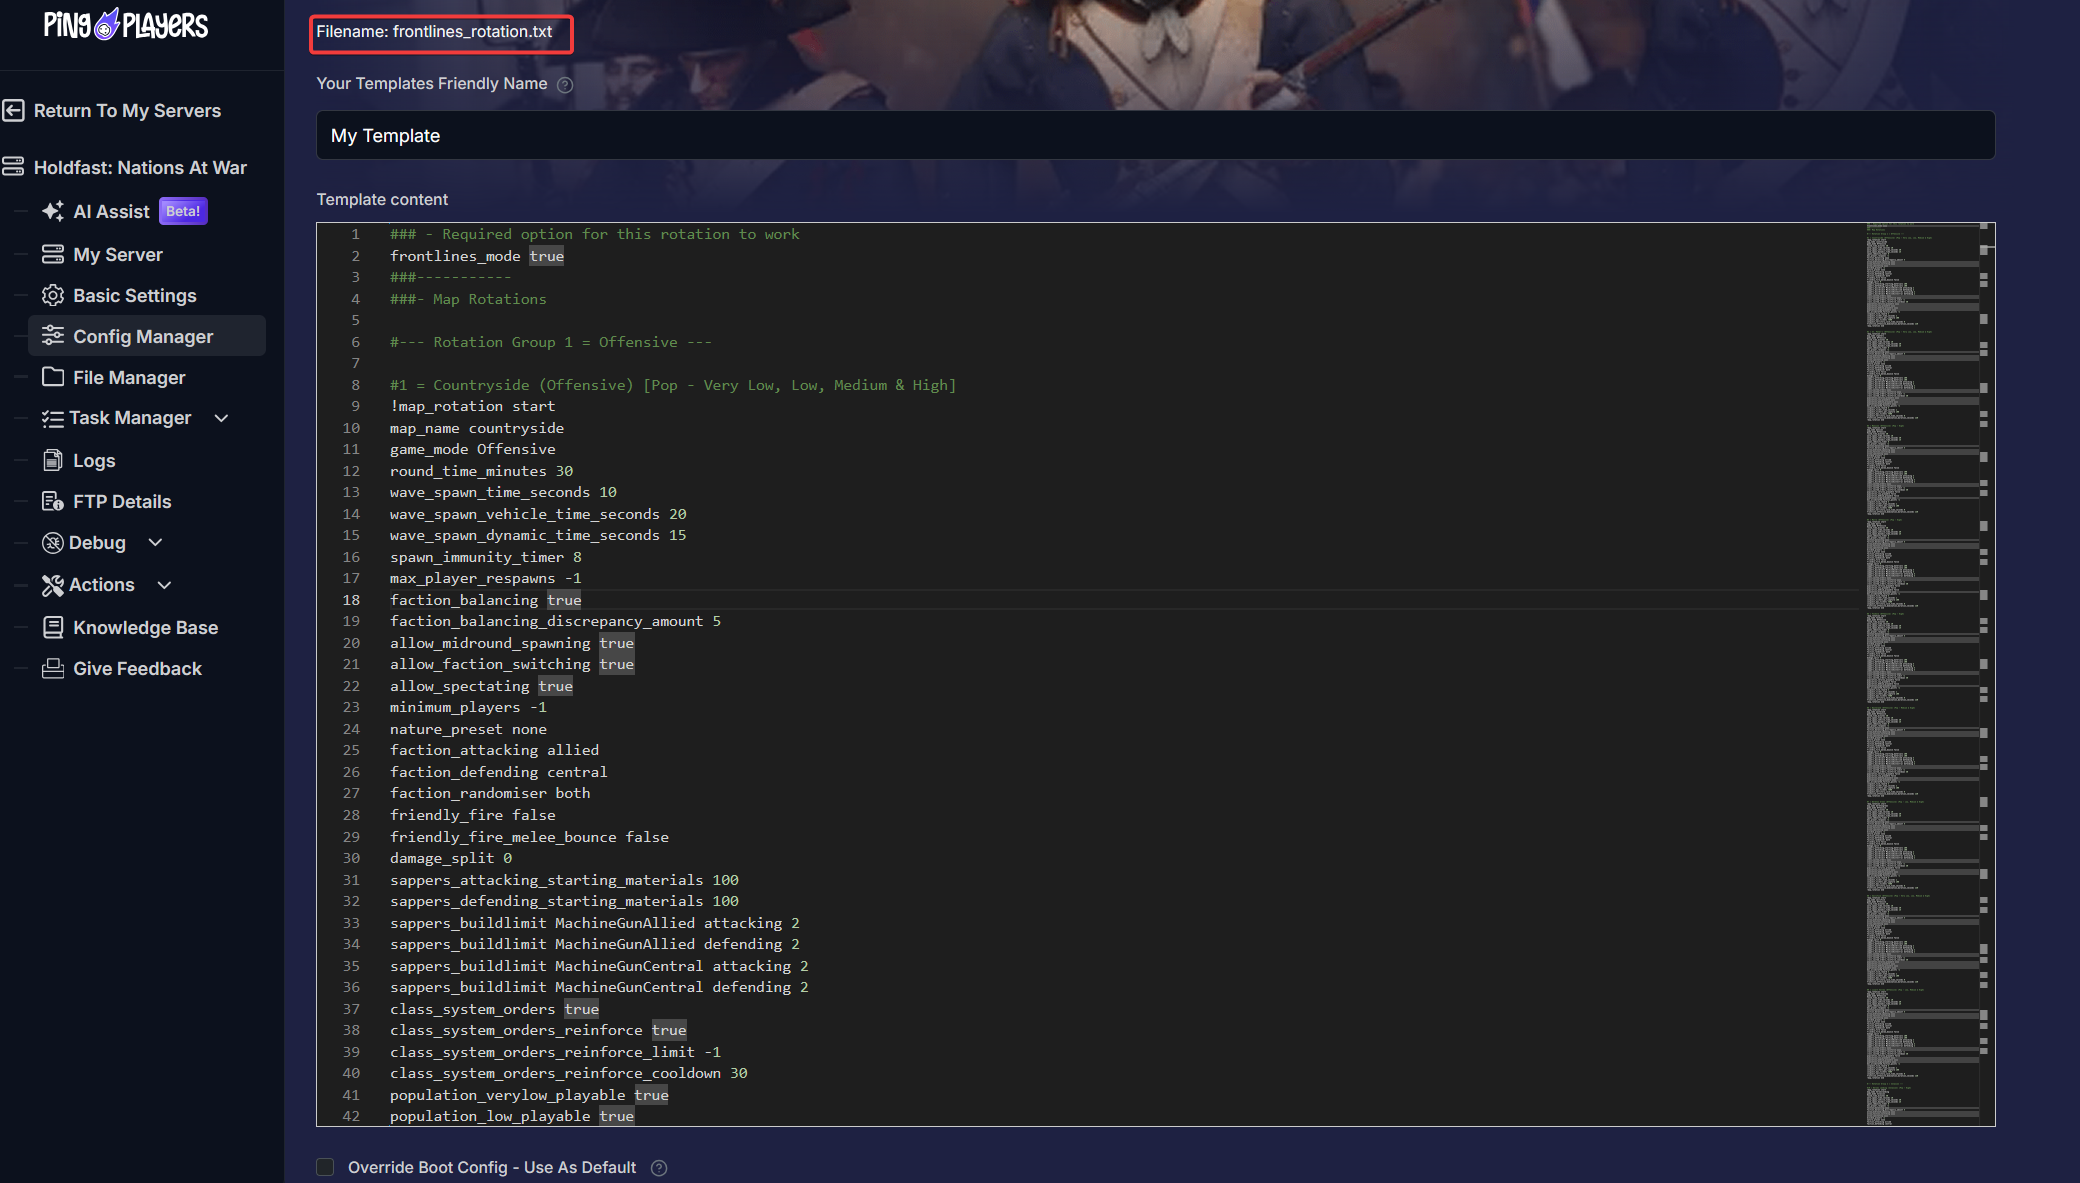
- Create a New Config File: Go to the Config Manager tab. Click Create new config and select the template for the exact same rotation file you chose in Step 1 (e.g.,
linebattle_rotation.txt). This is crucial.
Edit Your Rotation: You can now edit this text file to add, remove, or reorder maps and change their specific settings.
For a full list of commands and options, refer to the official documentation.
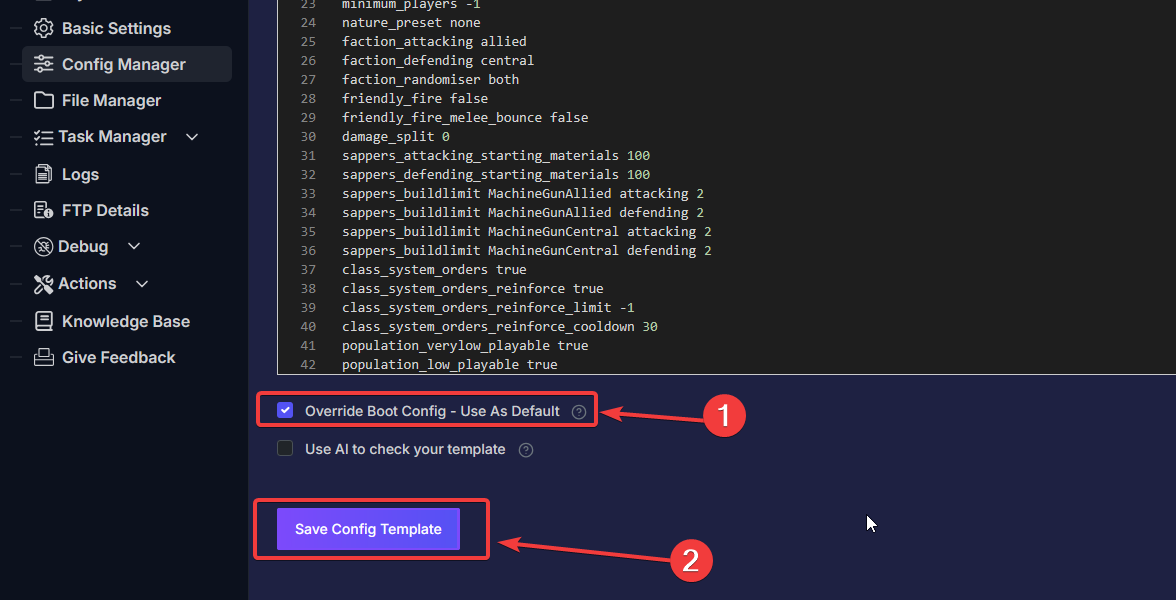
- Save and Activate: Click Override Boot Config - Use As Default and then Save Config Template.
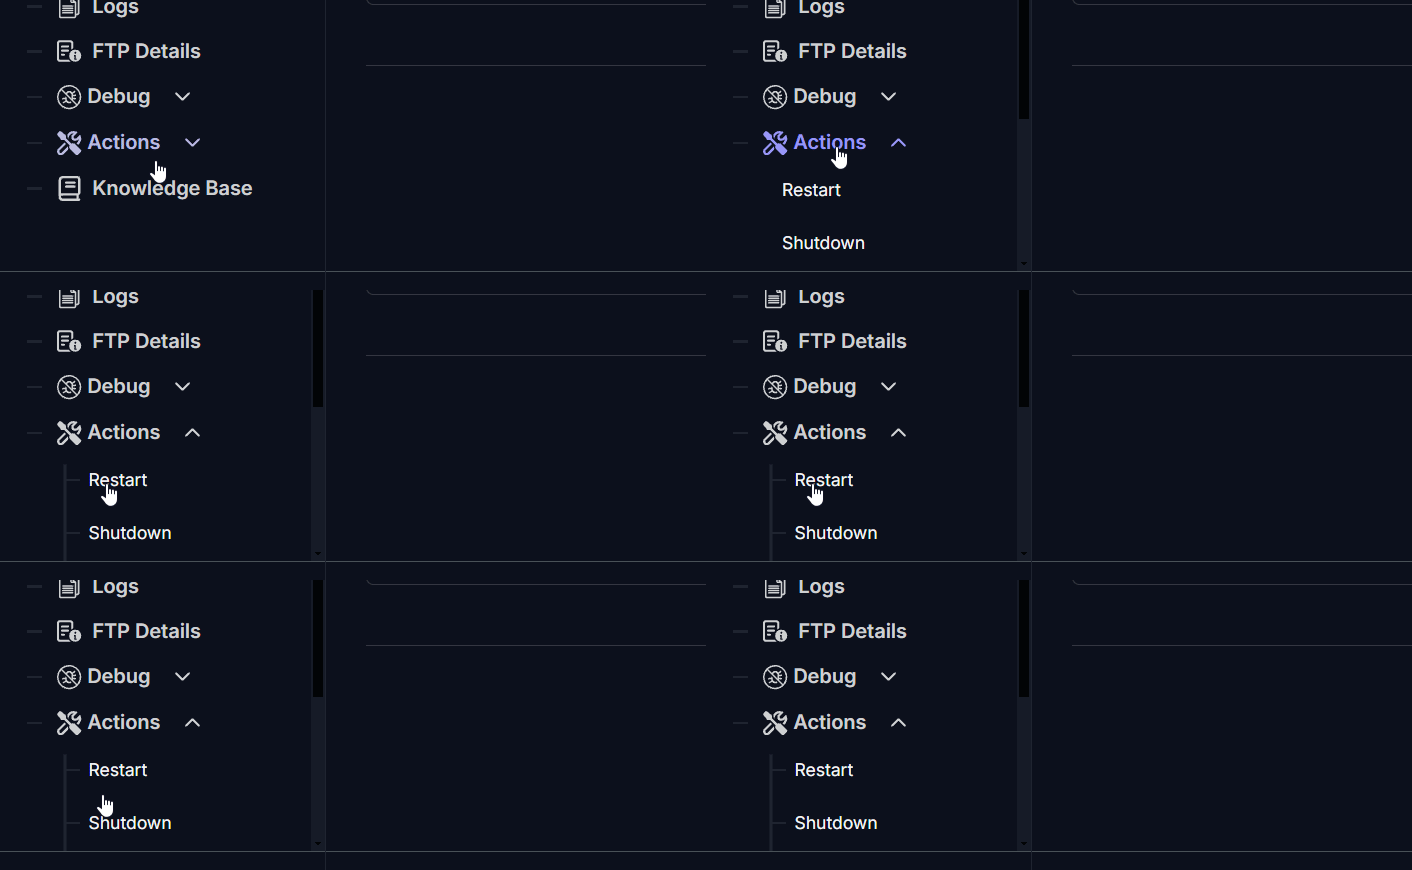
- Restart the Server: A final restart will apply your new custom rotation by going to Actions, then Restart.
Troubleshooting: Server Not Starting?
If your server fails to start after you've made changes, it's usually due to one of these common issues:
- Syntax Errors in the Config File: A single misplaced character or typo in your custom rotation file can prevent the server from starting. Double-check your work.
- Invalid Map/Mode Combination: Ensure the game mode you've selected is actually available for that specific map.
- Wrong Template Chosen: Make sure the map rotation template selected in Basic Settings perfectly matches the config file you are editing in the Config Manager.
Conclusion
Congratulations! You are now in full command of your server's tour of duty. By mastering the map rotation settings, you can tailor the battlefield experience perfectly to your community's desires—from a focused training session on one map to an epic, multi-map campaign that runs all weekend.
Don't be afraid to experiment with different maps, modes, and settings to create the ultimate Holdfast experience. If you have any questions or need assistance, feel free to reach out to our customer care agents through our live chat or email at [email protected].