Last Update 2025-11-21 15:21:53
How to Set Up Twitch Integration on Your 7 Days to Die Server
Want to let your Twitch chat join in on the apocalypse? Imagine your viewers voting to either help you with a timely care package or hinder you with a surprise wandering horde. 7 Days to Die features a powerful, built-in Twitch integration that makes this possible, creating a more dynamic and unpredictable experience for you and your audience.
This integration is highly configurable, allowing you to choose exactly what events can happen and how often. This guide will walk you through the simple setup process to connect your Twitch account directly to your game.
Before You Begin: Setting the Correct Permissions
To use Twitch Integration on your server, a player needs the right permissions. You have two choices: give them full Admin powers, or grant them Twitch-Only permissions.
This is useful if you want to allow a friend or community streamer to manage their own Twitch events without giving them full control over your server (like kicking players or changing settings).
Option A: The Full Admin (Simple Method)
The easiest way is to simply make the player a full server admin. Admins have access to all server features, including Twitch Integration.
You can follow our guide here: How to Become an Admin on Your 7 Days to Die Server
Option B: Granting Twitch-Only Permission (Advanced Method)
This method gives a player access only to the Twitch Integration features.
Step 1: Get the Player's ID. You will need the player's unique ID. This could be their SteamID64, PSN Online ID, or Xbox GamerID.
Step 2: Edit the serveradmin.xml File
- In your control panel, go to the File Manager.
- Navigate to the following path:
/Saves/. - Find and open the
serveradmin.xmlfile for editing.
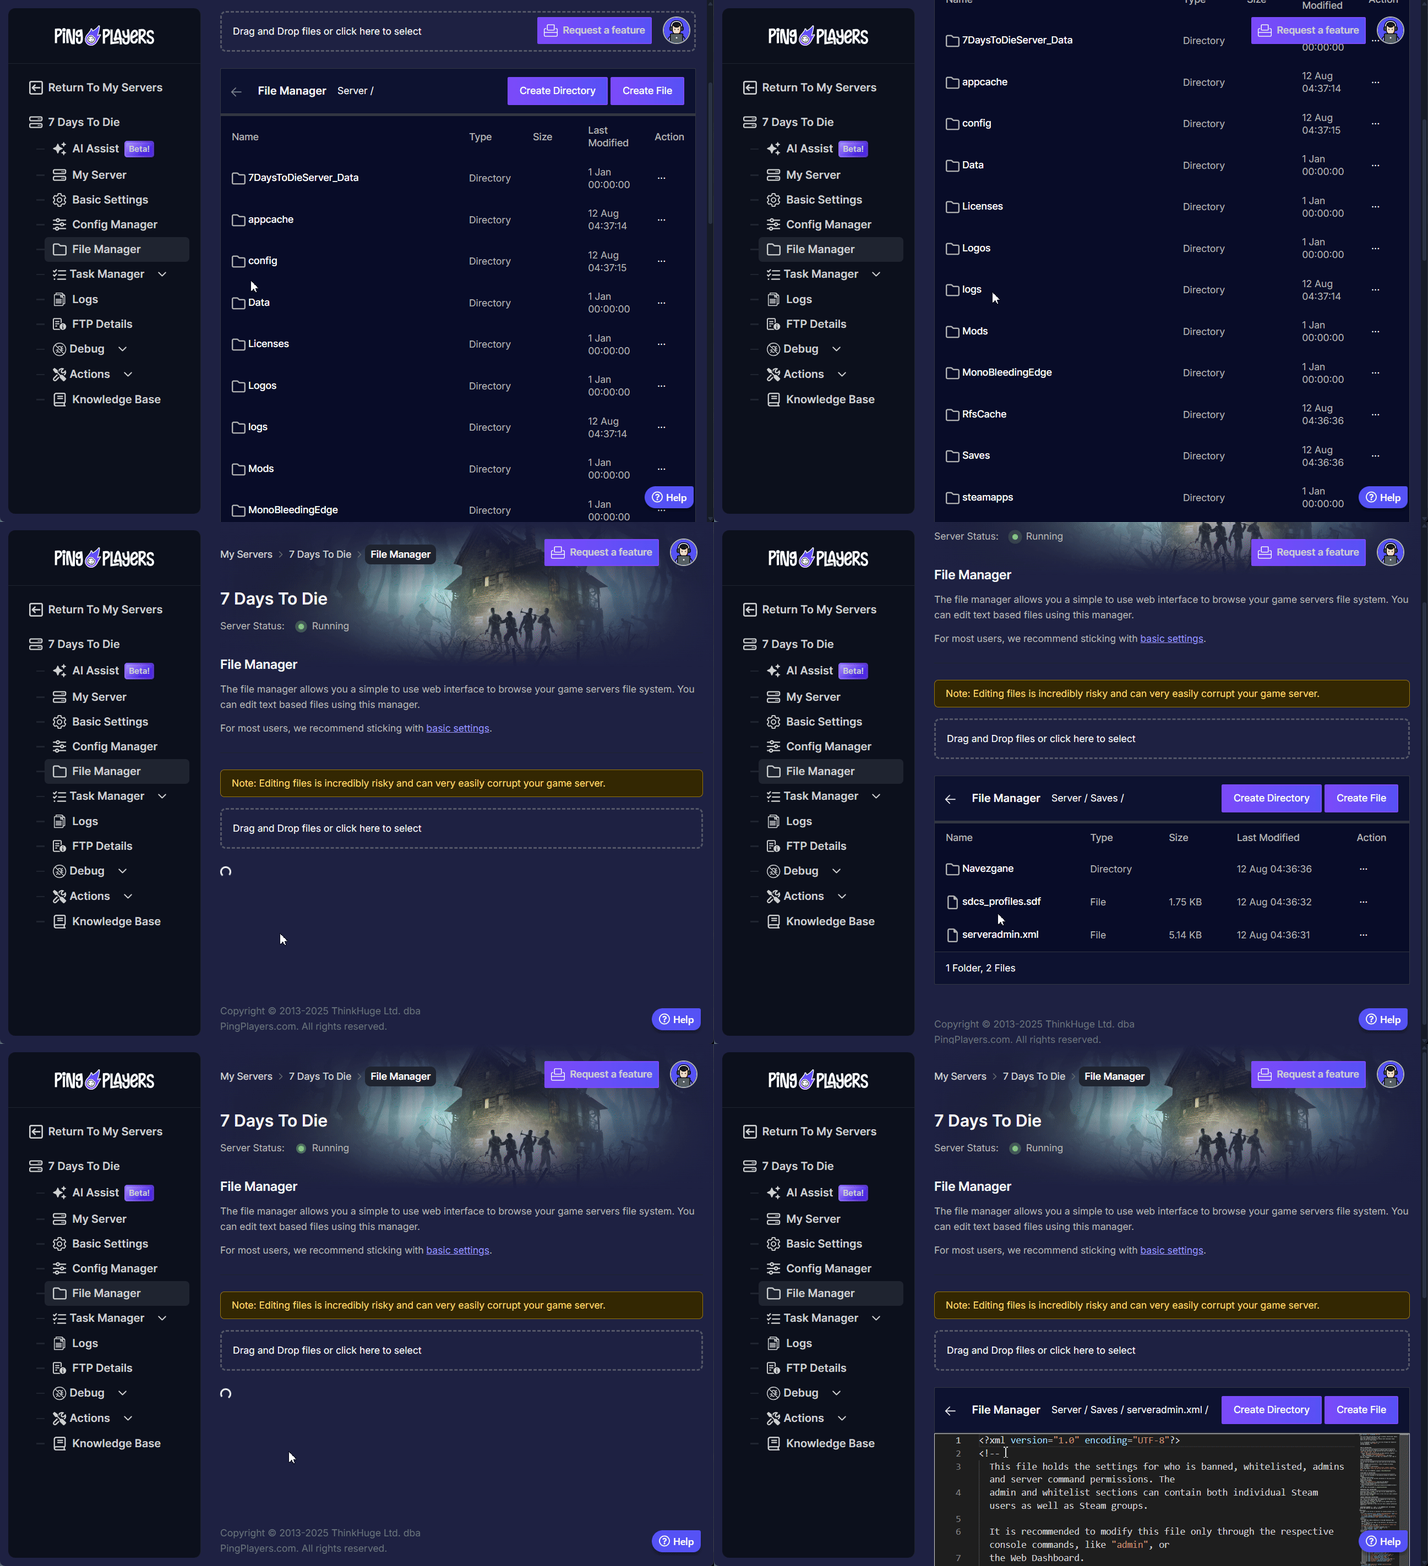
Step 3: Add the Permission Line
- Inside the file, find the
<admintools>section. - Below the users section, add the following line:
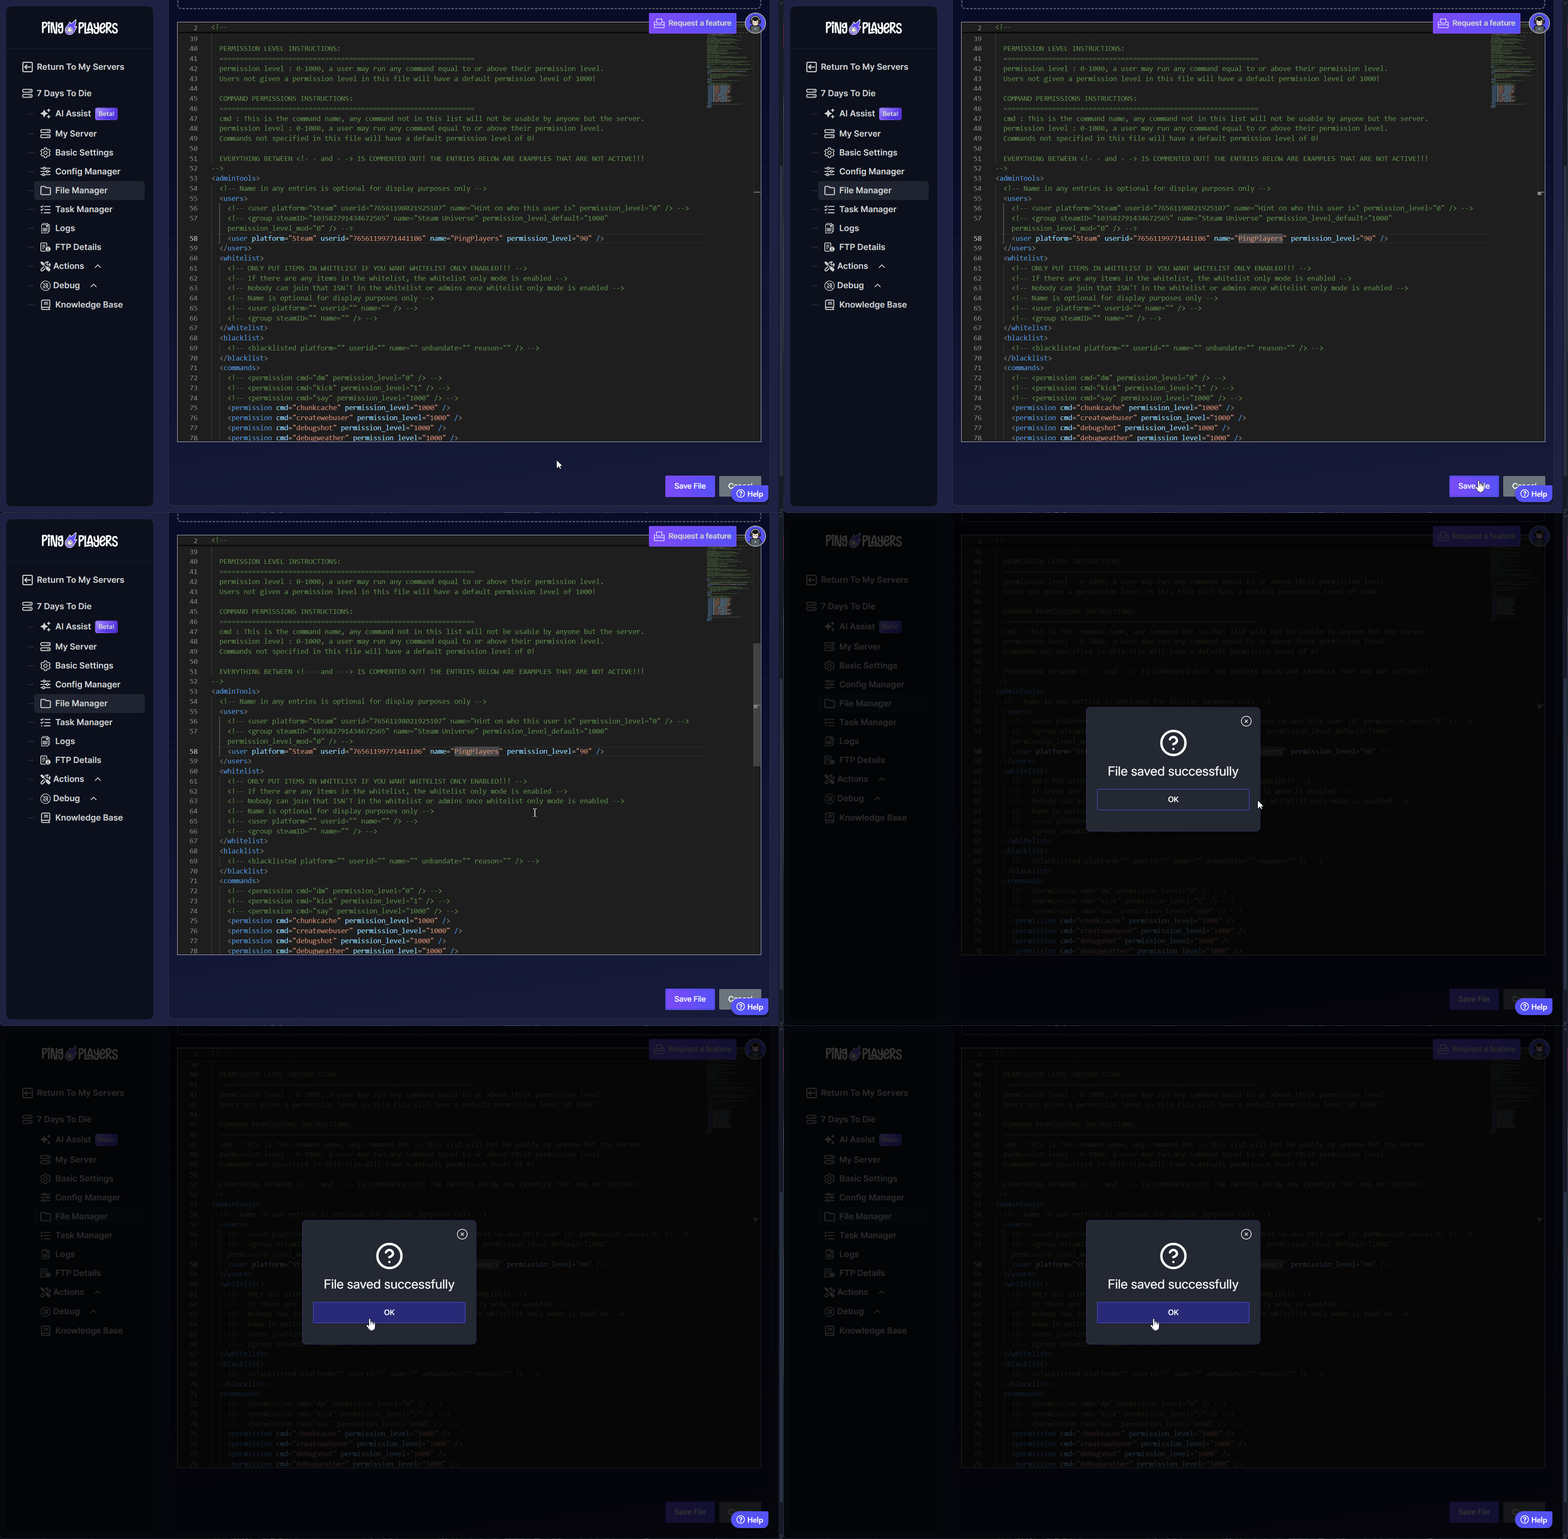
<user platform="Steam" userid="76561198021925107" name="Hint on who this user is" permission_level="90" />

- Crucially, you must edit this line:
platform="Steam": Change this toPSNfor PlayStation orEOSfor Xbox players.userid="YOUR_PLAYER_ID": Replace this with the player's actual ID you gathered in Step 1.name="PlayerName_Hint": This is just a comment for your reference. Change it to the player's name so you remember who it is.permission_level="90": Leave this as 90. This is the specific permission level for Twitch Integration.
Step 4: Save and Restart
- Scroll down and save the changes to the
serveradmin.xmlfile.
- Go to the Actions tab on the left panel, then click Restart to apply the permissions.
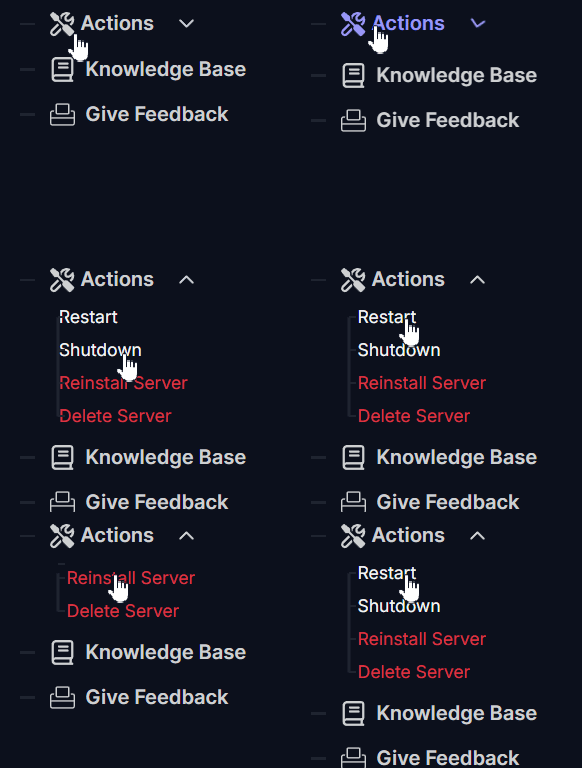
The designated player will now be able to log in and set up their Twitch Integration without having full admin powers.
Setting Up Twitch Integration: Step-by-Step
Step 1: Access the Twitch Menu
- Launch 7 Days to Die and connect to your server.
- Once you are in-game, press the Escape key to open the main menu.
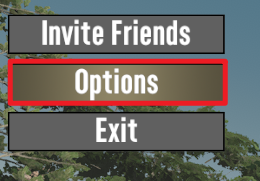
- Click on the Twitch button to open the integration panel.

Step 2: Log In to Your Twitch Account
- In the Twitch menu, click the prominent Login Twitch button.
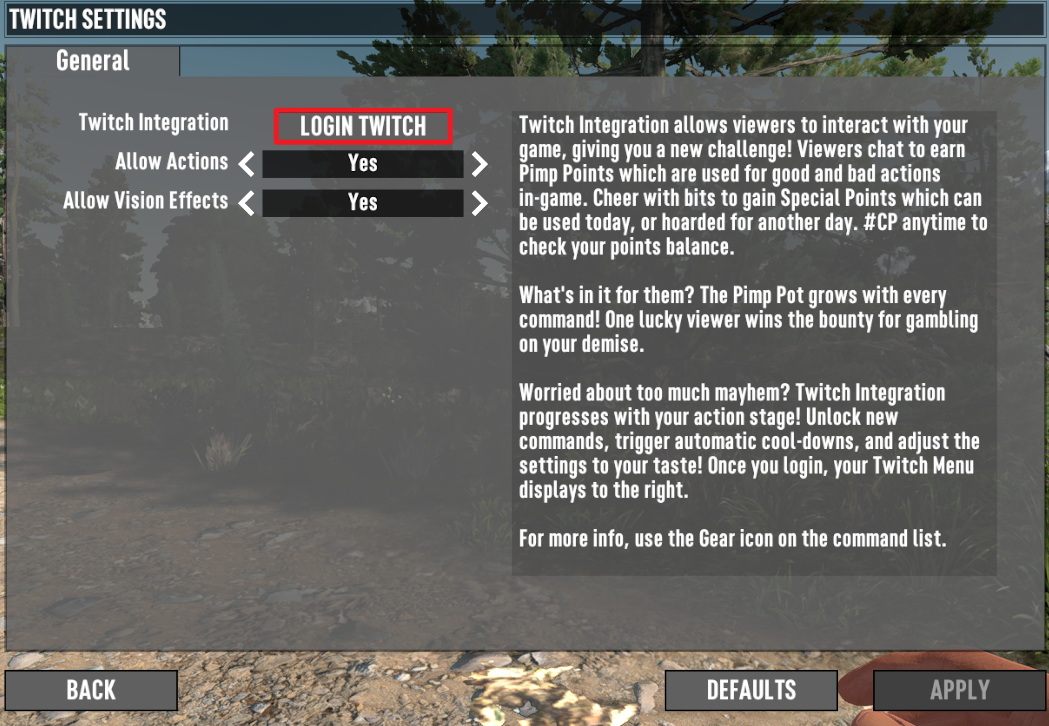
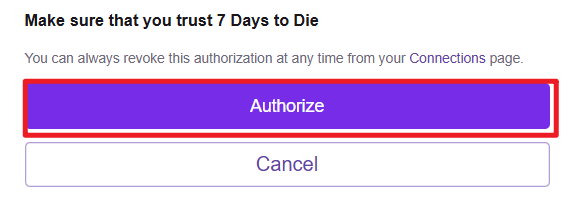
- A new browser window or an in-game overlay will pop up, prompting you to log in to Twitch.

- Enter your Twitch credentials and click Authorize to allow the game to connect to your account. This is a secure, standard process.
Step 3: Configure Your Integration Settings
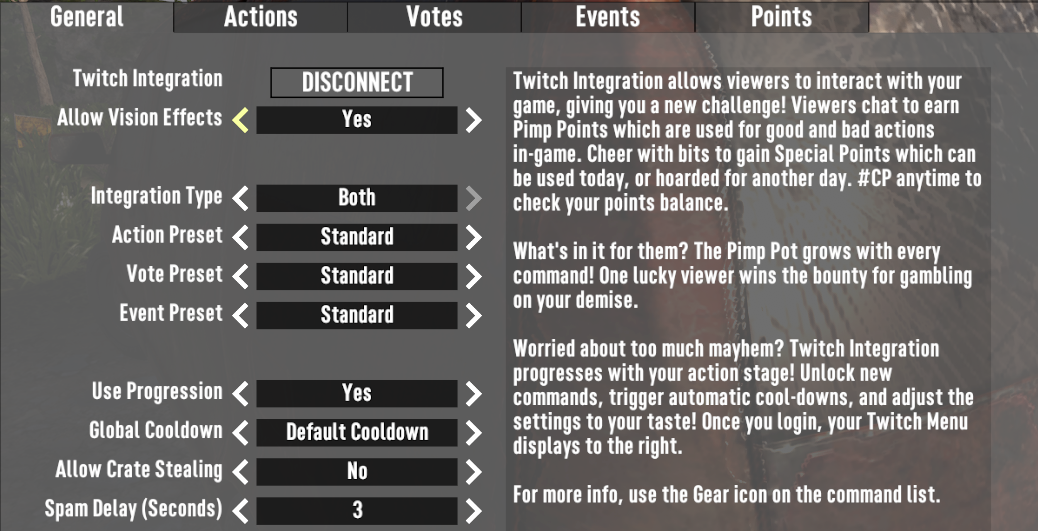
Once authorized, your game is now connected to your Twitch chat! The real fun starts here, as you can now customize exactly how your viewers can interact with your game. Go through the various tabs in the Twitch menu to tailor the experience.
You can configure dozens of options, including:
- Events & Actions: Choose which events your viewers can vote on, such as spawning specific zombies, dropping supply crates, or even changing the weather.
- Donation/Subscription Triggers: Set up special, more powerful events that are automatically triggered by Bits or new subscriptions.
- Voting & Cooldowns: Adjust how long viewers have to vote and set cooldown timers to prevent events from being spammed too frequently.
Troubleshooting Common Issues
Running into problems? Here are a couple of the most common issues and how to solve them.
- The "Twitch" Button is Greyed Out or You Can't Log In. This is almost always a permissions issue.
- Check Permissions: Confirm that the player has either full Admin rights or the specific Twitch permission (
level="90") set correctly in theserveradmin.xmlfile. - Verify Player ID: Double-check that the
useridandplatformare 100% correct. One wrong character will cause it to fail. - Check for Syntax Errors: Look closely at the
serveradmin.xmlfile for any typos or missing quotes (") in the line you added. - Restart Required: Permissions are only loaded on server startup. Make sure you have fully restarted the server after saving your changes.
- Check Permissions: Confirm that the player has either full Admin rights or the specific Twitch permission (
- Integration is Connected, but No Events Are Happening. If you're logged in but chat votes aren't working, check these settings:
- Enable Actions: Go into the in-game Twitch menu and check the Events or Actions tabs. Make sure you have actually enabled the specific events you want your viewers to trigger. Many are turned off by default.
- Check Cooldowns: Look at your cooldown settings. If you set them very high, it might just be that no events are available to be triggered yet.
- Relog and Reconnect: Sometimes, a simple disconnect can occur. Try logging out of the Twitch integration in-game and logging back in to refresh the connection.
Conclusion
And that's it! You've successfully bridged your game world with your Twitch community, creating a truly interactive and chaotic survival experience. By allowing your viewers to influence the game, you've added a new layer of unpredictable fun that will keep them on the edge of their seats (and you on your toes).
If you have any trouble with the setup or have more questions about the settings, our support team is always here to help.