Last Update 2025-08-16 02:53:36
How to Upload Your Local 7 Days to Die World to Your Server
Have you spent countless hours building the ultimate base in a single-player world and now want to bring your friends in on the action? Or maybe you're moving your progress from another server? Uploading your local world save is the perfect way to do it, and this guide will show you how.
The process is slightly different depending on whether you're uploading the pre-made Navezgane map or a Randomly Generated World (RWG). We'll cover both scenarios from start to finish.
Part 1: Finding & Preparing Your Local World Files
First, you need to locate and prepare the world files on your own computer.
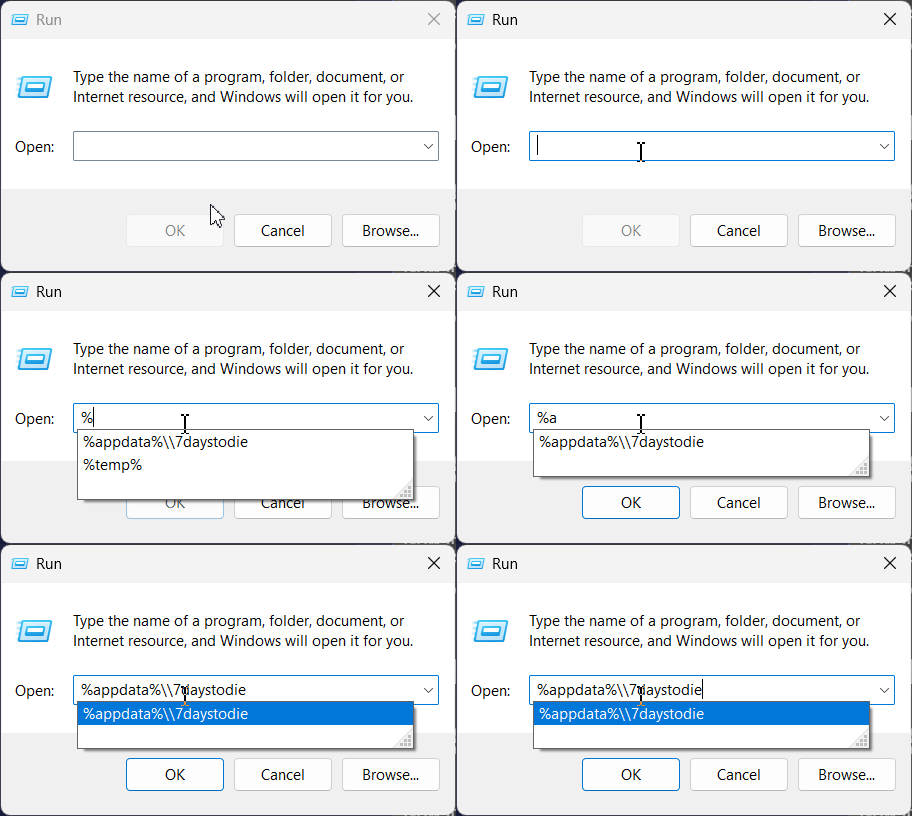
- Open Your 7D2D Folder: Press the Windows Key + R to open the Run dialog. Type
%appdata%\\7daystodieand press Enter.
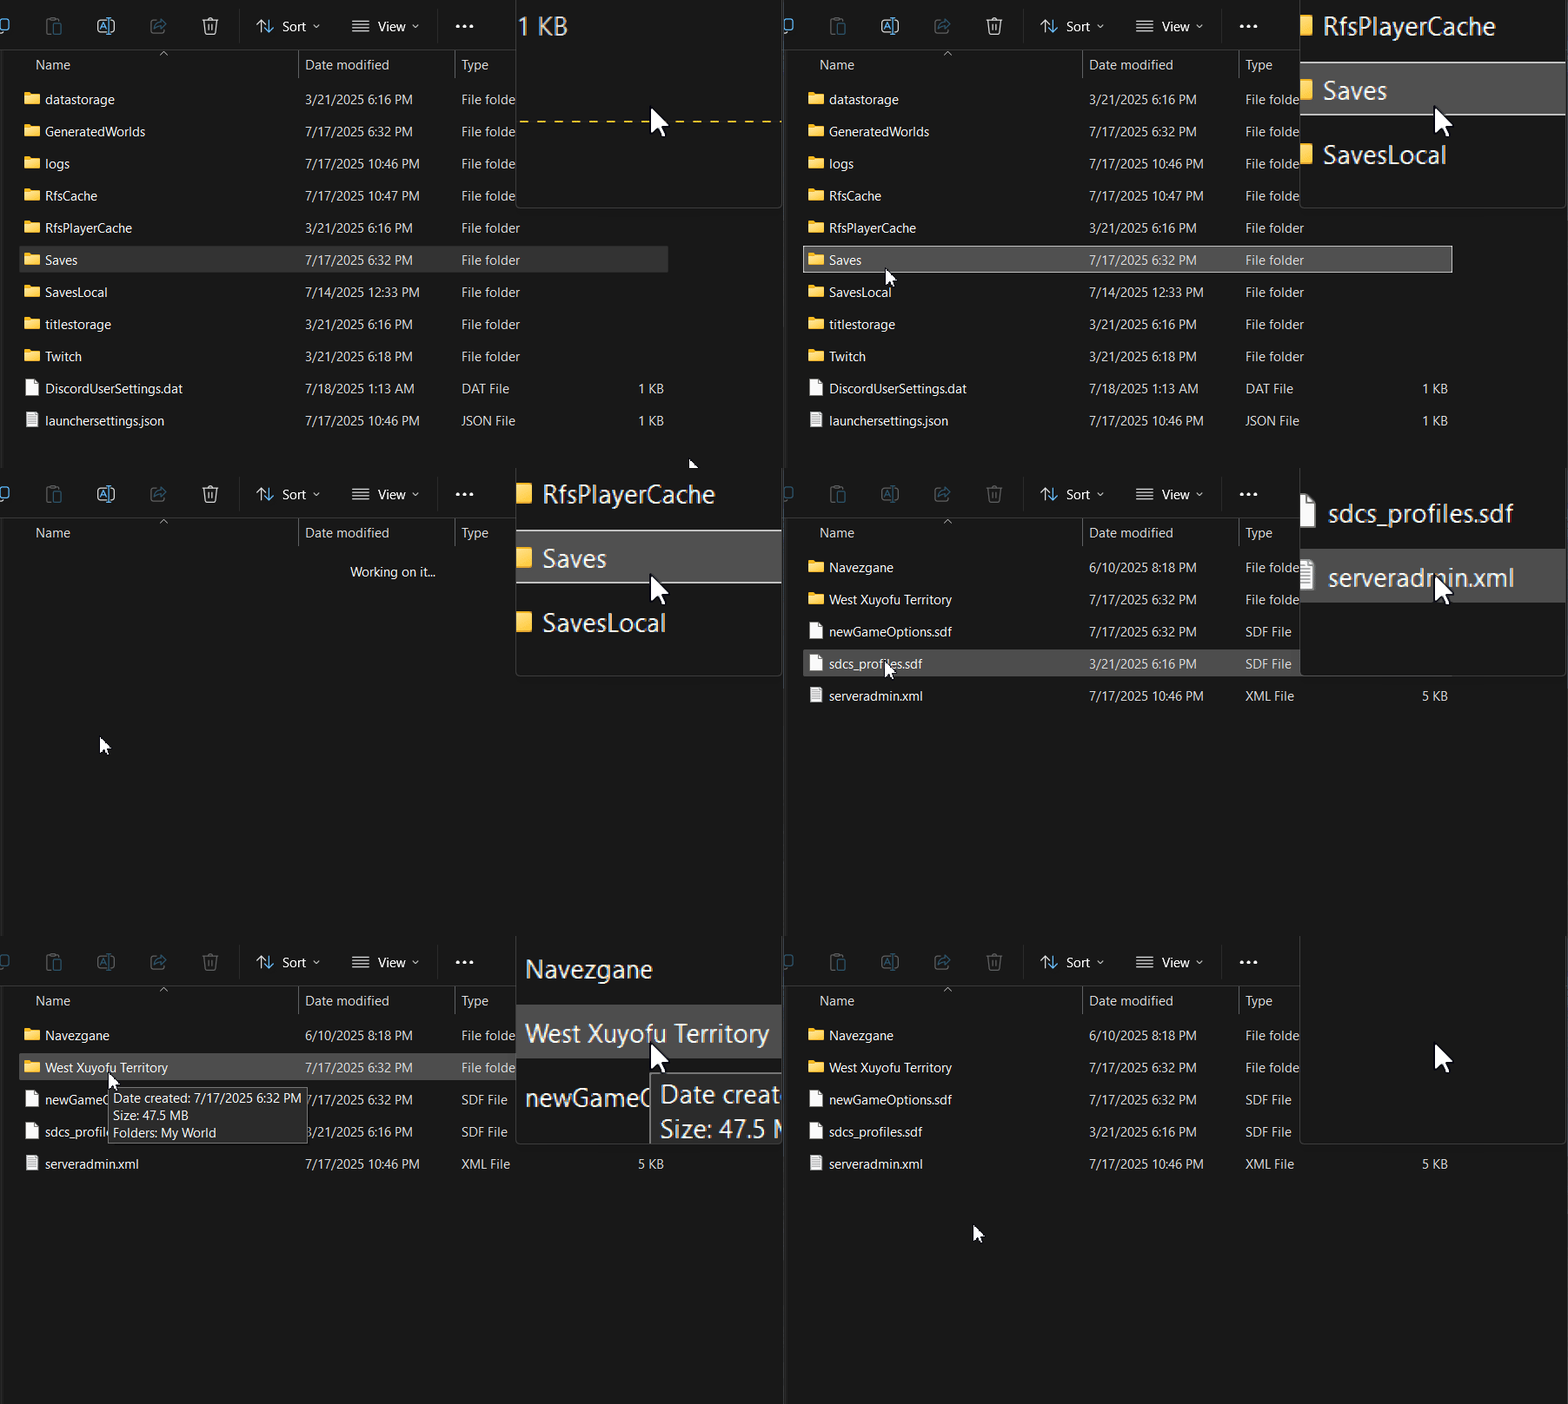
- Locate Your Save: Inside this folder, open the
Savesfolder. You will see a list of folders named after your saved worlds (e.g.,MyAwesomeRWG,Navezgane).
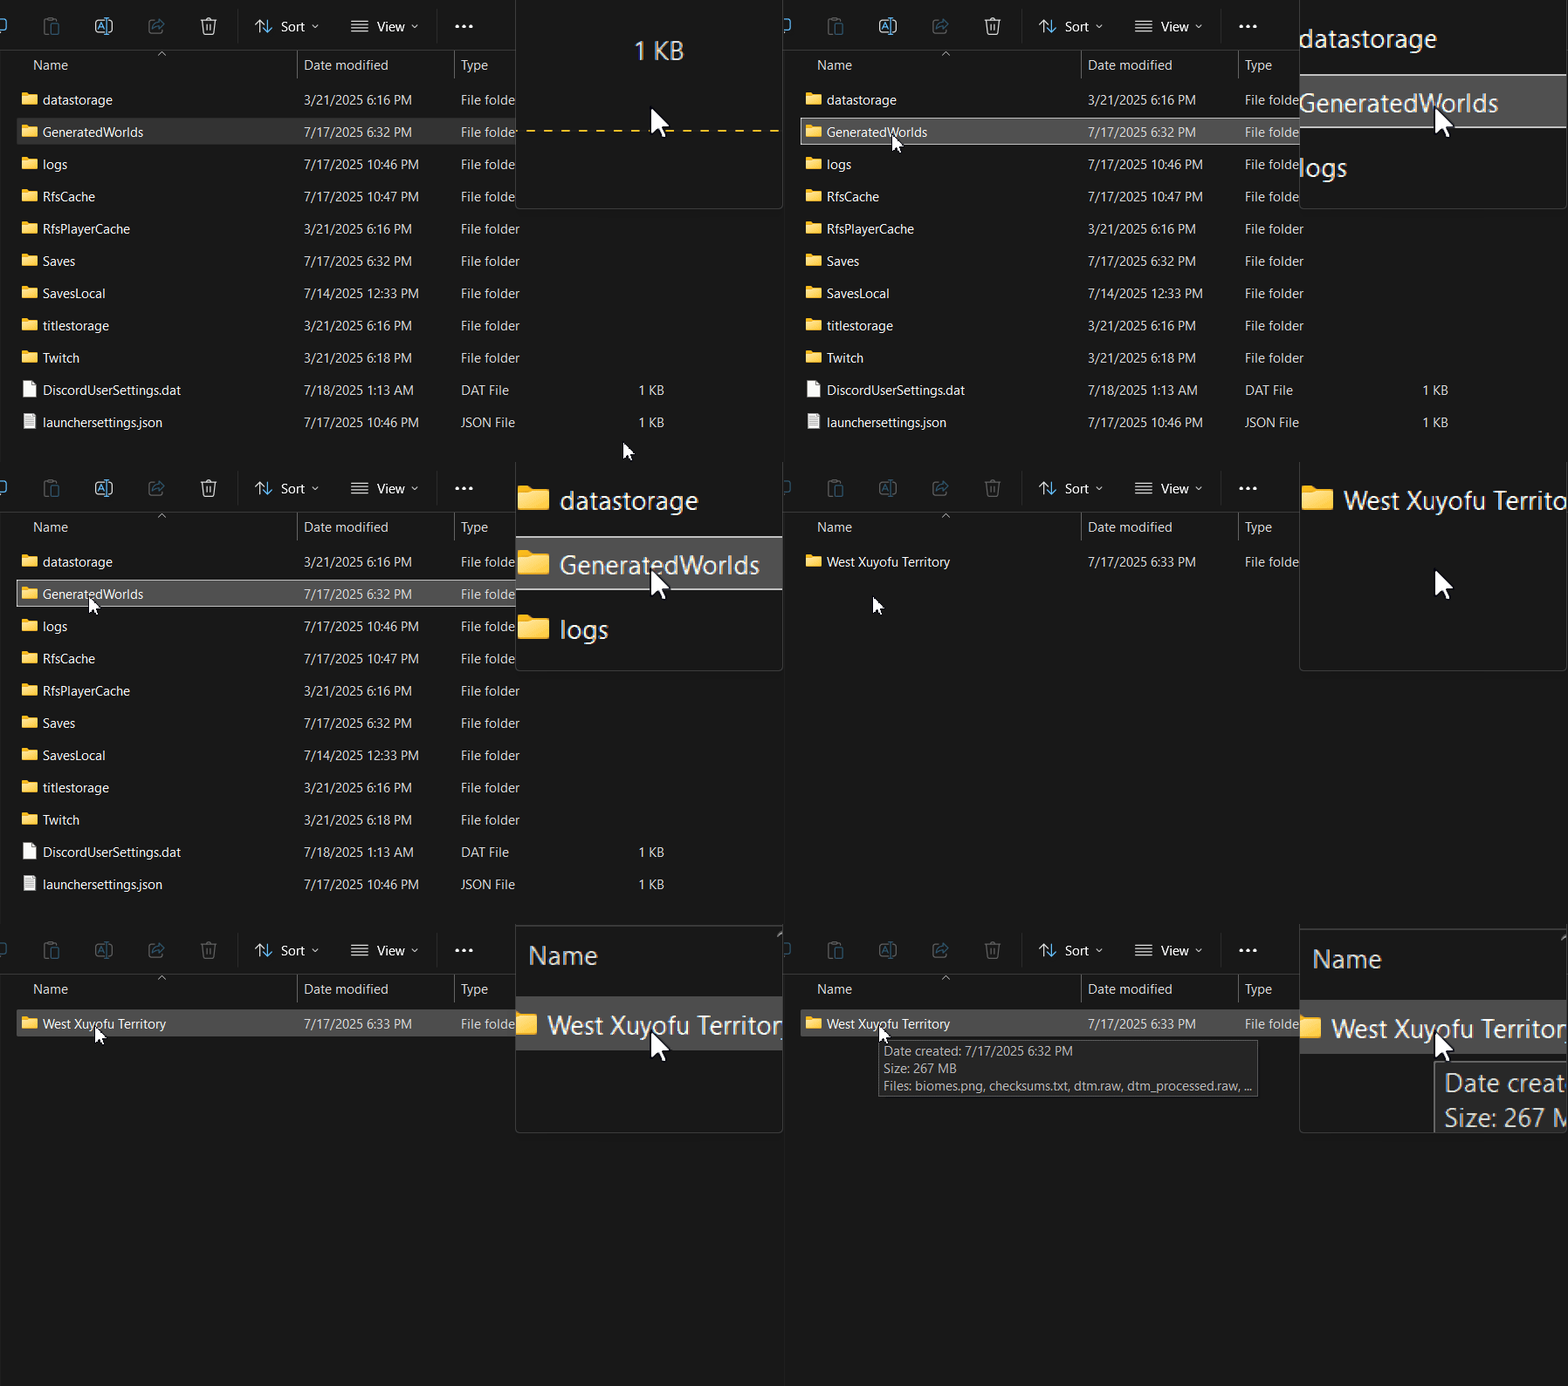
- Locate Your World Data (for RWG Worlds Only): If you are uploading a Randomly Generated World, you also need the world data itself. Go back to the main
7daystodiefolder and find theGeneratedWorldsfolder. Your world's data folder will be inside.
Part 2: Uploading the World to Your Server
Now it's time to transfer your prepared files to the server.
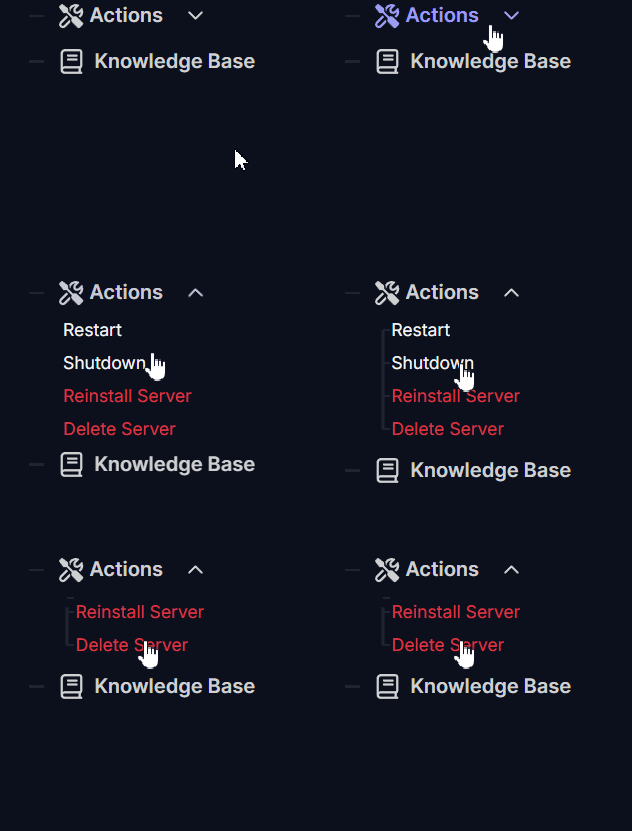
- Stop Your Server: This is the most important first step. Log in to your PingPlayers control panel, go to the Actions tab on the left panel, and click Shutdown.
You can upload the file via FTP or File Manager. We'll show the process through File Manager in this guide.
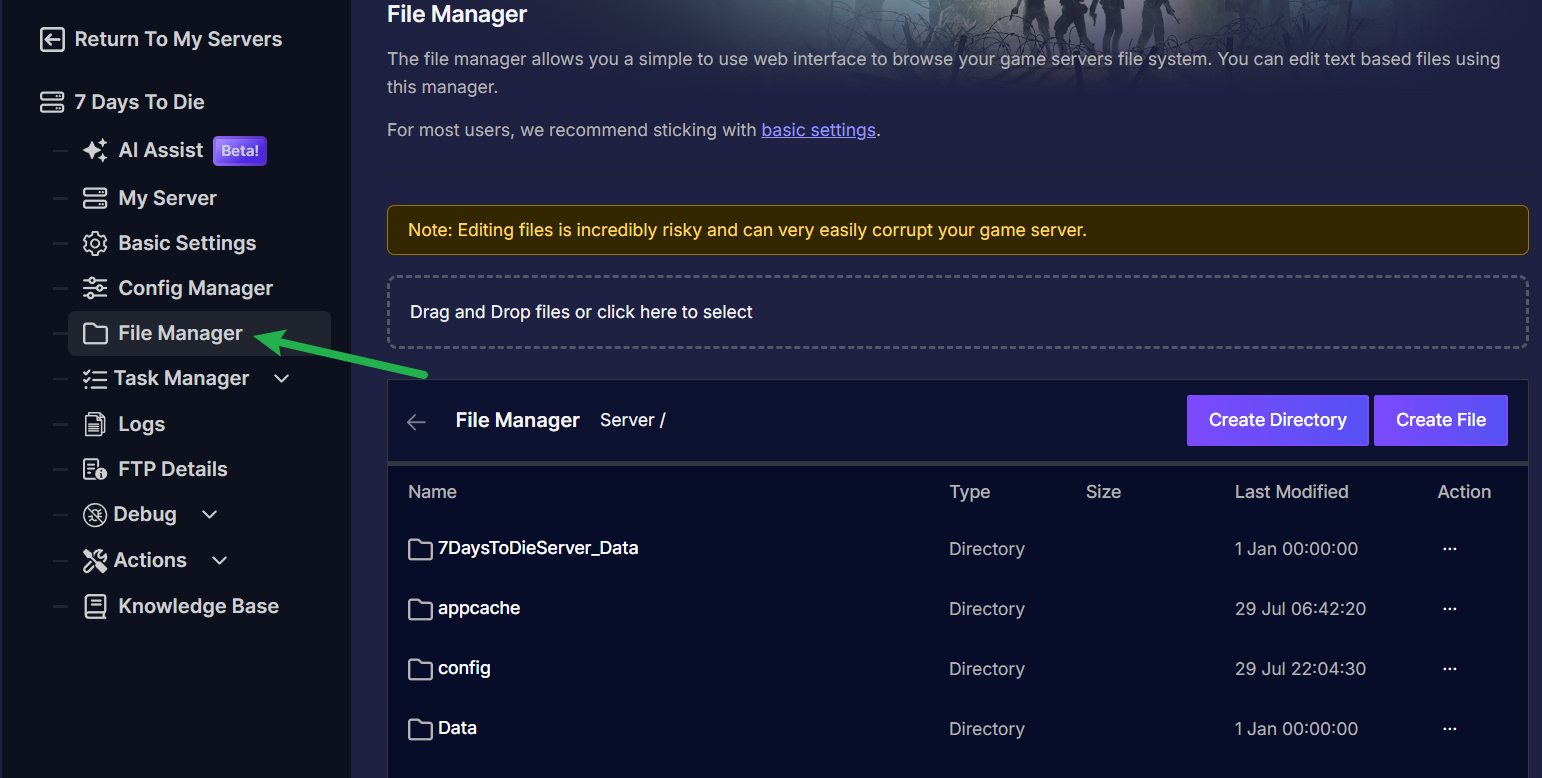
- Open the File Manager: Navigate to the File Manager tab in your control panel.
- Upload Your Save Folder: Go to the directory:
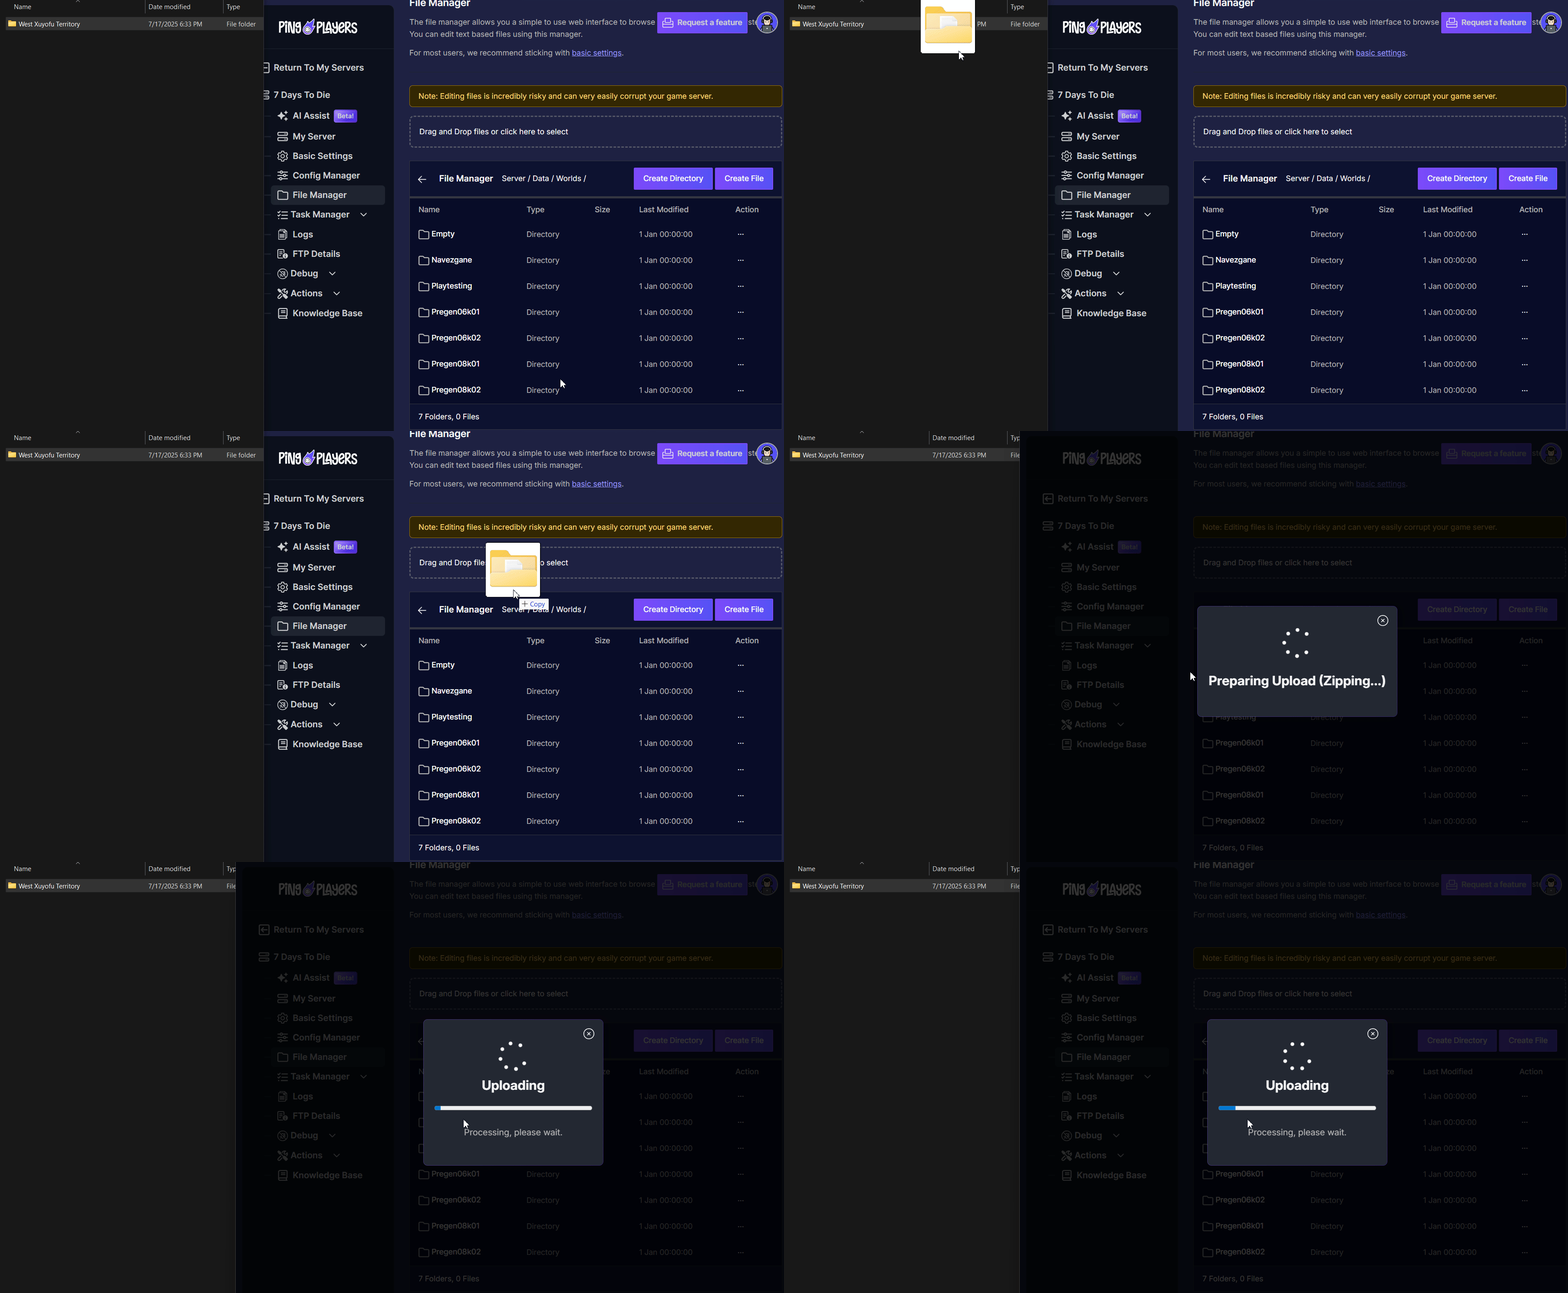
Server/Saves. Upload your save folder there (this is the same as the guide we have for how to restore data, which is on this link.), and if you have an RWG world, navigate to the directory:/Data/Worlds. Upload your world data folder there as well.
Part 3: Configuring the Server to Load Your World
The final step is to tell the server to use your newly uploaded world.
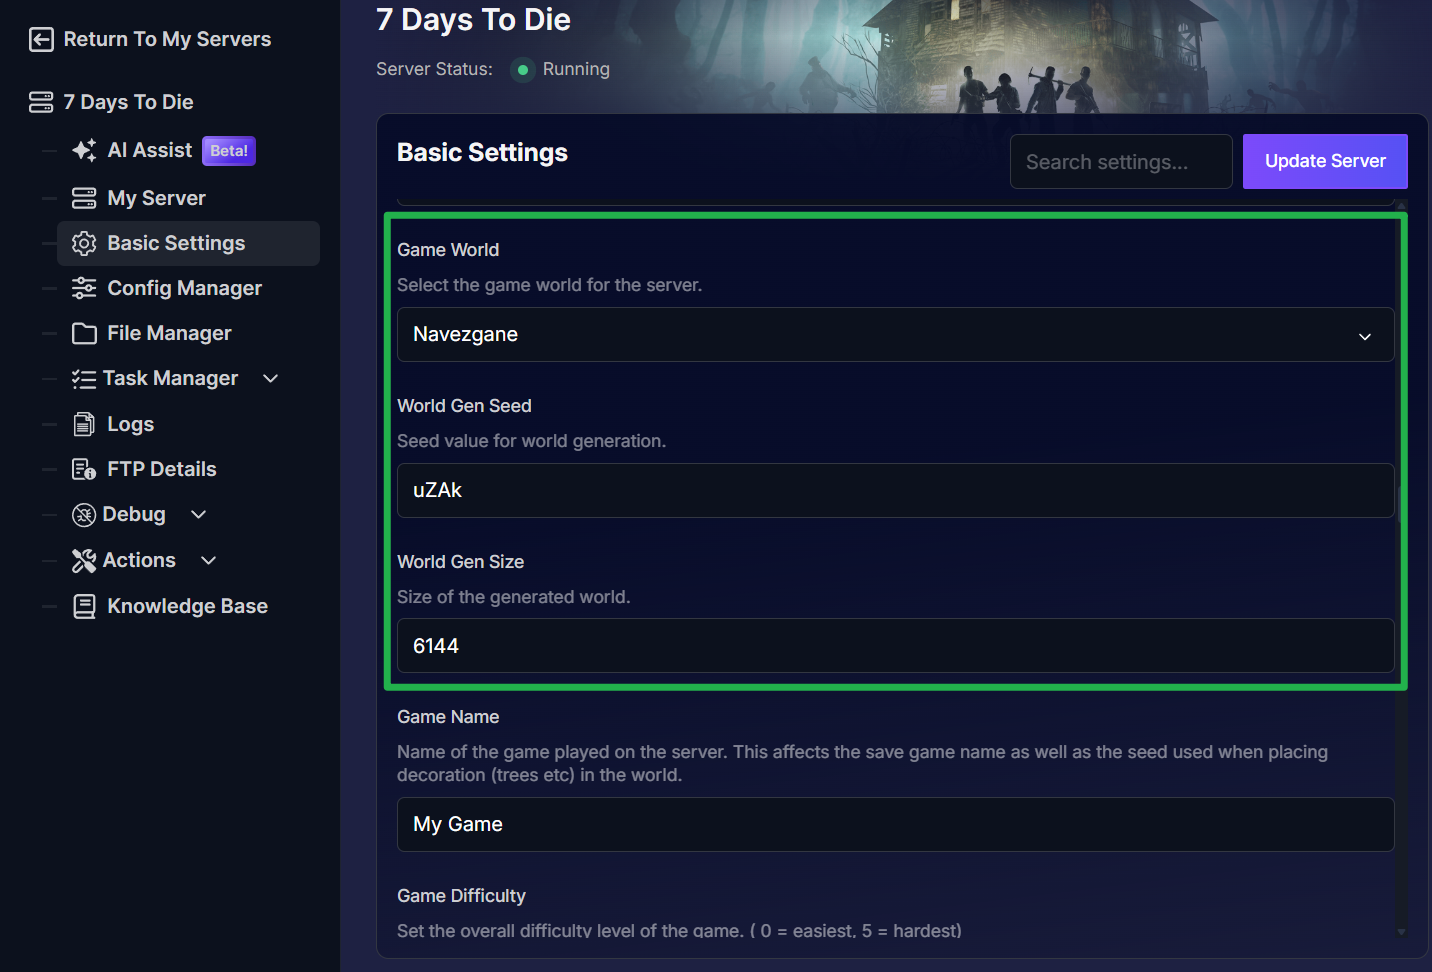
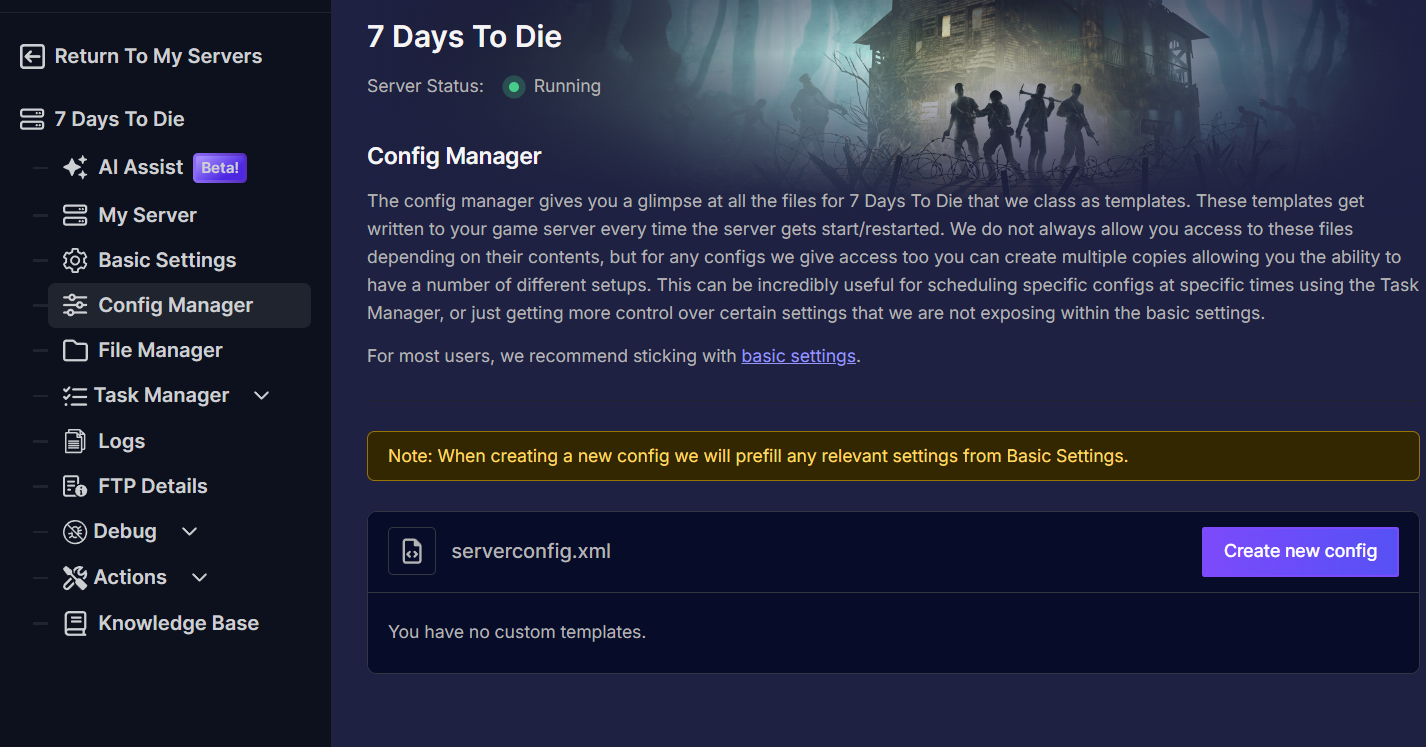
- In the control panel, you can either navigate to the Basic Settings to find the needed option to edit or Config Manager and click on Create new config.
serverconfig.xml.
- Locate and edit the following three settings using Config Manager:
- GameWorld: Set this to the name of your World Folder. For a randomly generated world, this might be
MyAwesomeRWG. For the pre-made map, it must beNavezgane. - WorldGenSize: Set this to the map size you used when creating the world (e.g.,
6144,8192). - GameName: Set this to the name of your Save Folder. This name identifies your specific save game with all your player progress and buildings.
- GameWorld: Set this to the name of your World Folder. For a randomly generated world, this might be
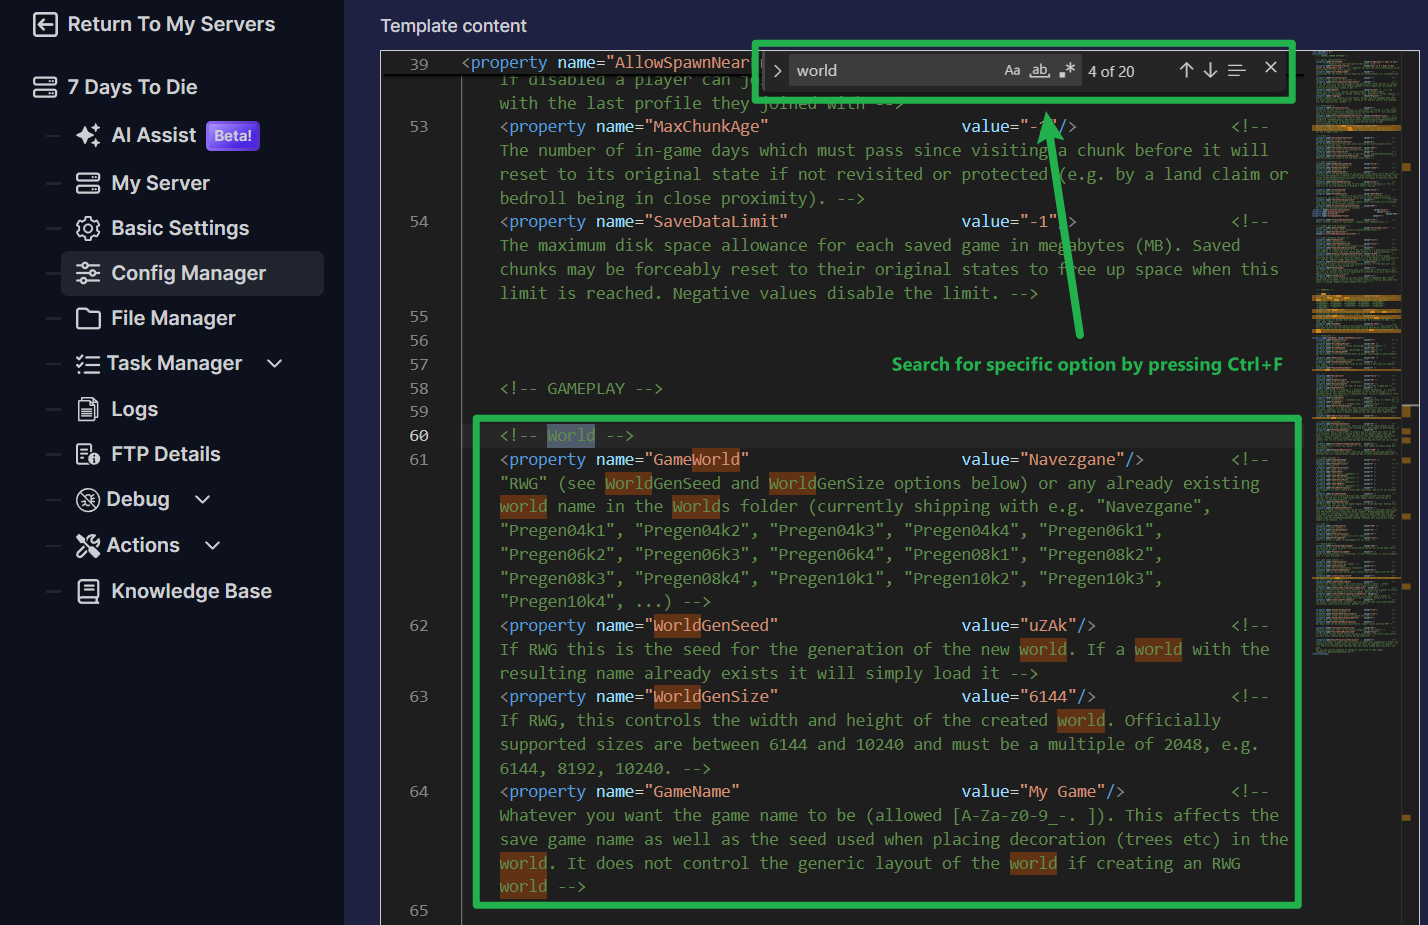
- Once you're done editing, scroll down and put a check on Override Boot Config - Use as default and then click on Save Config Template.

Part 4: Restart Your Server
With all the files uploaded and configured, the last step is to restart the server to bring your world online.
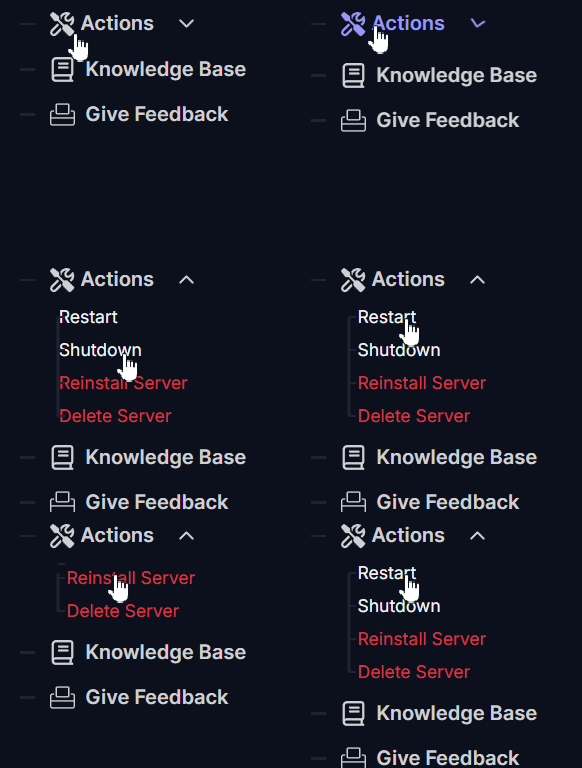
- Navigate to the Actions tab on the left panel, then click Restart.
Congratulations!
You've successfully transferred your personal apocalyptic wasteland to your server. Your progress is saved, your base is intact, and your world is now open for your friends to join and help you survive the next horde night. This is the best way to preserve your hard work and share it with your community.
If you followed all the steps and your world still isn't loading correctly, don't hesitate to reach out to our support team. We're always here to help.