Last Update 2025-05-27 09:35:16
How to Change the Seed to your Server
Changing the seed on your Valheim server is an easy way to create a unique gaming experience. Whether you're seeking a fresh start with closer bosses, more scenic landscapes, or just want to explore the unknown with your friends, a new seed can make your adventures feel brand new again. In this guide you'll learn how to use your custom map seed for the server.
Copying Your Local Map File
The only method to set a custom seed in your Valheim server is to copy your map file from your local game's files into the server. This process is similar to our guide on how to make a backup for your server progression.
To achieve this we'll connect to the server using FTP (File Transfer Protocol) with Filezilla. For detailed instructions on connecting to your server using FTP, check our FTP connection guide.
Before you begin modifying server files through FTP, ensure that you shut down your server. This is important as making changes while the server is running can corrupt your server data and break it.
Steps to Copy Your Local Map File:
Since we will use a custom map/seed, we need to load it in a private session first.
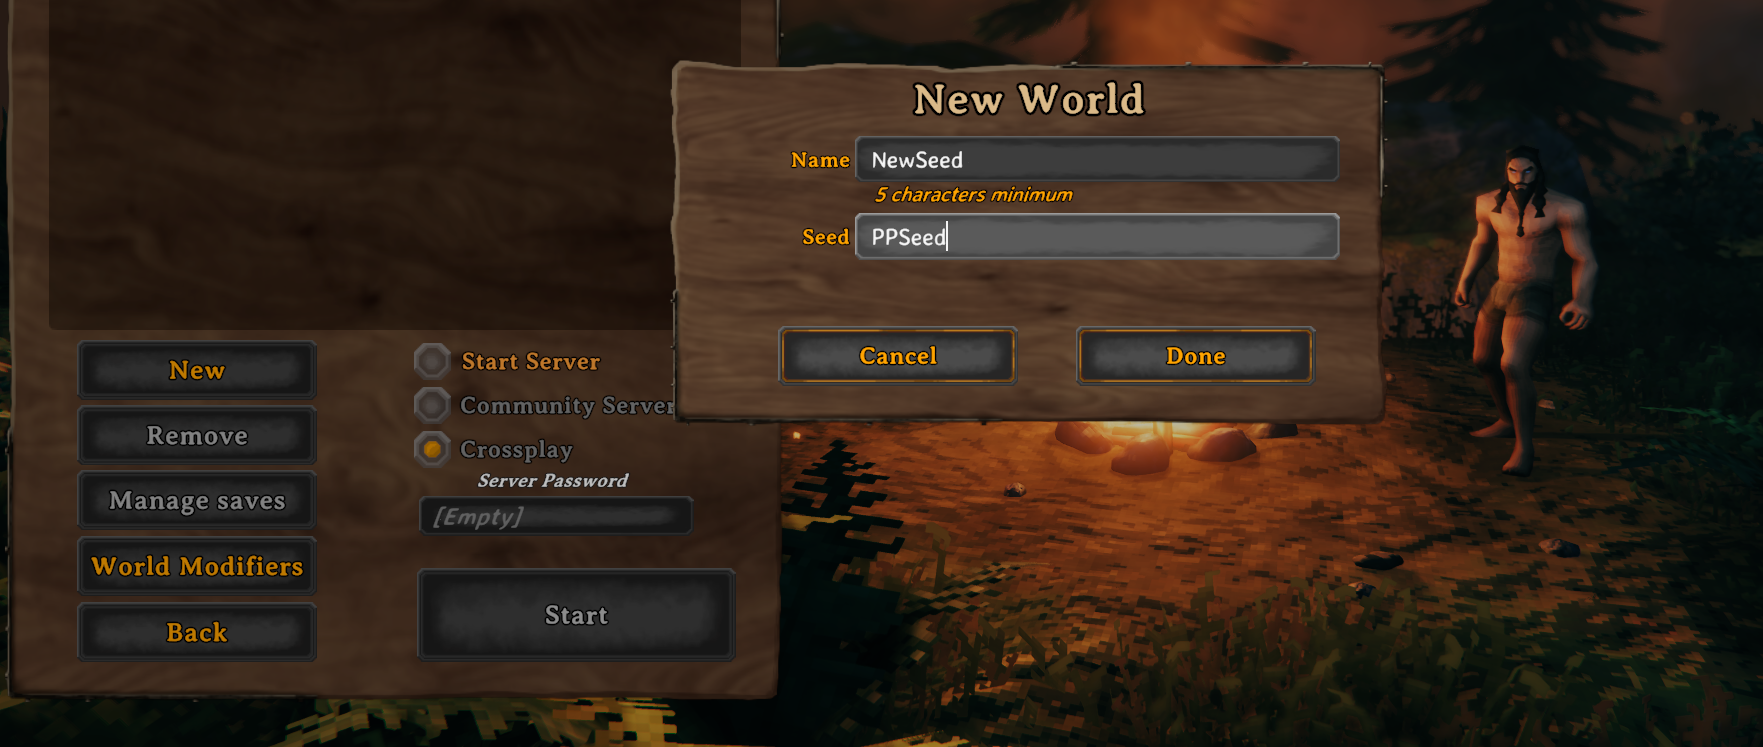
- Create a private server with the new seed on your local game. Click on “New Game” in-game and set the world name along with the seed ID.

Once created, locate the saved progression in your local files in the following path:
C:\Users\USER\AppData\LocalLow\IronGate\Valheim\worlds_local
(make sure to play in it for around a minute or two for the game to generate the files properly)
Important:
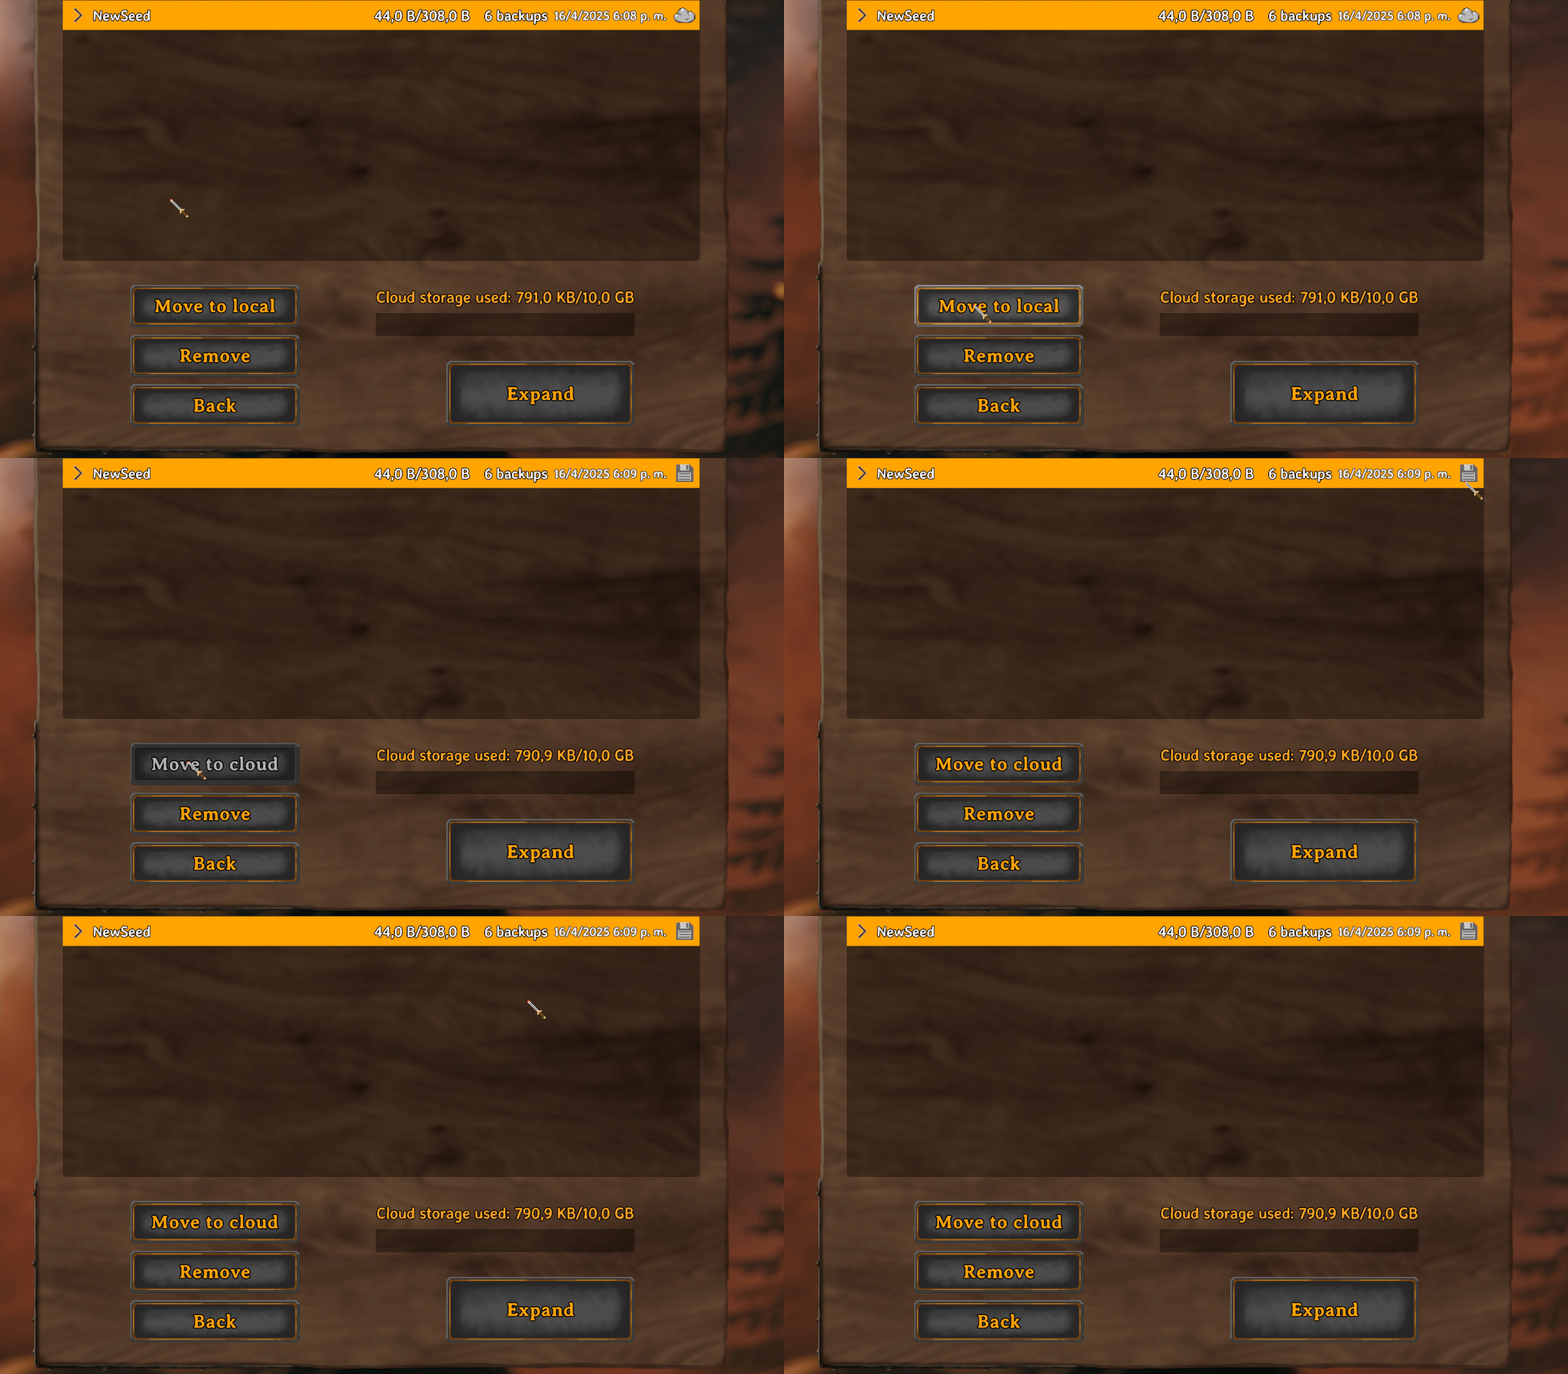
In case you don't find the local files for the world, make sure you have the saved progression set on your local files instead of the cloud.
To do so, go to the server list and click on “Manage saves” > “Move to local”. Once you see the cloud icon change to a save icon, the files will be created in your Valheim folder.

- You will see 2 different files inside the worlds_local folder, one ending with “.db” and the other with ".fwl".
Based on what you would like to upload into the server, is the file that you'll transfer over.
"WorldName.db": stores the in-game progression, such as chests, buildings, items, etc.
“WorldName.fwl”: stores the world/terrain data, such as seed, name, configuration, etc.
For this guide we'll only use the .fwl one as it only contains the seed ID, since we don't have any progression in the world yet.
Connect to the server files using FileZilla and paste the “WorldName.fwl” file into:
/save_dir/worlds_local.
If the server is new (no played progression), this folder should be empty so you'll simply load this new file to start with the custom seed.

If you were using the server already, make sure that the file name has the exact same name as the .db file; otherwise, it may fail to load properly.
You can either rename the uploaded file to match the .db one or vice versa.
(Right-click on the file to rename it)
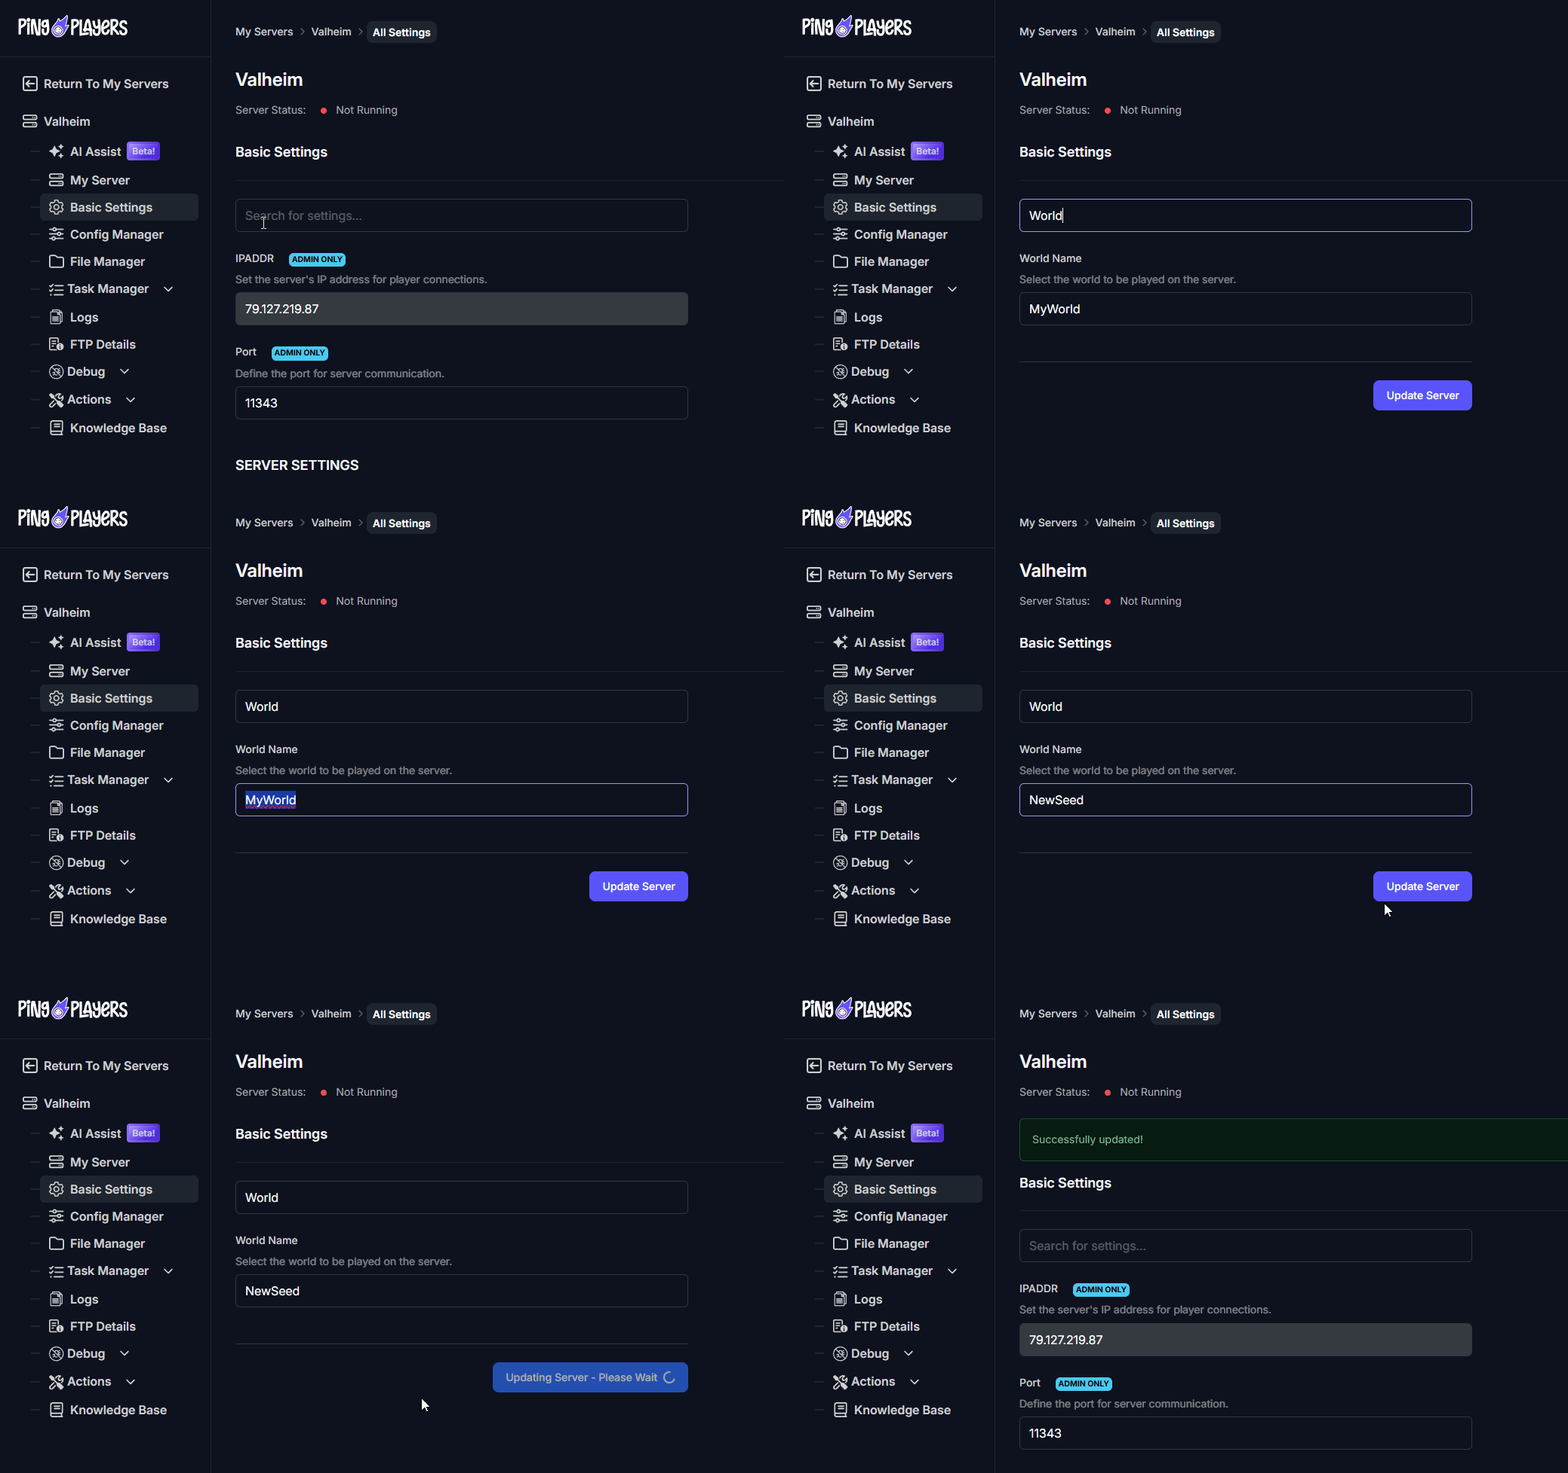
- After uploading the file, we need to set the correct name under the Basic Settings.
Go to your server configuration in our website and located the “World Name” parameter. Simply replace the default name there to the exact same name as the uploaded file and update the new changes.

- The only thing left is to turn the server back online. Locate the “Actions” option on the side panel in the server configuration and click on “Restart”.
That's it, you'll now play in your custom seed to explore new adventures!
Troubleshooting
If you encounter issues, check the following:
- Ensure that you typed the seed ID correctly, as any typo could lead to the server not generating the world you desire.
- Verify that the file is correctly named and matches the corresponding .db file if required.
- Check if the world's name is set correctly under the Basic Settings.
- If you've check all steps above and the issue persists, it could be related to the uploaded file being corrupted. You can simply re-upload the exact same file to replace the previous one.
For further assistance, if you have any questions or need help, feel free to reach out to our customer care agents through our live chat or email at [email protected]. Happy gaming!