Last Update 2025-04-05 05:44:50
Creating and Logging into the Web Dashboard
Okay, so you're running a 7 Days to Die server. If you've been using Telnet, you know it can be a bit… involved. All those commands? Yeah, not always fun. That's where the Web Dashboard comes in. It's like a control panel for your server, but way easier. Then, forget typing kickplayer [name] – just click a button. You can manage players, change settings, start and stop your server, everything, right from your browser. This guide shows you how to get your account set up and log in. Trust us, it's a game-changer for server management.
Just a quick heads-up: before you dive in, make sure you're logged in as an admin on your server. You can follow this guide here: https://pingplayers.com/knowledgebase/7-days-to-die/how-to-make-a-user-admin-in-7-days-to-die
Step-by-Step Guide to Create and Connect to the Web Dashboard
Enable the Web Console
a. Go to your server's Basic Settings.
b. Look for the option to enable Web Console and toggle it on.
c. After enabling, make sure to click on Update Settings.
d. Restart your server for the settings to take effect.

Note: If you have Telnet enabled, please disable it as it may conflict with the web dashboard and it will not work.
Log into Your Game
a. Once your server is set up and running, log into the game.
b. When you’re in the server, press the F1 key. This will lead you to the in-game console.
c. Typecreatewebuserand press Enter.
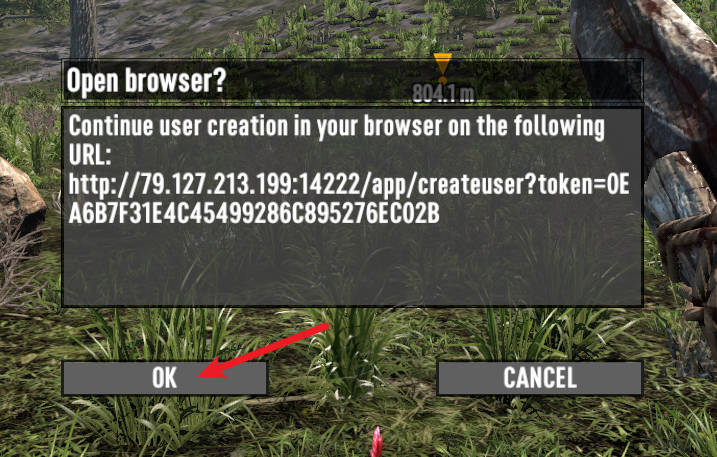
d. You should now see a pop-up with a link. Click Ok, and this will redirect you to your default web browser.


Register an Admin Account
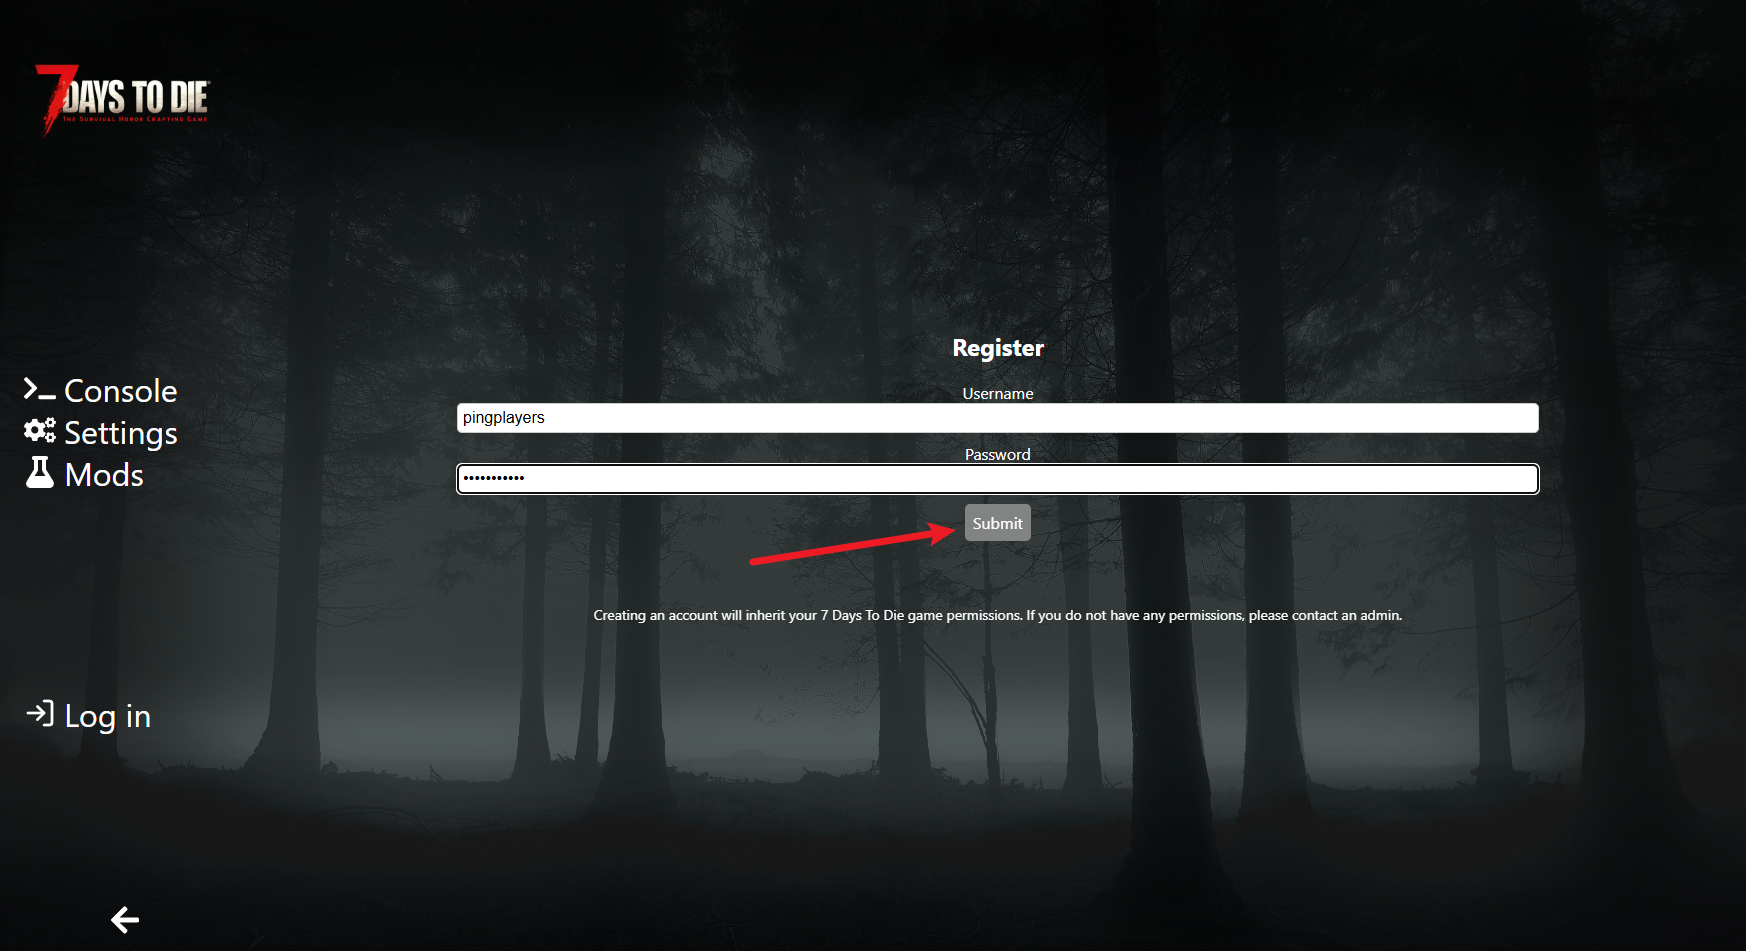
a. On the Web Console page, you will need to register an admin account.
b. For the username, it’s recommended to input your in-game name for easy recognition.
c. Once done, click on Submit.
Note: After registering your account, be sure to bookmark the Web Console link in your browser. This will make accessing the dashboard much easier in the future. The link should appear in the format:
http://(Server's IP:Port)/appas you see on the screenshot above.

Log Into the Web Console
a. After registering your account, try logging in using the credentials you just created.
b. If successful, you should see the web console menu ready for your use!
Helpful Tips
- Always keep your login details secure and private.
- If you encounter any issues, double-check that you've followed each step correctly.
Regularly check for updates to your server configuration and adjustments within the dashboard.
If you encounter any issues or have further questions, feel free to contact our support team for assistance! Happy gaming!