Last Update 2025-11-21 15:13:49
How to Add Mods to Your Necesse Server
Ready to expand your settlement beyond the basics? Mods can add everything from new items, biomes, and bosses to helpful quality-of-life improvements. Adding mods to your Necesse server is a straightforward process, but it has one golden rule that you must follow.
The Golden Rule of Necesse Modding: For the server to work, the server AND every single player who joins must have the exact same mods installed.
This guide will walk you through the entire process, from finding the mod files on your PC to uploading them to your server.
Before You Begin: The Essentials
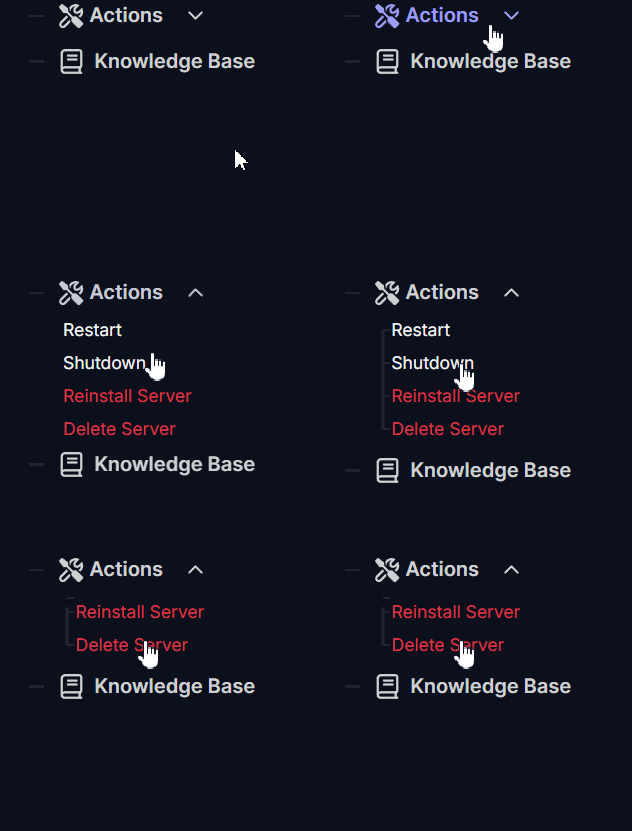
- Stop Your Server: This is the most important step. Before you upload or change any files, go to Actions > Shutdown in your control panel to prevent corrupting your world.
- File Access: You will need to access your server's files. You can use the File Manager in your control panel or connect via an FTP client (you can find our FTP guide here.)
Part 1: Finding Your Mod Files (On Your PC)
First, you need to gather the mod files from your own computer. You don't "download" them from a website; you subscribe on Steam, and then find the files Steam downloaded.
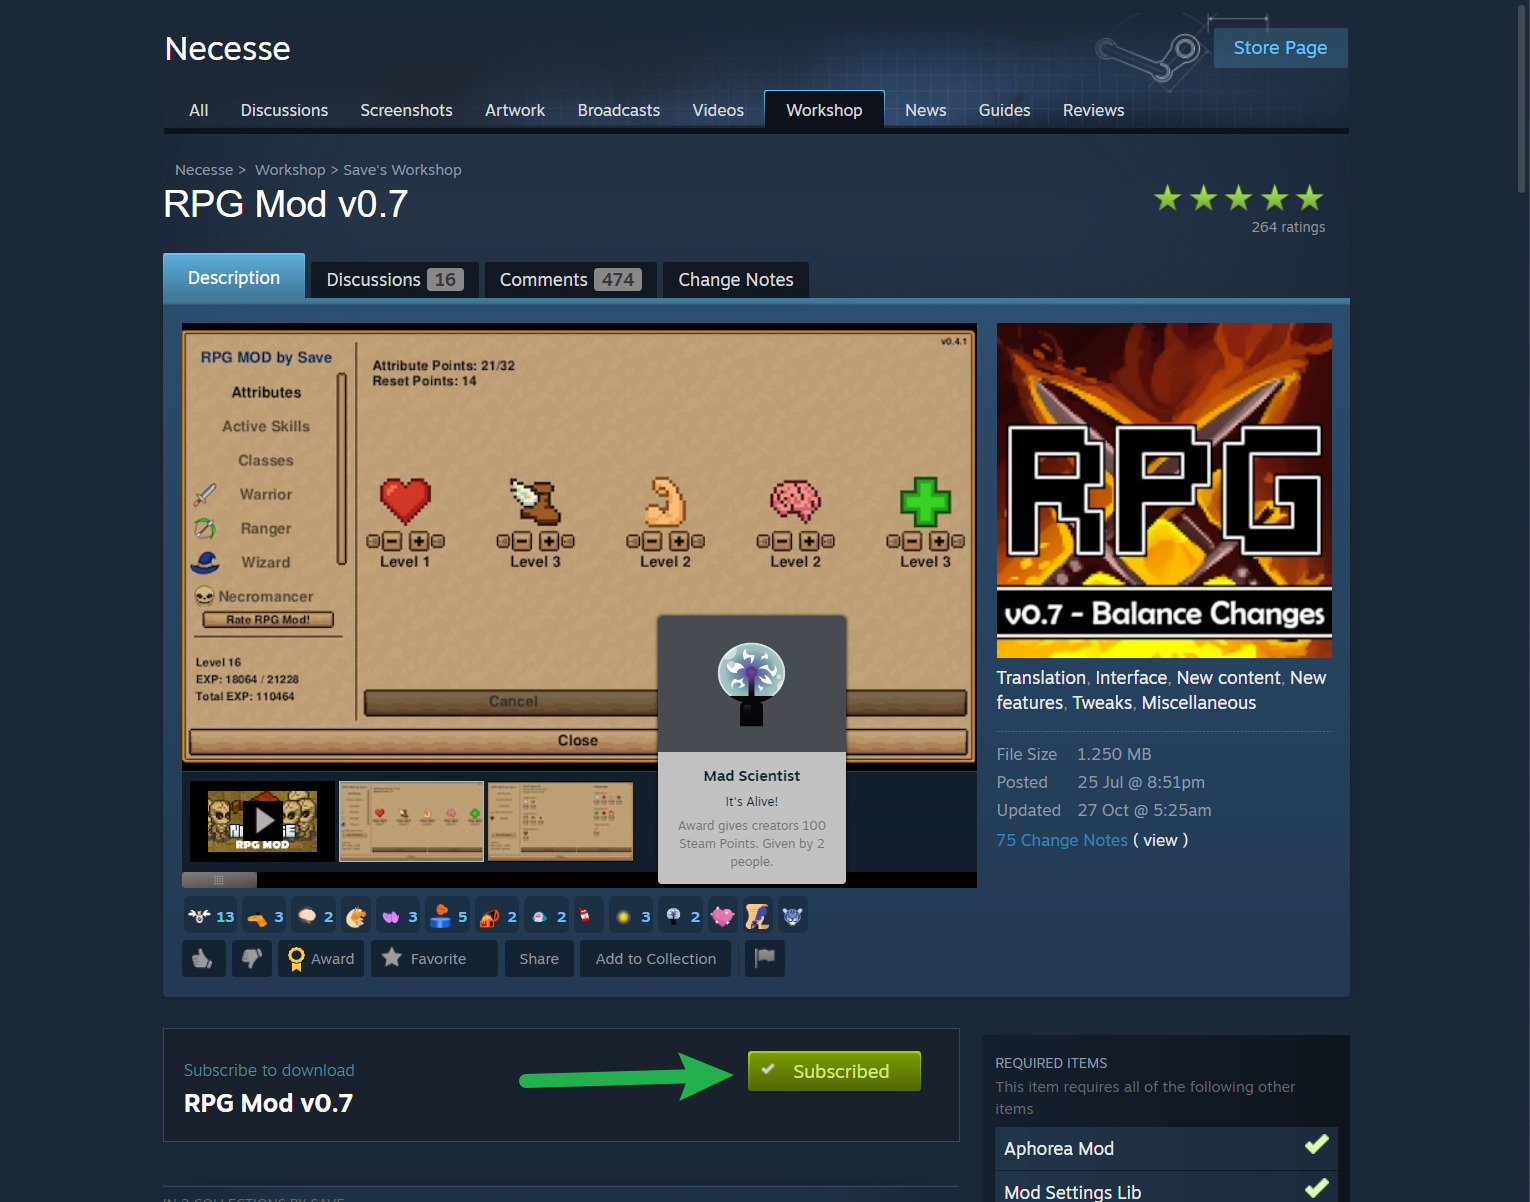
- Subscribe on Steam: Go to the Necesse Steam Workshop and Subscribe to all the mods you want to add to your server.
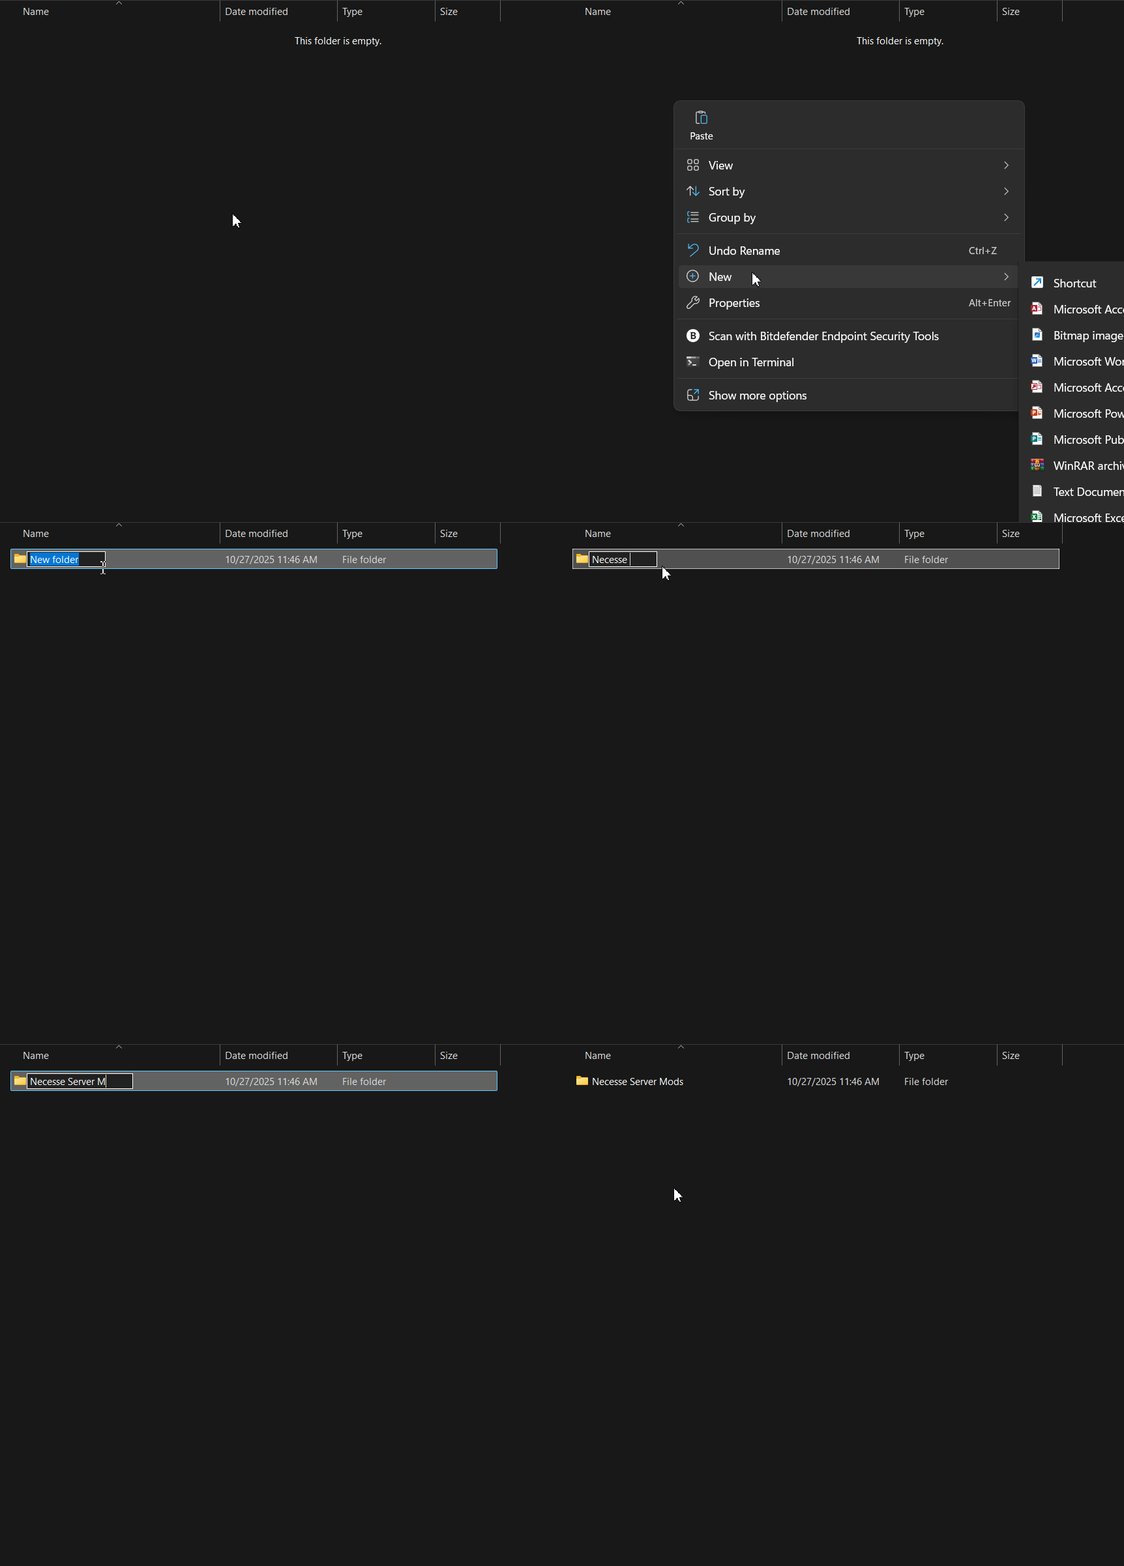
- Create a Prep Folder: On your Desktop, create a new, empty folder and call it something easy to find, like
Necesse Server Mods.
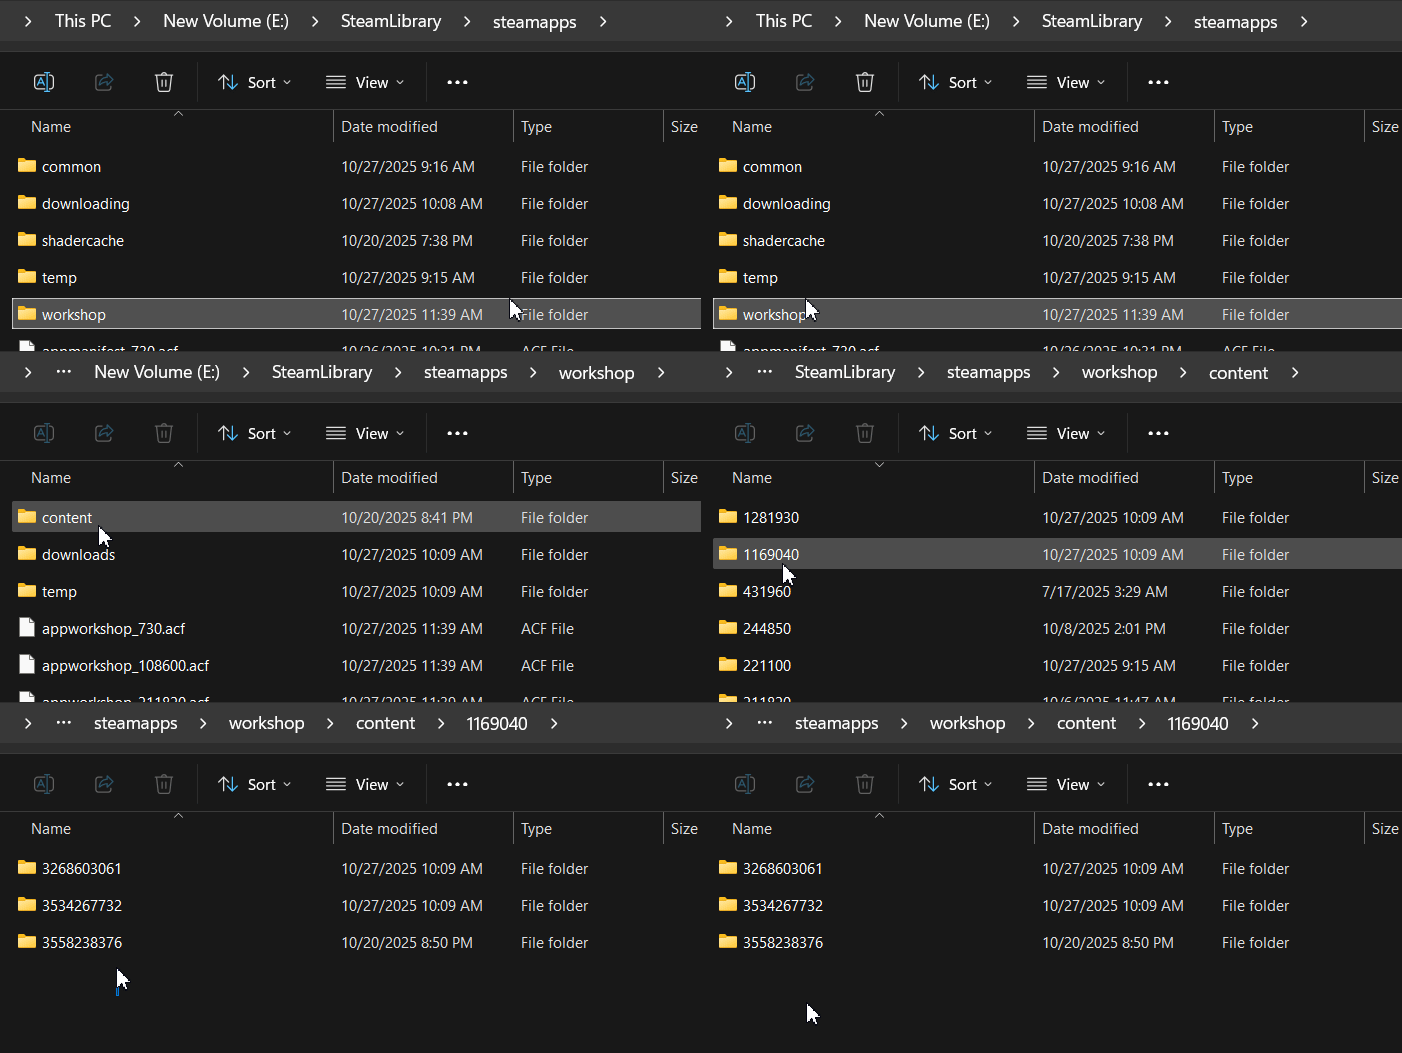
- Locate Your Workshop Folder: On your computer, navigate to your Steam Workshop directory for Necesse. The default location is:
C:\Program Files (x86)\Steam\steamapps\workshop\content\1169040\
- Gather the
.jarFiles:- Inside the
1169040folder, you will see more folders, each named with a long number (this is the mod's Workshop ID). - Open one of these numbered folders. Inside, you will find the mod file, which is a
.jarfile (e.g.,MyAwesomeMod.jar). - Copy this
.jarfile and paste it into yourNecesse Server Modsfolder on your Desktop.
- Inside the
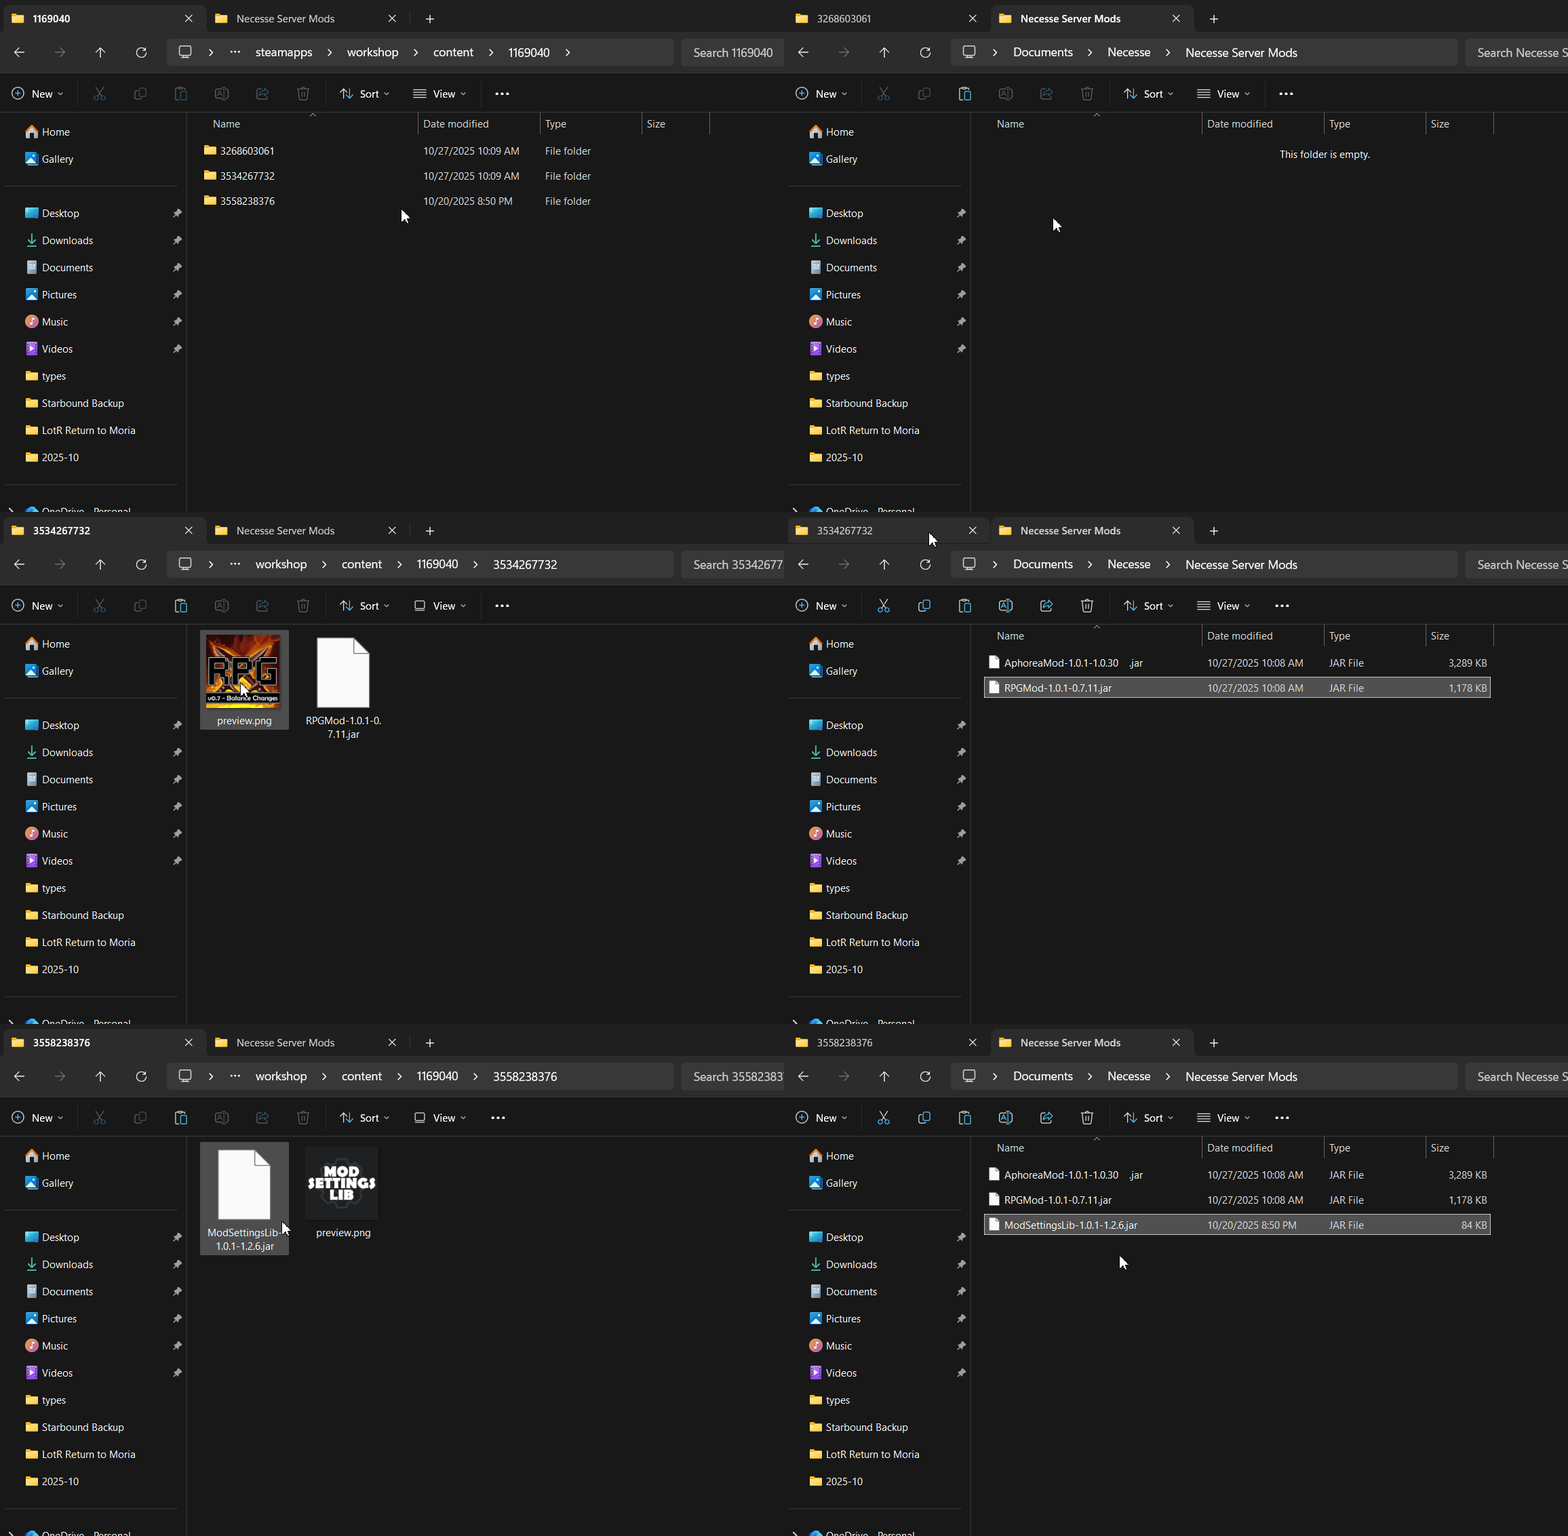
- Repeat for All Mods: Go through each numbered mod folder and copy its
.jarfile into yourNecesse Server Modsfolder. When you're done, you'll have all your server's mods in one organized place.
Part 2: Uploading Mods to the Server
Now that you have your organized .jar files, it's time to upload them.
- Ensure Your Server is stopped by going to Actions > Shutdown.
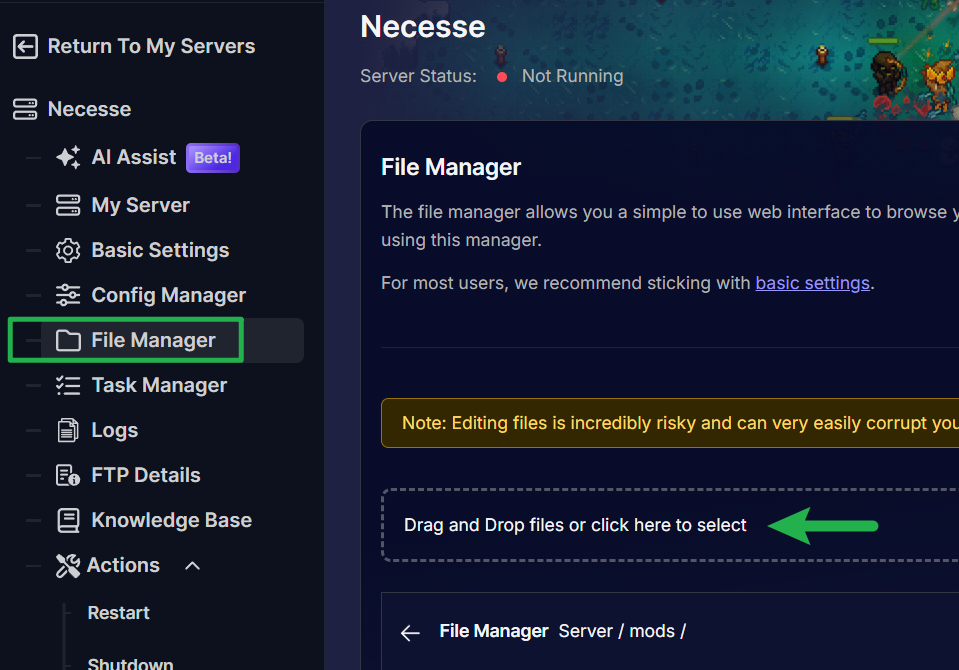
- In your server panel, open the File Manager or connect via FTP.
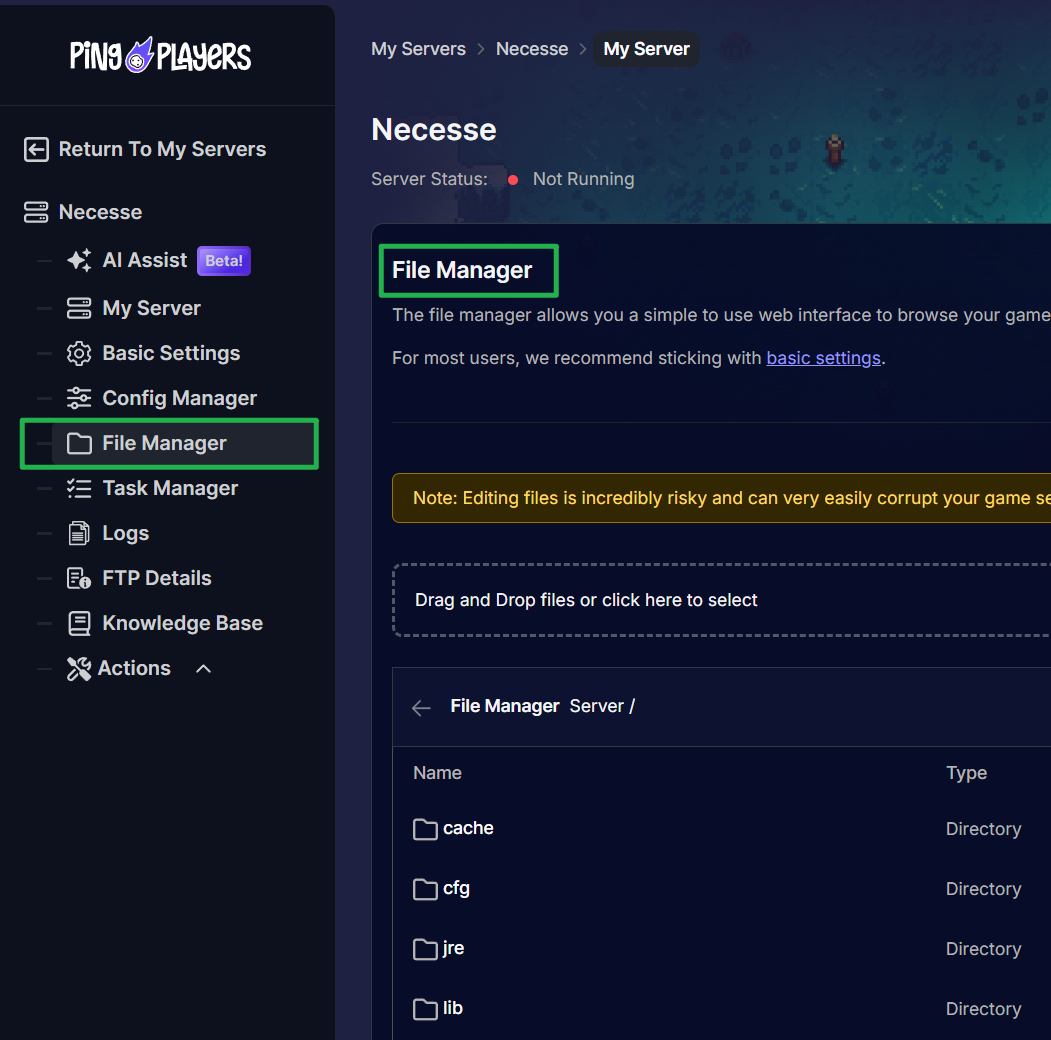
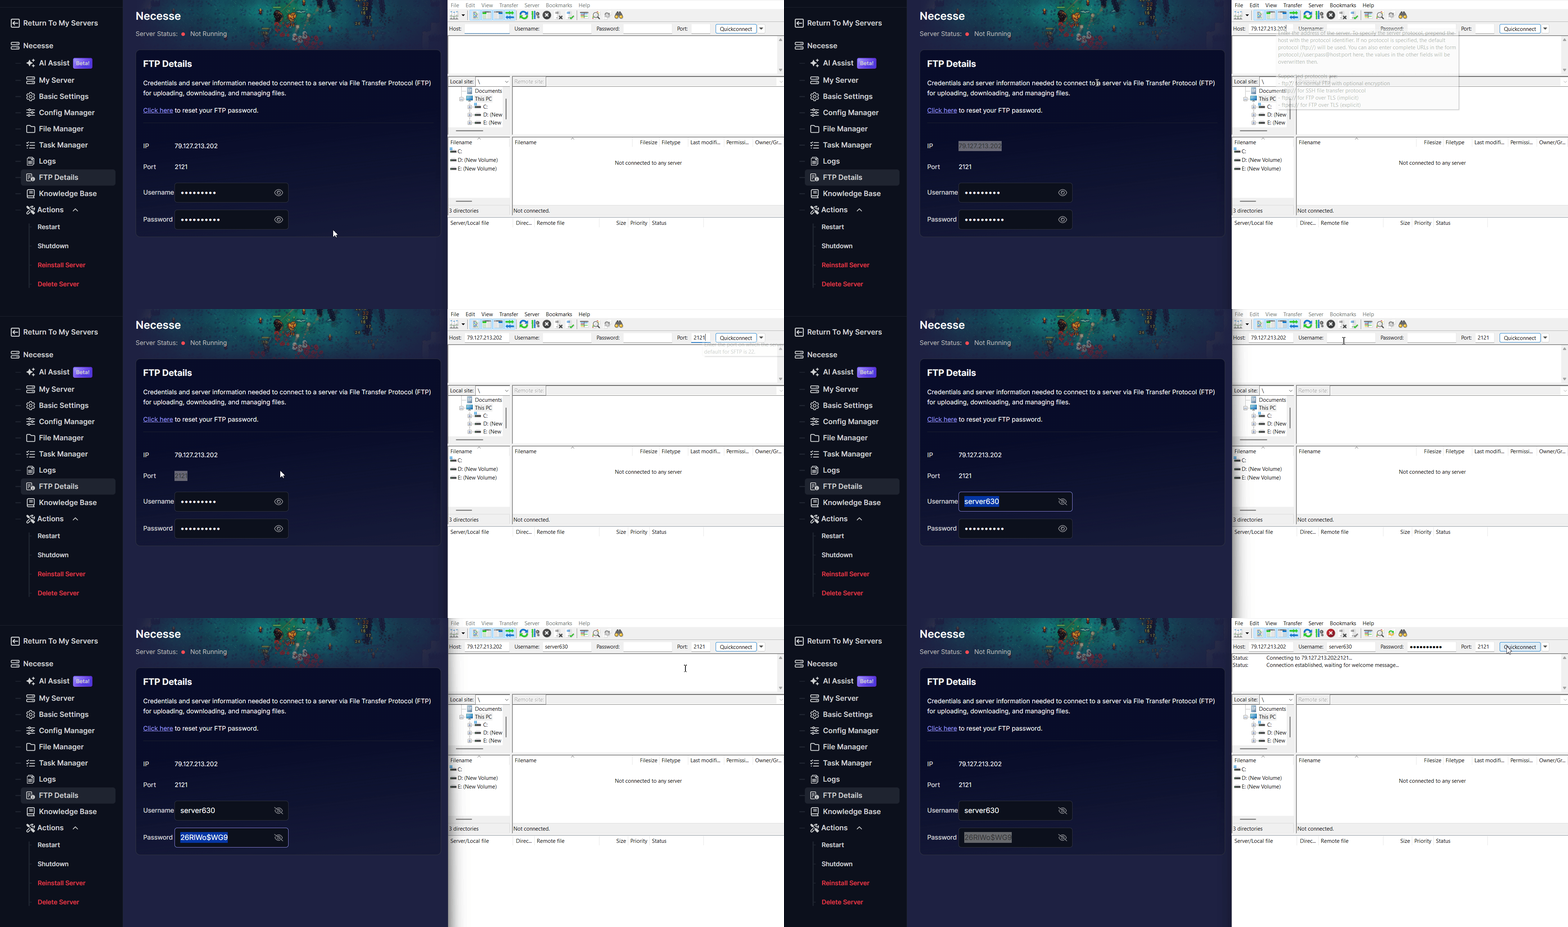
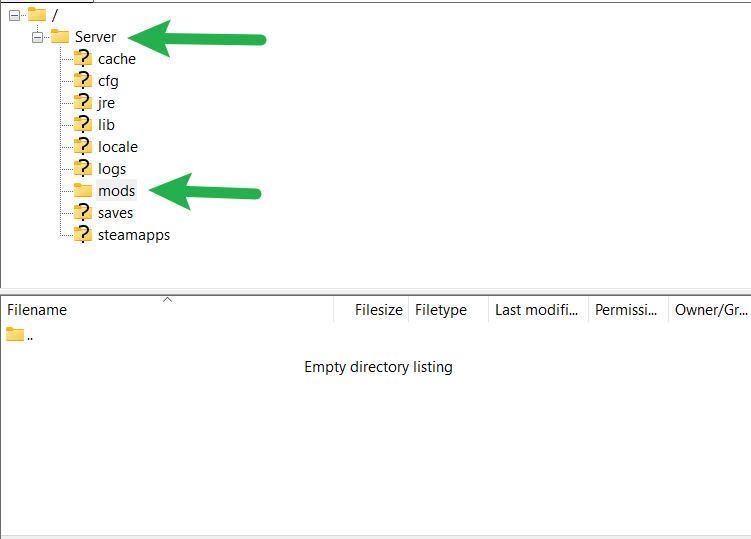
- Navigate to the mods directory on your server:
/Server/mods/
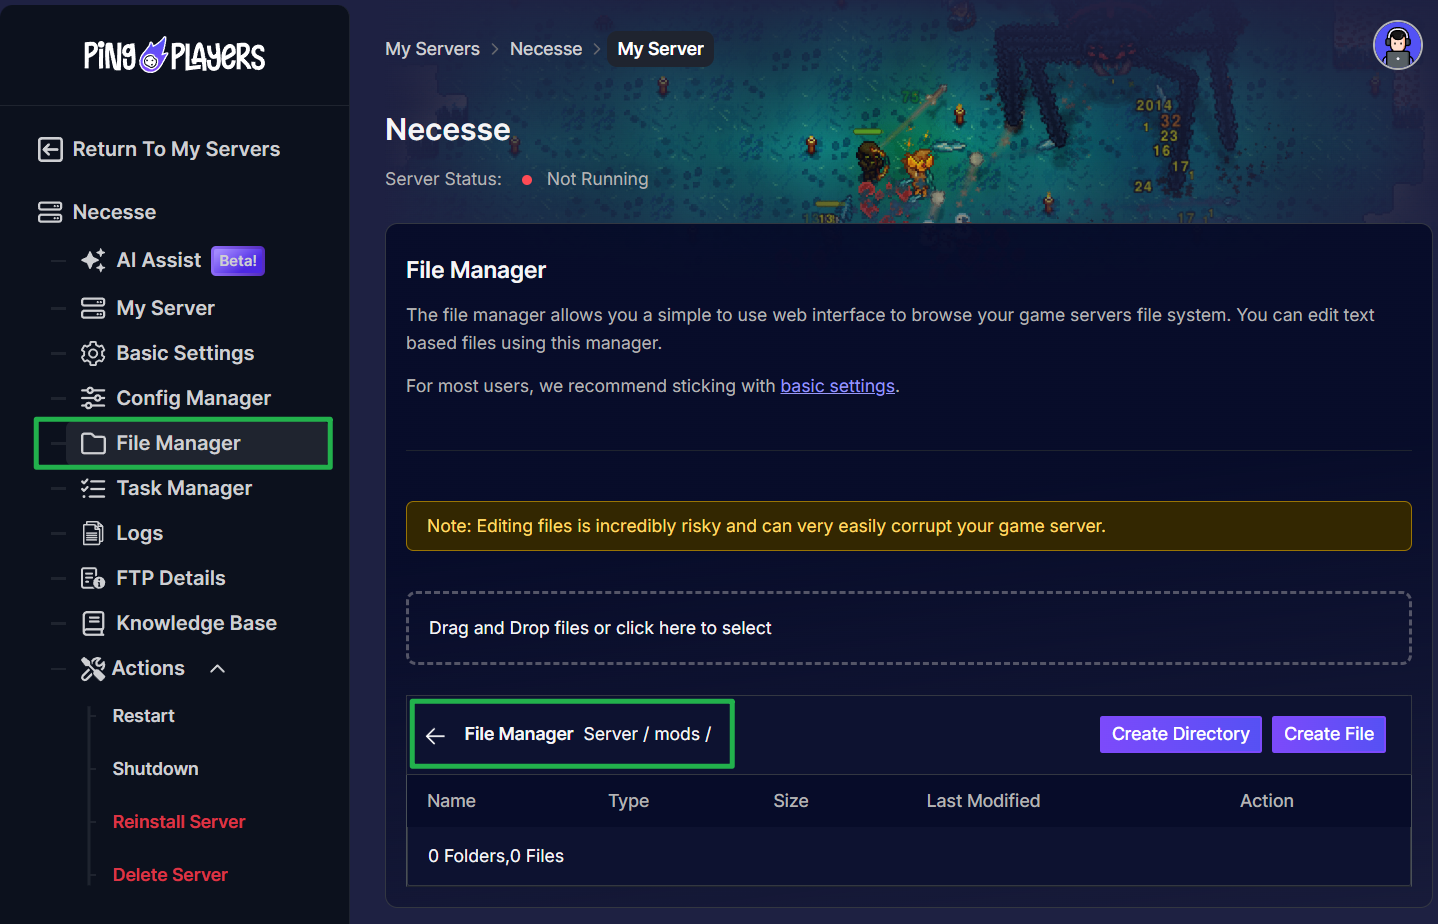
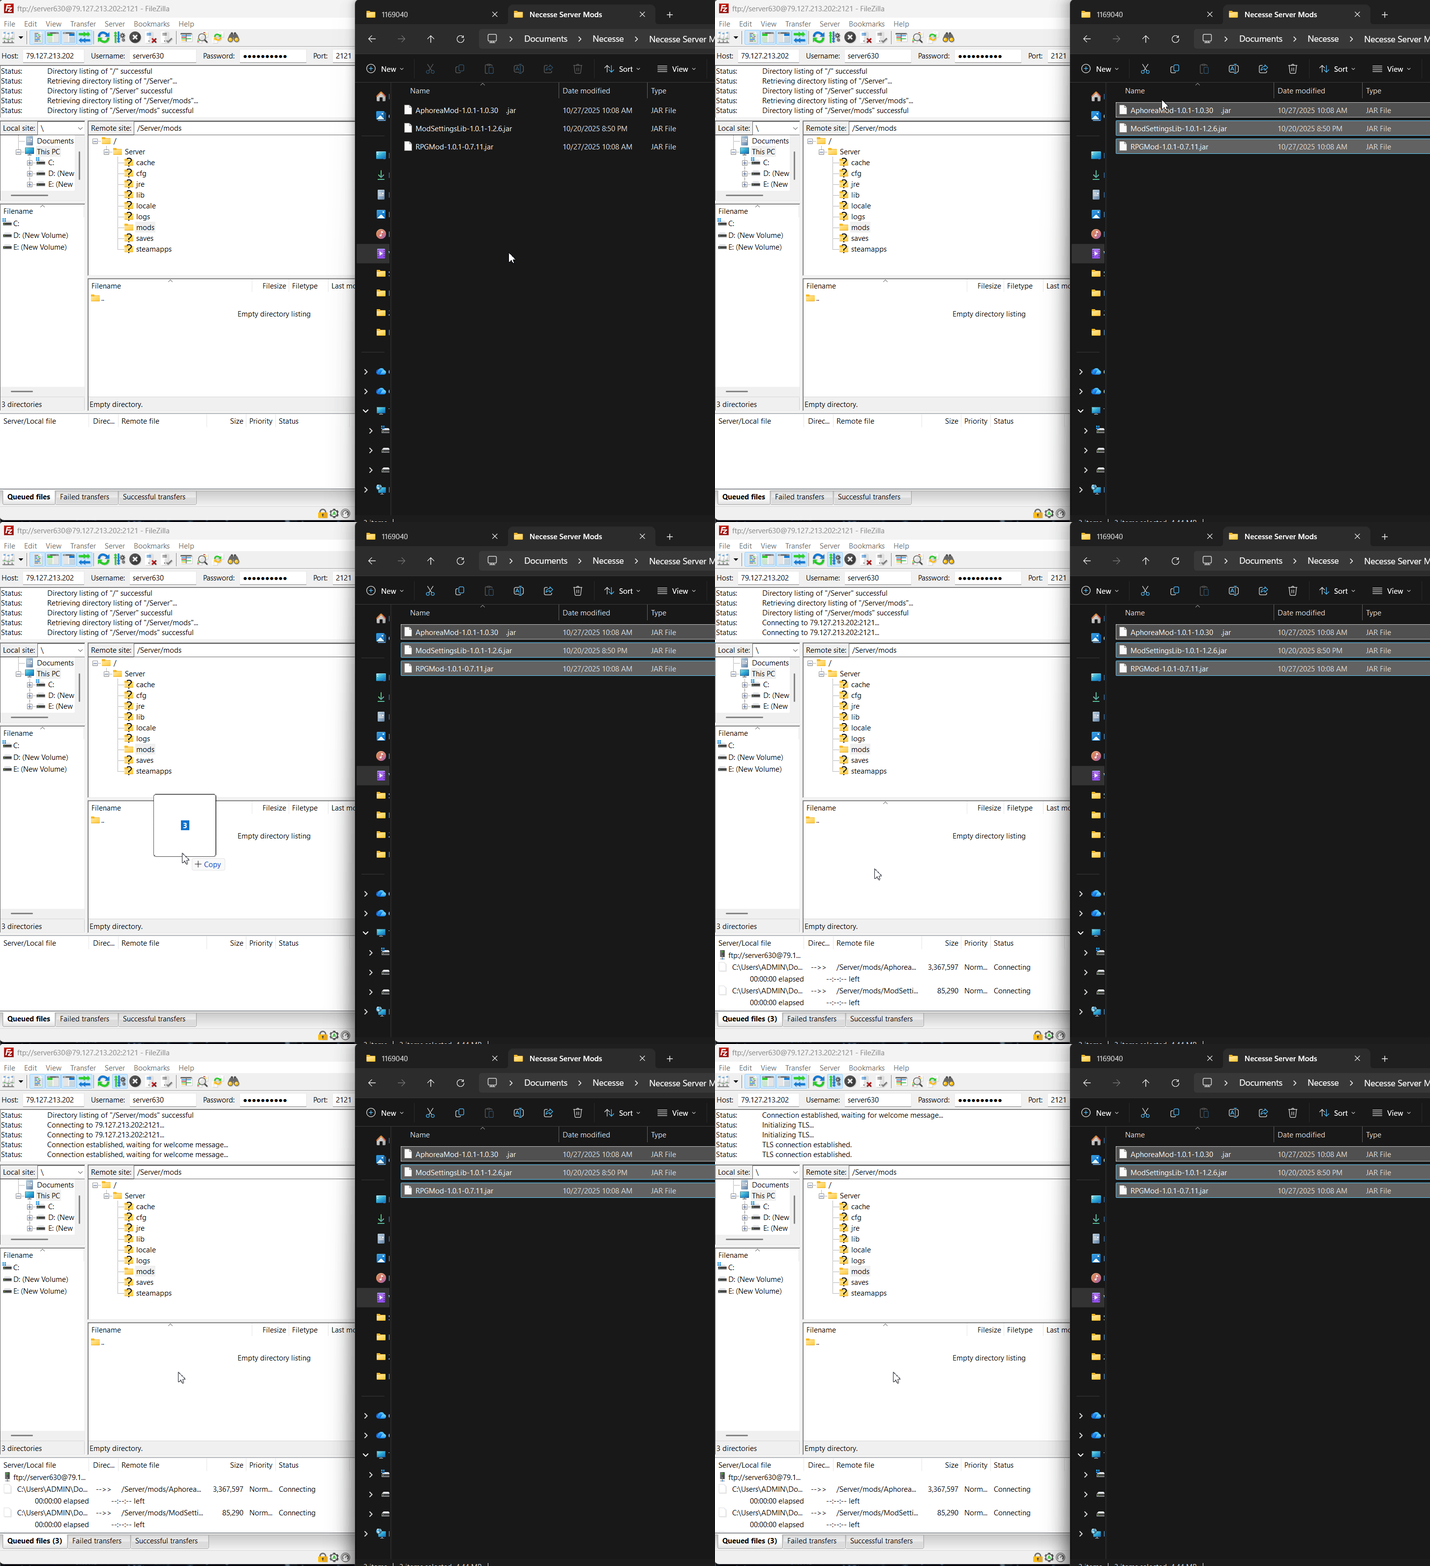
- Upload all the
.jarfiles from yourNecesse Server Modsfolder directly into this/mods/folder.
- Check for Configs (Optional): Some mods create configuration files. After you restart your server for the first time, check the
/Server/cfg/mods/folder to see if any new config files have appeared that you can edit.
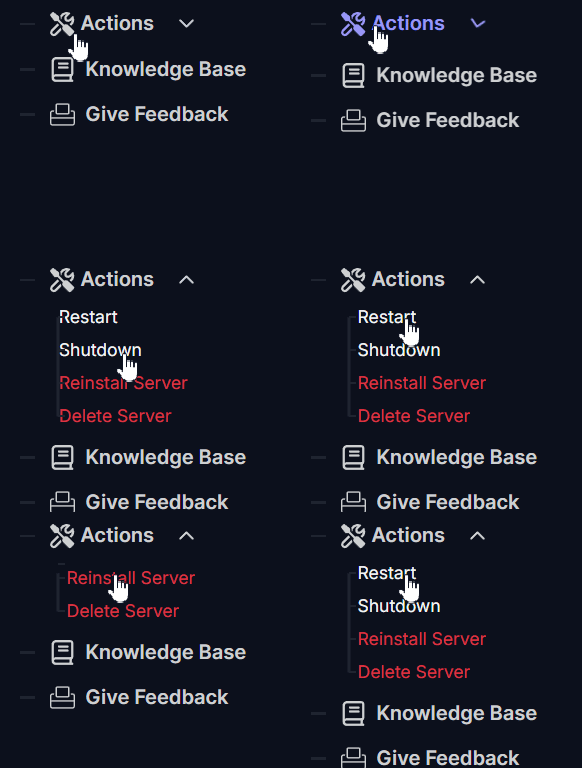
- Restart Your Server: Go to Actions > Restart to apply all your changes.
And that's it! Your server will now boot up with all your new mods installed and active.
Part 3: Instructing Your Players (The Final, Vital Step)
Your server is now modded, but no one can join it yet. To fix this, every player must do the following:
- Go to the same Steam Workshop page and subscribe to the exact same list of mods you just installed.
The easiest way to manage this is to create a Steam Workshop Collection with all your server's mods and share the link with your players.
Troubleshooting Common Issues
- Issue: Players can't connect, get a "Mod Mismatch" error, or are kicked on join.
- Solution: This is the #1 most common problem. It means a player's mod list is different from the server's. Ensure every single player (and the server) has the exact same mods installed and that they are all up to date.
- Issue: A mod doesn't seem to be working in-game.
- Solution: Read the mod's Steam Workshop page carefully. Many mods have dependencies, meaning they require other "library" mods to be installed to function. You must install all dependencies on the server and have your players subscribe to them as well.
- Issue: The server won't start after I added a new mod.
- Solution: The mod is likely outdated or conflicts with another mod.
- Stop your server.
- Go to
/Server/mods/and delete the.jarfile for the mod you just added. - Restart the server. If it starts, you've found the problematic mod.
- Solution: The mod is likely outdated or conflicts with another mod.
Conclusion
Your settlement is now modded and ready for a new, customized adventure! You've learned the correct way to prepare and upload mods, and most importantly, how to ensure your community can connect. Remember that "Golden Rule": Server & Players Must Match!
If your new mods cause any unexpected trouble, feel free to reach out to our customer care agents through our live chat or email at [email protected].