Last Update 2025-11-21 15:17:22
How to Set Custom Notifications on your SCUM Server
Setting up notifications for your SCUM server can enhance gameplay and keep your players informed of important events. The best part? This process is easy and straightforward! You only need to edit one file to customize notifications on your server.
To get started, it's important to understand how to edit server files. You can either use our website's "File Manager" option or connect to the server files using FTP.
For this particular guide, we'll use our File Manager option to have a better visualization.
In case you want to connect to the server using FTP, we suggest you to check our guide here on how to properly do so.
Custom Notifications
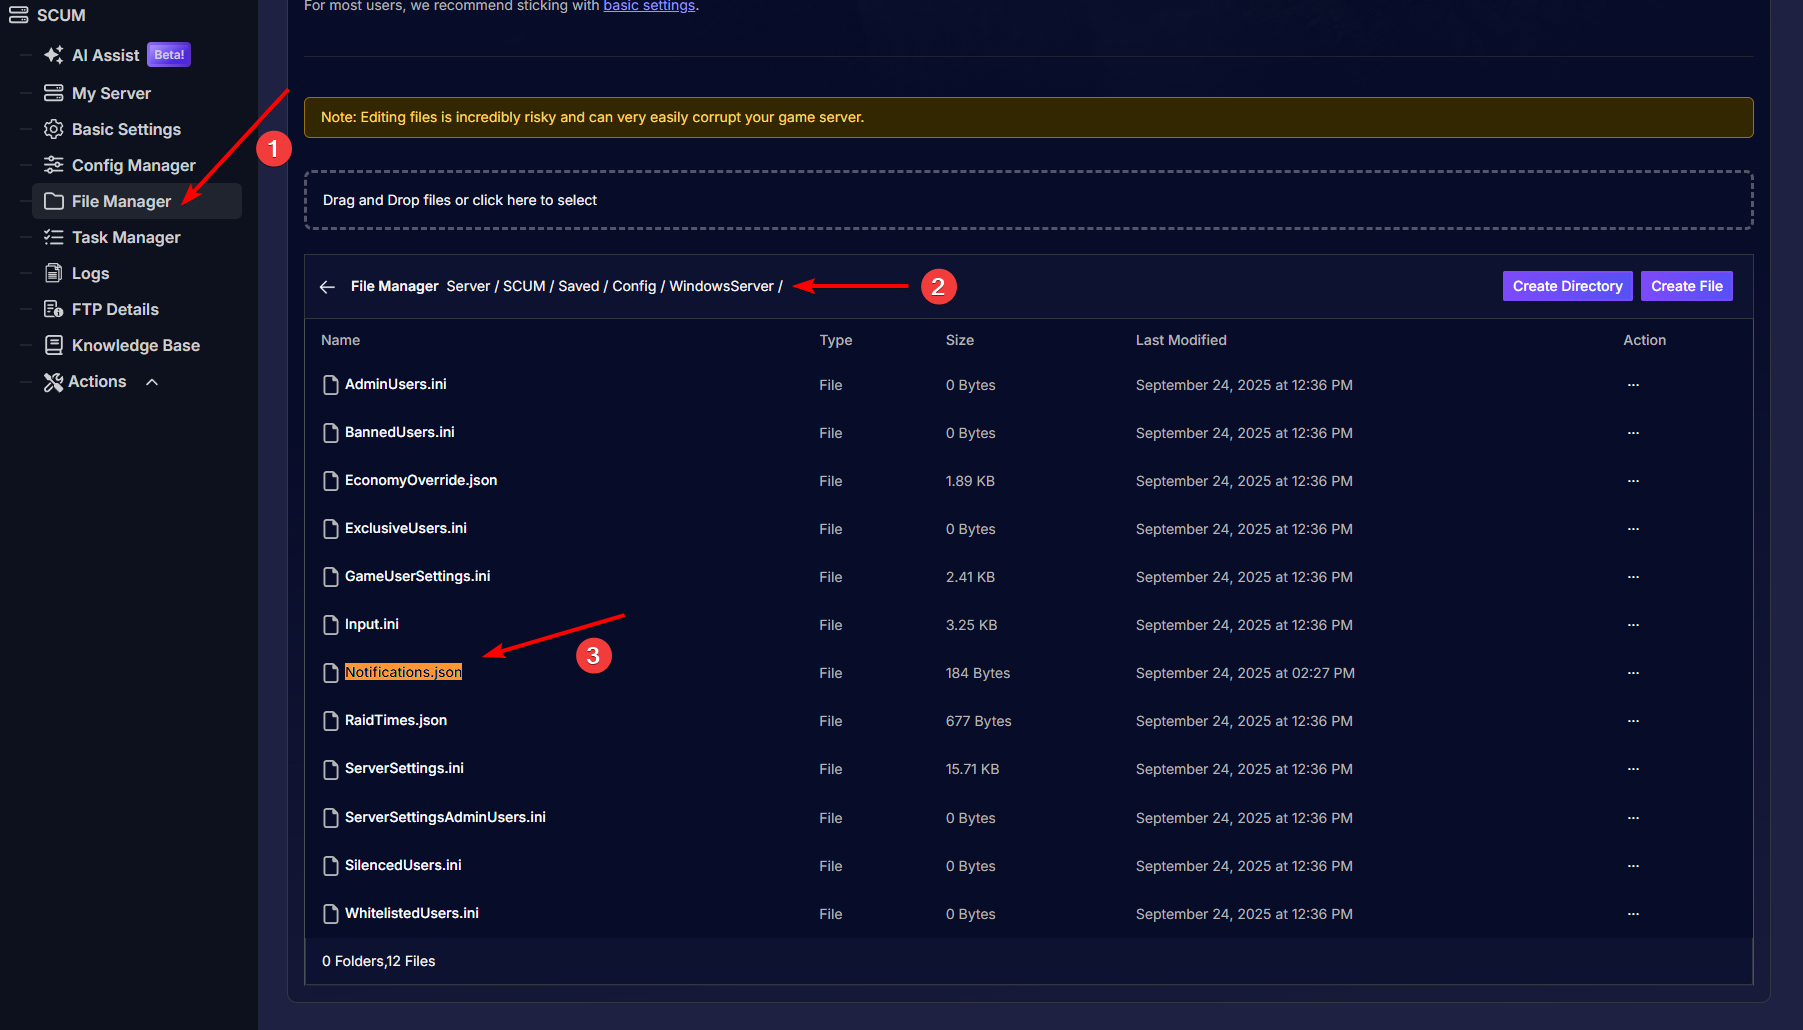
- Access your server's dashboard panel by clicking on “My Servers” > “Manage Server”.
- Open the “File Manager” tab on the left side to access the server files.
Navigate to the following path:
Server\SCUM\Saved\Config\WindowsServerIn here you can see all the server's configuration files, including the
Notifications.jsonone that we'll use.
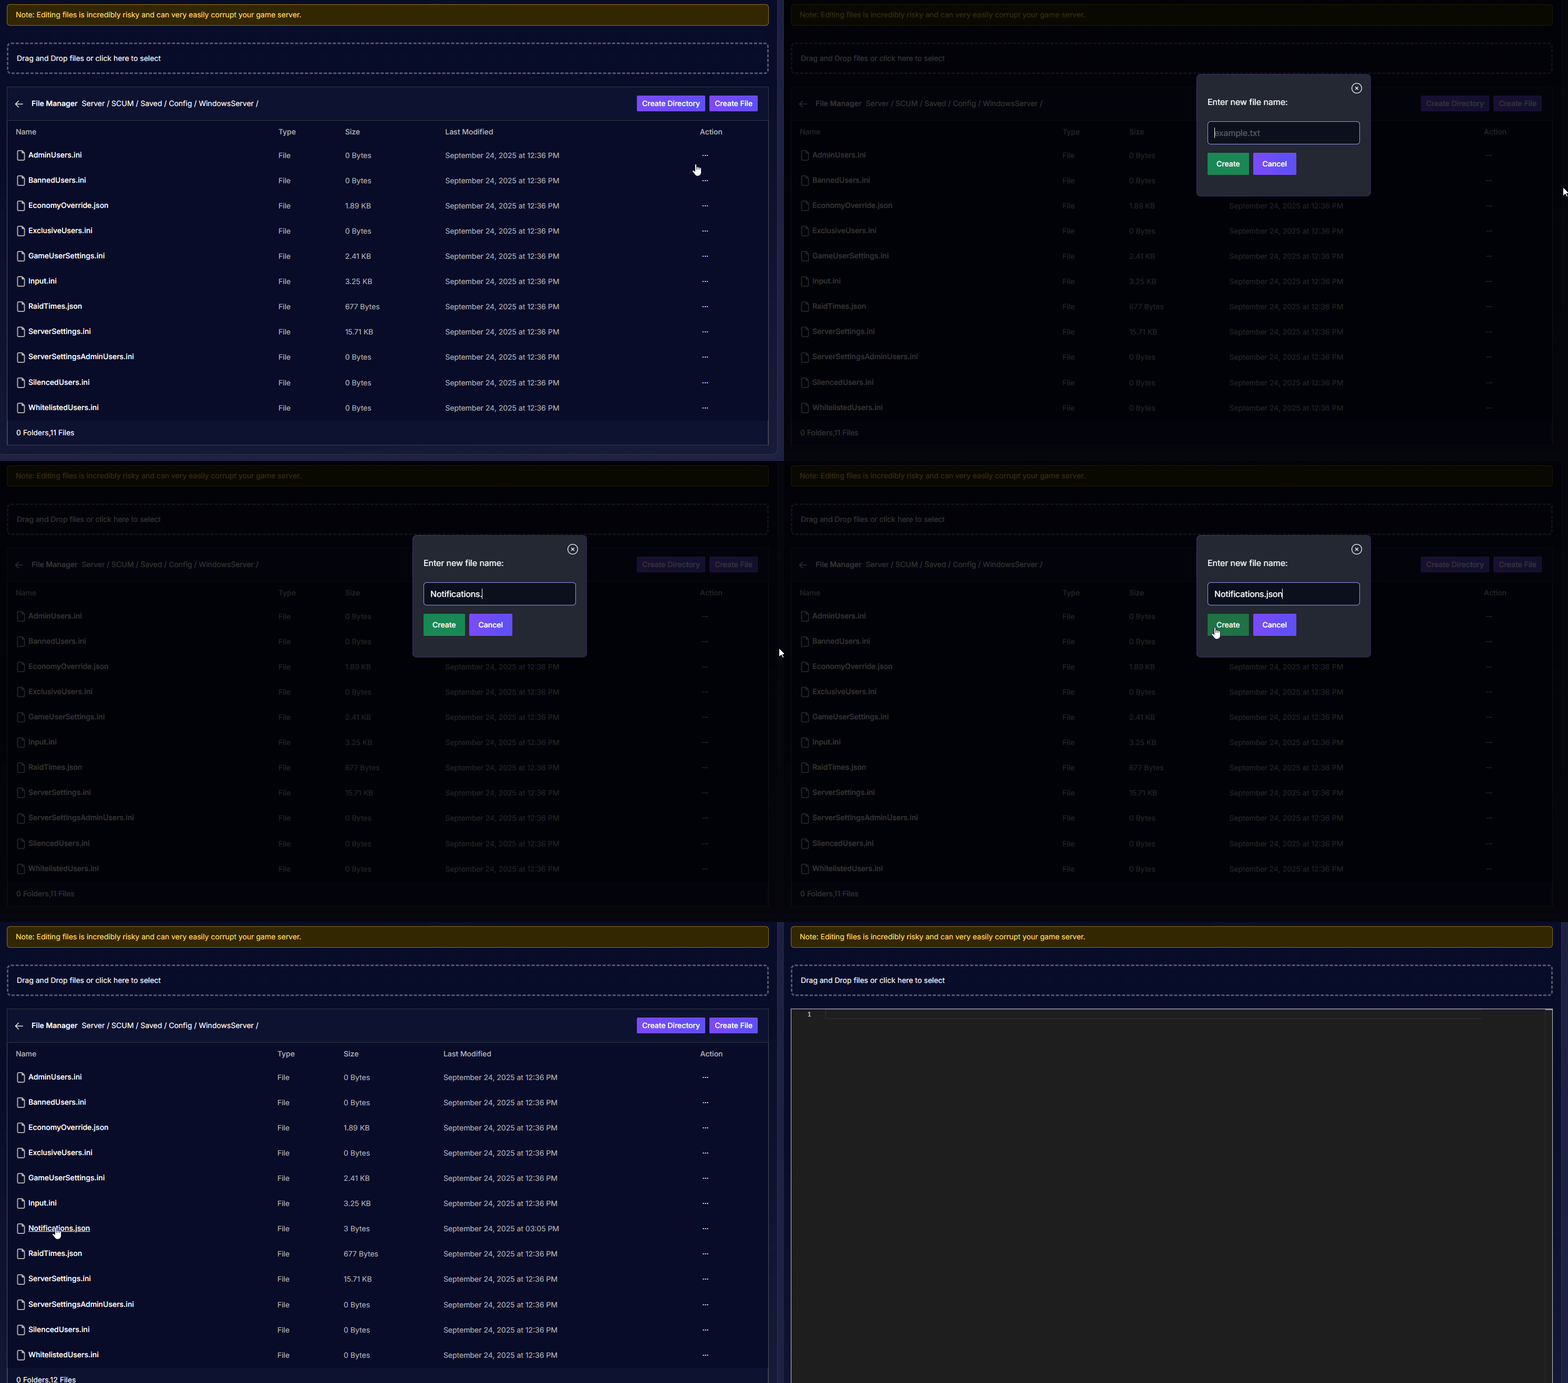
In case you don't see it there by default, feel free to create it by clicking on “Create File" at the top right.
Now it's time to edit our
Notifications.jsonfile. The default format for it will be:{ "Notifications": [ { } ] }(If you have created the file manually, copy and paste this exact format to avoid any syntax errors)
The variables need to be placed between “{ }” inside “Notifications”. There are many variables and each can be customized, so find at the bottom of this guide a full list for them.
Let's use “day” and “time” as examples.
Example:{ "Notifications": [ { "day": "Everyday", "time": "12:00-15:30", } ] }
It's important to know that changing this file will impact in-game right away, so you can edit it in real-time.
After editing the file, save the changes by clicking on
 at the bottom right.
And that's it, now you should be able to send custom notifications on your server at any time!
Notifications variables:
| day | When the message should appear | Single day: "Monday", "Tuesday", etc |
| Range: “Monday-Friday” | ||
| Special: "Weekend", "Everyday" | ||
| time | At what time(s) the message is shown | Single: "8:00", “12:00”, “17:00”, etc |
| Multiple: ["15:12", "11:14"] | ||
| Range: "11:00-14:00" → repeats every minute in that window | ||
| duration | How long the message stays visible (in seconds) | “10”, “60”, “120”, "300", etc |
| color | The text color in RGB format (R-G-B) | "255-0-0" = red, "0-255-0" = lime, etc You can use this link for different colors |
| wait | Interval (in minutes) between repeats inside a time window | It can be any number |
| messages | The text players see. You can include placeholders | Anything that you'd like say |
| #NumPlayers → shows number of players online | ||
| #Date → current server date | ||
| #Time → current server time | ||
| #RestartIn(HH:MM) → countdown to restart | ||
| #RestartAt(HH:MM) → restart notice at specific time |
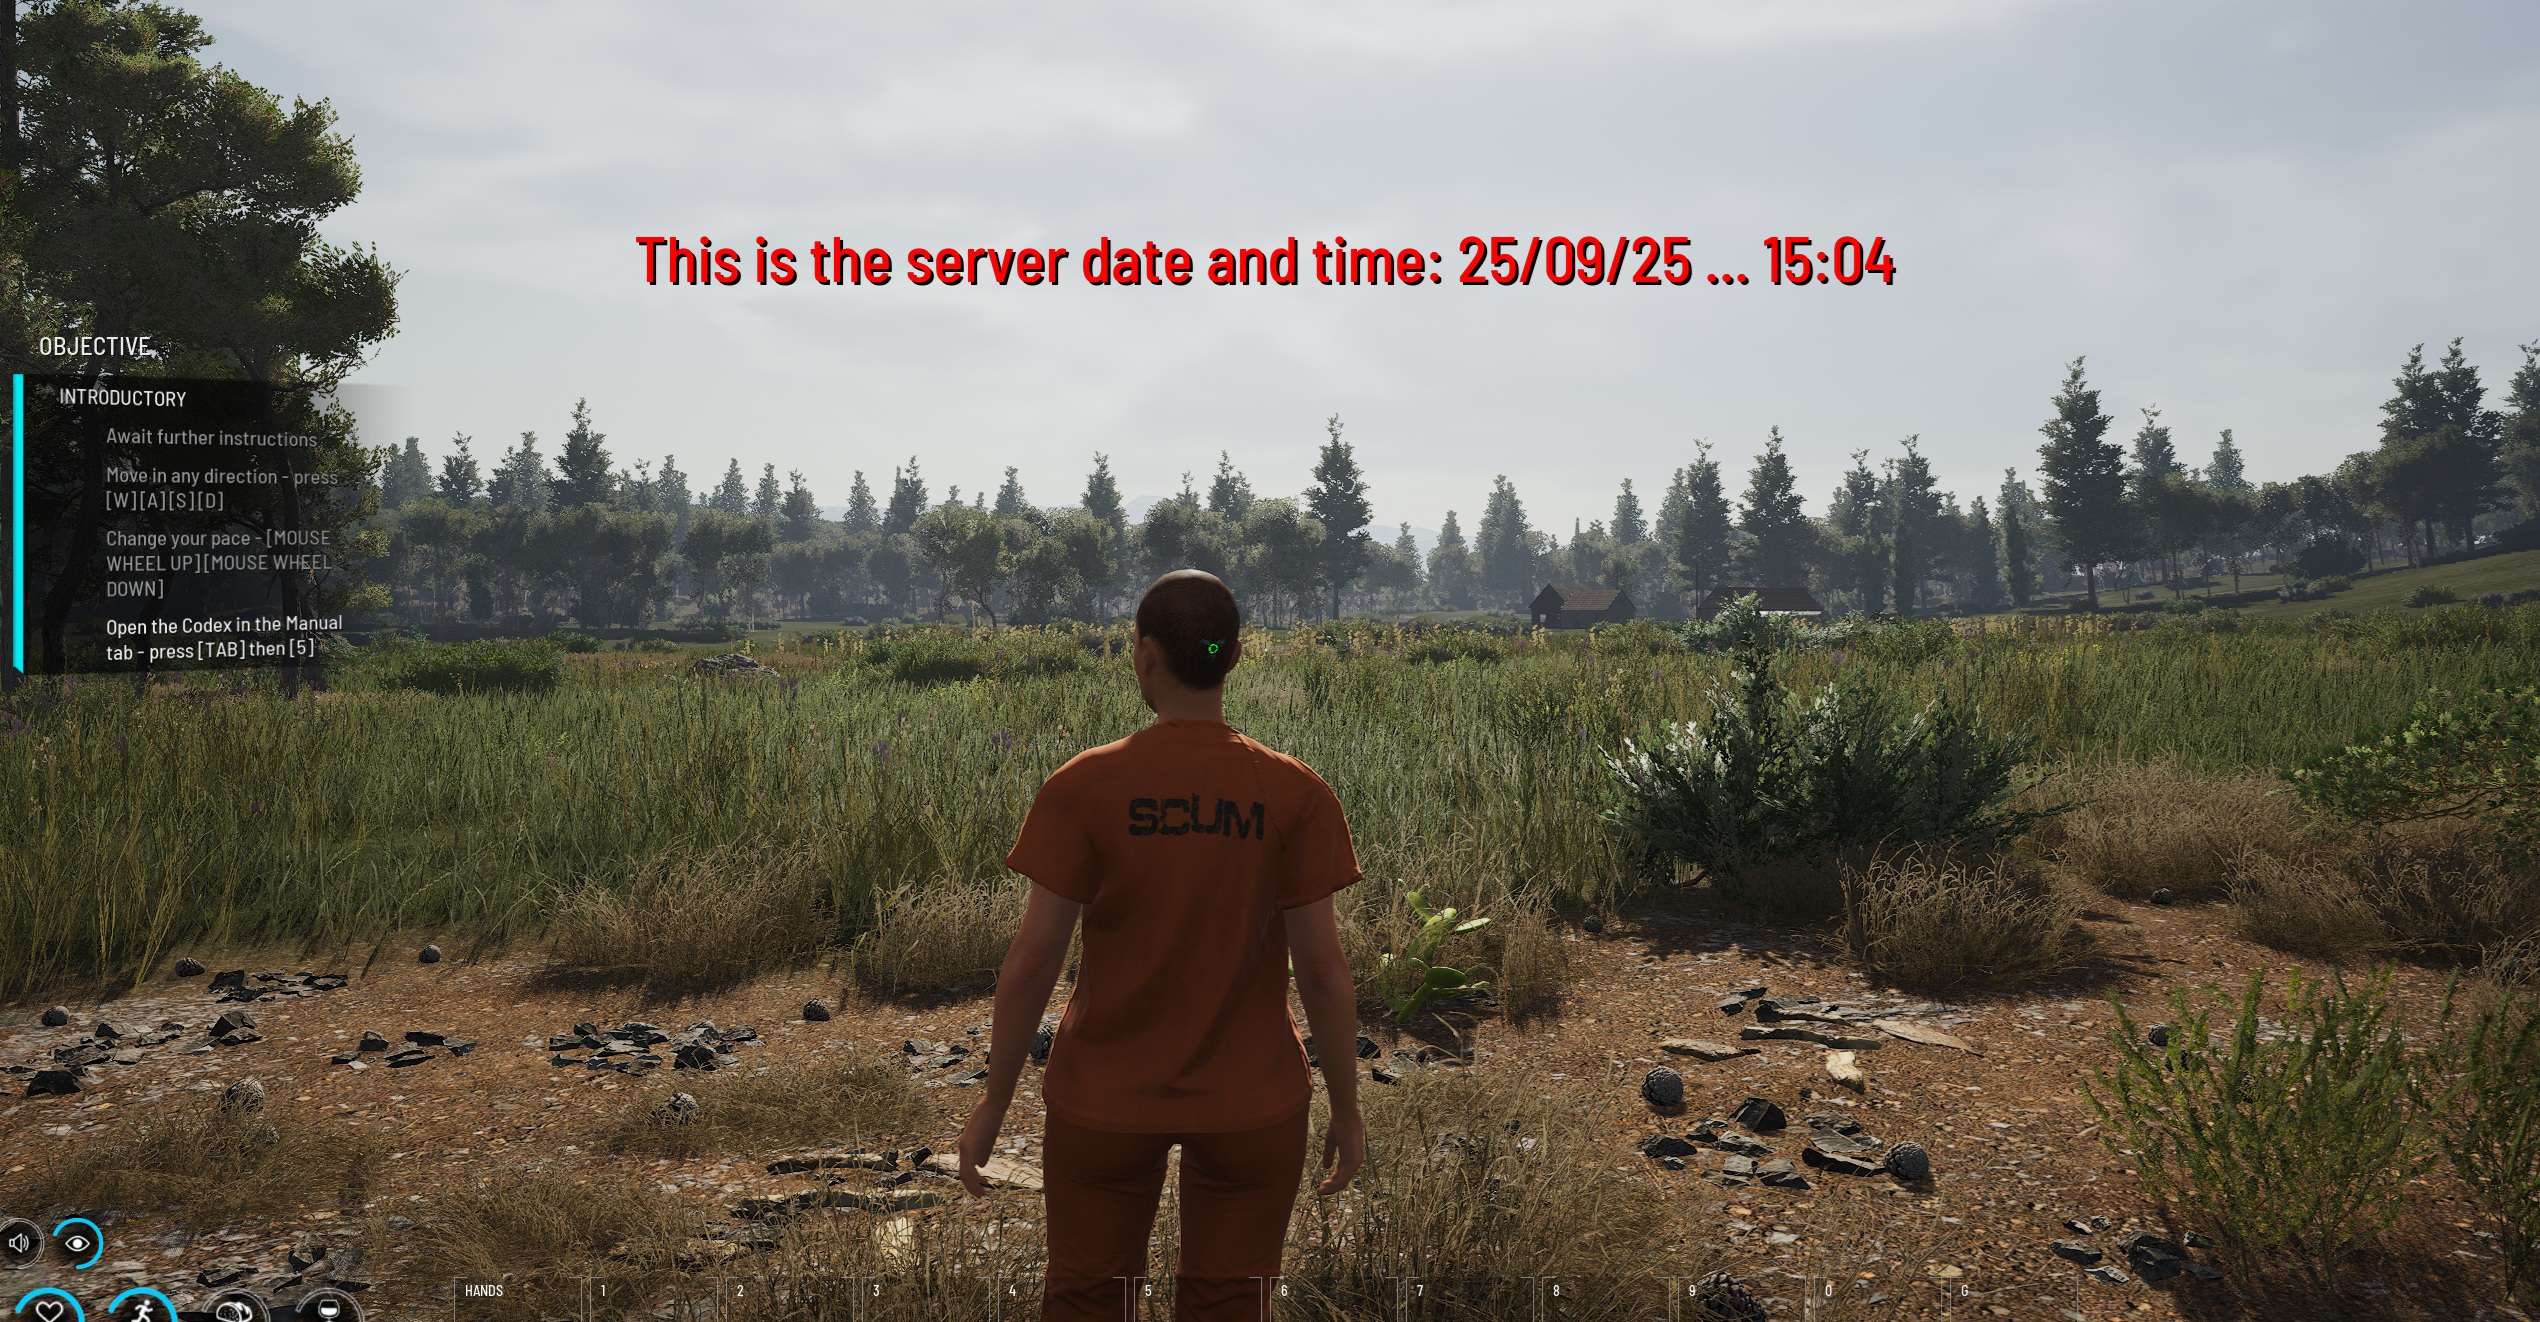
Note that the time inside the server is usually based on the server's location, so we suggest you to run a test notification to double check.
Find here an example to test it out:
{
   "Notifications": [
       {
       "day": "Everyday",
       "time": "00:01-23:59",
       "duration": "60",
       "message": "This is the server date and time: #Date ... #Time"
       }
   ]
}
This notification will show the time and date once every minute, and wil stay there for 60 seconds for you to see it at all times.

Troubleshooting
If you find that your notifications aren't showing up as expected in-game, here are a few things to check:
- Ensure that you have saved the configuration file after making your changes. Without saving, the changes will not be applied.
- Verify if the format is correct using an external .json checker, as you might be missing a comma or a quotation mark.
- Double-check if the time set on the notification matches with the in-game time.
If you have any questions or need assistance, feel free to reach out to our customer care agents through our live chat or email at [email protected]. Happy gaming!