Last Update 2025-11-21 15:14:40
How to Add Mods to Your Lord of the Rings: Return to Moria Server
Ready to delve deeper into Moria, beyond what the original Dwarven smiths intended? While Return to Moria doesn't have official Steam Workshop support, a brave community of modders has begun forging their own additions, which you can find on sites like Nexus Mods and ModDB.
Be warned, Lord of the Halls: adding these mods is an unofficial, manual process. The golden rule is simple but strict: both the server and every single player must have the exact same mod files installed. This guide will show you the correct process.
Before you Begin Adding Mods
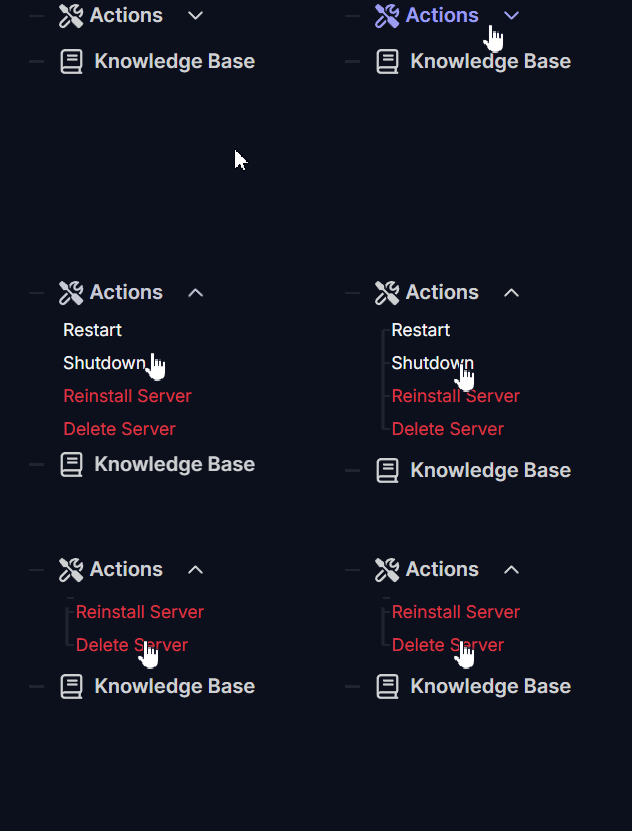
You must shut down your server (via Actions > Shutdown) to prevent corrupting your realm. You can upload the necessary files using the File Manager or an FTP client. For those who might be unfamiliar with FTP, you can refer to our detailed guide on Connecting through FTP. This can provide you with all the necessary steps for first-time usage.
Steps to Install Mods
Part 1: Finding & Preparing Your Mod Files
Your first step is to act as a quartermaster. You must find the mod, prepare it, and have it ready for both your server and your players.
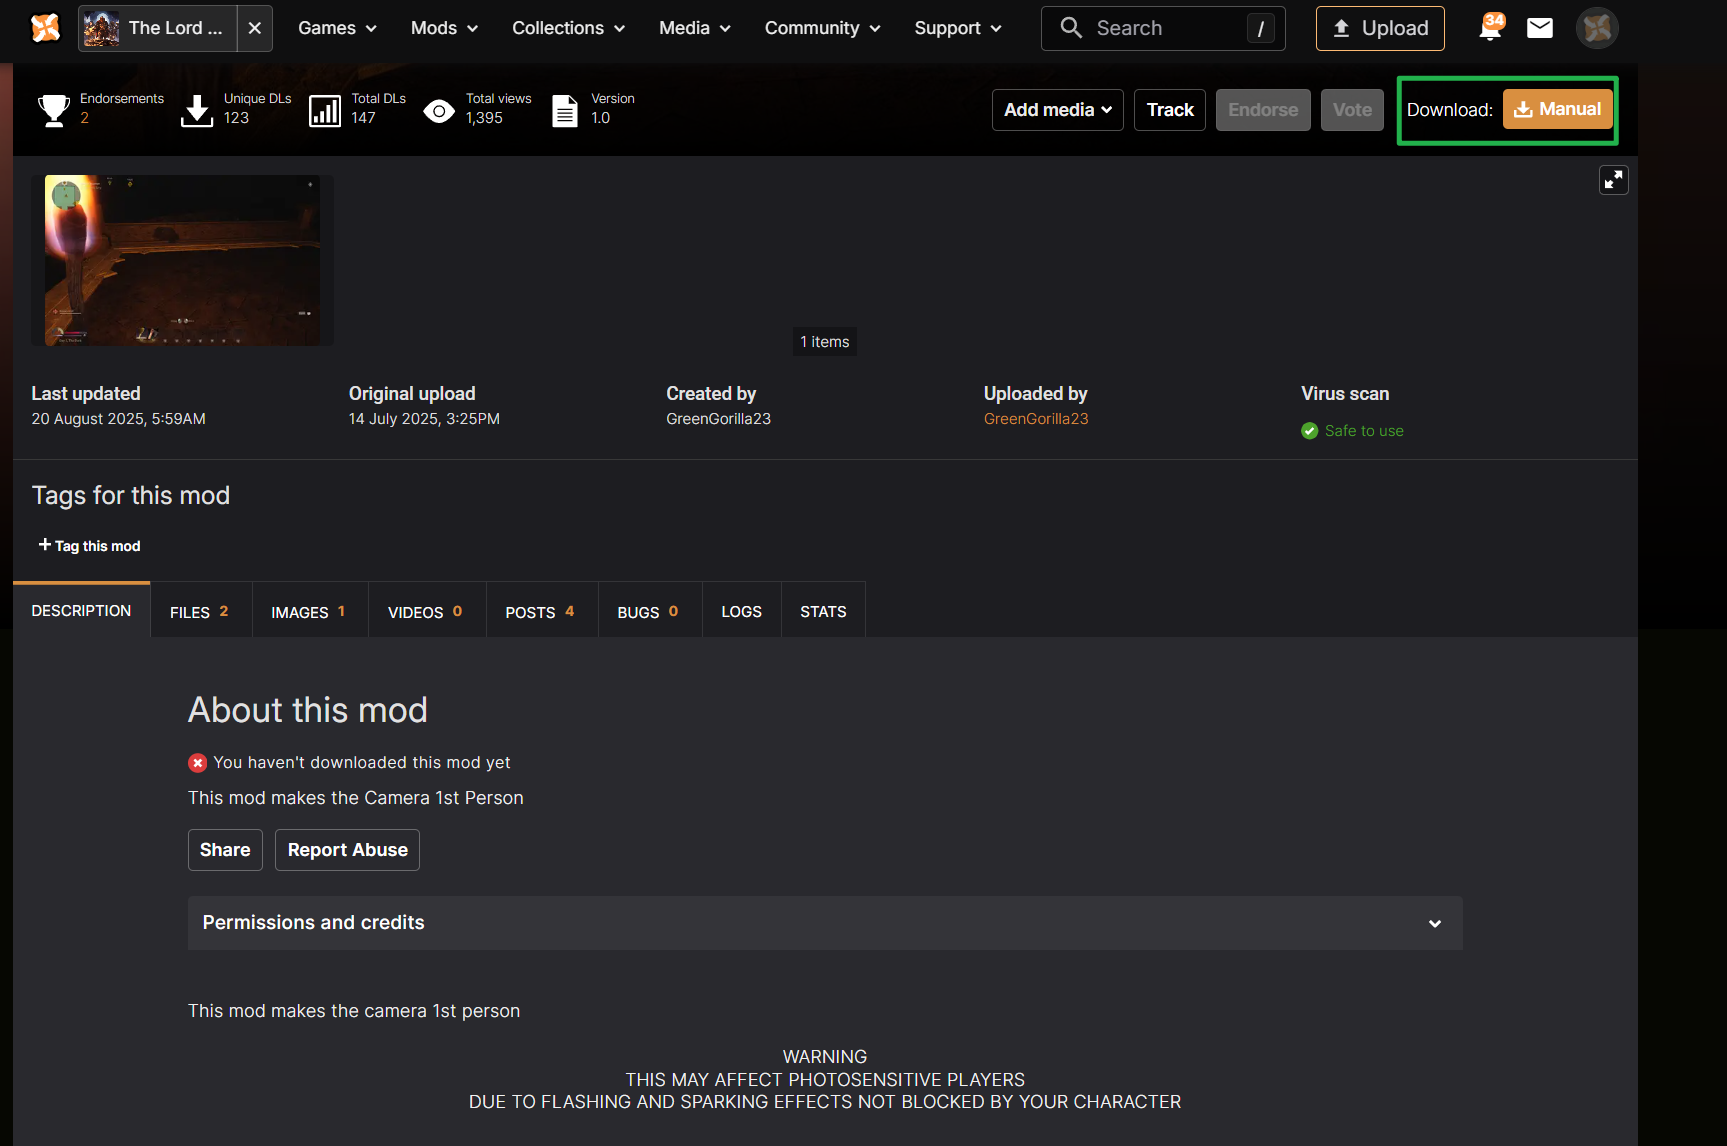
- Download the Mod: Find the mod you want on Nexus Mods. Download the file, which will usually be a
.zipor.rararchive.
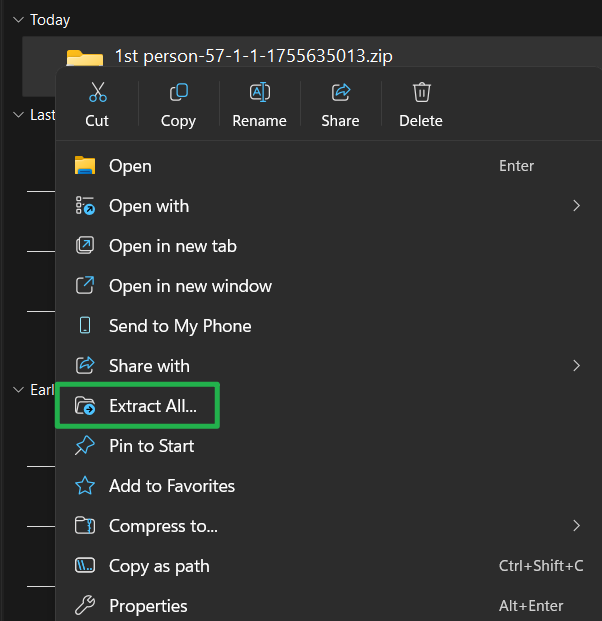
- Extract the Mod: On your computer, extract the downloaded file (using 7-Zip or WinRAR). Inside, you will find one or more files ending in
.pak. This.pakfile is the mod itself.

Part 2: Installing the Mod on Your Server
Now you must install the new files into your server's files.
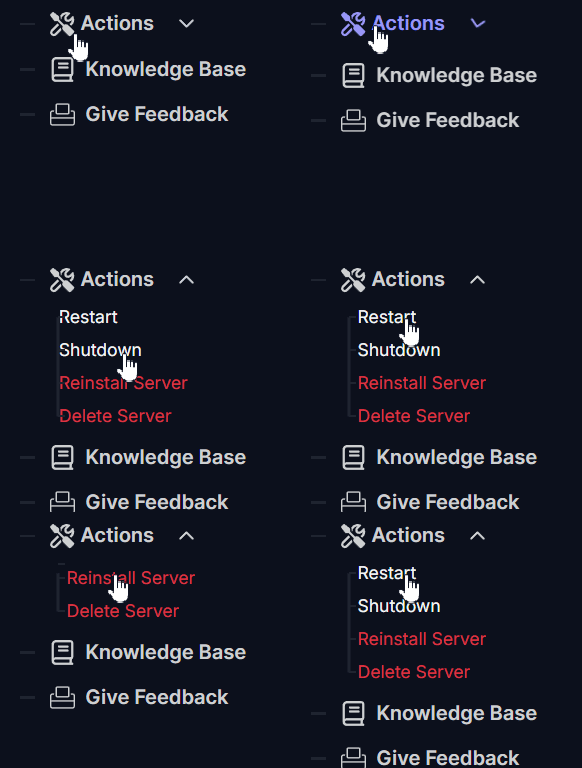
- Stop Your Server: If you haven't already, go to Actions > Shutdown in your server panel.
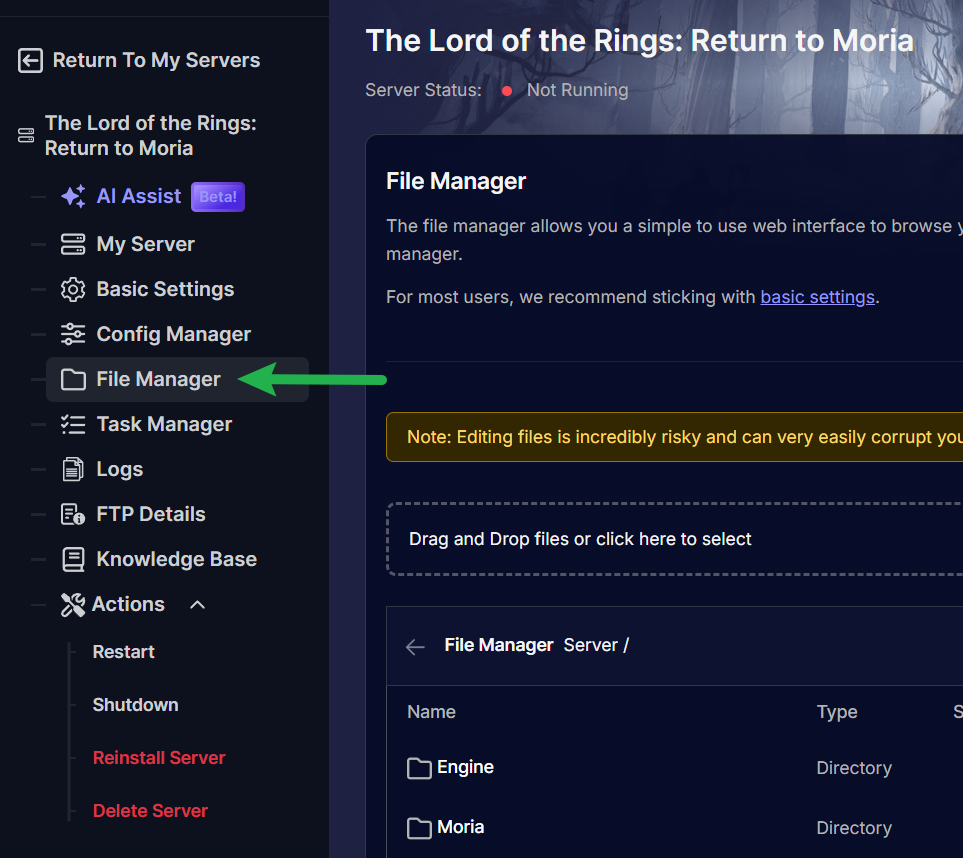
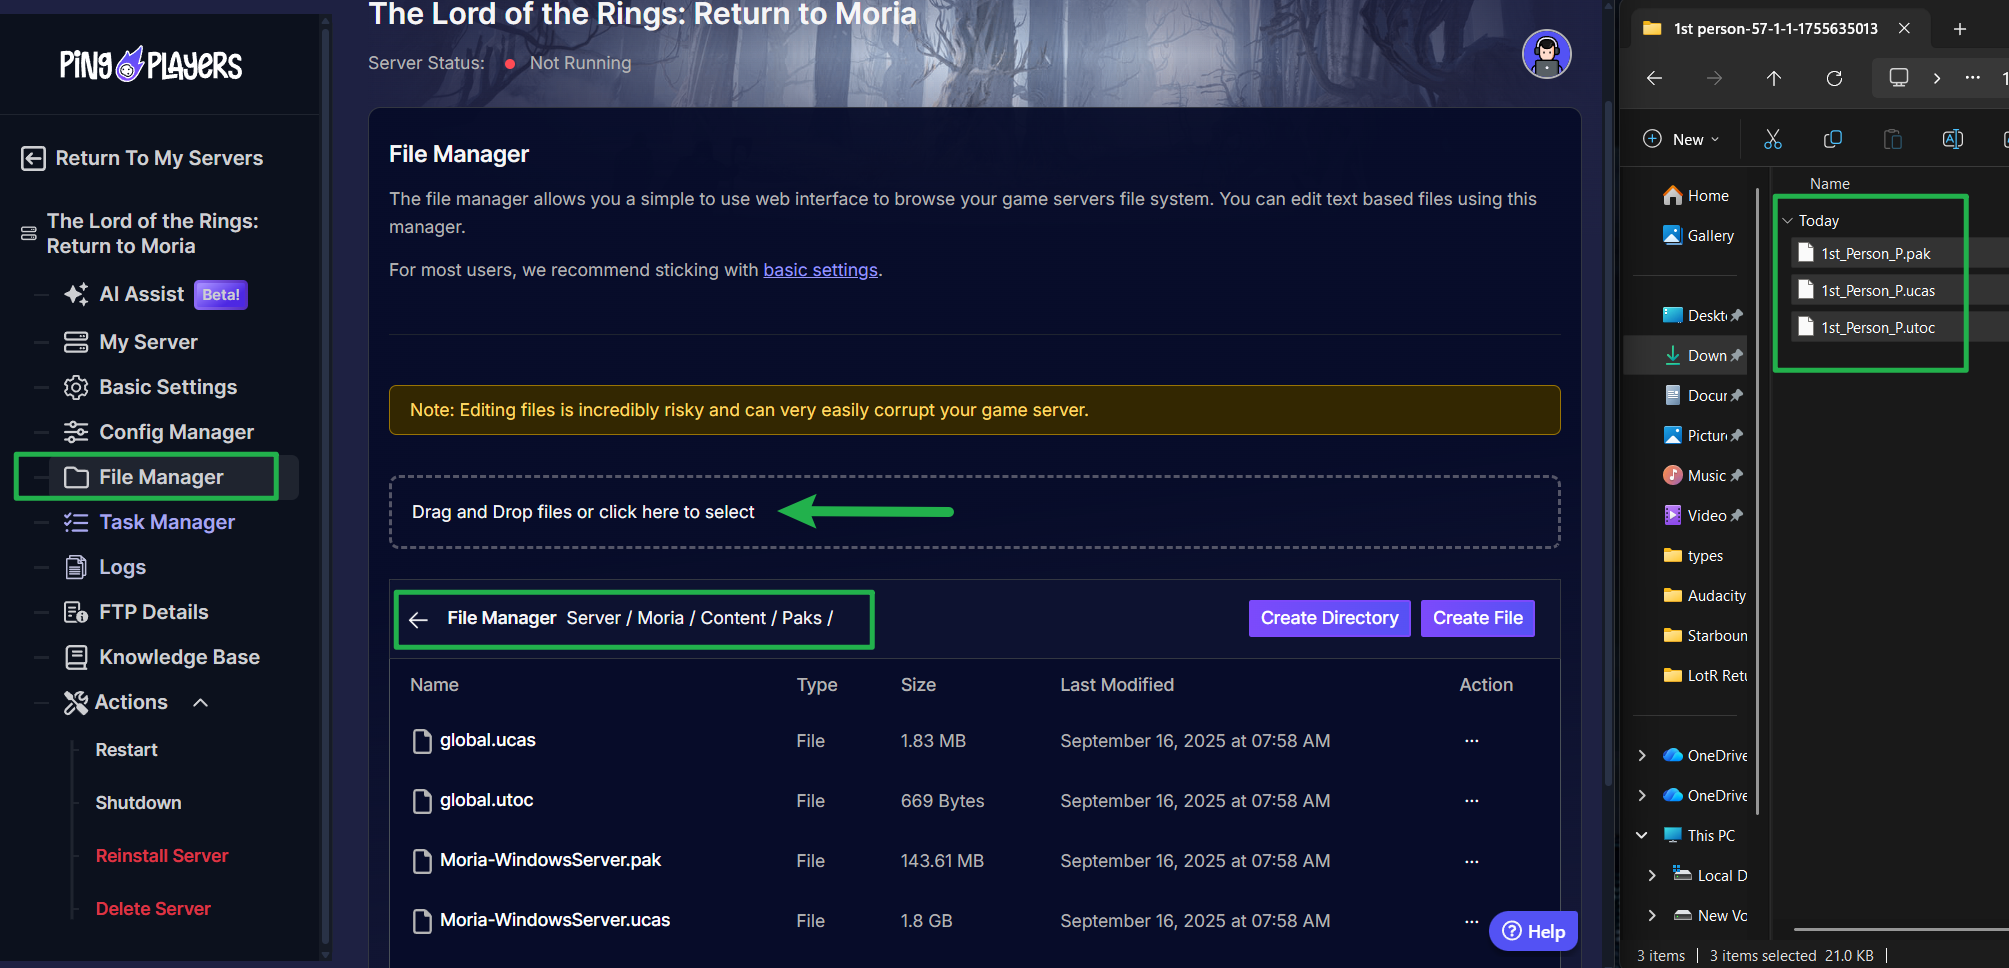
- Connect via File Manager: Open the File Manager from the left panel (or connect via FTP).
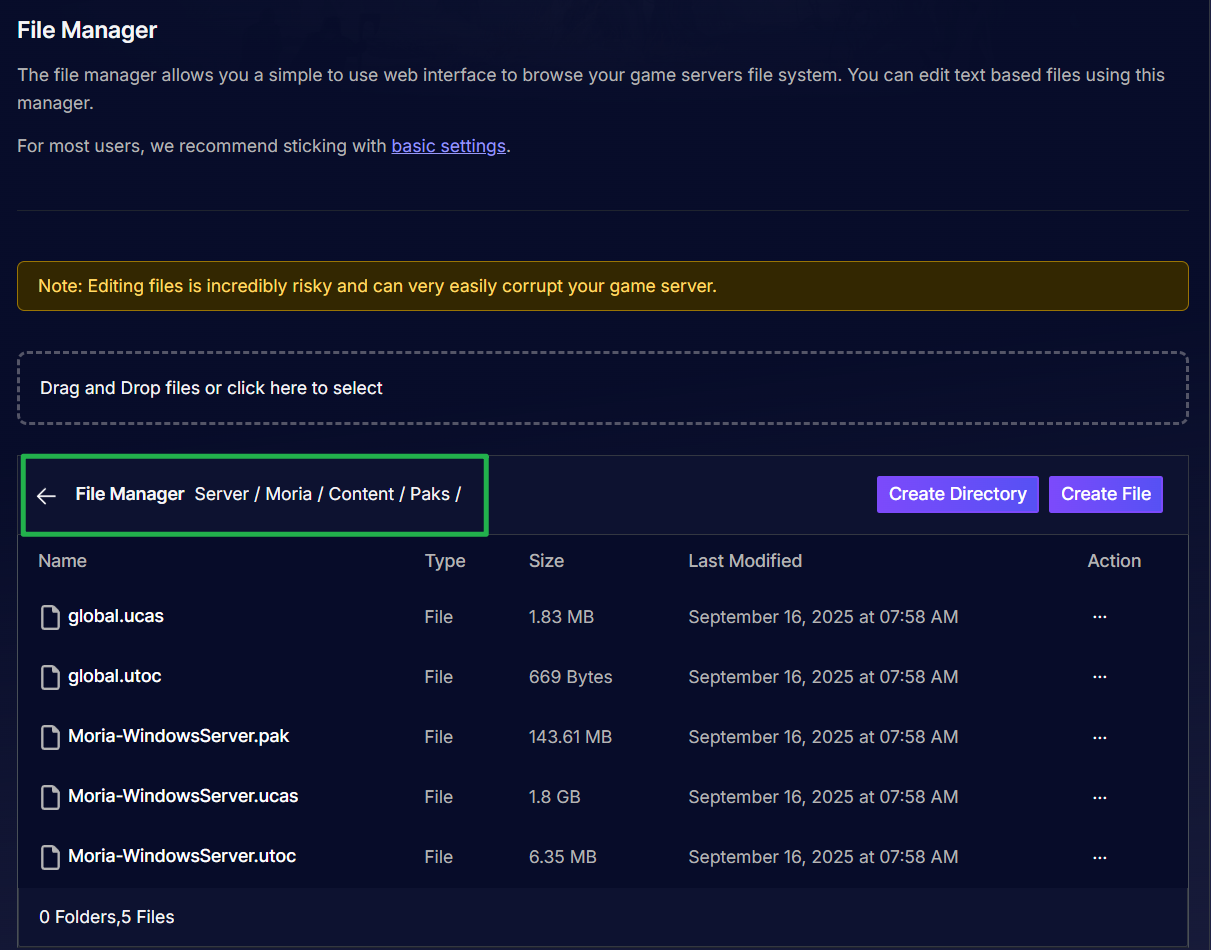
- Navigate to the Paks Folder: Go to the following directory on your server:
Server/Moria/Content/Paks/
- Upload the
.pakFile(s): Upload the.pakmod file(s) you extracted in Part 1 directly into thisPaksfolder.
- Restart Your Server: Go to Actions > Restart in your server panel.
Your server is now officially modded! But your work isn't done yet.
Part 3: Instructing Your Players (The Client-Side Install)
This is the most important step for a stable server. Your server will not work for anyone until they do this.
Every single player who wishes to join your server must now install the exact same .pak files on their own computers. You must provide these files to your players (for example, in your community Discord).
Instruct your players to place their .pak files in the following folder on their PC:
- For Steam users:
C:\Program Files (x86)\Steam\steamapps\common\The Lord of the Rings Return to Moria\Moria\Content\Paks\ - For Epic Games users:
C:\Program Files\Epic Games\ReturnToMoria\Content\Paks\
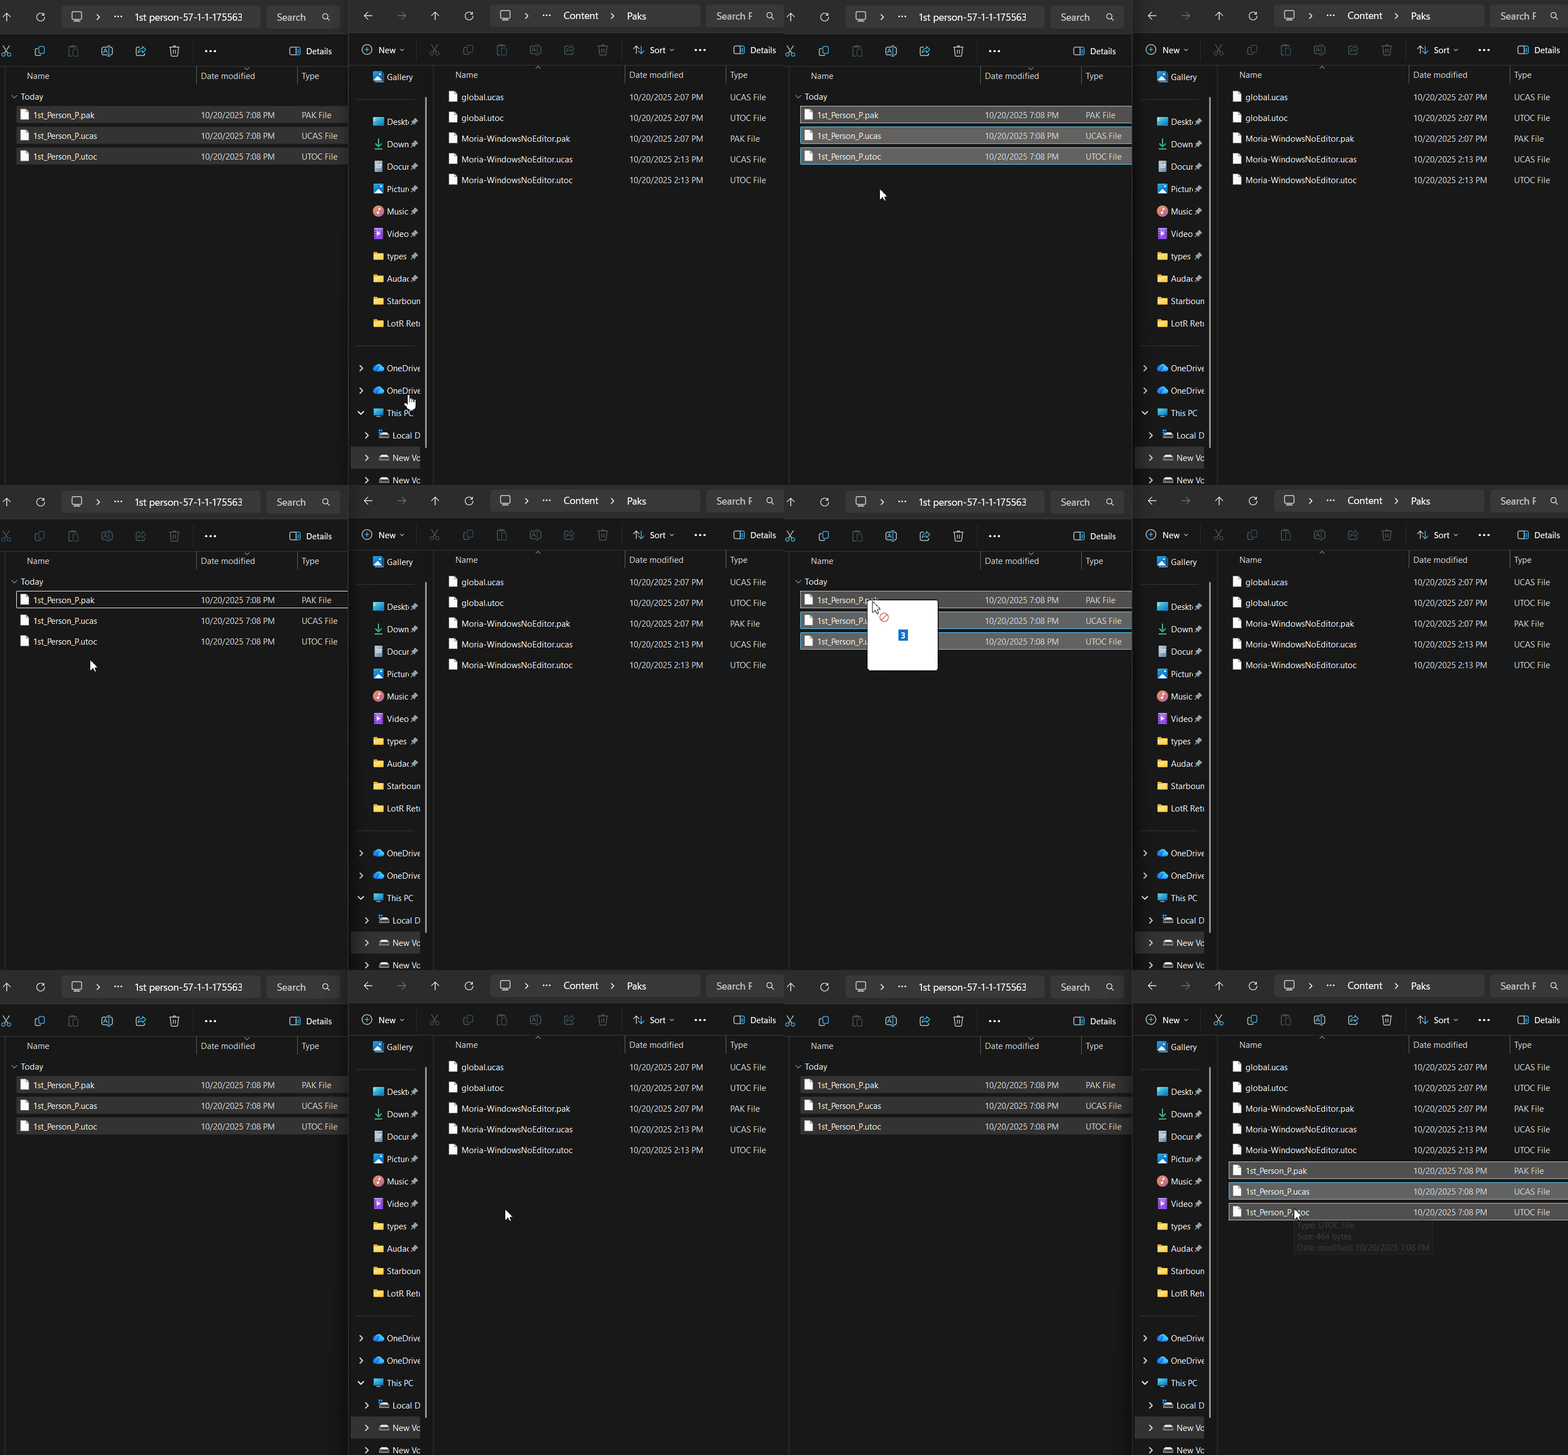
Once all players have the same .pak files as the server, they will be able to connect and play.
Troubleshooting Common Issues
- The game crashes, or players can't connect after installing a mod.
- Solution: This is the classic symptom of a mod mismatch. This error occurs if the server has a mod that a player doesn't, or a player has a mod the server doesn't. You must confirm that every single player (and the server) has the exact same
.pakfiles in theirPaksfolder.
- Solution: This is the classic symptom of a mod mismatch. This error occurs if the server has a mod that a player doesn't, or a player has a mod the server doesn't. You must confirm that every single player (and the server) has the exact same
- The mod doesn't seem to be working in-game.
- Solution: First, ensure you've restarted the server since uploading the file. Second, confirm the
.pakfile is in the correctServer/Moria/Content/Paks/folder and not in a sub-folder.
- Solution: First, ensure you've restarted the server since uploading the file. Second, confirm the
- The server crashes on startup after I added a mod.
- Solution: Remember, these mods are unofficial. The mod you added may be outdated, conflict with another mod you installed, or be incompatible with the latest version of the game. Try removing the mod and restarting to see if the problem resolves.
Conclusion
Your Dwarven hall has now been custom-forged with new, unofficial content! You've navigated the tricky process of modding and opened up a new realm of possibilities for your players. Remember, the key to a stable modded server is ensuring everyone in your fellowship has the exact same set of .pak files. Keep your mod list organized and your players informed.
If your new creations cause your mountain to crumble,If you have any questions or need assistance, feel free to reach out to our customer care agents through our live chat or email at [email protected].