How to Join Your Day of Defeat: Source Server
Join your custom Day of Defeat: Source server fast — use console direct connect or authenticate with a Steam GSLT. Get IP, tips, and fixes.
Whether you are storming the beaches as an Allied rifleman or holding the line as an Axis machine gunner, Day of Defeat: Source offers incredible classic squad-based WWII action. Hosting your own dedicated server gives you complete control over map rotations, class limits, and gameplay rules.
However, older Source engine games can sometimes make finding your brand new server in the massive public browser a bit tedious. Fortunately, you can easily bypass the search by using direct connection commands or by authenticating your server for the public master list. This guide will walk you through the best ways to join your server and get your boots on the ground!
Step 1: Retrieve Your Connection Details
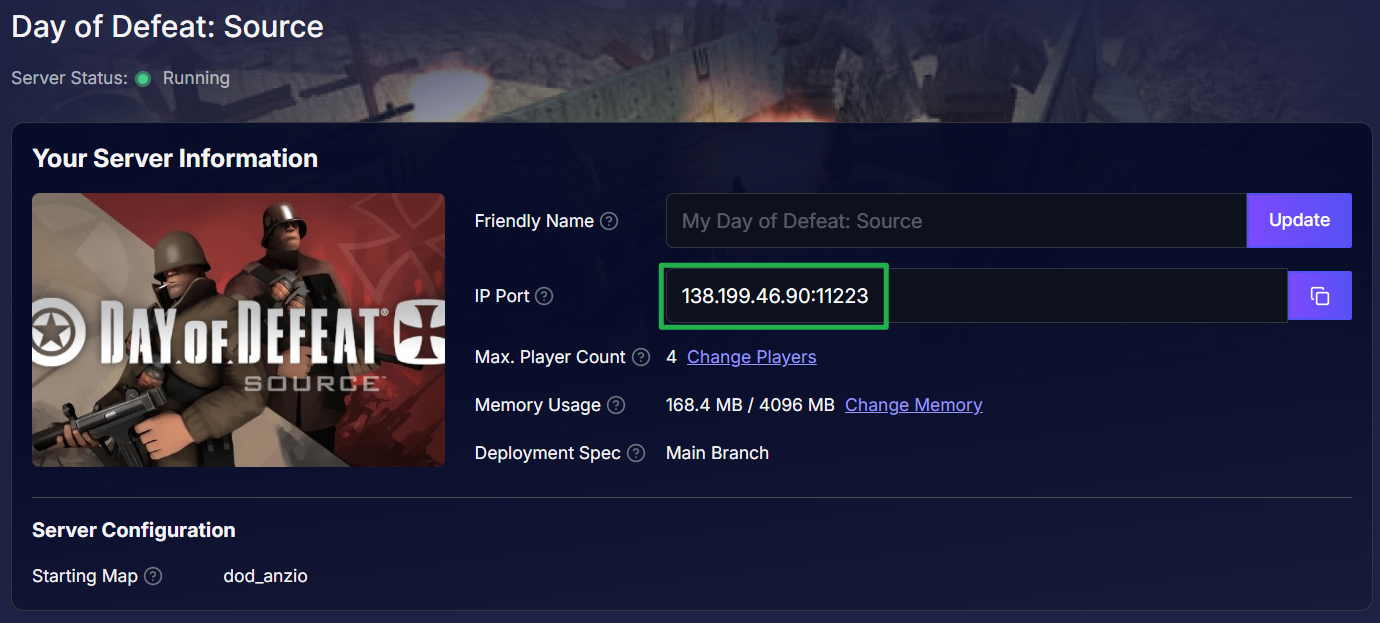
Before attempting to join, you need your server's connection info. Log into your server dashboard and locate your unique IP Address and Port number on the main page.
Method 1: The Developer Console (Direct Connect)
This is the fastest and most reliable way to connect to any Source engine game, as it completely bypasses the public master list.
Launch Day of Defeat: Source and wait for the main menu to load.
Press the ~ (tilde) key on your keyboard to slide open the developer console window.
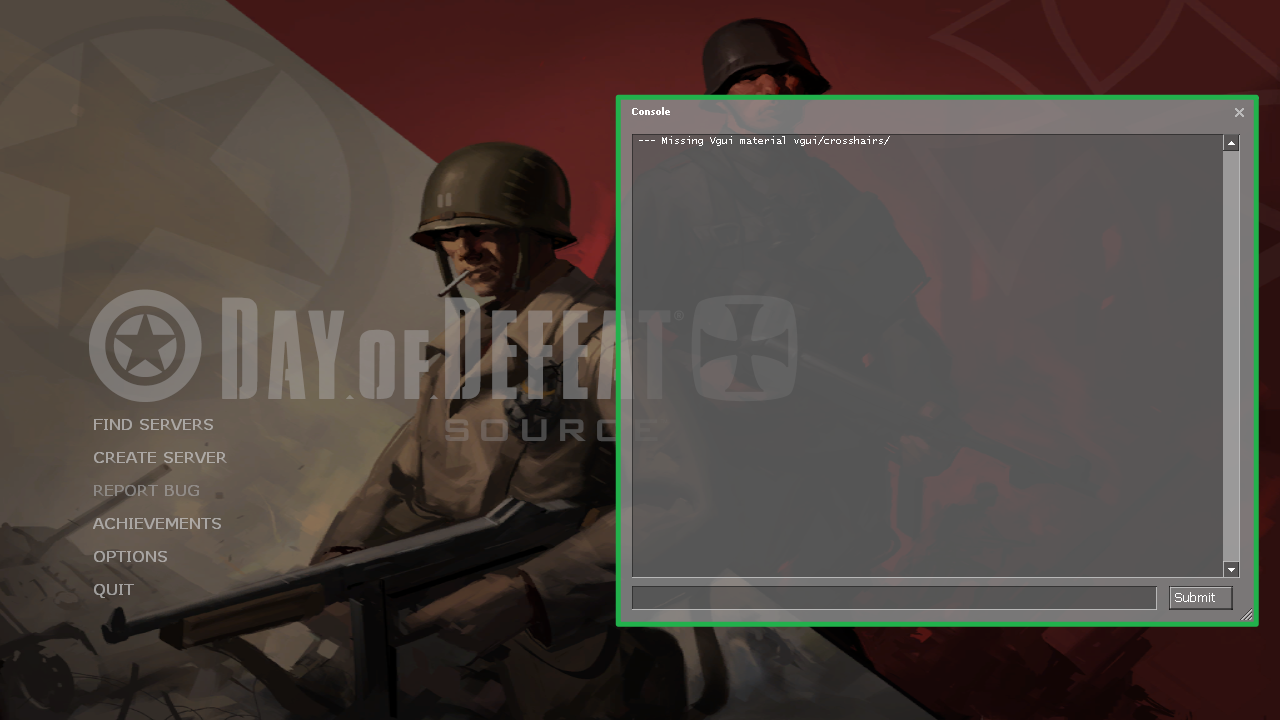
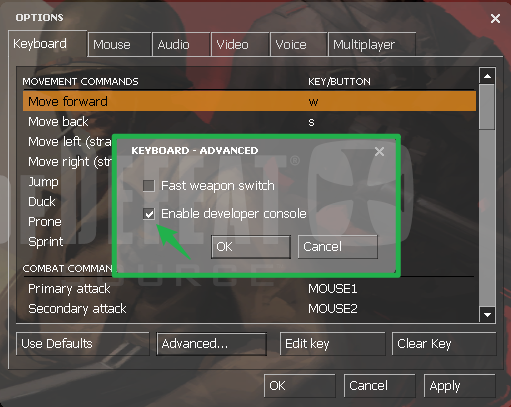
If it does not open automatically, you may need to enable it by going to Options > Keyboard > Advanced and checking the Enable developer console box.
Click inside the console text box, type
connect IP:Port(replacing the placeholder with your actual server digits, likeconnect 192.168.1.1:27015), and press Enter. Your game will immediately start loading into the server!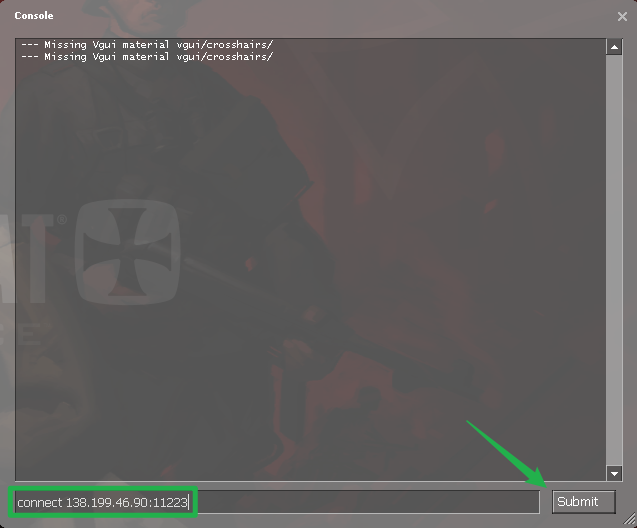
Method 2: In-Game Server Browser (Public Listing)
If you want your server to be fully public and searchable in the main menu, Valve requires you to authenticate it using a Steam Game Server Login Token (GSLT). Without this token, your server will not appear on the public master list.
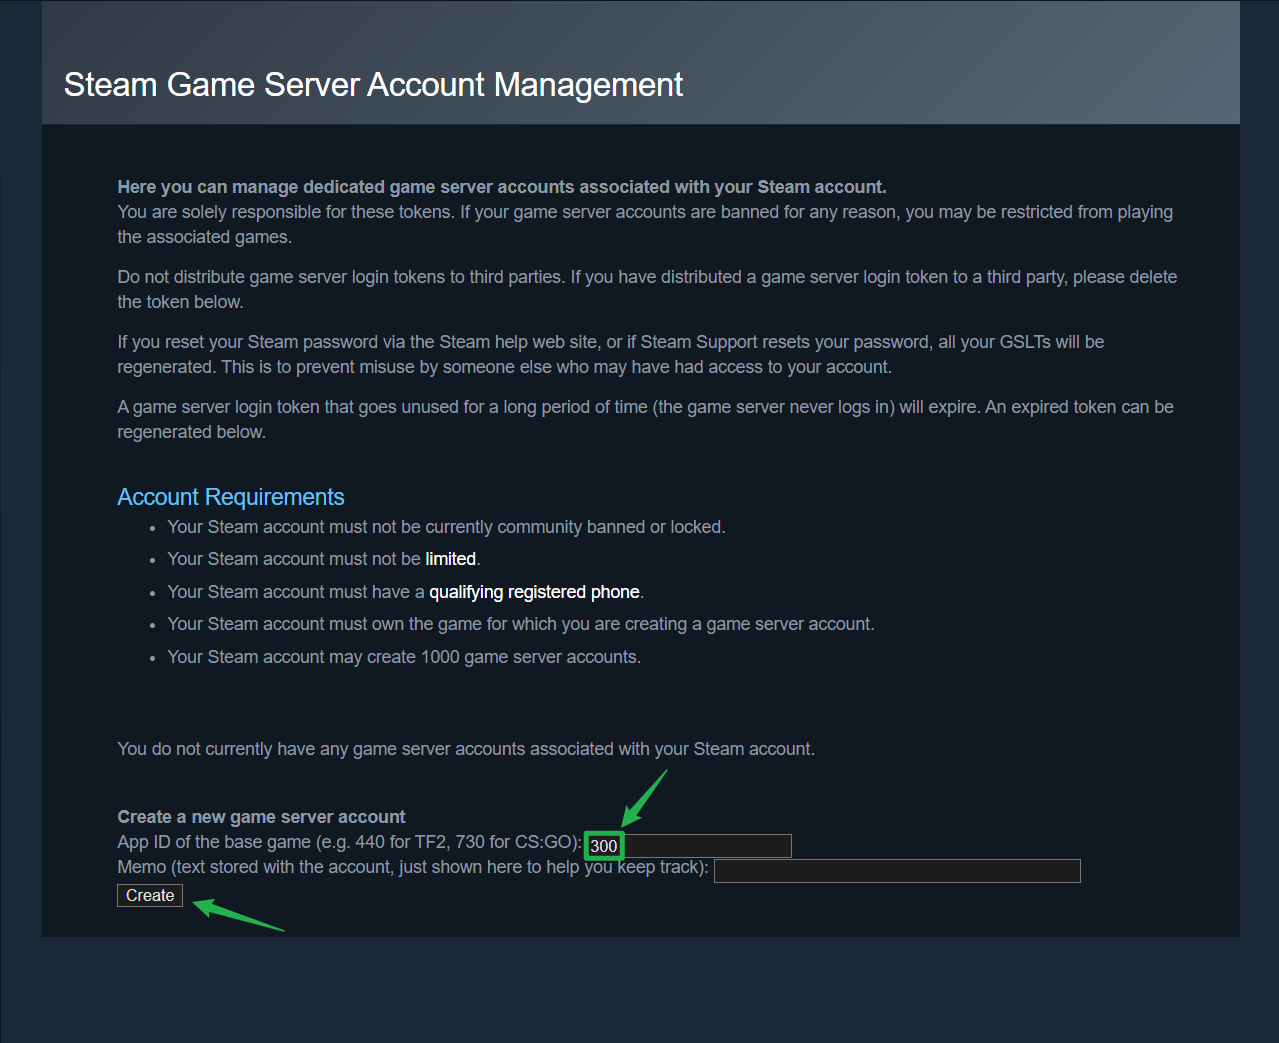
Go to the official Steam Game Server Account Management page (
steamcommunity.com/dev/managegameservers) on your web browser and log in with your Steam account.Under the account creation section, enter 300 as the App ID (the specific ID for Day of Defeat: Source) and generate a new token. Copy this long login token to your clipboard.
Open your server panel and navigate to the Basic Settings tab on the left-side menu.
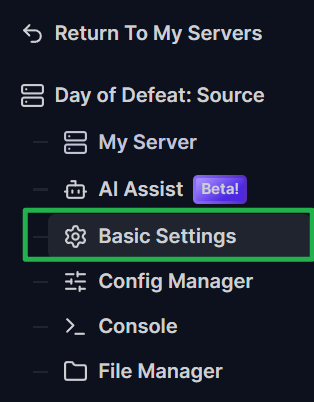
Paste your token directly into the Steam Account Token (GSLT) input field.

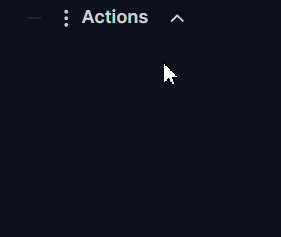
Save your changes and navigate to the Actions menu to Restart your server.
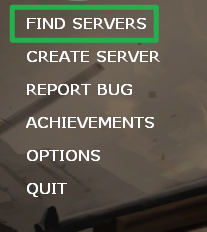
Once fully booted, launch the game and click Find Servers on the main menu. Type your Server Name into the search filter tags at the bottom. Because your server is now authenticated, it will populate in the list. Simply click on it and hit Connect.
Troubleshooting and Tips
If your squad is having trouble loading into the map or connections are getting rejected, keep these quick pointers in mind:
Connection Failed Error: Head back to your Server Panel and ensure your game instance is displaying as Running. Your server must be fully booted up and initialized before anyone can join.
Joining Password Protected Servers: If you set a password, connecting via the console with just the IP will reject you. Type
connect IP:Port; password yourpasswordinto the console and press Enter to join and bypass the lock in one swift command.Instant Ping AI Fixes: If your server is running but connections are still timing out, do not panic! Open your panel chat and ask Ping AI to read your latest console logs. The assistant will scan your files, find the exact error causing the connection issue, and tell you exactly how to fix it.
Conclusion
Getting your friends into your Day of Defeat: Source server is incredibly simple once you know how to navigate the Source engine tools. By utilizing the developer console or authenticating your server for the public browser, you can skip the clunky menus completely and focus entirely on capturing the flags!
If you encounter any issues or have further questions, feel free to contact our support team for assistance!