
How to Become an Admin on Your Empyrion Server
Guide to become an Empyrion server admin: add your Steam64 ID to adminconfig.yaml, stop server, edit Elevated block, save and restart.
Surviving the harsh environments of Empyrion - Galactic Survival takes grit. Whether you are fending off drone attacks from the Zirax Empire, building a massive capital vessel, or trying to manage a bustling multiplayer faction, having administrator privileges is essential for keeping your server running smoothly. Granting yourself admin rights allows you to use console commands, spawn items, and enforce server rules.
Setting up your admin permissions requires a quick edit to a configuration file in your server dashboard. It might sound highly technical, but it is actually a very straightforward process. This guide will walk you through exactly how to configure your files and claim your rightful place as the server commander!
Step-By-Step Guide
The admin configuration file is generated automatically when you first start your Empyrion server, meaning you simply need to find it and add your Steam ID. Follow these exact steps to elevate your permissions:
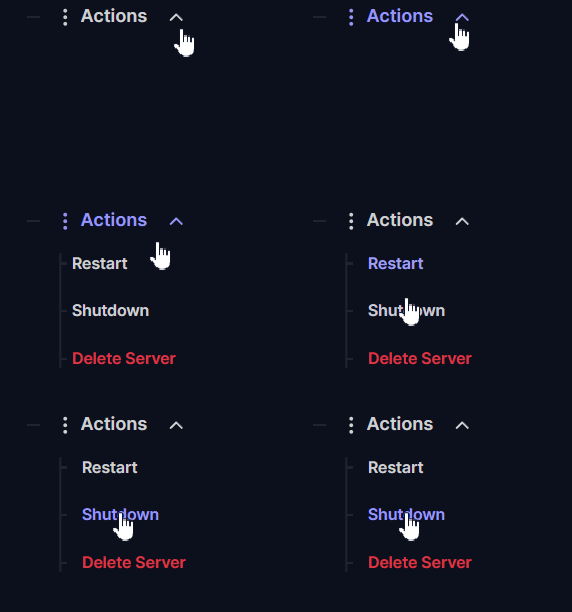
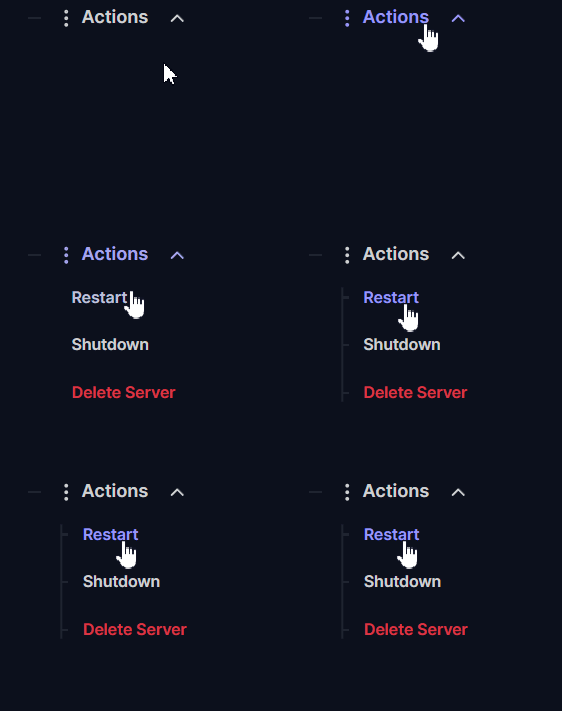
Log into your server panel and navigate to Actions > Shutdown to safely turn off your server. You must always completely stop your server before making file changes to prevent the engine from overwriting your edits!
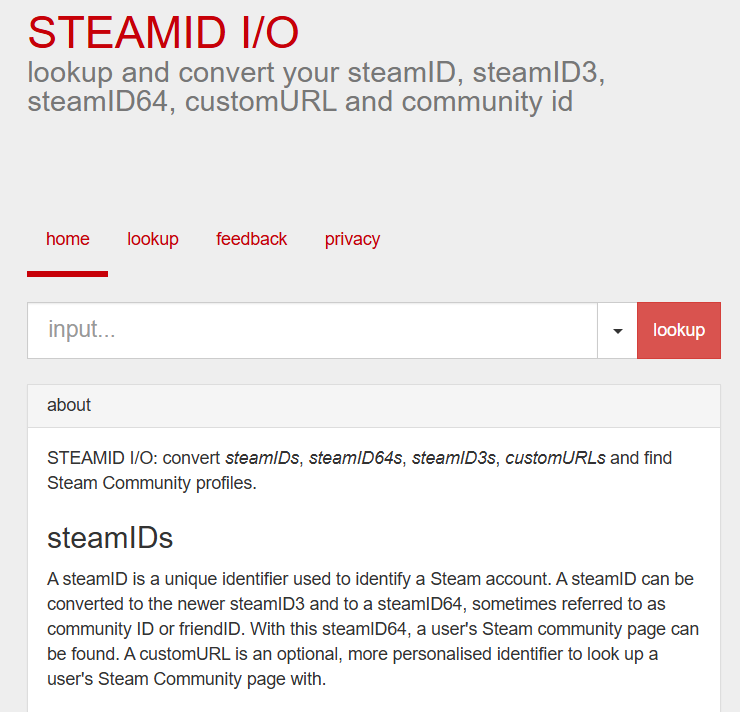
Before editing the file, you need to find your Steam64 ID. You can easily find this long string of numbers by pasting your Steam profile URL into a third-party site like SteamID.io. Copy that number to your clipboard.
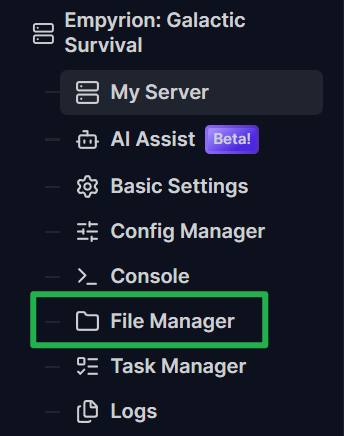
Click on the File Manager tab located on the left side navigation menu.
Navigate to the
Server/Saves/directory and locate the file namedadminconfig.yaml. Click on it to open the text editor.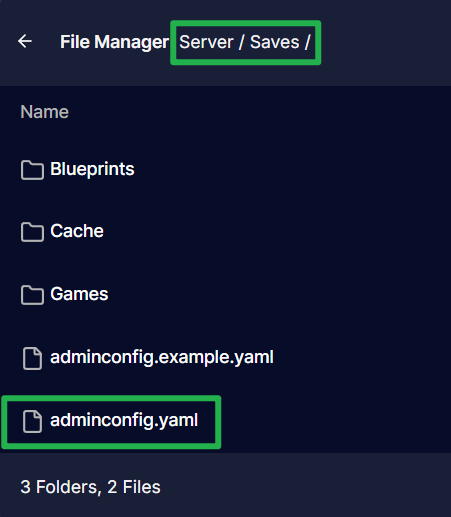
- Inside the editor, you will add your Steam64 ID under the "Elevated" section. Empyrion uses permission levels, with level 9 granting full admin access. Edit the text so it looks exactly like this example, but replace the placeholder ID with your actual Steam64 ID:
Elevated:
- Id: 76561198000000000
  Permission: 9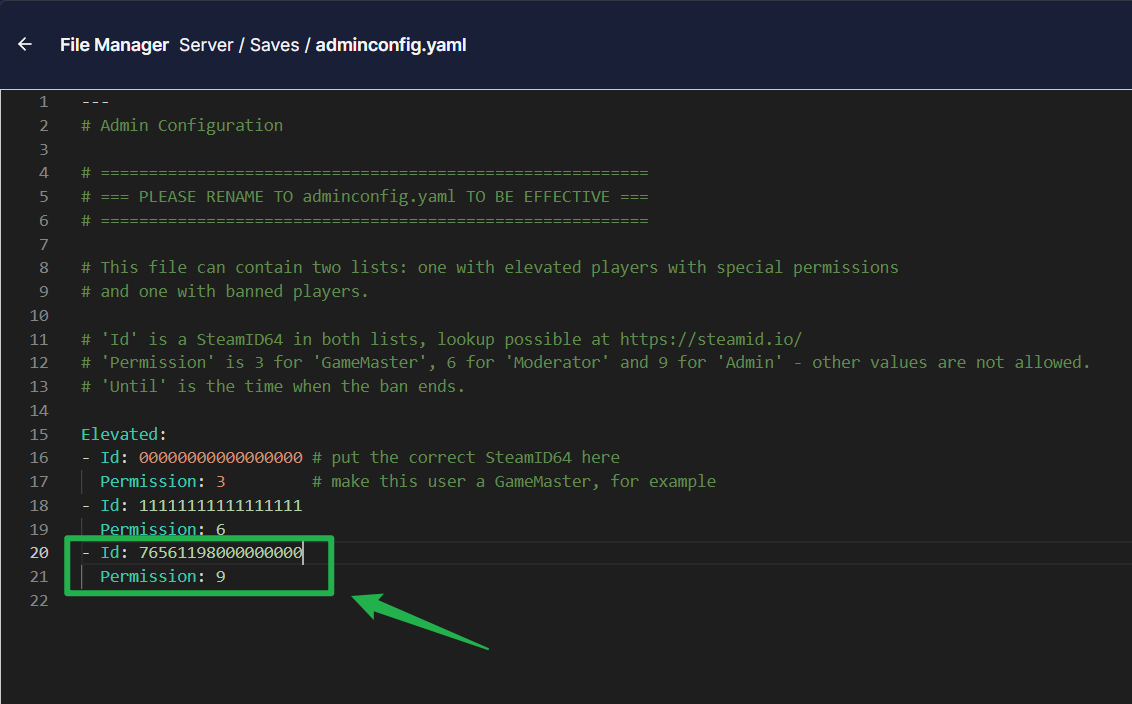
Click the Save File button to lock in your new configuration.

Navigate to Actions > Restart to boot your server back up. Once you join the game, you will have full admin privileges!
Troubleshooting and Tips
Editing a raw file can sometimes lead to minor formatting errors if you are a rookie to server hosting. Keep these troubleshooting tips on your radar if your admin powers are not working:
- Watch Your Spacing: YAML files are incredibly sensitive to spaces and indentation. Never use the "Tab" key to create spaces in a
.yamlfile. Ensure that theId:line is indented properly with standard spaces, otherwise the server will fail to read the file and your permissions will not be granted. - Exact Steam64 ID: Make sure you are using your Steam64 ID (which is a 17-digit number starting with 7656) and not your custom profile URL name or Steam account login name.
- Adding Multiple Admins: If you want to grant admin rights to your trusted faction members, simply add a new line directly below your entry with the same indentation. You will need a separate
Id:andPermission:line for each individual player. - Always Shutdown First: If your server is running or actively restarting while you hit save in the File Manager, the active game instance will immediately wipe out your new file with its current cached settings.
Conclusion
Taking the time to configure your admin file gives you the ultimate power to shape your galaxy. Whether you need to fix a glitched hover vessel, kick a disruptive player, or just spawn in some extra Promethium fuel for your crew, having console access makes server management a breeze. Double-check your YAML spacing, boot up the server, and get back to exploring the cosmos!
If you encounter any issues or have further questions, feel free to contact our support team for assistance!