
How to Add Mods to Your DayZ Server Using the Mod Manager
Quickly add and manage DayZ server mods with our automated Mod Manager—install mods, auto-handle dependencies, keys and uninstall safely.
Welcome to the intense survival experience of DayZ! Customizing your apocalyptic wasteland with mods used to mean moving files manually, copying keys, and editing code. But not anymore! With our brand new, fully automated Mod Manager, adding your favorite custom weapons, vehicles, and maps is as simple as a few clicks.
Whether you are a seasoned survivor or a first-time server owner, this guide will show you exactly how to install and uninstall mods effortlessly. You will never have to worry about digging through complicated file structures again!
The automated manager is highly recommended for all users because it removes the risk of configuration errors. However, if you have a private mod or still prefer to handle your files by hand, you can follow our alternative guide on How to Manually Add Mods to Your DayZ Server instead. Otherwise, follow the steps below to use the new automated system!
Step-by-Step Installation Guide
Before making any changes to your server, it is always best practice to go to Actions > Shutdown to safely turn off your server.
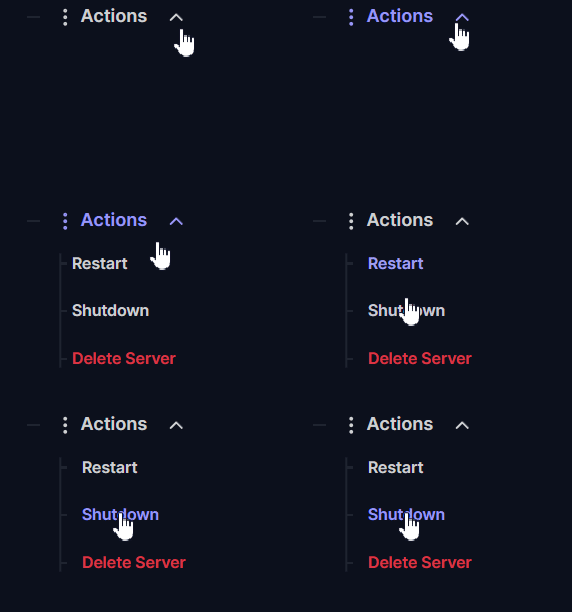
Once the server is offline, follow these simple steps:
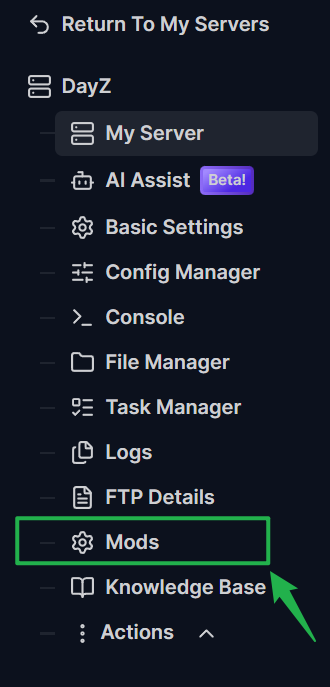
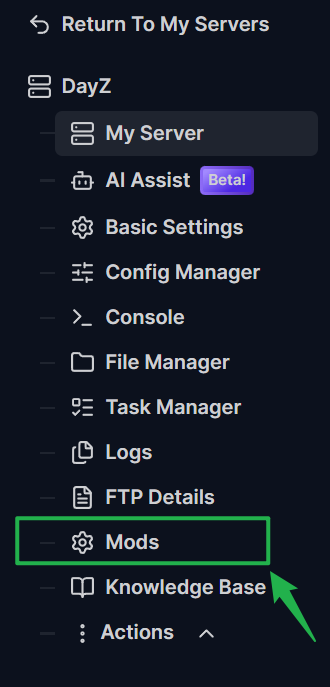
Log into your server panel and navigate to the Mods tab located on the left side menu.
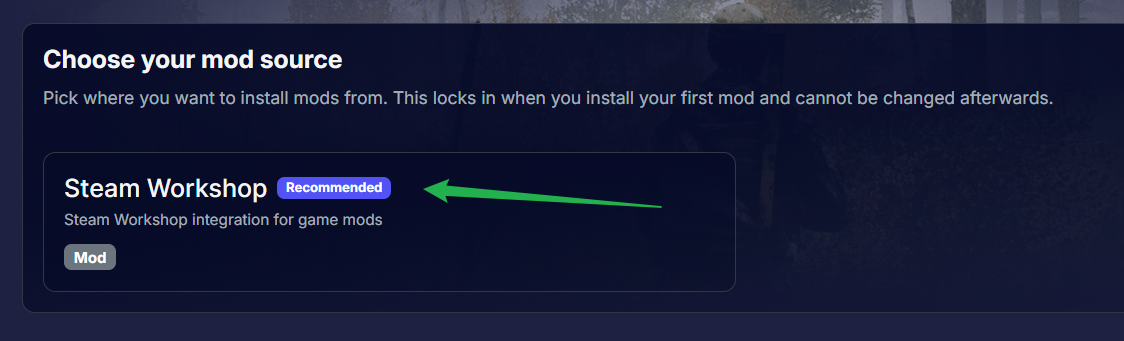
You will be prompted to choose your mod source. Click on the Steam Workshop option to proceed.
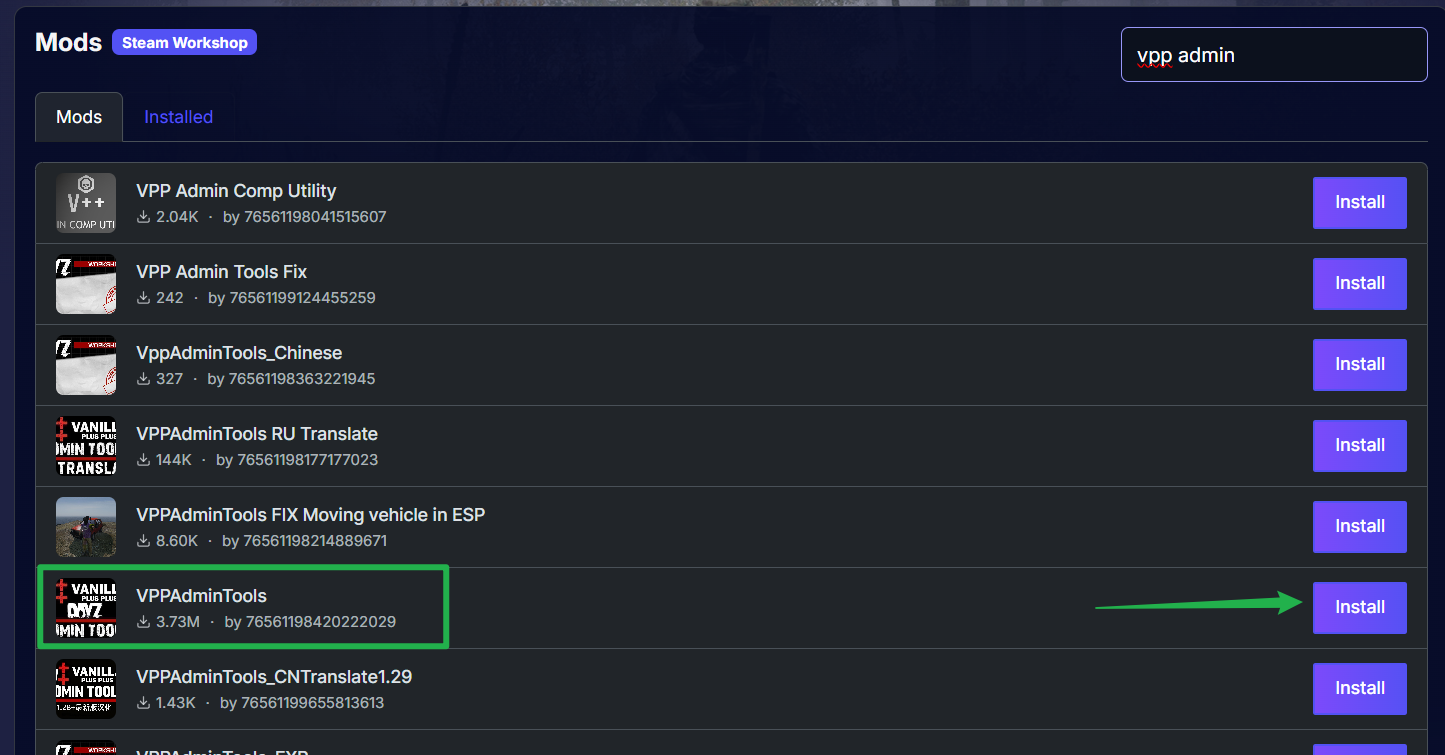
Use the search bar at the top right to find the specific mods you want to add to your server.
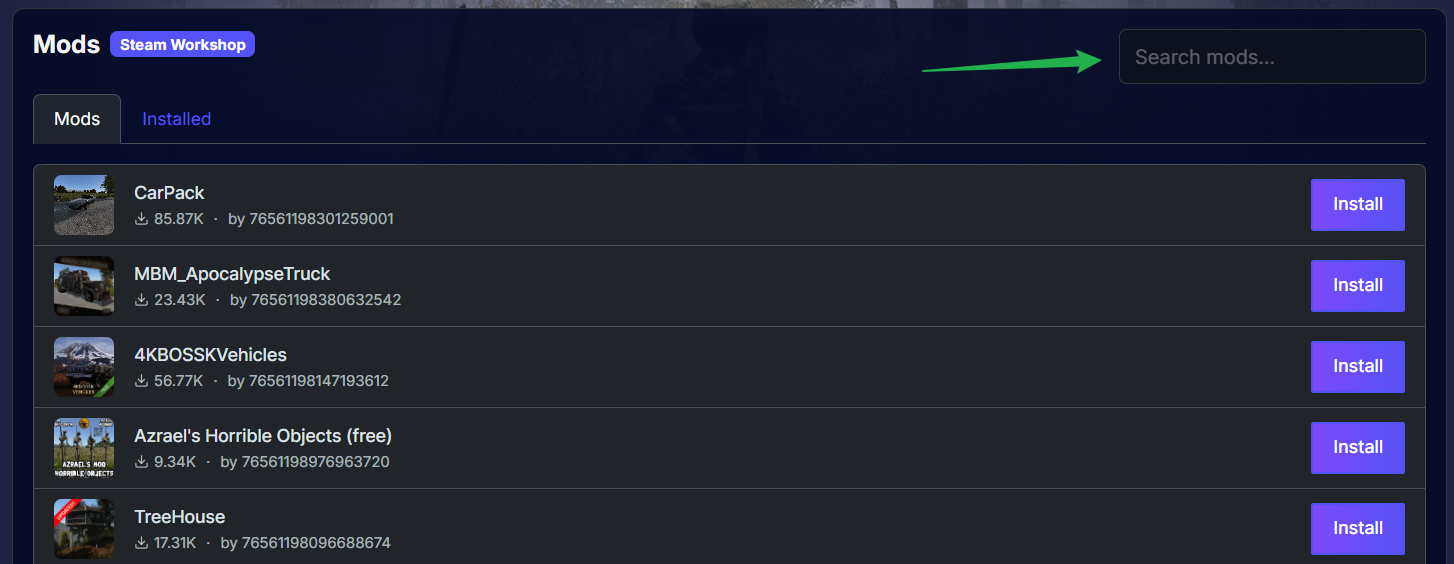
Once you find the perfect mod, simply click the Install button next to the name of the mod.
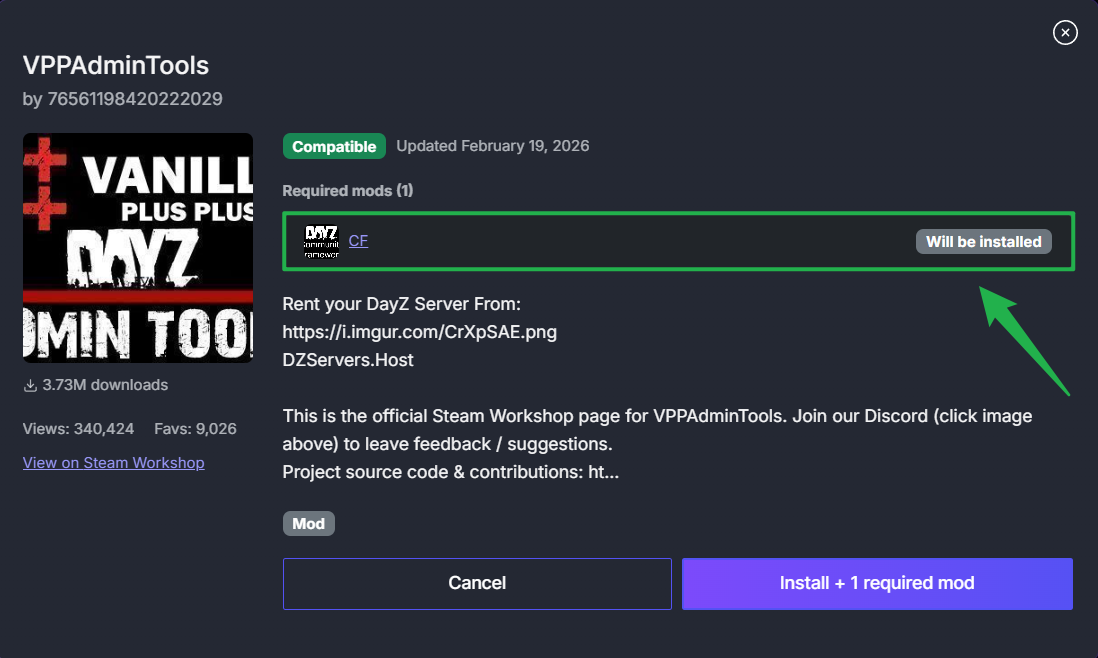
If the mod you selected requires other base mods to work properly (known as dependencies), the system is smart enough to detect them. A window will pop up showing the required mods and install them automatically as well!
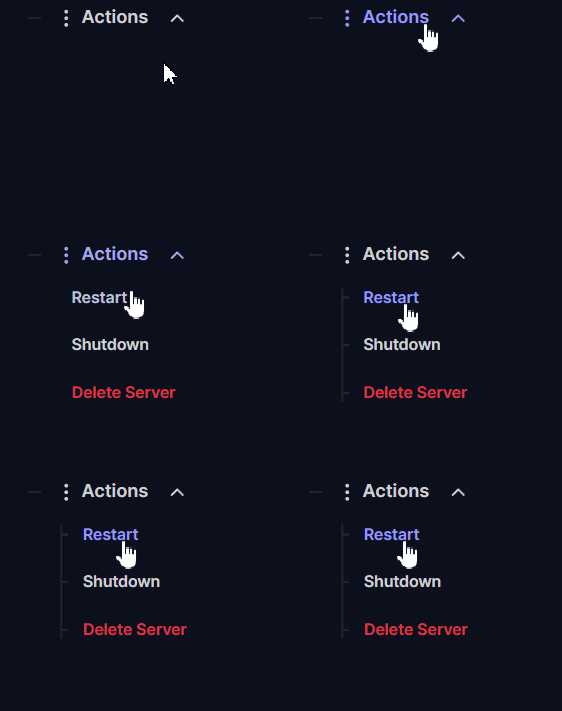
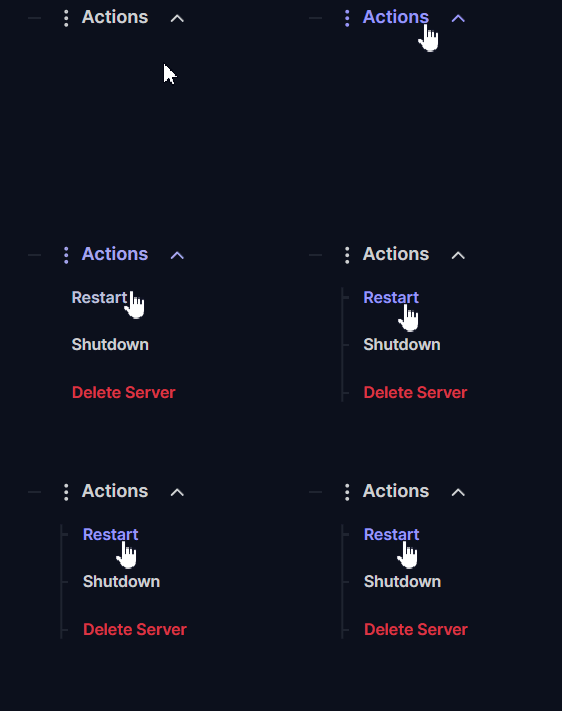
Go to Actions > Restart to boot up your server with your new mods active!
How the Automated System Works
Wondering what the system just did behind the scenes? Once you click install, the automated manager does all the heavy lifting for you so you do not have to:
- It downloads the mod folder directly to your root directory in the File Manager.
- It automatically copies the essential security key files for each mod and places them perfectly into the
keysfolder. - It automatically types the correct mod folder name into the Mods field inside your Basic Settings.
How to Uninstall Mods
If you ever want to remove a mod and return things to normal, the uninstallation process is just as easy:
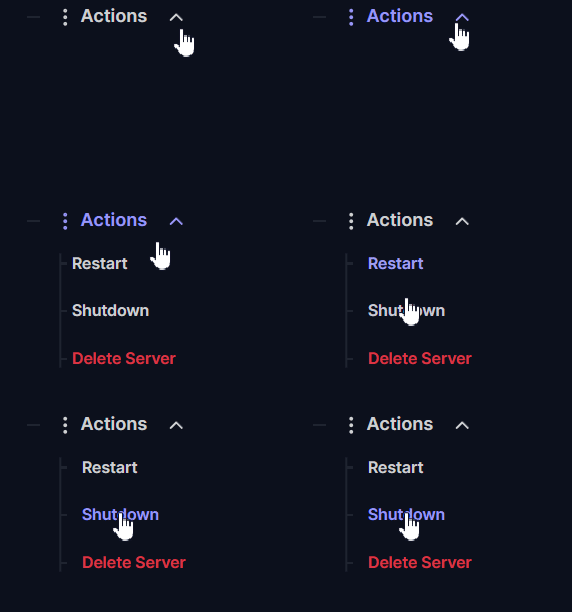
Go to Actions > Shutdown to stop your server.
Navigate back to the Mods tab in your server panel.
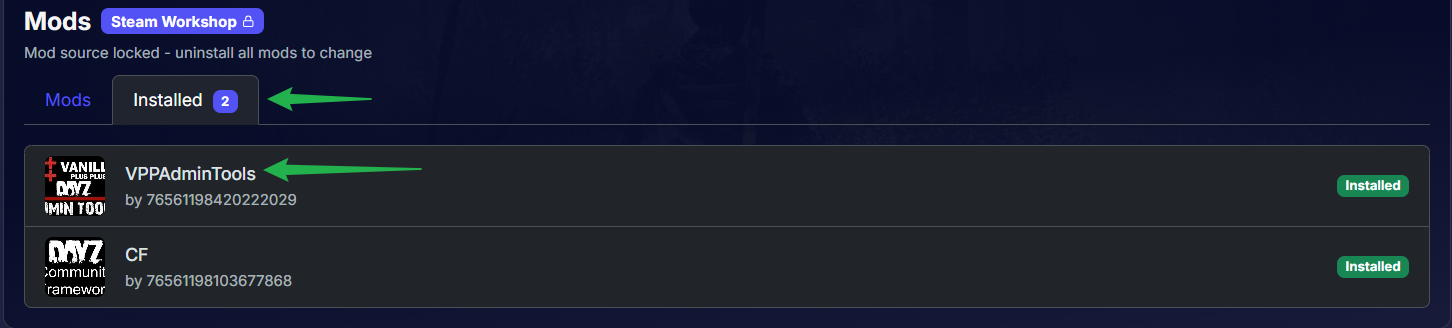
Click on the Installed tab to view all the mods currently active on your server and click on the specific mod you wish to remove.
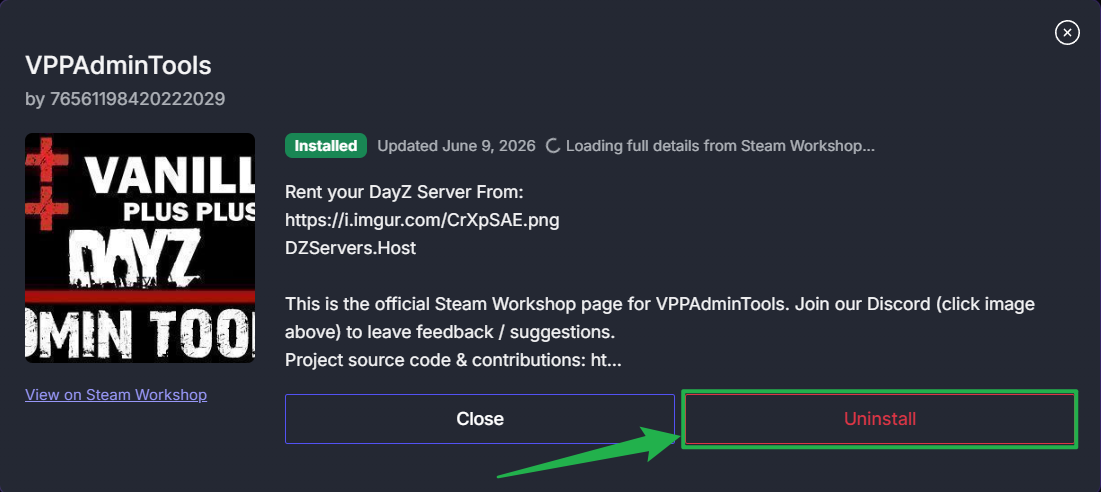
A window will pop up with the mod details. Click the Uninstall button at the bottom right.
Go to Actions > Restart and the mod will be completely wiped from your server files and settings!
Important Disclaimers and Troubleshooting
Running into a snag while trying to survive the zombie hordes? Keep these helpful tips and important disclaimers in mind:
Fixing Failed Mod Installations
Occasionally, a mod fails to install because the system is missing a specific folder during the download process. To fix this, navigate to your File Manager and open the
steam-workshop/steamapps/workshop/content/221100/directory. You will need to manually create the missing folder here. The missing folder name is simply the Steam Workshop Mod ID. If you do not know the ID, just find the mod on the Steam Workshop page and use its Workshop ID number as the folder name. After creating the empty folder, either ask your AI Assist to retry the mod installation or uninstall and reinstall the mod from the Mods page!
Leftover Files Do Not Cause Harm
When you uninstall a mod, it is successfully removed from your command line and the original mod folder. However, the uninstalled
.bikeyfiles will still remain in your server files, and occasionally the uninstallation fails to remove the main mod folder entirely. Do not panic! These leftover files will not impact your server performance at all.Give Massive Mods Time
Big mods, like huge map overhauls or massive weapon packs, may take a while to get fully installed. Do not restart or modify the server until they are completely done downloading.
Complex Mods Require Manual Tweaks
Highly customizable and complex mod configurations may not work right out of the gate. Because of extra files, you might need to manually adjust configurations and perform extra steps to get them running flawlessly.
Players Must Match
Remember that anyone trying to join your server must also subscribe to and download the exact same mods on their own personal computer through the DayZ launcher. The client and the server must always match!
Always Stop Your Server
We cannot stress this enough; always use Actions > Shutdown before installing or uninstalling mods. Trying to change files while the server is running is a quick way to cause crashes and corrupt your world save!
Conclusion
Customizing your DayZ server has never been this simple! By letting the automated Mod Manager handle the tricky files and keys, you get to spend less time messing with settings and more time surviving the apocalypse with your friends. You are now fully equipped to build the ultimate zombie survival experience!
If you encounter any issues or have further questions, feel free to contact our support team for assistance!