
How to Transfer Your Co-op Save to Your Palworld Server
Move your Palworld local co-op save to a dedicated server: find files, use a save converter, upload backups, fix player IDs, restart server.
How to Transfer Your Single Player / Co-op Save to Your Palworld Server
Transitioning from a local co-op game to a 24/7 dedicated server is the ultimate upgrade for your Palworld group. It allows your friends to log in, manage the base, and gather resources even when you are offline. Moving a local co-op save to a dedicated server requires a bit of file management because the game engine assigns player IDs differently in multiplayer environments.
Thankfully, community web tools make this process incredibly simple. This guide will walk you through exactly how to locate your local files, patch them using a save converter, and upload them so your entire squad can pick up right where they left off!
Step - By - Step Guide
To make this process as easy as possible, we have broken it down into three simple phases: finding your local files, converting them for multiplayer, and uploading them to your server panel.
Part 1: Finding Your Local Save Files
On the host PC, launch Palworld and select your world in the single-player menu.
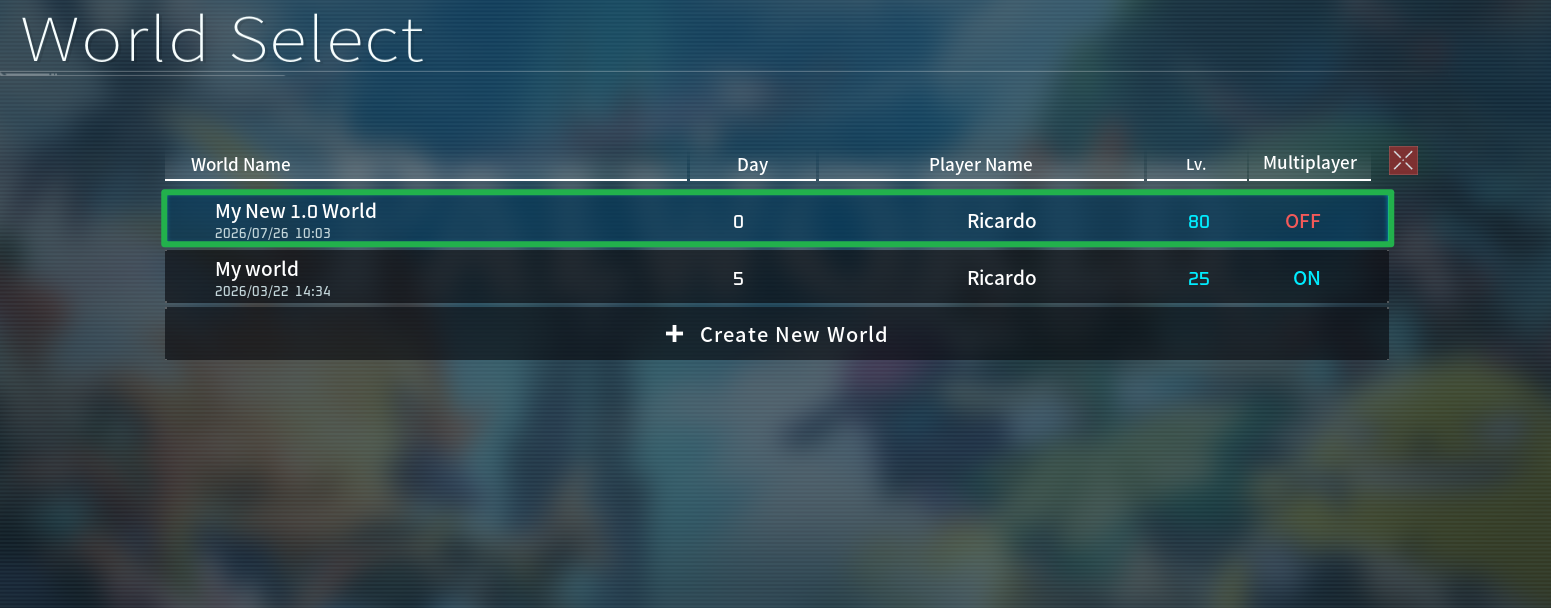
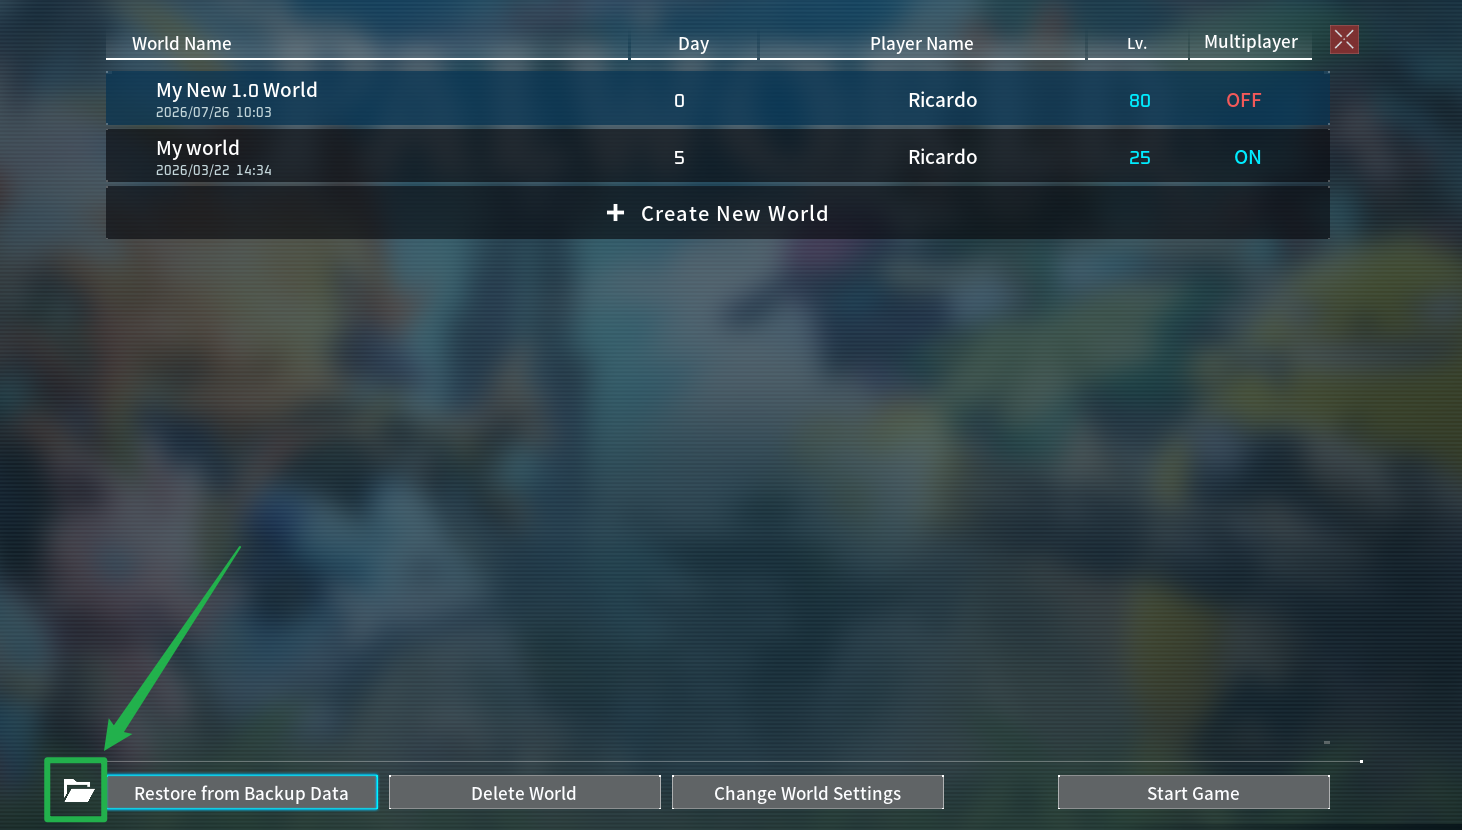
Click the Folder icon at the bottom of the screen to open your local save directory directly.
Alternative Method: You can press the Windows key + R to open the Run dialog and paste your exact directory path. For Steam users, enter
%LocalAppData%\Pal\Saved\SaveGames\. For Xbox Game Pass users, enter%LocalAppData%\Packages\PocketpairInc.Palworld_...\SystemAppData\wgs.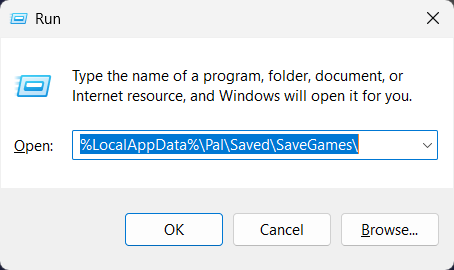
Copy the entire save folder and paste it somewhere on your PC (like your desktop) so that you have a folder you can safely edit later on. This also acts as your backup!
Part 2: Converting the Files for Dedicated Multiplayer
Open your web browser and navigate to a community Palworld save converter tool.
Click on the Upload Files button to upload your complete world save folder (or the
wgsfolder for Xbox) on the website.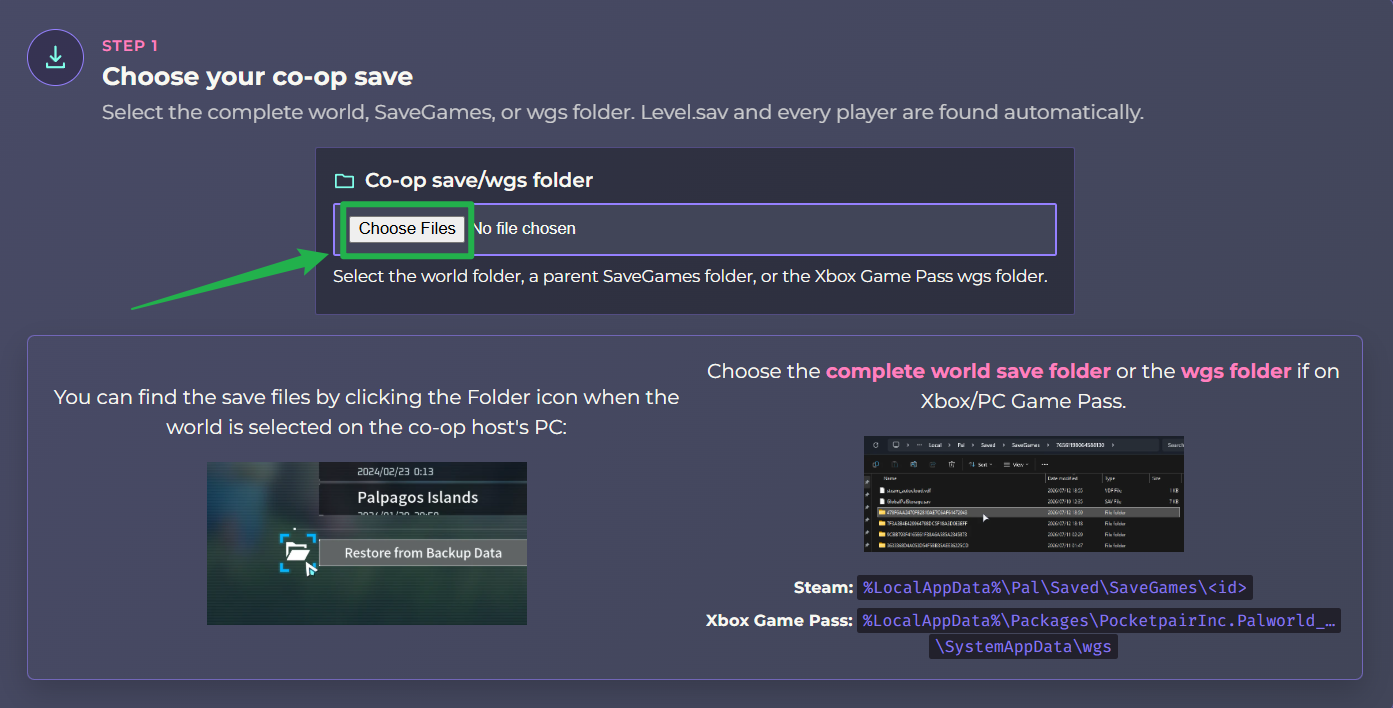
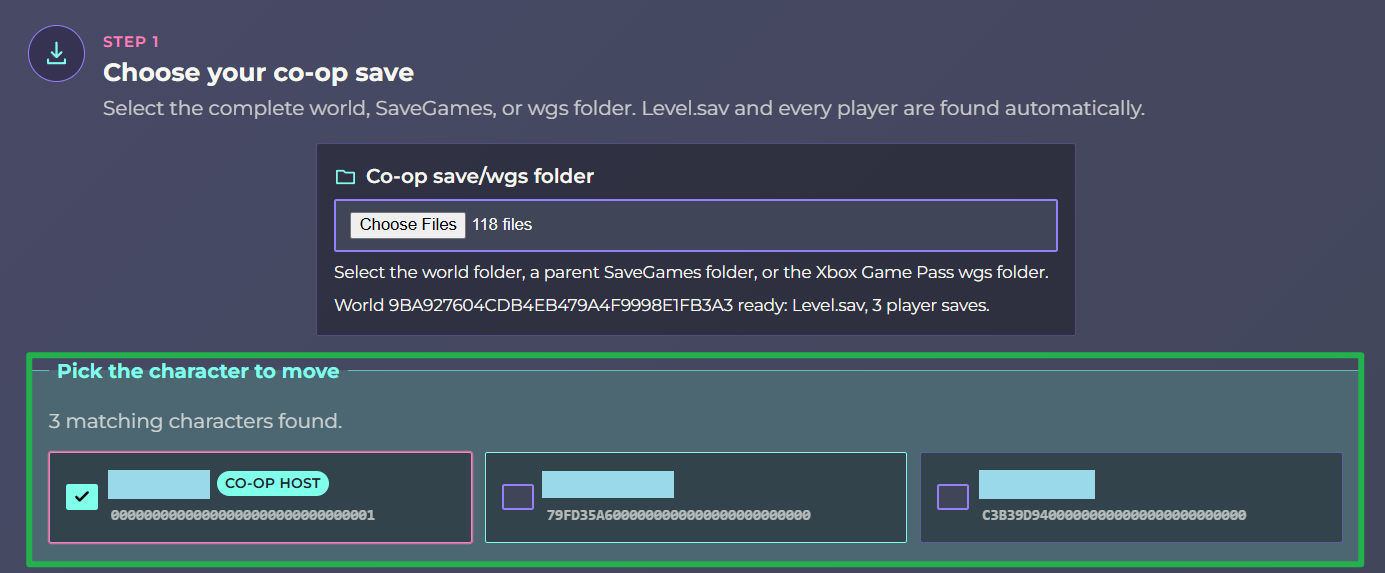
Optional: If your uploaded save folder contains data from multiple players who joined your previous sessions, a Pick the character to move section will appear once the tool reads your files. Check the box for the specific character you want to migrate, which is typically labeled as the CO-OP HOST.
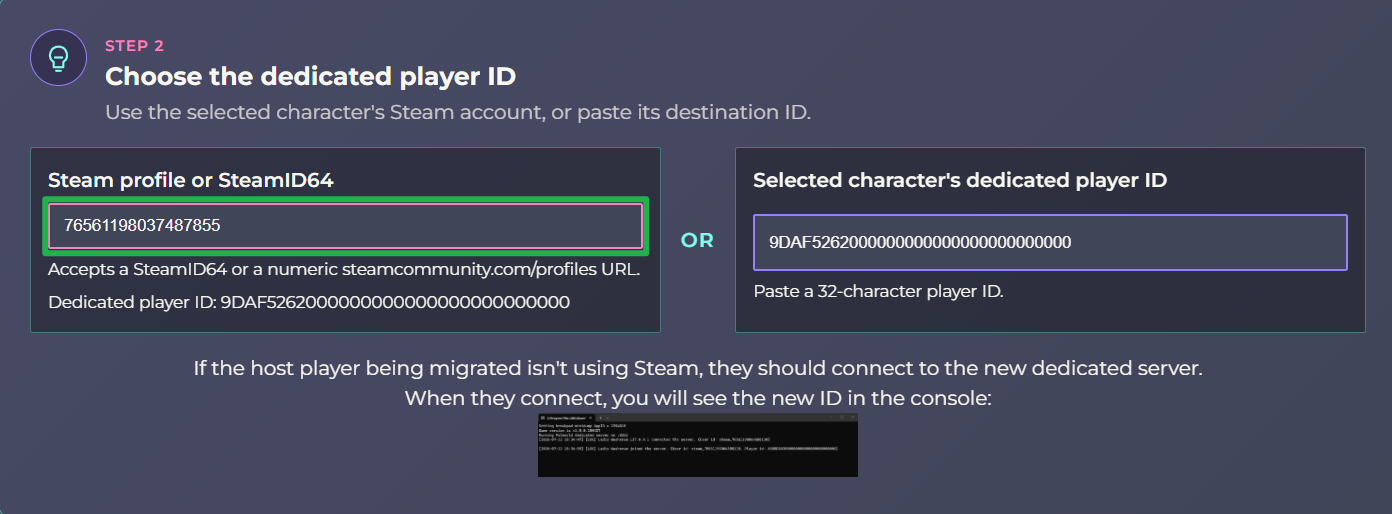
You must now tell the tool your new dedicated player ID so it knows where to assign your host character. If you are playing on Steam, simply paste your Steam profile URL or SteamID64 into the provided box. To get your SteamID64, you can go to this link.
If the host player is not using Steam (such as playing on Xbox Game Pass), they must connect to the new server in-game first and disconnect after a few minutes. After disconnecting, go to the File Manager and go to the path:
Server/Pal/Saved/SaveGames/0/"SaveID"/ Players /and copy the file name.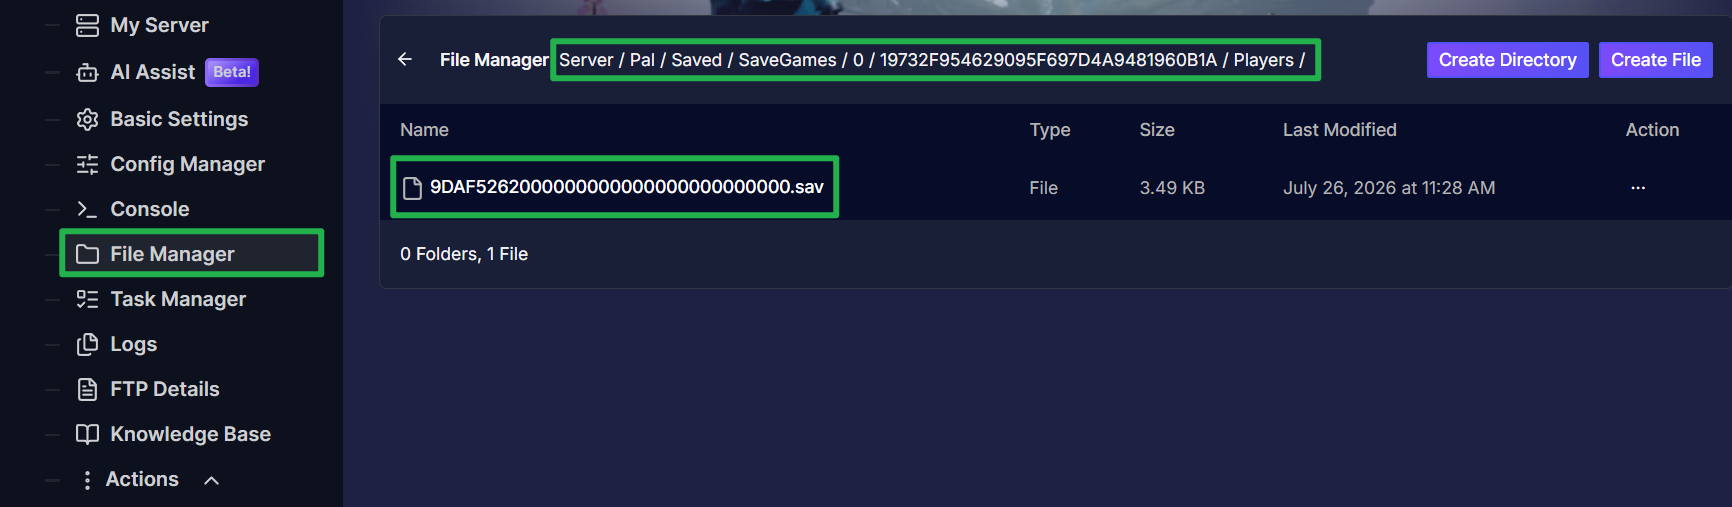
Click the convert button on the tool to process your files. Once the conversion finishes, a download button will appear so you can save the patched
.zipfile directly to your computer.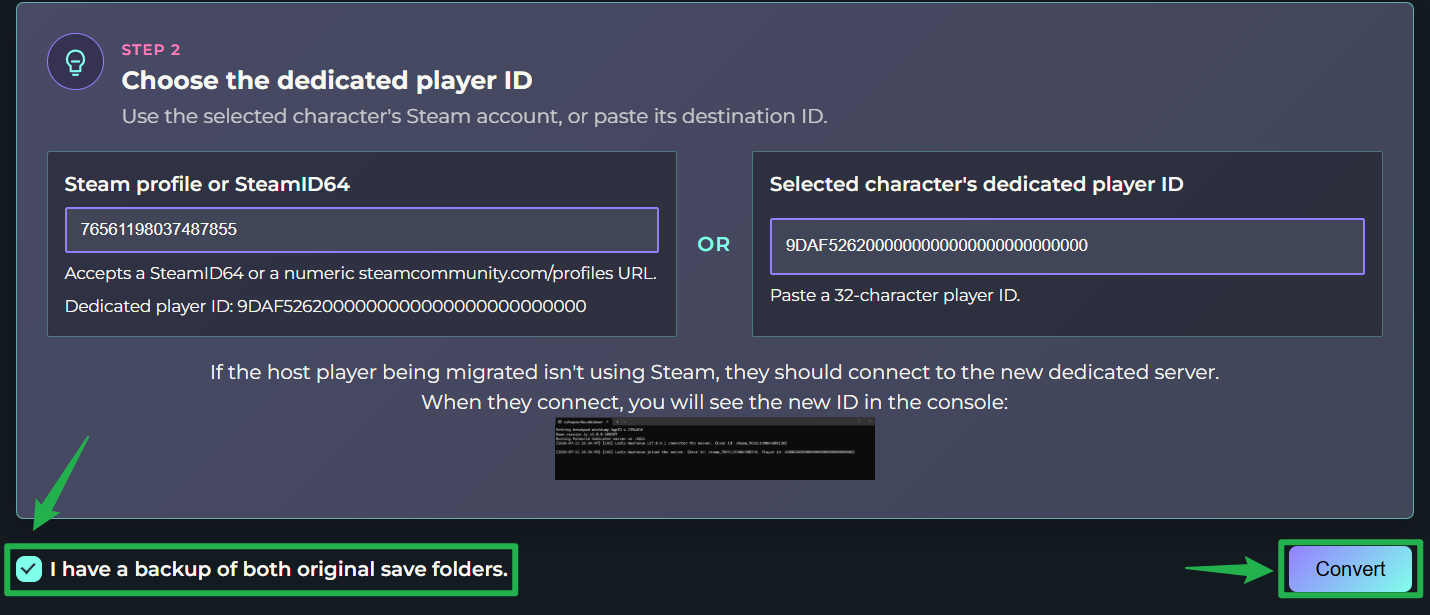
Extract (unzip) the downloaded
.zipfile on your PC. Copy all the files inside this newly extracted folder, and paste them directly into the backup folder you created on your Desktop in Part 1. When prompted by your computer, choose to overwrite and replace the existing files. Your Desktop folder is now fully converted and ready for upload!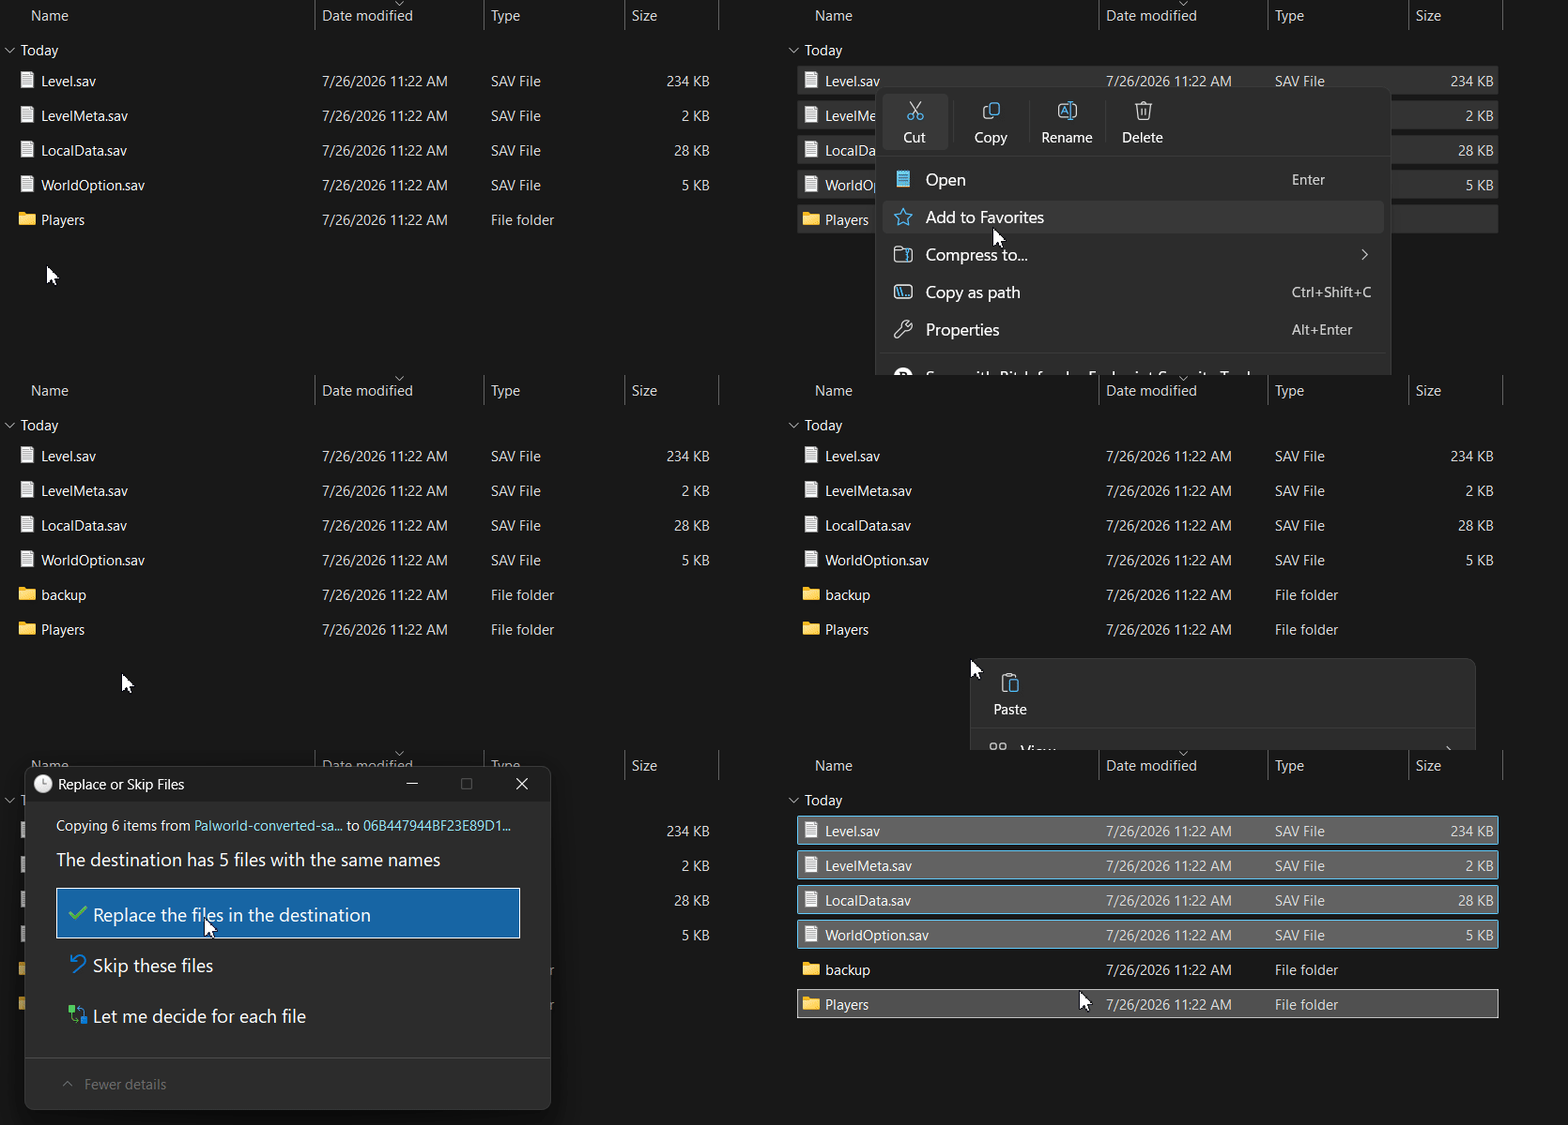
Part 3: Uploading to Your Server
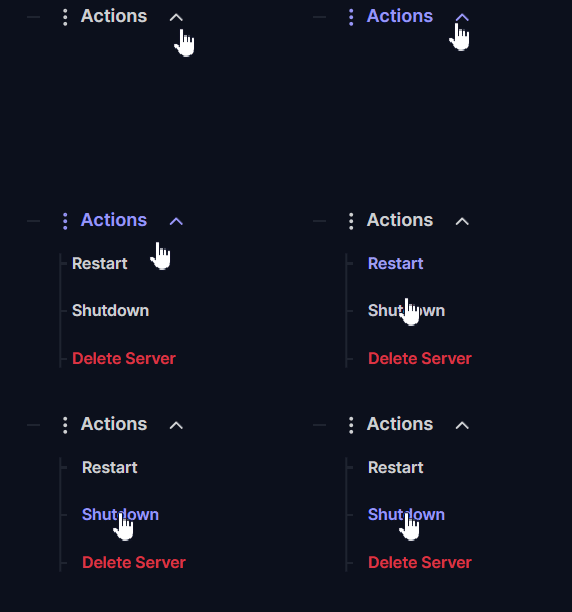
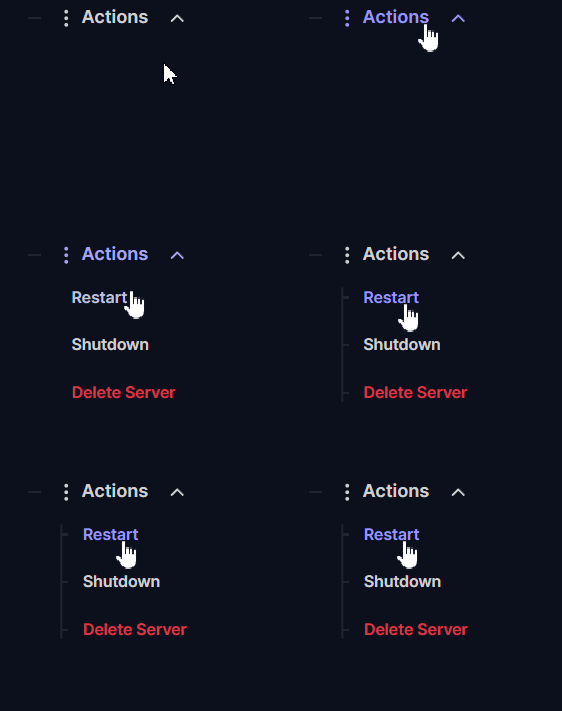
Now that your files are converted, log into your server panel and navigate to Actions > Shutdown to safely turn off your server. You must always completely stop your server before modifying world files to prevent data corruption!
Since replacing your world files uses the exact same process as restoring a backup, you will need to follow our dedicated guide for uploading the data. Follow the exact steps outlined in our guide at this link to safely upload your newly converted Desktop folder to your server.
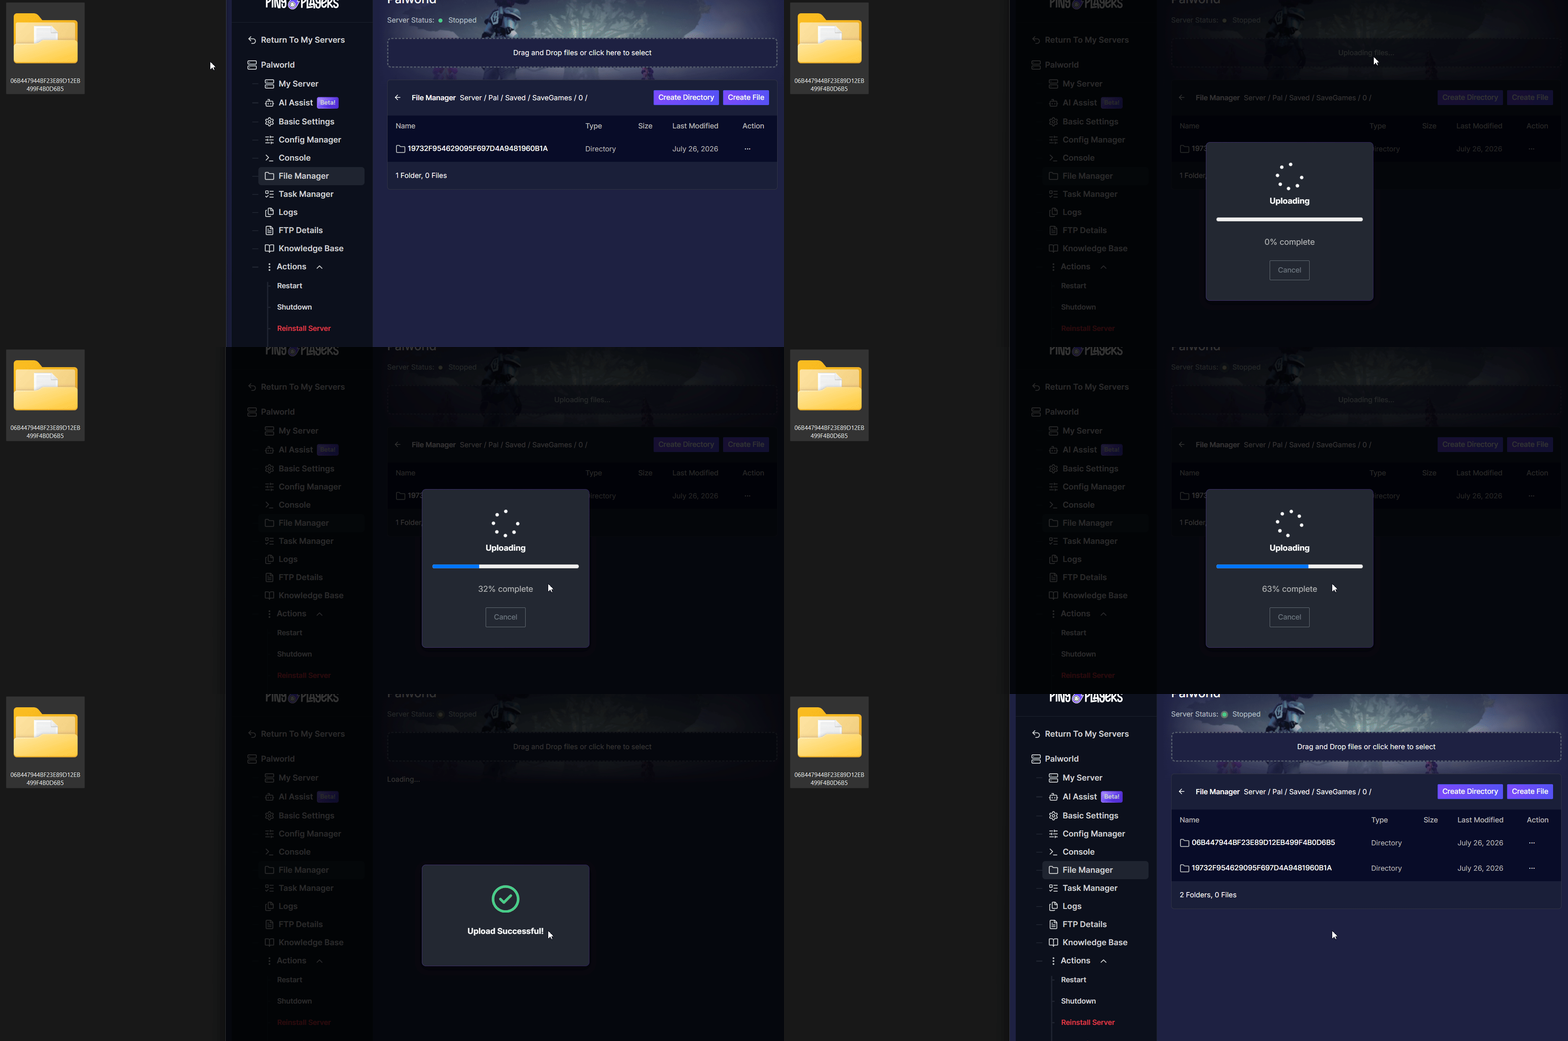
You can upload the save folder by dragging and dropping it on the upload bubble. 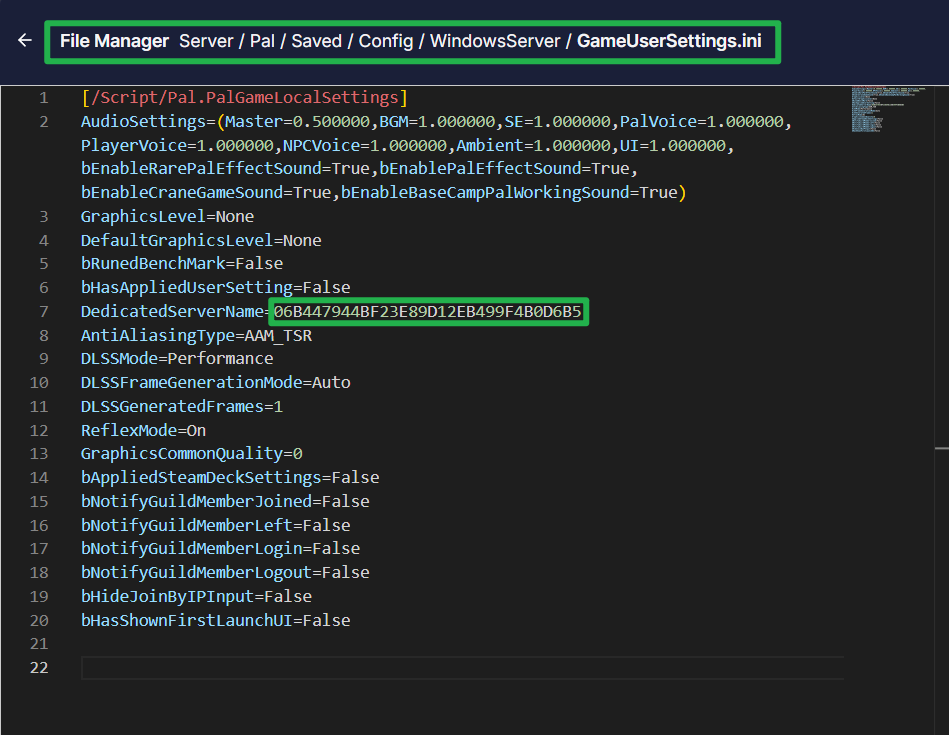
Make sure to paste the exact name of your save folder into the GameUserSettings.inifile for theDedicatedServerNameoption.Navigate to Actions > Restart to boot your server back up. You and your guild are now ready to continue your Palpagos adventure!
Troubleshooting and Tips
Handling raw game files can sometimes lead to unexpected glitches. Keep these tips in mind if your world is not loading properly:
Update the Server Name Variable: After adding your backup files, go to this path in your File Manager:
Server/Pal/Saved/Config/WindowsServerand find the fileGameUserSettings.ini. Edit it by replacing theDedicatedServerNamewith the 32-character name you have taken note of during the conversion process.Always Backup First: Before touching any files, make a copy of your local co-op folder and save it to your desktop. If an upload fails or corrupts a file, having a raw backup ensures you never lose your hard-earned progress.
Check Your Xbox ID: As a reminder, Xbox Game Pass players have a completely different unique ID when connecting to a co-op server compared to a dedicated server. They absolutely must connect to the new server first to generate their ID for the converter tool, otherwise, their progress and items will not carry over.
Conclusion
Migrating your local co-op save to a dedicated Palworld server takes a few technical steps, but the payoff is massive. By using a community save converter tool, you can easily patch your files and get your group onto a stable, always-online world. Check your player IDs, upload your patched folders, and get back to automating your production lines!
If you encounter any issues or have further questions, feel free to contact our support team for assistance!